Let’s take a tour through ScreenFloat and see how it can power up your screenshots, too.
ScreenFloat for Mac – Your Screen Capture Power Tool All-Rounder
ScreenFloat powers up your screenshots by allowing you to take screenshots and recordings that float above everything else, keeping certain information always in sight. Its Shots Browser stores your shots and helps you organize, name, tag, rate, favorite and find them. Everything syncs across your Macs.
Extract, view and copy detected text, faces and barcodes. Edit, annotate, markup and redact your shots effortlessly and non-destructively. Pick colors any time. And more.
Posts in this Series
Part II: Capture – Take Screenshots and Recording your Screen
At the heart of ScreenFloat are its screen capturing abilities. Read on to learn how to take screenshots, take screenshots with a timer, and record your screen.
Table of Contents
- Capture Screenshots and Recordings
- Screen Recording Options
- Timed Screenshots
- Re-Capture Previously Captured Areas
Capture Screenshots and Recordings
With ScreenFloat, you can capture screenshots (by default, ⌘ ⇧ 2), recordings (by default, ⌥ ⇧ 2), and timed screenshots (by default, ^ ⇧ 2).
While the keyboard shortcuts are very handy, you can also start captures from ScreenFloat’s menu bar icon:
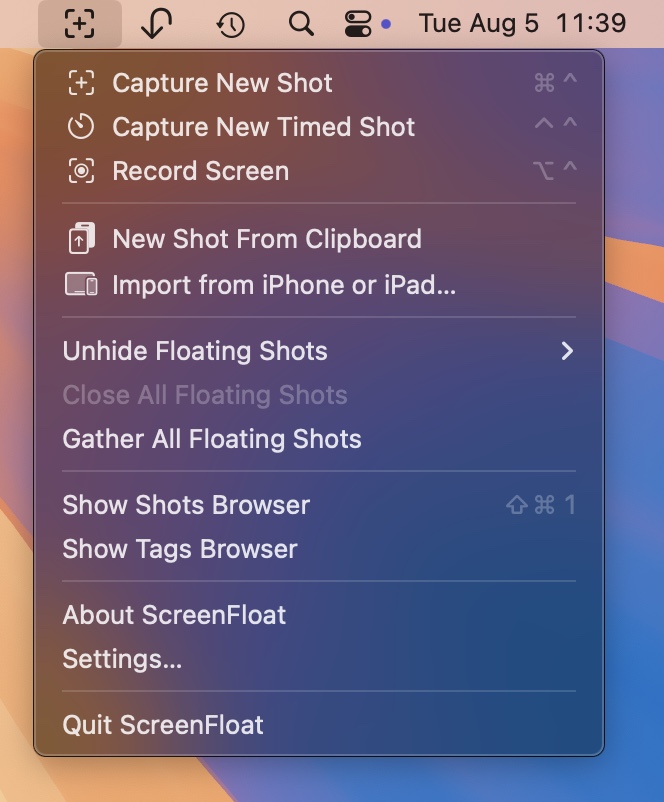
Speaking of the menu bar icon:
– option (⌥) – click onto ScreenFloat’s menu bar icon to take a screenshot
– option (⌥) – shift (⇧) – click onto it to start a screen recording
– option (⌥) – click onto it and then drag away to set up a timer for your screenshot between 3 and 15 seconds
– control (^) – click onto it and ScreenFloat’s Settings will open
– shift (⇧) – click onto it and the Shots Browser will open
All captures are selective, which means after you start a capture, you can select an area of your screen you’d like screenshot or record.
To capture fullscreen, press the respective keyboard shortcut a second time:
Any shot you take with ScreenFloat is stored in the Shots Browser for easy access.
Images and videos can be imported from other apps (like an image file in Finder, or an image from a webpage in Safari) – you can find out more about that in the Store section of this article series.
During the Capture
ScreenFloat uses macOS’ built-in screen capturing capabilities, which means you can make use of the following tricks while you select the area of your screen you’d like to capture:
By default, windows are captured without their shadows, a setting you can change in Settings > Capturing > Images > Remove shadows from captured windows.
Once you capture a shot by releasing the mouse button, the floating shot will appear.
Copy Text and Barcodes Right Away (OCR)
If you just want to quickly copy some non-copyable text or barcode content, here’s a neat trick:
Hold down control (^) and command (⌘) when releasing the mouse button, and any captured text will be copied to your clipboard right away.
If you want to copy the image data to your clipboard right away, hold down control (^) when releasing the mouse button.

Screen Recording Options
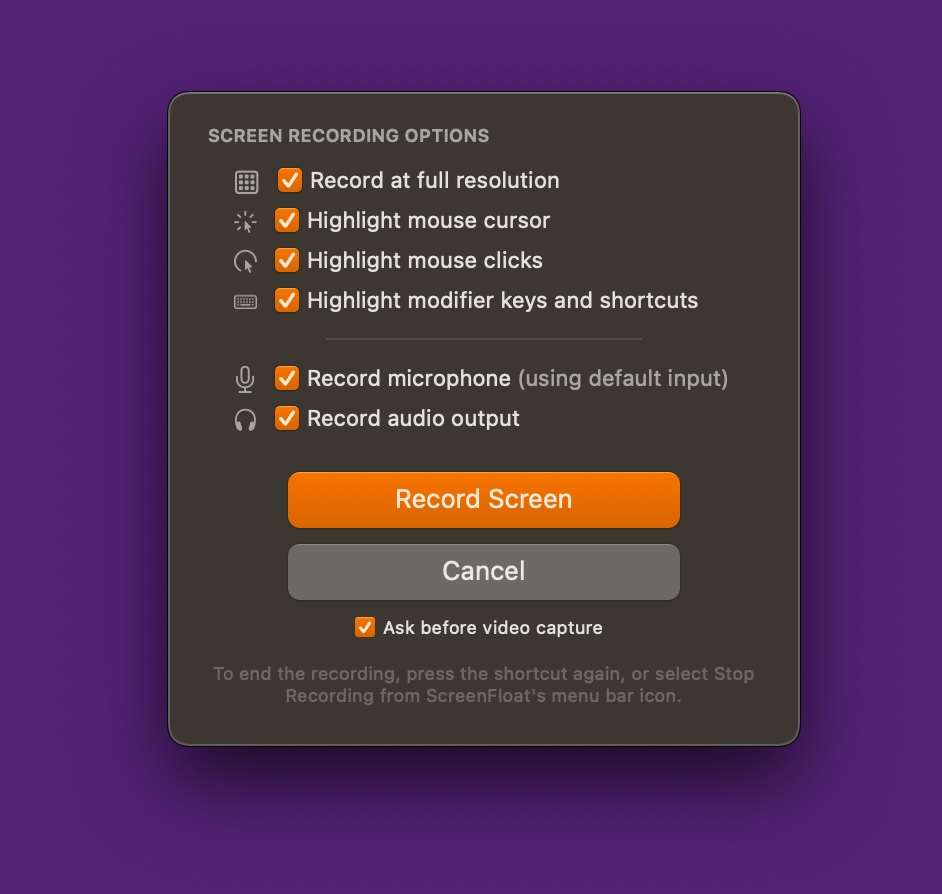
ScreenFloat offers these options when recording your screen:
+ Record in full resolution
+ Highlight your mouse cursor
+ Highlight mouse clicks
+ Highlight modifier and key strokes *
In addition to that, you can
+ Record audio input (using your default microphone)
+ Record system audio (macOS 13 Ventura and newer)
While recording, ScreenFloat displays a handy HUD for you (macOS 13 Ventura and newer).
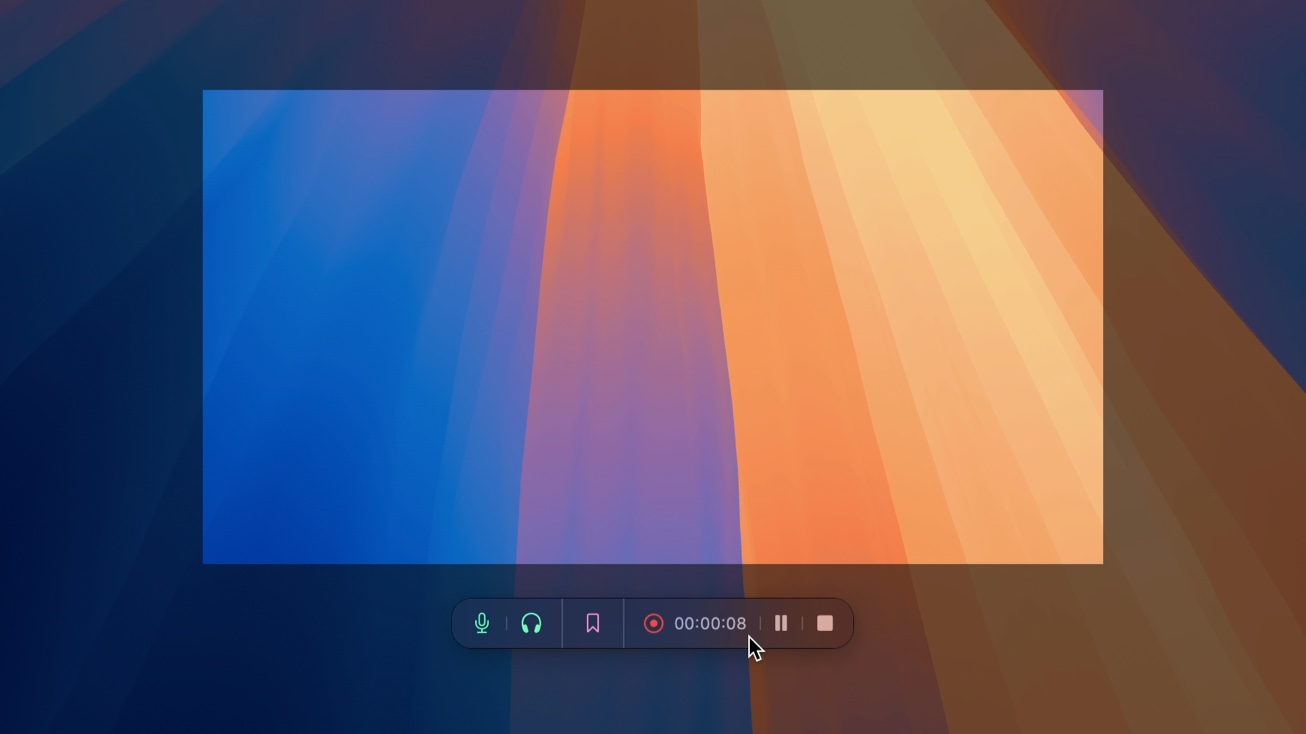
Using the HUD, you can place edit markers for possible cutting points manually. ScreenFloat places them automatically, too, when you change audio settings, pause the recording, and switch apps and spaces. This helps you later on when you cut your video. You can hold down the modifier keys on your keyboard (option ⌥, command ⌘, shift ⇧, function fn) to use different marker colors.
To stop the recording, press the keyboard shortcut again, use the Stop button in the recording HUD, or select Stop Recording from ScreenFloat’s menu bar icon.
Audio can be removed from recordings at any time, all at once, or individually (only system- or microphone audio). You can trim, crop, resize and cut your recordings.
ScreenFloat automatically trims away how you end the recording, which means that you pressing the keyboard shortcut to end the recording, or selecting “Stop Recording” from the menu bar icon, will not be part of the final video.
Easily extract still images from your video shots with a right-click, or from the top right document-icon in custom file formats and sizes.
Highlights and Recording Customization
Customize how your mouse cursor, clicks and key strokes * are highlighted and displayed.
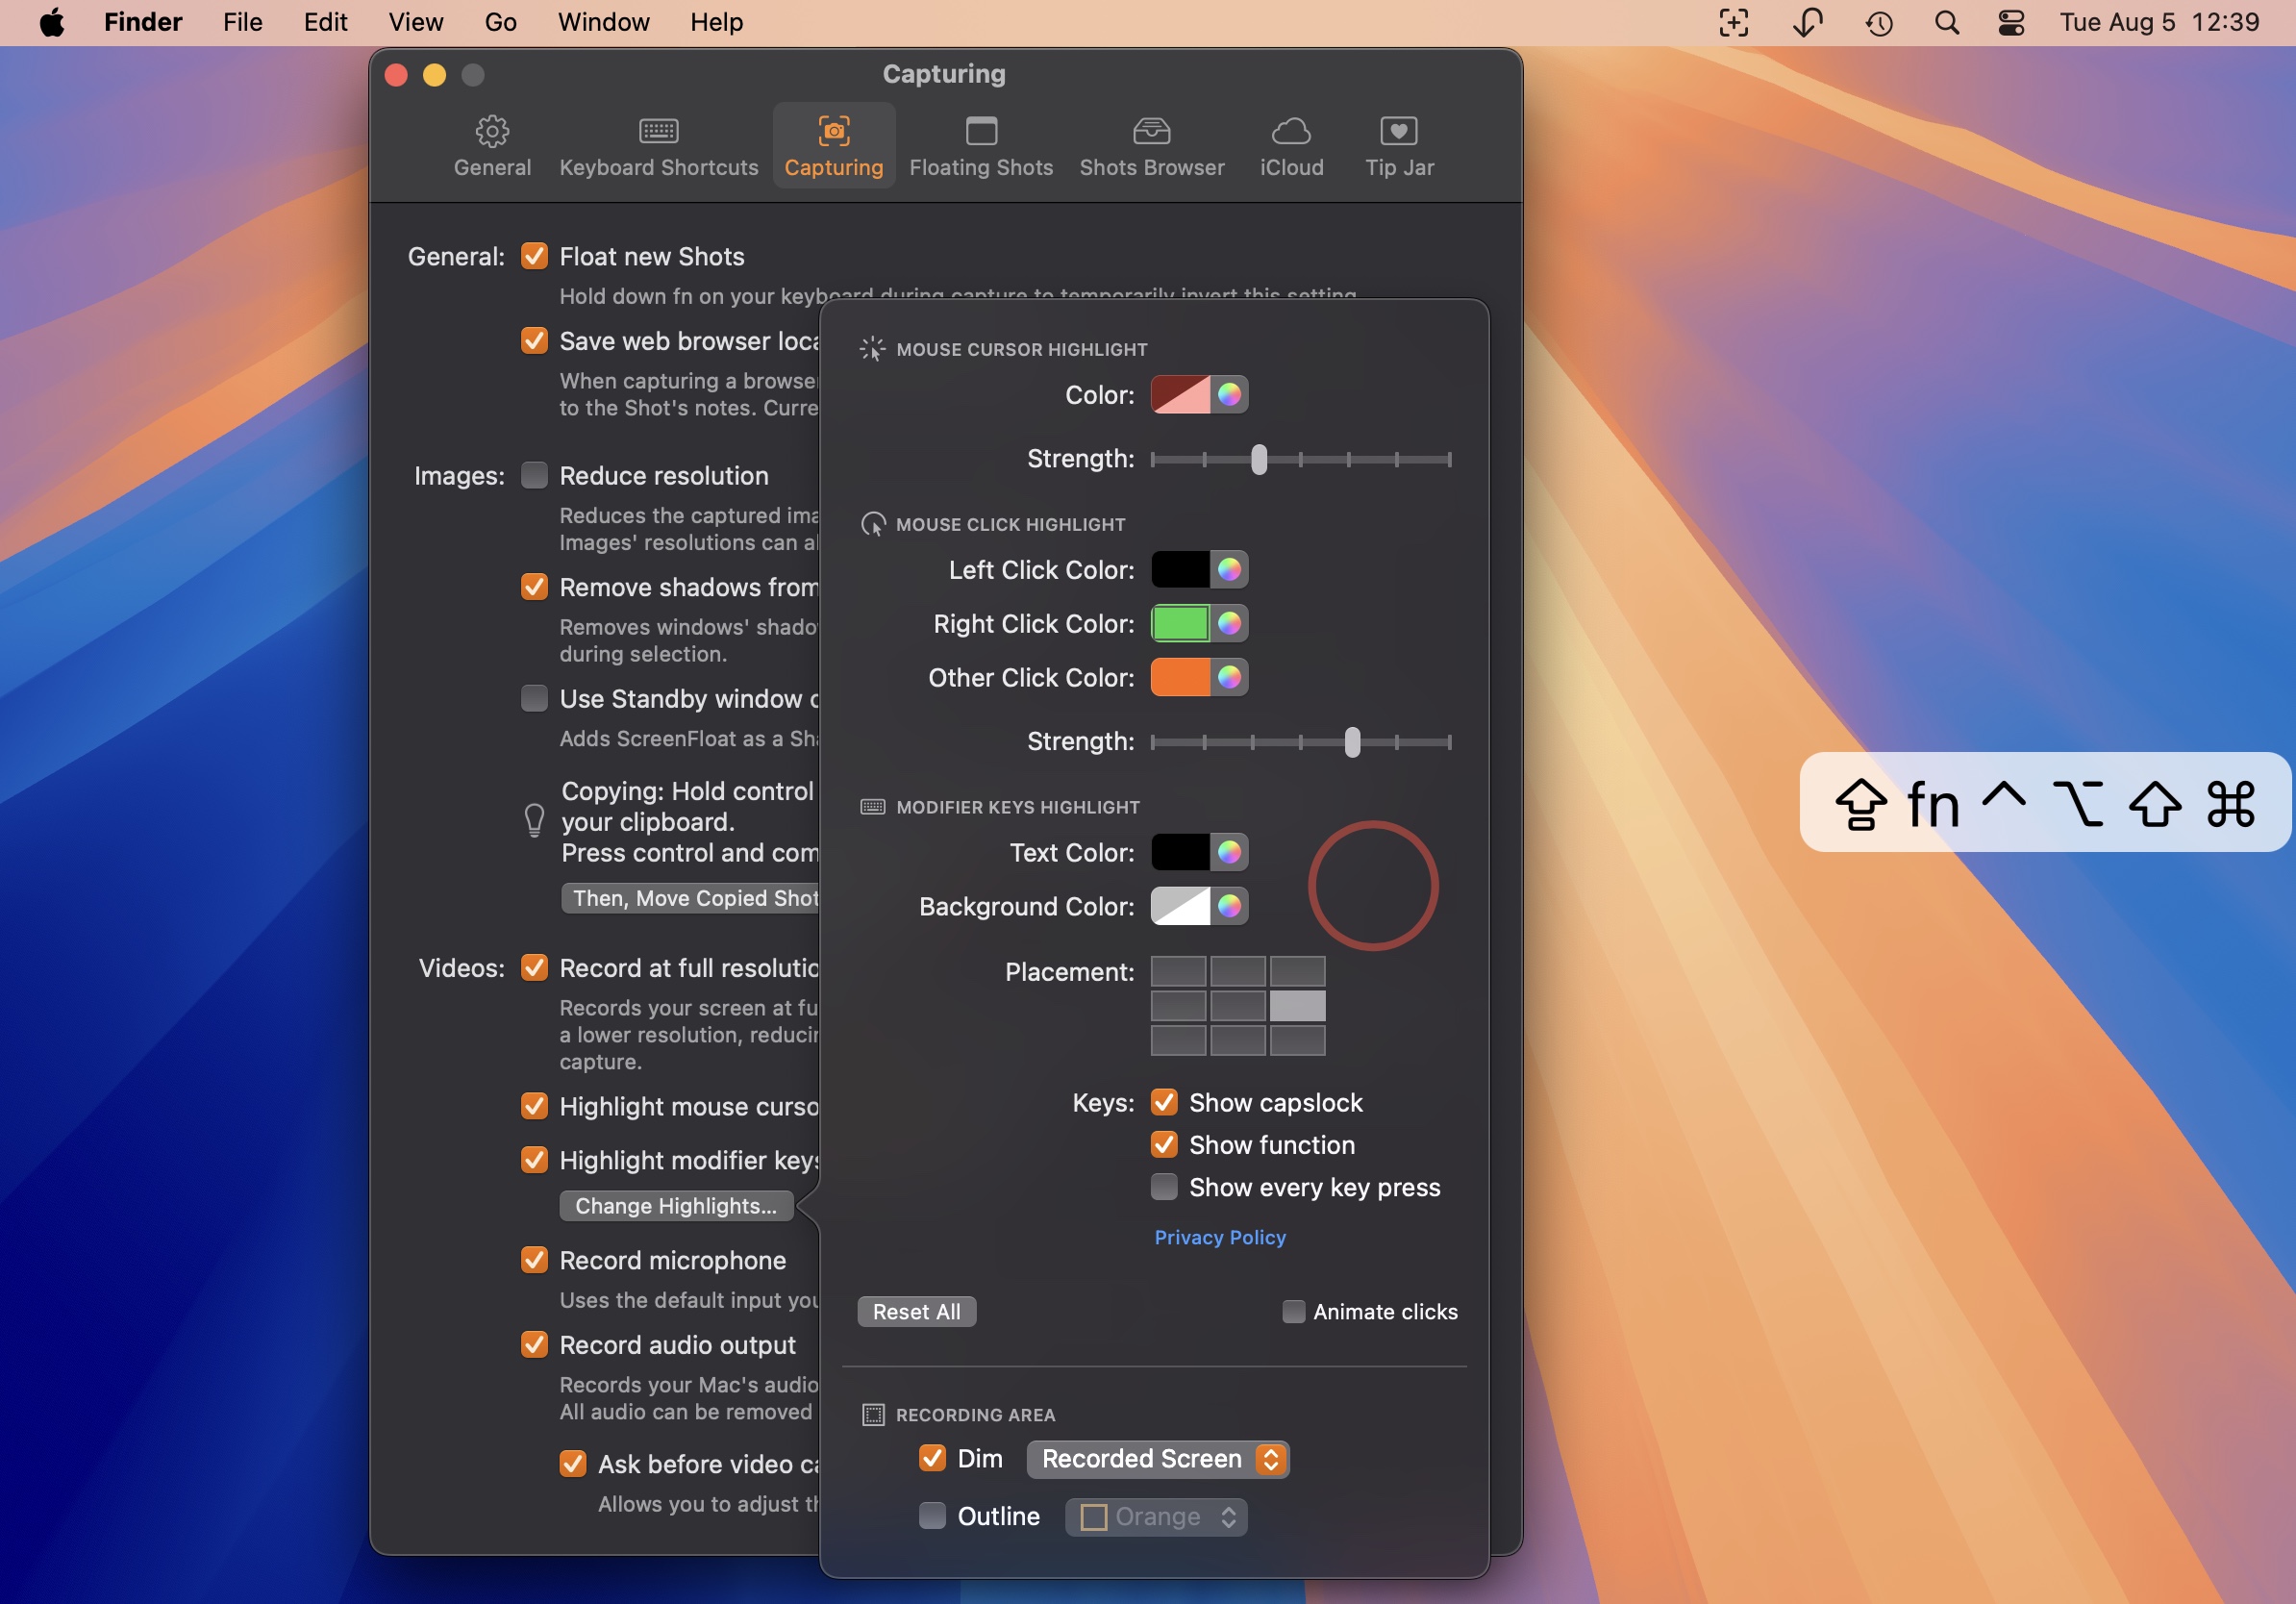
Change the mouse cursor highlight’s color and strength;
Change the highlight colors for left clicks, right clicks and other-button clicks, as well as the highlight’s strength;
Change the key stroke highlight’s text color, background color, its placement (top left, top center, top right, middle left, middle center, middle right, bottom left, bottom center, bottom right), whether to show caps lock and function key presses, or if every key press should be highlighted.
By default, ScreenFloat dims the area around your capture (and other screens) to indicate what you are recording. You can change whether to dim all screens or the recorded screen only, and if there should be an outline around the recorded area.
*Privacy note on key stroke highlights: Keyboard input monitoring begins and ends with video recordings and does not operate at any other time when ScreenFloat is running. Key strokes are neither stored, nor logged, and certainly not transmitted. Input monitoring is exclusively used to display key presses in your video recordings. You can grant and revoke input monitoring permissions any time in System Settings > Privacy & Security > Input Monitoring. Please refer to my privacy policy for further info.
Timed Screenshots
In addition to screenshots and screen recordings, you can also take timed screenshots, where the selected area will be captured after a countdown. Press ^ ⇧ 2 to start the countdown, and press it again to cancel it if you change your mind.
This can be handy when trying to capture a menu item in a submenu, or for anything else that needs further preparation and can’t be captured instantly with a normal screenshot.
The default interval is 5 seconds, but you can change it in Settings > Keyboard Shortcuts > Capture Shot With Timer > … .

You can also option (⌥)-drag from ScreenFloat’s menu bar item to select a range between 3 and 15 seconds.
Re-Capture Previously Captured Areas
Sometimes you’ll want to re-frame a shot slightly, or just capture an area again.
It’s easily done with ScreenFloat. Just press and hold any of the capture keyboard shortcuts, and you’ll be able to re-frame the previously selected area.
Select aspect ratios, save and use custom aspect ratios, and save capture areas for repeated access:
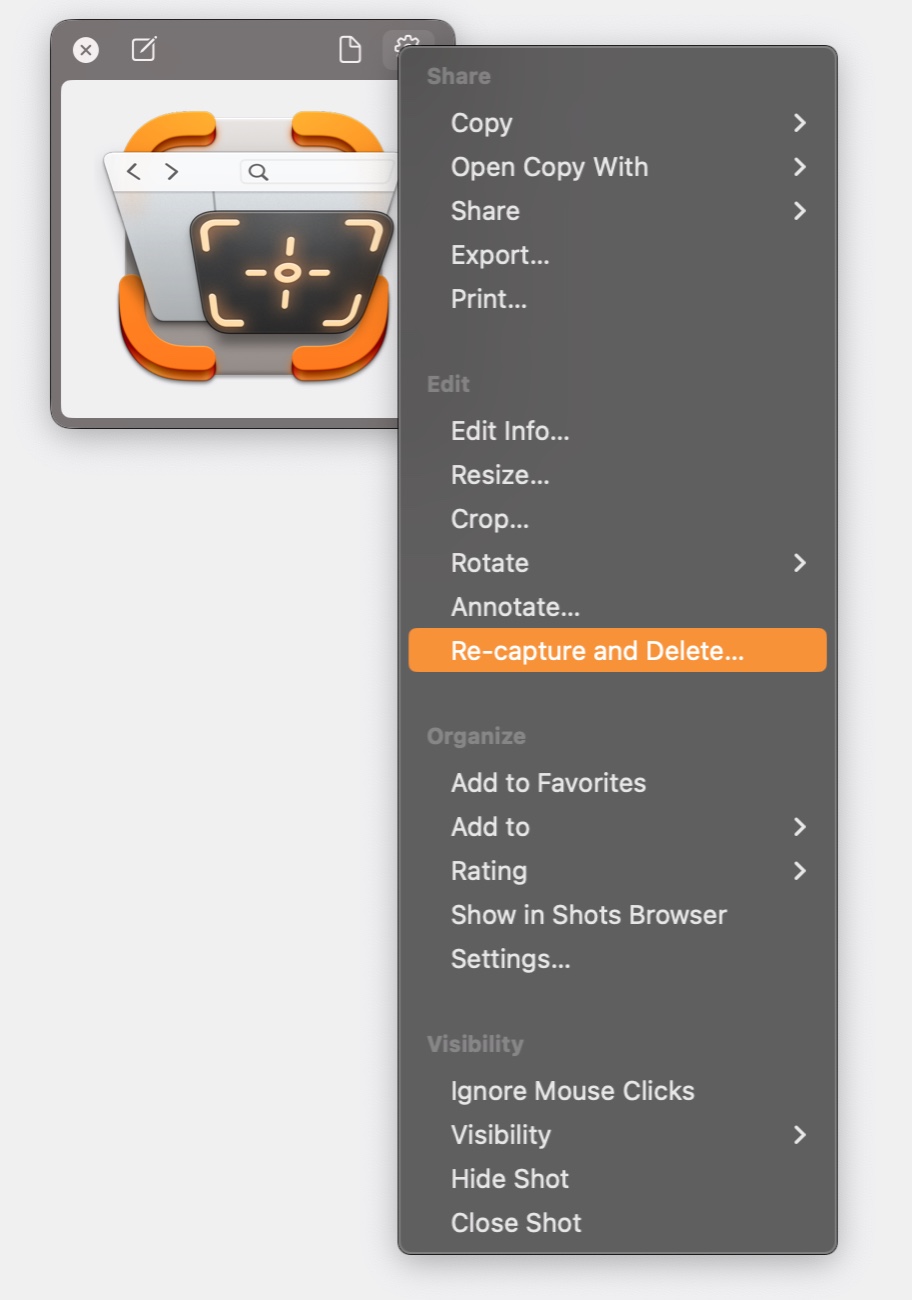
Re-use the frames of previously captured shots, by right-clicking onto them and selecting “Re-capture and Delete…”, which will bring up that shot’s area again for you to capture (and will only delete the original shot if you actually capture anew), or, if you hold down the option (⌥) key, you can select “Capture Shot Again…”, which will do the same, without the deletion part.

Up Next
The next part of this series – Part III: Float – Picture-in-Picture for your Screenshots and Recordings – takes a detailed look at all the advantages that floating shots have. Definitely take a look, there’s a lot of neat stuff there!
Links
ScreenFloat Website (+ free trial & direct purchase)
ScreenFloat on the Mac App Store (one-time purchase, free for existing customers)
ScreenFloat on Setapp (7-day trial, then subscription for 200+ awesome apps)
ScreenFloat Usage Tips
Eternal Storms Software Productivity Apps Bundle (Yoink, ScreenFloat, Transloader and DeskMat at ~20% off)
Contact & Connect
Thank you for your time. I do hope you enjoy ScreenFloat!
[…] You can find the blog post here. […]
[…] Part II […]
[…] Part II […]
[…] Part II […]
[…] Part II […]
[…] Part II […]
[…] Part II […]
[…] Part II […]
[…] Part II […]