DeskMat for Mac v1.3.2 – your Desktop-covering companion for more privacy during screen sharing, cleaner streams, and distraction-free work – now has a new widget in addition to the Control Center widget to toggle your Desktop cover.
“Exactly what I needed”
Captain Muso @ Mac App Store
What is DeskMat?
DeskMat helps you:
retain your privacy when sharing your screen
have cleaner streams
work distraction-free
by providing a simple cover for your Desktop. With the click of a button, all your files and folders (or selected ones) on your Desktop disappear, and re-appear just as easily when you need them. Tie the app to your Focus modes or specific apps coming to the foreground, so the cover activates and deactivates automatically. Create workflows with Shortcuts and AppleScript. With widgets in your Control Center, your Desktop and Notification Center, you can toggle the cover from anywhere.
Tip: Check out the Get to Know DeskMat Blog Post for a deep-dive into its functionality.
What’s New in DeskMat v1.3.2
A “normal” widget for your Desktop or Notification Center to toggle DeskMat (in addition to the Control Center widget)
DeskMat is a one-time lifetime purchase on the Mac App Store or my website for currently USD 3.99 / EUR 3,99 / GBP 3.99. There is no difference in functionality between the different versions. As with all previous updates, v1.3.2 is completely free for existing customers. A free, 28-day trial is available for download. DeskMat requires macOS 13.0 Ventura or newer. The app is currently localized in English, German, Chinese (Simplified), Dutch, French, Italian, Japanese and Spanish.
A note on in-app purchases in the Mac App Store version: These are completely voluntary tips you can give me to support me and the development of my apps beyond the one-time purchase price. No additional functionality can be unlocked by giving tips. Your one-time purchase gives you to the complete functionality of DeskMat.
In lieu of a software update today – ScreenFloat v2.3.8 is taking me a bit longer than anticipated – I thought I’d share a fun 🙃 story about SwiftUI with you.
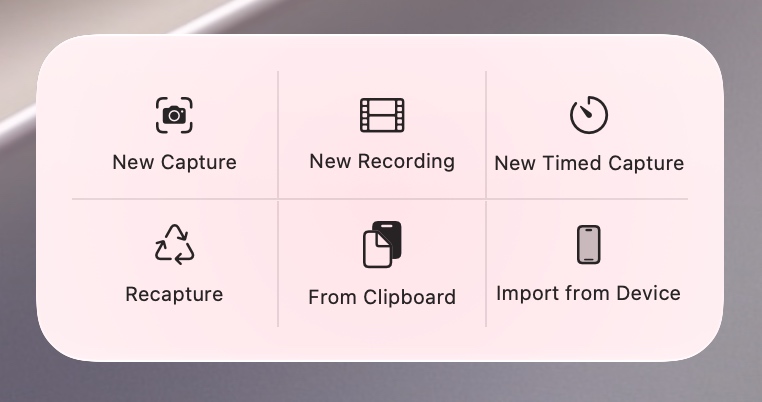
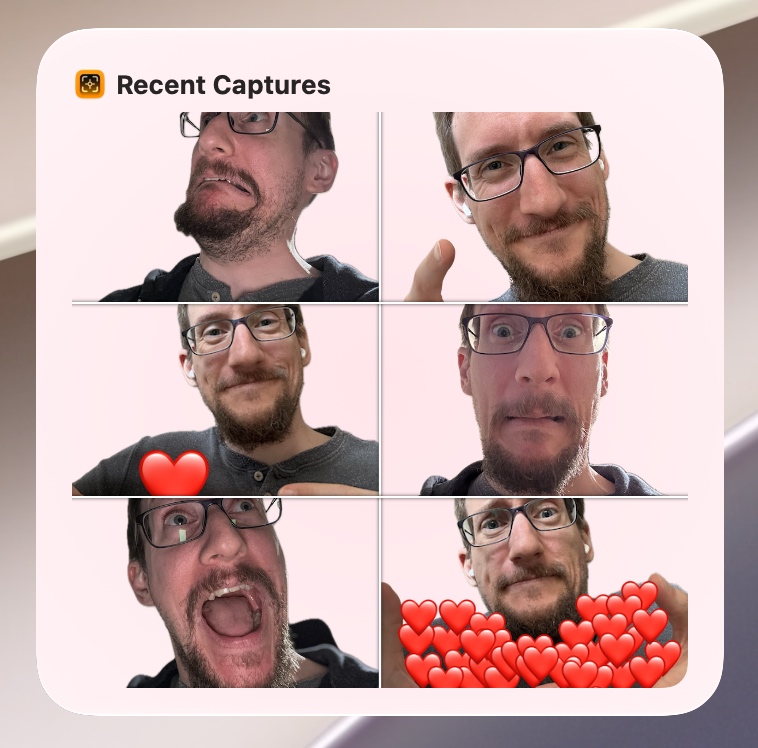
ScreenFloat offers widgets that give you quick access to different things. Among others, you have the Capture widget which allows you to start a screen recording, capture your screen, import from your iPhone, etc. And there’s the Recent Captures widget displays your recent shots so you can easily float them. Or so I thought. But I’m getting ahead of myself.
The Capture widget
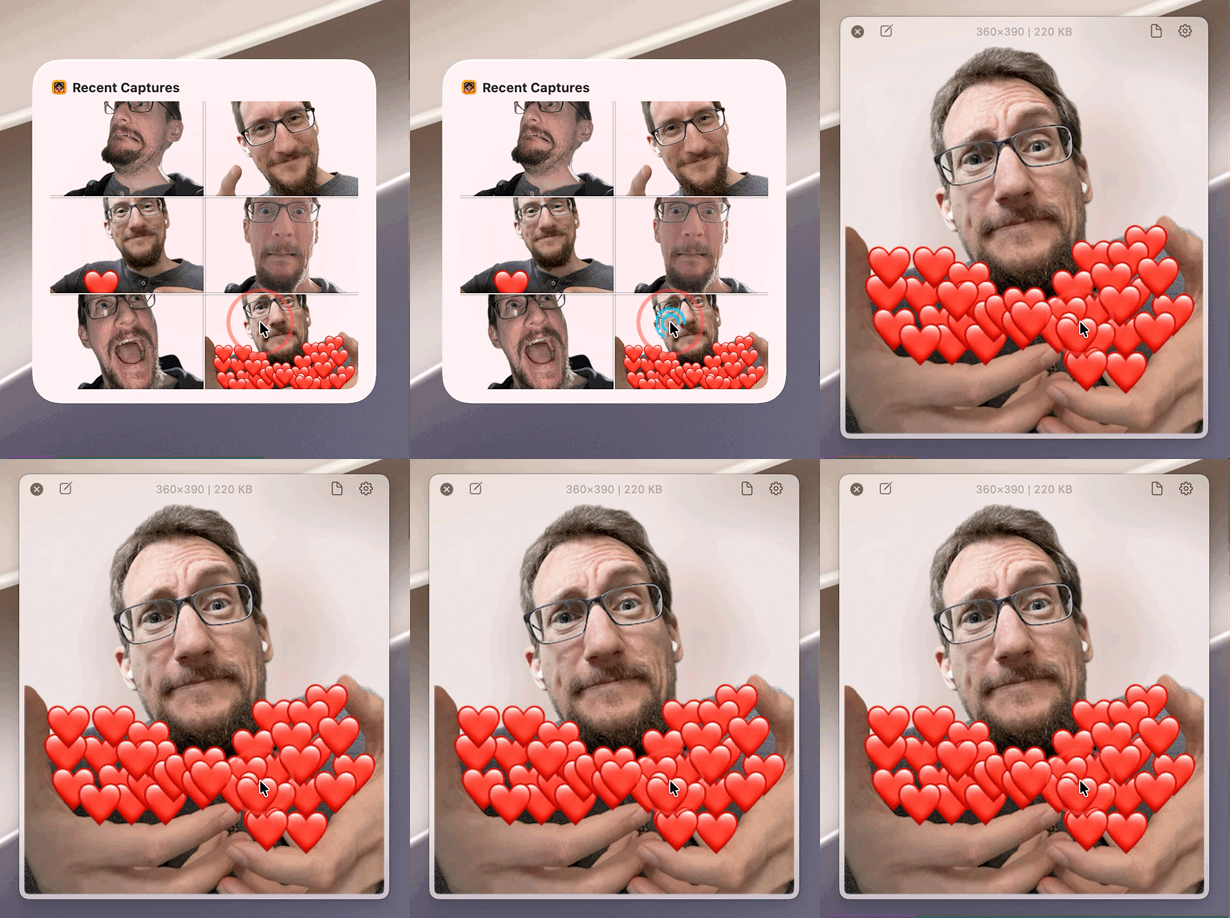
The Recent Captures widget
All the actions in these widgets (when a button or a shot in a widget is clicked) are powered by SwiftUI’s Link(), which opens my app with a custom URL that contains whatever information I need to perform the action the user requested. For clicked shots, that would be floating them (such a custom URL could look like this: esssf2://widget.at?shotID=<someid>&action=float).
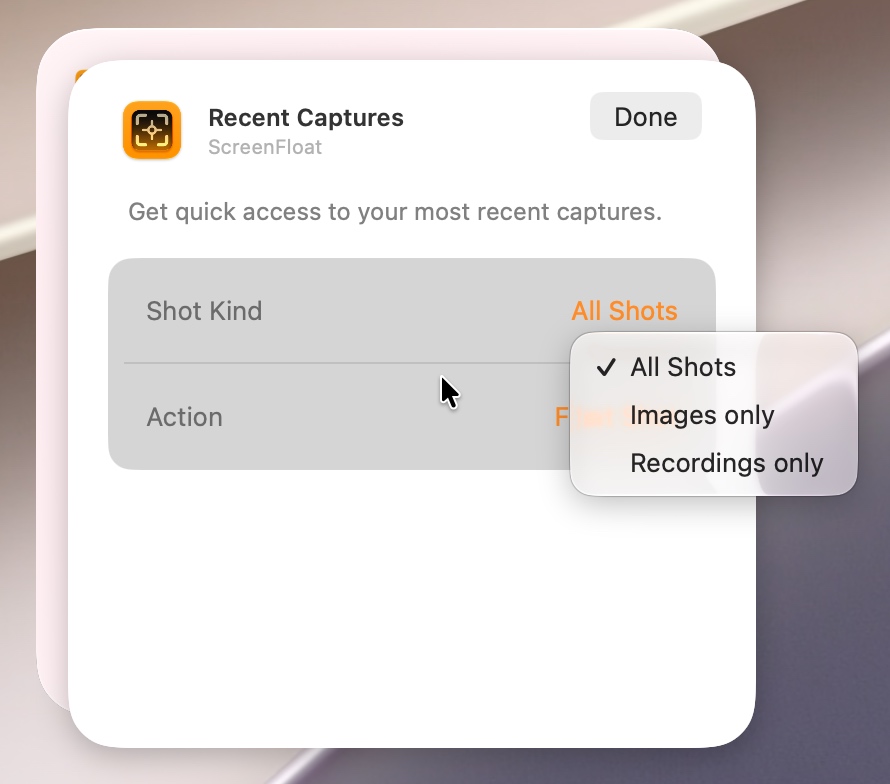
Now, some of these widgets are static (the capture utility widget, for example, can not be configured in any way by the user and always shows the same capture buttons), while others are dynamic (widgets that display shots can be configured to only show images, or only video recordings, for example).
Configuring the dynamic Recent Captures widget
That’s all lovely, but recently I discovered something puzzling. While my static widgets worked just fine – each button in the Capture widget was individually clickable and did the correct thing in my app –, clicking a shot in a widget to float it would not open my app with the custom URL I specified, but with the dynamic widget’s configuration intent instead. No matter which shot I clicked, it always did the same, wrong, thing. (A configuration intent is what internally makes customizing widgets possible; and to make things even more confusing, ScreenFloat’s dynamic widgets are set up internally partially through a .intentdefinition file (Apple’s older way to make widgets configurable), and partially through AppIntents (Apple’s modern approach) ). So instead of my app receiving the correct custom URL which tells it which shot to float, it receives info on how the widget is configured – information not exactly useful in this context.
So I figured it had to do with the widget’s dynamic nature – a logical assumption, given that my app received the configuration intent instead of my URL.
First, I thought perhaps the .intentdefinition file and the AppIntents somehow confused each other, so I temporarily removed the definition file, but the results were the same. Dead end. (Which is good. Otherwise I would have only been able to offer my widgets on macOS 14 “Sonoma” and later, leaving behind two earlier releases of macOS that ScreenFloat supports).
So I set out to test my assumption that the widget’s dynamic nature was at fault. I tried yet another dynamic widget, the Folders widget.
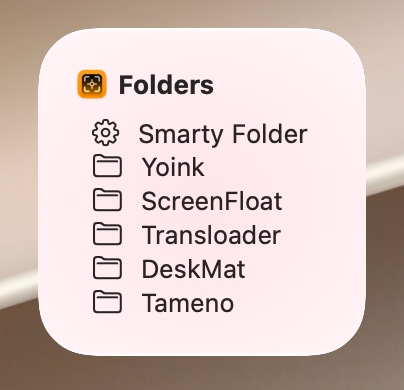
The Folders widget
It can be configured to show all, only smart, or only “dumb” folders, and when clicked, ideally opens the clicked folder in ScreenFloat’s Shots Browser.
With a smirk on my face, confidently clicking on a folder in that widget, absolutely certain it would not result in the folder being opened in ScreenFloat’s Shots Browser, what did my tired, shocked eyes perceive?
The freaking folder opened in the freaking Shots Browser! The Link() with my custom URL worked!
But why!? I couldn’t make sense of it. What was the difference between the Link() in my Recent Captures widget, and the Link() in my Folders widget? Readers dabbling in the arts of SwiftUI might have already noticed that the first consists of Image()s, while the latter is made of Label()s. So I swiftly swapped out the Image() for a Label() to test that this was indeed the culprit, and lo and behold, the widget now worked. A shot was finally floated correctly!
At this point, I was desperate. Close to tears of rage. Ready to rage-quit. Not only Xcode, but also my app’s development. My profession. Coding in general. I was done. Perhaps Image()s in Link()s are just bugged and there’s nothing I can do about it? The thing is, I knew it worked at some point, so I fired up my virtual machines in UTM and went back to see when it started to break. macOS 12? Fine. macOS 13? Fine. macOS 14? Fine. macOS 15? Bingo.
Something on macOS 15 and later broke my widget.
So the first thing I did was to remove all modifiers from my Image() and try again. If it still didn’t work then, I’d have to find a different way to make it work. Maybe hack my own Image() implementation together. Fun times ahead. But I got lucky for once. Removing all modifiers from the Image() did the trick. Now all that was left to do was to go through each modifier and see which one broke things.
“How many lines of code are there?” “About two million…”
Ready? .widgetAccentedRenderingMode(). It was .widgetAccentedRenderingMode() that messes with Link()s. Only specific configurations, though: While .fullColor and .accented work fine, the other two (.desaturated and .accentedDesaturated) render the Link() defunct. Guess which ones I used.
Now why is this happening? Nobody knows. I doubt Apple knows. Or cares. Is any of this documented? LOL. How long has this bug been around for? Since macOS 15, so for about 2 years.
Now that I knew where the bug was, out of interest I googled it, and sure enough found others with the same issue. Not something I found before, because who’d think to google for that particular setup? Nobody, that’s who.
So, there you have it. A Link() containing an Image() with .widgetAccentedRenderingMode() set to .desaturated or .accentedDesaturated will render said Link() defunct 🤷♂️ . I found two ways around this: Don’t use those two properties, or don’t embed the Image() in the Link(), but have the Link() be an .overlay() modifier of the Image(), like so:
var body: some View {
    Image(...)
        .overlay {
            Link(destination: ...) {
                Rectangle()
                    .foregroundStyle(.clear)
                    .frame(...)
            }
        }
}
The downside with the .overlay{} method is that you lose any visual click-feedback, where the clicked Image() would change color on mouse down.
The Shot floats when I click it in the widget!
A radar’s been filed (FB23593239) and is now ready to gather dust in the forgotten depths that is Apple’s Feedback Assistant, never to be looked at again, until some digital archaeologist far into the future stumbles upon it and finally marks it as “works as intended”.
I’ll go now and scream into a pillow some more.
Update July 7th, 2026: I was contacted by a very nice person on the SwiftUI team at Apple notifying me that A) I posted the wrong radar number above (fixed now, mea culpa), and B) they’re looking into it. That’s amazing, I really appreciate that. Thank you, J. and team. I humbly redact my snarky statement about Feedback Assistant.
Tameno for Apple Watch, iPhone, iPad, Mac and Apple TV helps you stretch, brush your teeth, do exercises, water your plants, meditate, do yoga, and so much more, with auto-repeating timers. Set an interval, and it’ll inform you every time it elapses. Version 1.2.5 adds more audio feedback options, improves background execution on the Watch, and more.
What is Tameno?
I have an electric toothbrush. It has a built-in 30sec timer, so I can brush each quadrant of my teeth for the same amount of time. But what about each side of each quadrant? I needed a 10-second self-repeating interval that would tell me to move on. That’s where the idea for Tameno came from. Now, I just start Tameno at a 10 second interval, and until I’m done brushing, it’ll let me know that 10 seconds have passed continuously. Perfect. Now I can also do my stretches without having to count in my head, or water my hedge-plants for the same amount of time. Bliss! With widgets on your lock screen, home screen or in Control Center, and custom shortcuts in the Shortcuts app, your favorite intervals are always just a tap away!
What’s New in Tameno v1.2.5?
New audio feedback sound options: In addition to “Tick”, there’s now “Bamboo”, “Wood”, “Chime”, “Glass”, “Service Bell” and “Bell”.
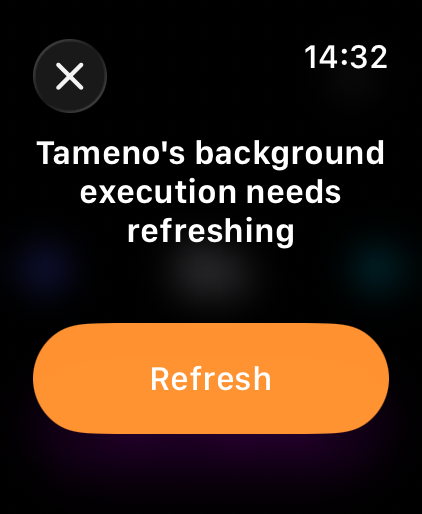
The background execution on Apple Watch has been improved, in that it now lets you know when its allotted time is about to run out so you can continue without interruptions
Fixes UI issues on Apple TVs running tvOS 26
More haptic feedback, better scrolling-adjustments on macOS, and other fixes
❗️Tameno is a one-time lifetime universal app purchase. That means you purchase it once (on the store of your choice), and are then free to use it on your Apple Watches, and iPhones, and iPads, and Macs, and Apple TVs. The app requires macOS 13, iOS 16, watchOS 9.4 and tvOS 16 or newer and is currently localized into English, German, French, Italian, Spanish, Dutch, Japanese and Simplified Chinese.
If you have any feedback or questions, please don’t hesitate to use the contact link above, or below : ) Have a great day, and thank you for stopping by.
Maybe this is common knowledge and everybody knows this, but I’ve only recently come to learn how this works, so I thought I’d share.
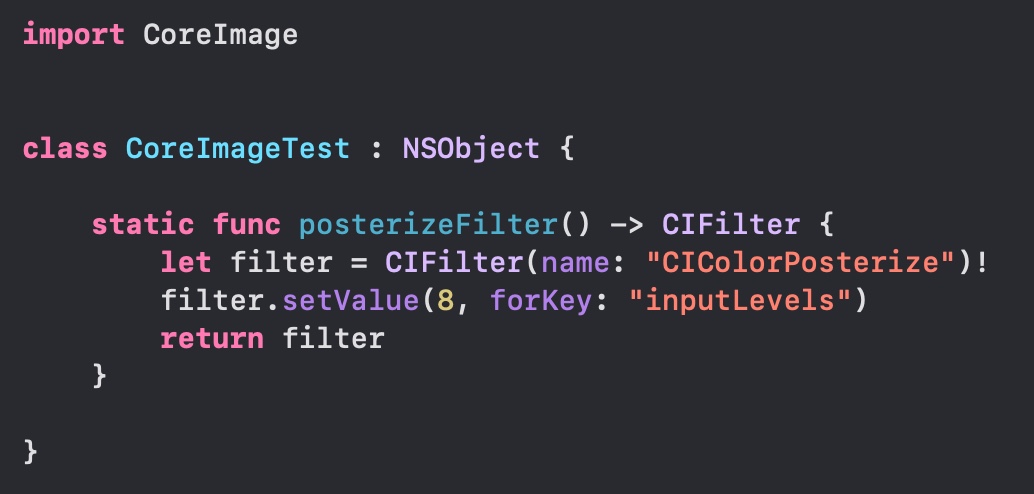
I’ve been setting up Core Image filters like this for god knows how long:
The downsides are obvious: 1) I have to know the exact name of the filter (“CIColorPosterize”) 2) I have to know the keys and values it accepts (“inputLevels”)
Browsing the Core Image headers, I did find functions for these filters where you could just call let filter = CIFilter.colorPosterize()
Yet every time I tried, it never worked and would give me an error that CIFilter has no member 'colorPosterize'. Well, “Crap!“, I thought, this must be something that will become available eventually.
How wrong I was. This has been available for a while, you just need to know how to do it! The “trick” is to not only import CoreImage, but also (why!?) import CoreImage.CIFilterBuiltins:
And lo and behold, it works. I’m so happy, I could cry. I’m off to refactor some stuff now.