Yoink 3.2 comes with a handful of new features. In this post, I will … NOT tell you about those. Instead, I’d like to focus on what changed under the hood.
I think it can be interesting to reflect on how things change from release to release and what improvements were made. And how.
I’ll write about performance improvements and perceived speed-ups in the app and how I managed to improve Yoink’s handling of resources within the OS X sandbox to be able to hold more files than it was previously able to.
Performance Improvements and Speed-Ups
Let’s begin with low-hanging fruit, shall we?
I improved the responsiveness and perceived performance of Yoink in a couple of subtle, but nonetheless important places:
Make “Clear All” Faster
This is the perfect case of “put work on another thread to make the app seem faster”.
Files that don’t exist on the disk yet (like images from websites, text snippets from documents, a file from an FTP client, etc.), Yoink has to create and therefor, when they’re removed from Yoink, they need to be deleted from disk as to not waste space.
For this, I have a method named -prepareForRemoval. It checks if the file was created by Yoink itself and deletes the file from the disk.
Now, the way “Clear All” works is fairly straight forward:
- Iterate over each item in Yoink
- Check if the file is currently pinned in Yoink. If it is, skip it; if it isn’t, continue with
- Call -prepareForRemoval that cleans up any files that we don’t need anymore
- Update the tableView
For starters, for removing files out of the array that powers the tableView, I had used another array that held the items to be removed and after the loop was done, removed the files from the main array.
This I’ve replaced with -filterUsingPredicate:. It’s not only much cleaner to read, but also more performant and using less resources (getting rid of the superfluous array and the second loop for iterating over it for removal).
Secondly, I took step #3 (calling -prepareForRemoval for each item) out of the filtering method and put it on a background thread that gets executed concurrently with everything else, making the filtering much faster.
It’s almost instant now, no matter how many items there are in Yoink.
Make Splitting Up Stacks Faster
A Stack in Yoink is an item that encapsulates multiple files, created by dropping more than one file to Yoink in one single file-drag. The Stack can be split up so individual files can be dragged out of it.
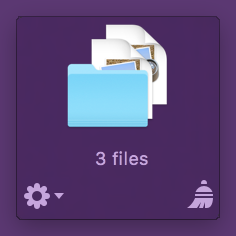 A Stack in Yoink
Splitting up works fine, but again, if a Stack holds more than just a few files, there might be slow-downs. I can’t entirely get rid of those because of the work that needs to be done, but I can speed up the process.
It used to be a simple for-loop, iterating over the files in the Stack and creating a new item in Yoink for each one.
Now, the method uses concurrent enumeration, by calling
[array enumerateObjectsWithOptions:NSEnumerationConcurrent usingBlock:^(aBlock)].
It makes the system create as many threads as it sees fit under the current system load and configuration and loops over the array concurrently, making splitting up larger Stacks noticeably faster.
Accepting a Drop
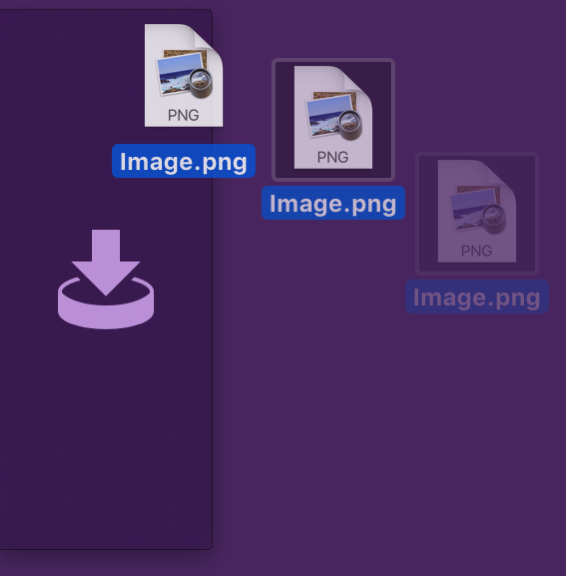
Because of changes equivalent to brain surgery (which I’ll discuss below), I had to speed up accepting files in Yoink, otherwise it would be perceived as slower than the previous version, and that’s unacceptable.
Again, NSEnumerationConcurrent to the rescue. It can do wonders.
On the other hand, sometimes it can be slower than an ordinary for-loop, because there’s the overhead of the thread-creation that goes on behind the scenes.
For example, the equivalent to NSEnumerationConcurrent for sorting is NSSortConcurrent. If you use it for something very simple, though, like comparing two strings, it doesn’t do much good. For more complex comparing, it might speed up your method. Another example, NSEnumerationConcurrent would not have given me any speed-ups before the brain-surgery in Yoink.
Removing Sandbox Limitations in Yoink (a.k.a Brain Surgery)
In older versions of Yoink, the app would start behaving incorrectly once a certain amount of files were added to it over the course of the app’s session lifetime. It’s a direct result of how the sandbox hands NSURLs to your app.
Files can be added to an app via the Open dialog (known inside the sandbox as Powerbox) or via drag and drop – which is what Yoink is doing.
These files come in the form of NSURLs. In the sandbox, NSURLs that hold references to files can’t just be used nilly-willy, access to them has to be started (-startAccessingSecurityScopedResource) and stopped (-stopAccessingSecurityScopedResource).
When a file is added through the powerbox or a drag, the system automatically calls -startAccessing(…) for that NSURL for you before it is passed to you in code (without telling you. Also, it causes problems: see Addendum #1).
The documentation has the following to say about -startAccessing(…):
If you fail to relinquish your access to file-system resources when you no longer need them, your app leaks kernel resources. If sufficient kernel resources are leaked, your app loses its ability to add file-system locations to its sandbox, such as via Powerbox or security-scoped bookmarks, until relaunched.
So, -startAccessing(…) and -stopAccessing(…) have to be balanced, otherwise resources are leaked and no further files can be handled by the app – which is exactly what caused earlier versions of Yoink to misbehave once a certain amount of files have been added to it, because I didn’t balance the -startAccessing(…) call the system made before handing the NSURL to me.
The obvious solution, then, is to indeed call -stopAccessing(…) once you receive the NSURL and call -startAccessing(…) once you really need to access the file. But there’s where things go downhill. Once you stop accessing an NSURL, the sandbox believes you never had access to it in the first place, and any subsequent call to -startAccessing(…) fails. Unless…
NSURL’s Security-Scoped Bookmarks (the actual Brain Surgery Part)
Unless you create a security-scoped bookmark of the NSURL first and then call -stopAccessing(…). In versions prior to 3.2, I created bookmarks only when the app quit, in order to keep access to files over relaunches and restarts.
While the app was running, though, I only handed around and worked with NSURLs (with the limitation that once ~1.500 files were added to it, the app would seize to work properly and needed a restart).
This is what I do now, to allow for many, many more files than ~1.500 to be added during the app’s run:
The first thing I do when I receive an NSURL from the drop is create a bookmark from it. Subsequently, I call -stopAccessing(…) (important: without first calling -startAccessing(…), as the system has already done that for me at that point) and the resource is freed – the app is now in a state just like right from launch – as if no file had been added yet.
But now I have an NSData object where an NSURL object used to be – pretty incompatible. That’s where the brain surgery came in. It sounds trivial, but switching from NSURL to the bookmark and making sure the resource is accessed in all the right places (and not unnecessarily) and also cleaned up was an unexpected amount of work.
But long story short, the brain surgery worked, and the patient is up and well. No spasms. No drool.

– – – Do you enjoy my blog and/or my software? – – –
Stay up-to-date on all things Eternal Storms Software and join my low-frequency newsletter (one mail a month at most).
Thank you 🙂
Resource Usage Improvements
In the second part of this post, I’d like to explain how I was able to reduce not only Yoink v3.2’s memory footprint, but its overall resource usage.
In Yoink, I want to be able to reflect changes in filenames and be aware of file deletion – it’s a better user experience when, if a file is renamed in Finder, that file also updates its filename inside Yoink.
And there’s not much use in having a file in Yoink that’s been deleted a while ago.
Watching Files for Renames
For this, I use dispatch_sources to watch NSURLs.
GCD provides a suite of dispatch sources—interfaces for monitoring (low-level system objects such as Unix descriptors, Mach ports, Unix signals, VFS nodes, and so forth) for activity.
I want all the information I can get right from the start – probably a habit I picked up during the development of flickery, where flickr counts the number of API requests and once you hit a certain limit, you’re cut off.
So up until now, I created a dispatch_source for every single file that was added to Yoink – better safe than sorry, right?
Well, wrong! dispatch_sources are limited as well, as you need to call open() on the files you’d like to watch. The limit lies around 2.500 files (which, if the NSURL-issue I described above hadn’t already limited the amount of files Yoink could accept, would limit the amount of files Yoink could accept).
No. I needed another, saner and resource-friendlier approach.
Sane and resource-friendly? Bye-bye, polling. You’re out of the race. Good riddance.
Now, three facts are painfully obvious, in the case of Yoink. There are three promising places for improvement, as I don’t actually need to watch:
- … files that were created by Yoink (images from websites, text snippets, any files that haven’t actually been written to disk yet…)
- … files that are scrolled out of view in Yoink
- … files that are encapsulated in a Stack
Files that were created by Yoink don’t need to be watched for name-changes
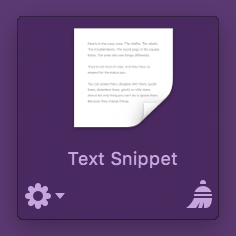
Files Yoink creates itself are inside Yoink’s sandbox container (at /Users/name/Library/Containers/) and managed by Yoink. No need to watch those.
Text snippets especially – their names are created based on their contents.
Files that are scrolled out of view don’t need to be watched for name-changes

Imagine this: You have 9 files in Yoink, separately. You have it set up to show 3 at a time. Currently, you see files 4, 5 and 6. You definitely want to be notified when the name of any of these three files changes in Finder, as the user can currently see them in Yoink, so the changes need to be reflected right away.
But what about files 1, 2, 3 and 7, 8, 9? Do they need to be updated if the user can’t see them right now, anyway?
No!
We watch only visible files, and already we’ve reduced the files to watch for name changes from 9 to 3, saving ~67% of valuable resources – which also means more performance (no extra code execution for those 6 files) and less memory usage. (API side-note: In an NSTableView, you can get the currently visible rows by passing the rect you get from -visibleRect to -rowsInRect:).
If a user scrolls, though, the visible files change and the watched files might now be out of view, being completely useless.
Due to this, Yoink needs a mechanism to update which files need to be watched for filename changes. They are updated when:
- files are added
- files are dragged out or removed
- the window’s size changes
- Stacks are split up
- a scroll ends
Files that are in a Stack don’t need to be watched for name-changes
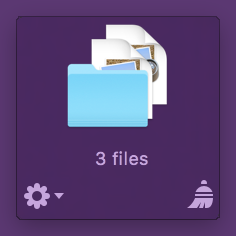
Yoink displays Stacks like you see in the picture above. An icon, with the number of files inside the Stack. There’s actually no need to watch those files, as file name changes wouldn’t be reflected anyway.
This has “opportunity” for resource-savings written all over it.
When to actually update filenames for files that aren’t being watched
So, when are those filenames updated?
Files that are currently not visible might be visible later because the user scrolls to them or files are removed and dragged out.
Files in Stacks might be exposed by splitting them up.
There needs to be some way to update those filenames, even if they’re not actually being watched by the app right now.
Files in a Stack are actually easy – the filenames are created as soon as the user decides to split the Stack up, as Yoink gets the NSURLLocalizedName for each file.
Files currently not visible require a bit more work, but nothing too difficult.
OS X thankfully provides notifications for when a scroll occurs. Depending on the version of OS X you’re targeting, there’s either NSViewBoundsDidChangeNotification (OS X 10.8 and earlier) or the more fine-grained NSScrollViewWillStartLiveScrollNotification, NSScrollViewDidLiveScrollNotification and NSScrollViewDidEndLiveScrollNotification (OS X 10.9 and newer). For a caveat regarding “legacy” mice, see Addendum #2.
When the *WillStart* notification is sent, I start updating all filenames in Yoink in a background thread (all filenames, because I don’t know where the scroll is going to end).
Once *DidEnd* is called, I update the files to be watched with my usual routine of getting the -visibleRect. Then I update the filenames for the now visible files, just in case the background-thread is still running and hasn’t come to those files yet.
Watching For File Deletion
 Yoink 3.2 displays a warning once a session when a fie is moved to the Trash.
Watching for files being moved to the trash or deleted altogether is another beast entirely.
For this alone, I’d have to watch every single file – being in a stack, not currently visible, etc. -, effectively subverting every single improvement I had hoped for above.
There had to be a better way.
Luckily for me, there is.
I had the idea that, if a file or folder could be watched, the Trash itself should be watchable too, meaning that instead of having to watch every single file if it was moved to the trash or deleted, I’d only have to watch one Trash folder for each volume attached to the Mac (because external volumes have their own Trashes).
Since dispatch_source is my go-to-API for watching files (and I have experience with it), I set up a test-app that watched all Trash(es) folders on the Mac. Surprisingly, it worked only for the internal volume, external volume’s Trashes folders couldn’t be watched. Busted.
FSEvents to the Rescue
Just when it looked like all hope was lost, I remembered the FSEvents API:
[The FSEvents] API provides a mechanism to notify clients about directories they ought to re-scan in order to keep their internal data structures up-to-date with respect to the true state of the file system. (For example, when files or directories are created, modified, or removed.)
It was worth giving it a shot, and – again, surprisingly – watching external volume’s trashes for changes worked this time around. Success.
Now I can tell whether a file in Yoink was moved to the Trash or deleted, without having to set up a dispatch_source for every file and without having to do any polling.
In Closing
Having had code in Yoink that could render the app useless after a couple of thousands files had been added makes me uncomfortable and is pretty embarrassing to admit, but I’m glad I got rid of it.
I’m also very happy with the improvements made with the upcoming update.
In many places, Yoink feels much more responsive because of them.
Addenda
Addendum #1
An NSURL you receive from the powerbox or a drag’n’drop operation already has started access to the resource it points to. This causes the problem that file drags with more than ~1.500 files behave incorrectly (your mileage may vary). The first ~1.500 files are added just fine, but suddenly you start seeing something like this in your logs:
Yoink[74545]: Consume sandbox extension for itemIdentifier (9035) with path: /some/file/path from pasteboard failed!
And worse, the NSURLs you receive beyond that point are useless, you can’t access the files they point to.
My understanding is that this would be a non-issue if the system didn’t automatically call -startAccessing(…) before it hands the NSURLs to you and lets you decide when to startAccessing the NSURLs.
As far as I can tell, this is an issue that can not be worked around at this time, and I’ve tried a couple of things. I hope Apple is working on it. One should believe since 10.7, they’ve had enough time.
Addendum #2
A legacy mouse, as in, a mouse that has a traditional scroll wheel, will only call NSScrollViewDidLiveScrollNotification, not *WillStart* or *DidEnd*.
I handle that in Yoink by calling the update method delayed, and canceling the delayed call should another *DidLiveScroll* notification occur in the meantime, this way, I “simulate” *WillStart* and *DidEnd*:
[NSRunLoop cancelPreviousPerformRequestsWithTarget:self selector:@selector(scrollingDidEnd:) object:nil];
[self performSelector:@selector(scrollingDidEnd:) withObject:nil afterDelay:0.15];

– – – Do you enjoy my blog and/or my software? – – –
Stay up-to-date on all things Eternal Storms Software and join my low-frequency newsletter (one mail a month at most).
Thank you 🙂
