With Tameno, you set auto-repeating, “tapping” timers – the perfect companion for repetitive tasks.
It’s available for your Apple Watch, iPhone, iPad, Mac and Apple TV as a universal binary – always ready, wherever you might need it.
Set up an interval between 2 seconds and 20 minutes, and Tameno lets you know each time it elapses (by tapping you, by sound, or by screen flashing), and then re-sets itself to alert you again.
Posts in this Series
| Part I | Hello, Tameno |
| Part II | Tameno on Your Apple Watch |
| Part III | Tameno on Your iPhone and iPad |
| Part IV | Tameno on Your Mac |
| Part V | Tameno on Your Apple TV |
Part II – Tameno on Your Apple Watch
On your Apple Watch, Tameno is always with you and ready at times when your other devices, like your Apple TV or your Mac, are out of reach, and alerts you with vibration every time your set auto-repeating interval elapses.
Table of Contents
- Starting Your First Interval
- Changing the Interval
- Accessing Recently Used Intervals
- Settings
- Complications
- Widgets
- Siri Shortcuts
Starting Your First Interval
To start an auto-repeating timer with Tameno, launch the app by selecting its app icon and pressing Start Tapping.
Right away, the timer will begin its count-down, vibrate when the interval elapses, and start again from the top.
On the Watch, Vibration is the only feedback you have for elapsed intervals, whereas on the other devices, there’s an optional sound and screen-flash you can set up.
Congratulations, you have just successfully used Tameno for the first time!
Note: The interval will continue repeating even in the background until you end it by pressing Stop Tapping, or until one hour of background time elapses, or you switch to a different app – whichever comes first.
Changing the Interval
That’s all nice and dandy, but at some point, you might want to use an interval other than 5 seconds, right? Well, I figured as much. Tameno allows you to set an interval between 2 seconds and 20 minutes, and there are a couple of ways you can change it.
+ and – Buttons
For the most precise adjustment, you can use the + and – buttons on either side of the screen. This will add or remove a second from your interval.
Drag Up and Down, Left and Right
A quicker way to adjust the interval is to just tap and drag up and down, or left and right, where down/left will decrease, up/right will increase the interval by seconds.
Double-tap-and-drag to adjust by minutes.
Digital Crown
Naturally, you can also use your watch’s digital crown to adjust the interval comfortably.
Accessing Recently Used Intervals
Long-press onto your interval to select a recently used one.
Recently used intervals are synced across your devices over iCloud.
Settings
Count to Zero
With Count to Zero enabled, instead of counting down a 5 second interval 5-4-3-2-1, 5-4-3-2-1 (etc), it counts it down as 4-3-2-1-0, 4-3-2-1-0 (etc).
Haptic Feedback, Secondary Feedback
While you can disable Haptic Feedback in Settings here, I would recommend against it, as it’s kind of the point of the app to alert you for each elapsing interval.
You can choose between three different Strength settings for it: Soft, Regular and Strong.
In addition to Haptic Feedback for each elapsing interval, you can enable a softer, secondary feedback for every second that passes. Please keep in mind that this may cause your battery to drain faster.
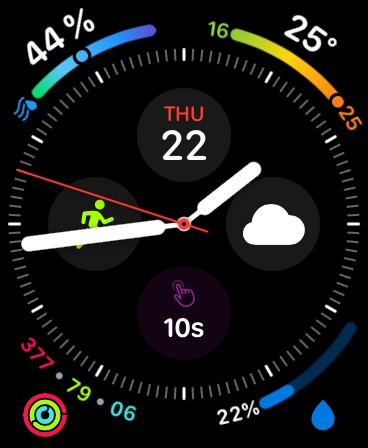
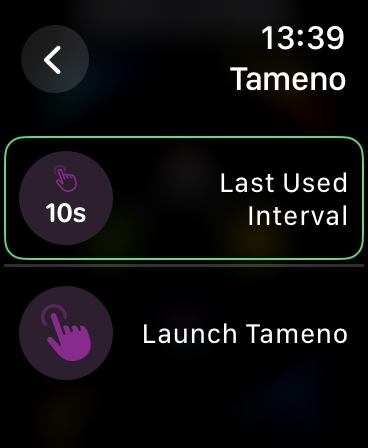
Complications
Tameno’s Complications allow you to either just launch the app quickly from your Watch face, or start the last used interval right away.
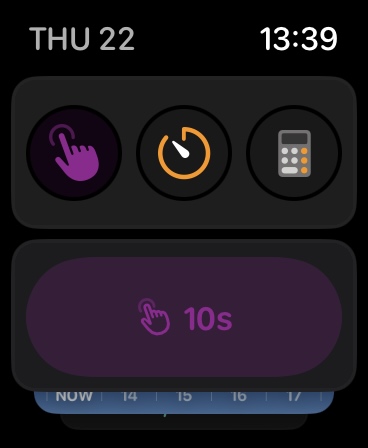
Widgets
Tameno offers two widgets for your Smart Stack: the last used interval, and a launcher.
Siri Shortcuts
Any Siri Shortcuts you set up for Tameno on your iPhone, iPad or Mac, you can also use on your Apple Watch.
Up Next
Next time in Part III, I’ll show you all about Tameno on your iPhone and iPad. I hope you’ll join me!
Links and Availability
Tameno is a universal one-time purchase on the App Stores, so a single purchase allows you to use the app on your Apple Watches, iPhones, iPads, Macs, and Apple TVs.
It costs USD 3.99 / EUR 3,99 / GBP 3.99 and is available in English and German. It requires watchOS 9.4, iOS 16.6, iPadOS 16.6, macOS 13.5, and tvOS 16.6.
Complications and Widgets on Apple Watch require watchOS 10. The interactive widget requires macOS 14 and iOS 17.
If you have any feedback, questions or suggestions, please do not hesitate to contact me – I’d love to hear from you.