Software Development

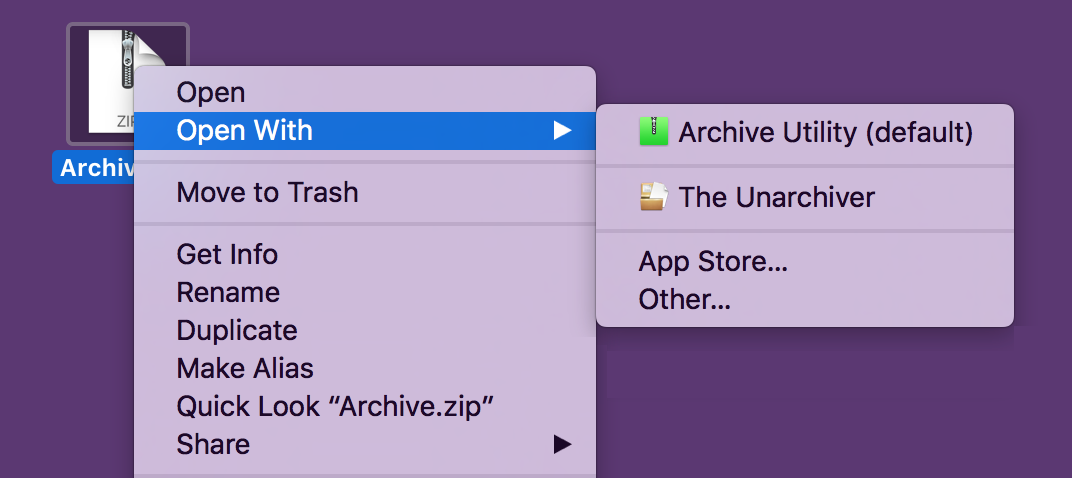
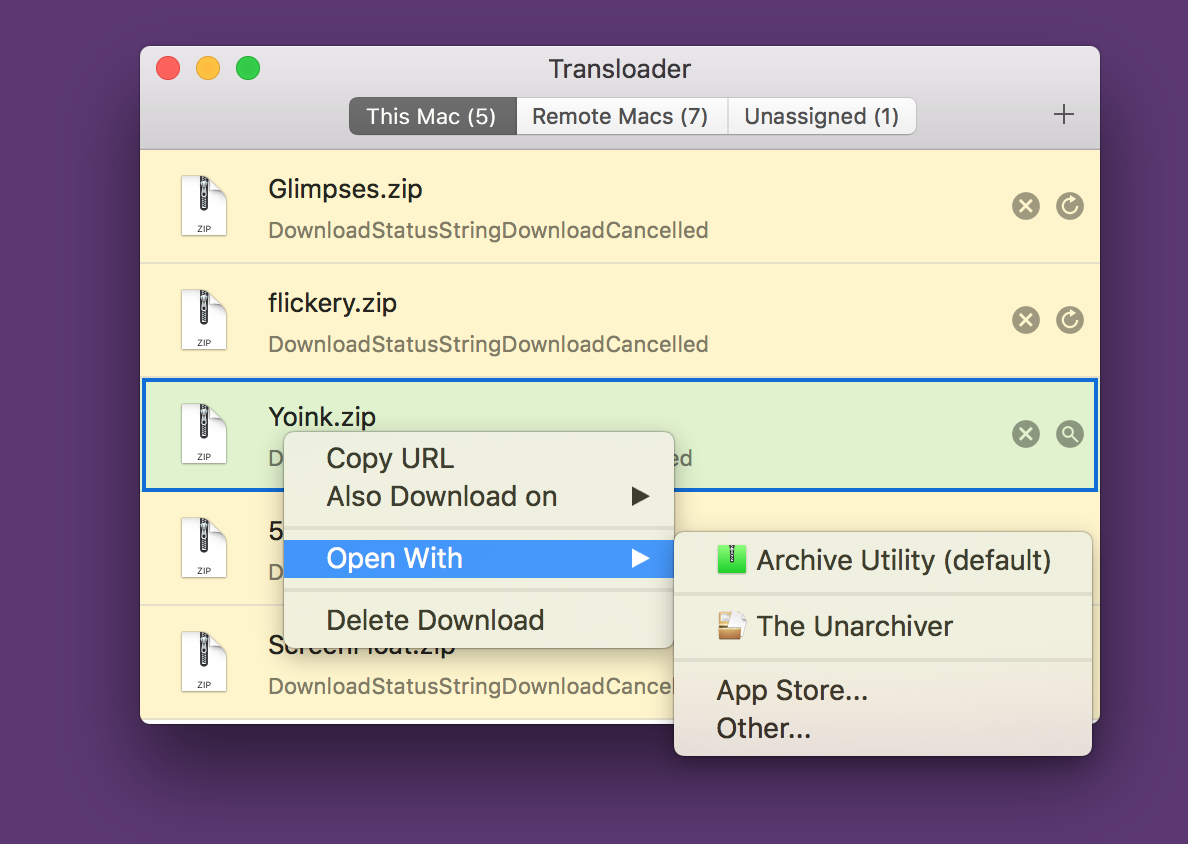
Working on Transloader 3, I wanted to re-implement the Finder’s Open With… contextual menu:

The Finder's Open With contextual menu

Getting the apps in there turned out to be the easy part. What took some effort was the “App Store…” menu item, as I wanted to precisely replicate its functionality.

Transloader 3's Open With contextual menu

Right-click a file in Finder, select Open With -> App Store…, and it will launch the Mac App Store with a UTI search, for example: uti:public.zip-archive.
This will give you a list of all apps available in the Mac App Store that can handle that file type. Neat!

The ‘macappstores’ URL scheme

The Mac App Store app luckily offers a URL scheme:

  • macappstores://
    Launches the Mac App Store
  • macappstores://showUpdatesPage
    Launches the Mac App Store and takes you directly to your Updates page
  • macappstores://showPurchasesPage
    Launches the Mac App Store and takes you directly to your Purchased page
  • macappstores://itunes.apple.com/app/idYOURAPPID
    Launches the Mac App Store and takes you directly to the product page, identified by the product ID

That’s very practical, but not what I was looking for. I was in need of a way to start a search the way Finder does.

In order to find out the URL Finder uses, I wrote a quick throwaway-app that would overtake the Mac App Store’s URL schemes (using LSSetDefaultHandlerForURLScheme) and print out the URL that was opened.
Alas – no dice. Apparently, Finder uses Apple Events or some other magic that “can not be used in a third-party sandboxed app anyway”™ to do its bidding.

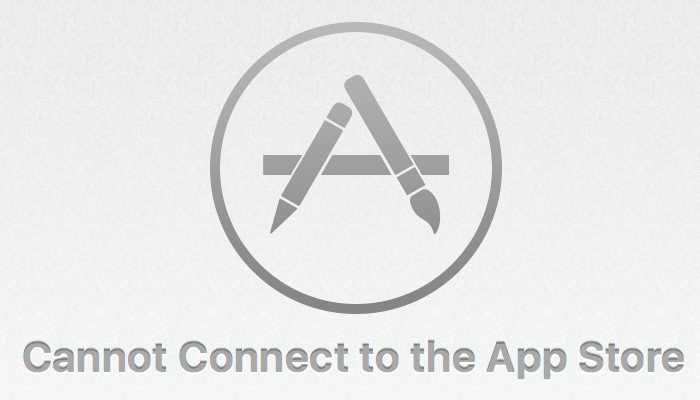
After googling the issue, I found a URL that supposedly worked: macappstores://ax.search.itunes.apple.com/WebObjects/MZSearch.woa/wa/search?q=searchterm, but just to pour more salt into an already wide-open wound, it only worked on pre-10.9 systems:

The search URL in 10.9-and-beyond systems

Another dead end. Or was it?
I guess I should have experimented with that URL a little, because Jan Vitturi (@jan4843 on twitter) had the answer: just remove “ax.” from the URL, and it works (on both pre-10.9 and post-10.9 systems)!

Using this URL:
macappstores://search.itunes.apple.com/WebObjects/MZSearch.woa/wa/search?q=searchterm
I was able to get a search going on the Mac App Store, right from within my app.

Sadly, there’s a caveat.
I can’t do a UTI search this way. When I pass (even a percent-escaped) search term along the lines of ‘uti:public.zip-archive’, the Mac App Store tells me there are no results. Reloading that very same page then does show the results – weird and annoying, but nothing I was able to work around.
Using extension:zip seemed to work a little better, but still didn’t return all results a reload would.

Jan Vitturi to the rescue again – the URL’s a little different for UTI or extension searches:
macappstores://search.itunes.apple.com/WebObjects/MZSearch.woa/wa/docTypeLookup?uti=youruti

Alternatively, instead of uti=…, you can use extension=… to search by file path extensions.

My sincere thanks go to Jan Vitturi!


Eternal Storms Software Logo

– – – Do you enjoy my blog and/or my software? – – –
Stay up-to-date on all things Eternal Storms Software and join my low-frequency newsletter (one mail a month at most).
Thank you 🙂
Read more

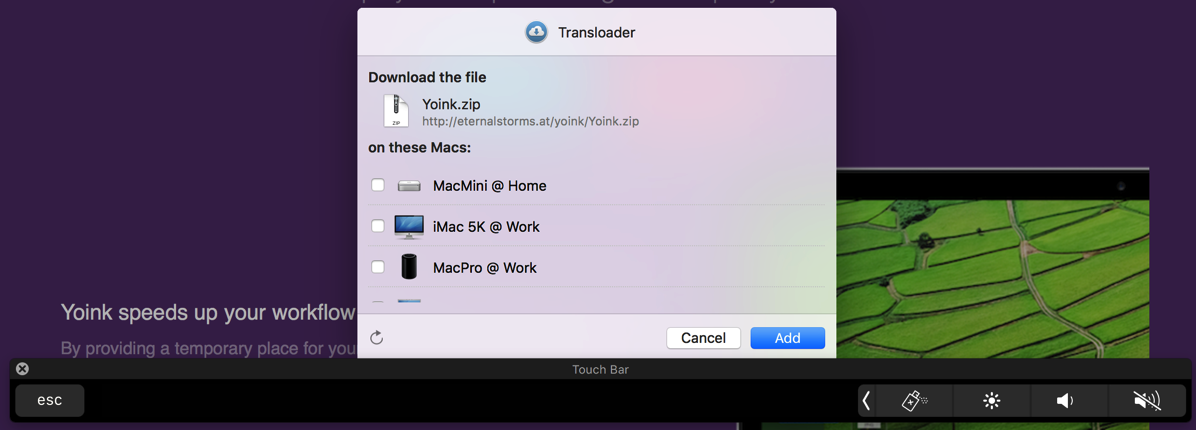
You’re working on your Share extension with support for MacBook Pro’s Touch Bar, but it’s empty and doesn’t appear when your extension is loaded?

NSTouchBar Empty

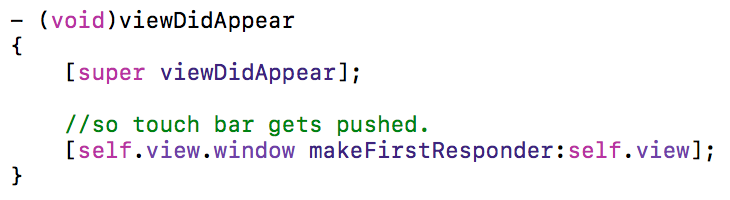
The solution is simple:

Solution for showing NSTouchBar from within a Share extension

Call [self.view.window makeFirstResponder:self.view]; and it will push your glorious NSTouchBar onto the stack:

NSTouchBar working in a Share extension

Hope it helps – it would have saved me 20 minutes if I’d known 😉

Eternal Storms Software Logo

– – – Do you enjoy my blog and/or my software? – – –
Stay up-to-date on all things Eternal Storms Software and join my low-frequency newsletter (one mail a month at most).
Thank you 🙂
Read more

Last year, I started using the iTunes Affiliate Program.
The program allows you to make a little money by linking to your apps with your affiliate token and lets you track where clicks and purchases come from, as well.
I thought it’d be interesting to do a little retrospective, now that a year has gone by.

Using Affiliate Links

Turning an (Mac) App Store link (or almost any other iTunes – based link) into an affiliate link couldn’t be simpler.
All you need to do is append your affiliate token (like &at=your_token).
Additionally, you can provide context with your links so you can track them more easily later on.
For instance, I “tag” my links with “twitter”, “facebook”, “blog”, “website”, “newsletter”, “yoinkdemo” and so on.
That makes it very easy to track where your customers come from.

I use affiliate links for every iTunes link I share – be it an app of my own or that of another developer.

Tools and Info

There are tools available to you to make affiliate linking even easier, like John Voorhees’ Blink (for iOS).
I personally don’t use any extra software – I have a note in Notes.app with all my affiliate links and then just change the aforementioned context string.

If you’re interested in an in-depth look at the iTunes Affiliate Program, I recommend you read John Voorhees’ excellent comprehensive guide about it on MacStories.
It’ll get you up to speed on how to set it all up.

Where do Clicks Come From?

A very interesting aspect of the iTunes Affiliate Program is its tracking capabilities.
When someone clicks your link, you know:

  • the country the user is in
  • when the link was clicked
  • the context string you provided for the link (like “website”, “blog”, etc)
Live-View of Clicks on Links

A click presented in the live-view of iTunes Affiliate Program’s dashboard. I can see the click came from the US, and from within Yoink‘s “Demo Expired” window.

Furthermore, it tracks what the user purchased – a Mac app, an iOS app, a song, a book, etc.

Top 5 Countries

Based on the number of clicks, the top 5 countries from where people click on my links are:

  1. United States
    22,498 clicks
    $254.15
  2. Brazil
    924 clicks
    $4.96
  3. Germany
    570 clicks
    $76.70
  4. United Kingdom
    91 clicks
    $46.10
  5. Spain
    50 clicks
    $19.17

Apparently, more clicks don’t automatically equal a higher payout.

Conversion Rates

The program allows you to see the conversion rates for your links.
Who really purchased after clicking my link? Here’s what I found out:

  1. 38.62% purchased an app after clicking a link on my website
  2. 25.70% purchased an app after clicking on the link from the “demo expired” window inside the app
    (I haven’t had the affiliate link in the “demo expired” window in Yoink for the entirety of the year, more like only half a year)
  3. 00.72% purchased something when they clicked on a link on my blog

I can’t be sure what the user purchased – once a user clicks a link with an affiliate token, that token is used for the next 24 hours for that user.
Which means that they might click on a link for Yoink, but don’t purchase it. Then, some hours later, they purchase a book on the iBook Store – that will count towards that link’s conversion rate.

A Year of iTunes Affiliate Program Links

Here’s the gist of my first year in the iTunes Affiliate Program:

  • Clicks: 24,647
  • Items Bought: 4,465
  • Revenue Generated: $ 9791.12
  • Payout: $ 685.38
  • Average Conversion Rate: 18.12%

Granted, $685.38 isn’t a lot, but it’s money I wouldn’t have seen otherwise, and as an indie developer, every bit counts 😉

Eternal Storms Software Logo

– – – Do you enjoy my blog and/or my software? – – –
Stay up-to-date on all things Eternal Storms Software and join my low-frequency newsletter (one mail a month at most).
Thank you 🙂
Read more

An app icon badged with 'Badge'

A recent conversation I had with Jeff Johnson (of ClickToFlash fame, @lapcatsoftware on twitter) prompted me to look into how badging an app’s icon in macOS’ Dock works.

There were a couple of questions that needed answering:

  • Does badging happen automatically when sending an NSUserNotification?
  • If not, how do I apply a badge to my app’s icon in the first place?
  • How do I retrieve and respect the user’s Notification settings for the app in System Preferences?

Automatic Badging by Sending a NSUserNotification?

NSUserNotification Notification

Nope, automatic badging doesn’t happen. Even though System Preferences -> Notifications suggests that badges and notifications belong together, in code, they’re separated.
That means you have to add the badge to your app’s icon yourself. Also, you need to keep track of whatever number you want to display with the badge and update or clear it at appropriate times.

For example, Mail.app uses the badge to display the amount of unread eMails you have. The badge doesn’t clear when you activate Mail and only decreases when you mark mails as read.
Transmission, on the other hand, informs you about how many downloads have finished since you last had the app active. Once you activate the app again, the badge gets cleared and re-starts from zero.

How to Badge the App’s Icon?

Badging is straightforward:

NSApp.dockTile.badgeLabel = @"Badge";

Please note that putting text into the badge is not a good idea – I did it here just for fun, but text in the badge is very limited and if you have a longer string, what you’ll end up with is something like “A….z”.
It’s best to stick with numbers.

Respecting System Preferences’ Notifications Settings?

If you only use badges (without notifications), you’ll notice your app is missing from System Preferences’ Notifications preference pane.
That can pose a problem, because now you either have to create your own user-setting for badges or the user will have no way of turning them off.
The trick, then, lies with NSUserNotification. Not in the API itself, but in two crucial steps:

  1. Code sign your app.
  2. Add this key-value pair to your Info.plist: NSUserNotificationAlertStyle with a string value of either banner (recommended by Apple) or alert.
    Supposedly, there’s another value, none, but that hasn’t worked for me yet – the app won’t appear in the Notifications preference pane.

Having the key-value pair in your Info.plist has no downside if you don’t use NSUserNotifications. There’s only the upside of having the user be able to disable your app’s badges if they like.

Now that the user can change the setting for your app’s badges, how do you read it out to see if you should badge or not? It’s easier than you think: you don’t.
Just like the system doesn’t show your NSUserNotifications if the user has disabled them for your app, the Dock simply doesn’t display your badge if the user has disabled it in System Preferences.

All you have to do is keep track of the number that should be displayed in the badge, and that you update or clear it at appropriate times.
For example, you might not want to have the badge visible when the user quits your app, so you could set -badgeLabel to nil in -applicationWillTerminate:.

By the way, if you ever need to reset System Preferences – Notifications for your app (or all apps), there’s a nice how-to on stackoverflow.

Happy badging 🙂

Update: Jeff Johnson follows up with some more tips and tricks about NSUserNotification in this blog post.

Eternal Storms Software Logo

– – – Do you enjoy my blog and/or my software? – – –
Stay up-to-date on all things Eternal Storms Software and join my low-frequency newsletter (one mail a month at most).
Thank you 🙂

Read more