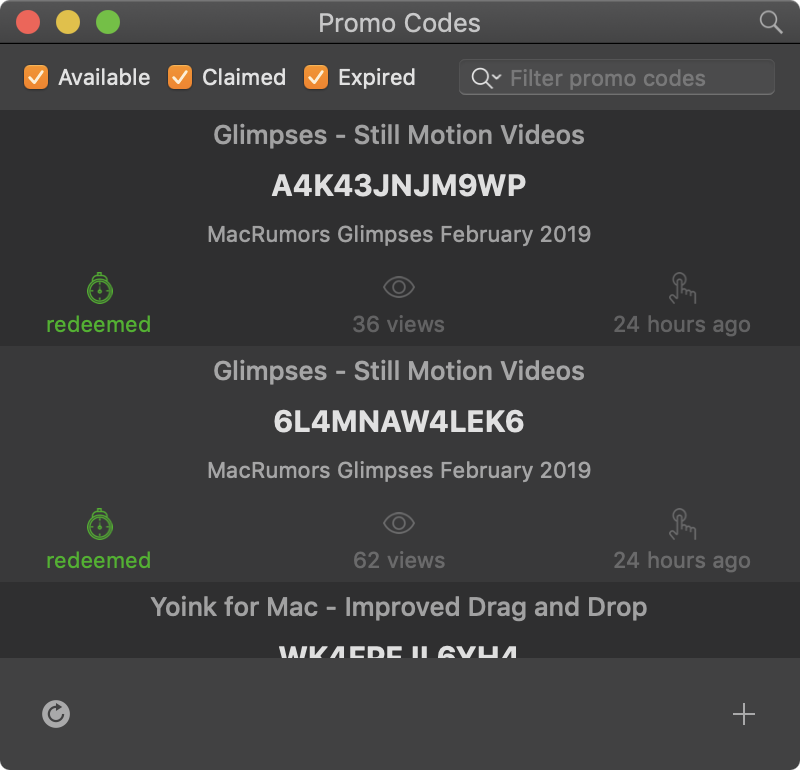
About the creation of an internal tool to create and track promo codes created for apps on App Store Connect.
Side Project: Promo Codes (Part 1 – Intro and Promo Code Creation)
About the creation of an internal tool to create and track promo codes created for apps on App Store Connect.
When creating a custom Quick Action for macOS Mojave’s Finder, you have the option to supply a custom icon:
.jpg")
.jpg")
But this is what happens when you supply an ordinary image in Dark Mode:
.jpg")
or Light Mode:
.jpg")
(in Light Mode, it’s obviously better, but still not as subdued as it should be, which is more grey than pitch-black, or whatever color your original icon file might have).
The trick is to have the file end in ‘Template’, like ‘MyWorkflowIconTemplate.tiff’. But that’s not all there is to it. When you add a custom icon through Automator, it automatically gets renamed into ‘workflowCustomImage.png’. So no matter what you name your file, it won’t matter.
To fix this, add a custom icon to your Quick Action in Automator, save, switch to Finder and navigate to /Users/yourname/Library/Services/, where your newly saved Quick Action will end up.
There, right-click your Quick Action, select ‘Show Package Contents’, and navigate into Resources, where your icon file will be. Rename it to ‘workflowCustomImageTemplate.png’.
Now, navigate into Contents and open Info.plist. Look for <key>NSIconName</key> and change ‘workflowCustomImage’ to ‘workflowCustomImageTemplate’. Save.
Now the icon will look like this:
.jpg")
.jpg")
That’s much better. But there’s another issue we need to take care of:
![]()
The icon’s a bit too large, even though in Finder and the “More…” menu, it looks well-sized.
I thought I’d be smart about it, since the “append ‘Template’ “ trick worked, I’d have three differently sized images and append @2x and @3x. But it didn’t work.
The trick is to have a TIFF file with 2 (or 3, to be on the safe side) representations – one at 1x, one at 2x and one at 3x.
And voila, it worked:
![]()
To create the TIFF, I wrote a small app that takes my icon file, creates three NSBitmapImageRep objects from it and adds them to an NSImage instance. Then it writes the NSImage object’s TIFFRepresentation to disk.
Open that file in Preview.app and you’ll notice all three icons inside that one TIFF (you might have to select View – Thumbnails in the menu to show them)
Select the first and select Tools -> Adjust Size… in the menu bar.
Resize the image to 16×16 (which I found to be working nicely) and set its resolution to 72, if it isn’t already.
Select the next thumbnail and resize it to 32×32 at 144 DPI, and the third thumbnail to 48×48 at 216 DPI. Save.
Now repeat Tip #1 with this new file and you’re all set.
I hope this will save you some time, as it cost me plenty 😉
_____
Matthias Gansrigler | Founder & Developer – Eternal Storms Software
e: blog@eternalstorms.at
twitter | facebook | instagram
When testing your Today Widget on macOS Mojave and you see something like this using Dark Mode:

don’t fret, there’s a rather easy fix.
In your Today Widget’s Info.plist, in NSExtension > NSExtensionAttributes, there’s NSExtensionPointVersion.
For the widget above – with the wrong appearance – the version was set to 2.0:
.jpg")
To see where the problem might be, I created a new widget under macOS Mojave, and it turns out, it uses version 3.0, which also fixes the appearance issue:
.jpg")
and voilà, it worked like a charm:

I’ve tested back to macOS El Capitan 10.11 and it worked, it will possibly work for earlier versions of macOS, too.
Hope it helps 🙂
Today, I released two quick updates to my apps Yoink for Mac and ScreenFloat. Here’s what’s changed.

– Fixed a rare crash when trying to share files
– Fixes a bug where the keyboard shortcut would act up after deleting a file held by Yoink in Finder or using the app’s Share extension
– Fixed a bug where, after changing the screen’s resolution, Yoink would be misplaced
Links:
Yoink for Mac Website (with free, 15-day demo)
Yoink on the Mac App Store

– Fixes a rare crash when dragging the mini-icon of a floating shot
Links:
ScreenFloat Website (with free, 15-day demo)
ScreenFloat on the Mac App Store