Let’s take a tour through ScreenFloat and see how it can power up your screenshots.
ScreenFloat for Mac – Your Screen Capture All-rounder
ScreenFloat Website (+ free trial)
ScreenFloat on the Mac App Store (one-time purchase, free for existing customers)
Eternal Storms Software Productivity Apps Bundle (ScreenFloat, Yoink and Transloader at ~25% off)
Posts in this Series
Part I – Hello ScreenFloat
ScreenFloat is a versatile screen capture utility that powers up your screenshots and recordings in numerous ways:
- Capture screenshots, timed screenshots, recordings (with system and mic audio), your clipboard’s contents, or import photos, scans and sketches from your iOS devices (or files from Finder and other apps).
- Float shots, so they’re always visible, like Picture-in-Picture. It’s a great memory aid, perfect for reference material, and gives quick and easy access to ScreenFloat’s OCR capabilities and other features, like the color picker and quicksmart-redaction. Create powerful workflows you run on floating shots with a simple double-click.
- Edit your shots. Add annotations and markup, crop, “fold”, rotate, resize, de-retinize, trim, mute and cut them. Quicksmart-redact text, barcodes and faces, or copy text and barcode content to your clipboard.
- Share effortlessly, by dragging the floating shot to other apps. Change formatting, sizing and quality options on-the-fly, and even decide if annotations should or should not be included. Create shareable and embeddable links for your shots with iCloud, ImageKit.io or Cloudinary.com.
- Store, organize and collect your shots in the Shots Browser, and keep your Desktop clutter-free. Name, tag, rate, favorite and find them. Synchronize your shots over iCloud.
- Integrate with macOS and other apps, using ScreenFloat’s Shortcuts, url scheme, and its AppleScript integration. Use Spotlight to find shots system-wide. Widgets make your shots, tags, folders and picked colors accessible system-wide.
Table of Contents
- Getting Started
- Capturing, Importing
- Floating Shots
- Editing, OCR, Redaction, Annotation
- Share
- Store
- Integrate
Getting Started
When you first launch ScreenFloat, you’ll be greeted by its setup screen that helps you set up keyboard shortcuts, iCloud sync, Spotlight indexing, and also – if you used ScreenFloat 1.x – upgrades your existing shots library to the new v2 format, analyzing your shots for texts, barcodes and faces along the way. (Depending on the number of shots you have, this might take a little while)

ScreenFloat is an app that runs in the background. More specifically, in your menu bar: you will not find it in your Dock, nor the app switcher (although you can, of course, drag ScreenFloat to your Dock manually).
You can access ScreenFloat any time via its icon in the right portion of your menu bar:
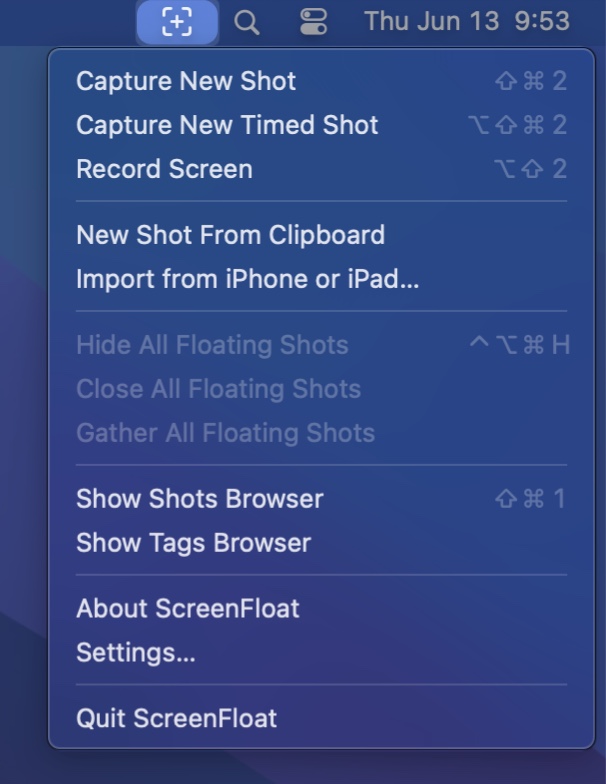
Using its keyboard shortcuts, menu bar icon, or widgets, ScreenFloat is always ready for you to capture your screen, or browse your Shots in the Shots Browser.
Capturing, Importing
ScreenFloat offers three types of captures: Screenshots, Screen Recordings, and Timed Screenshots.
Screenshots
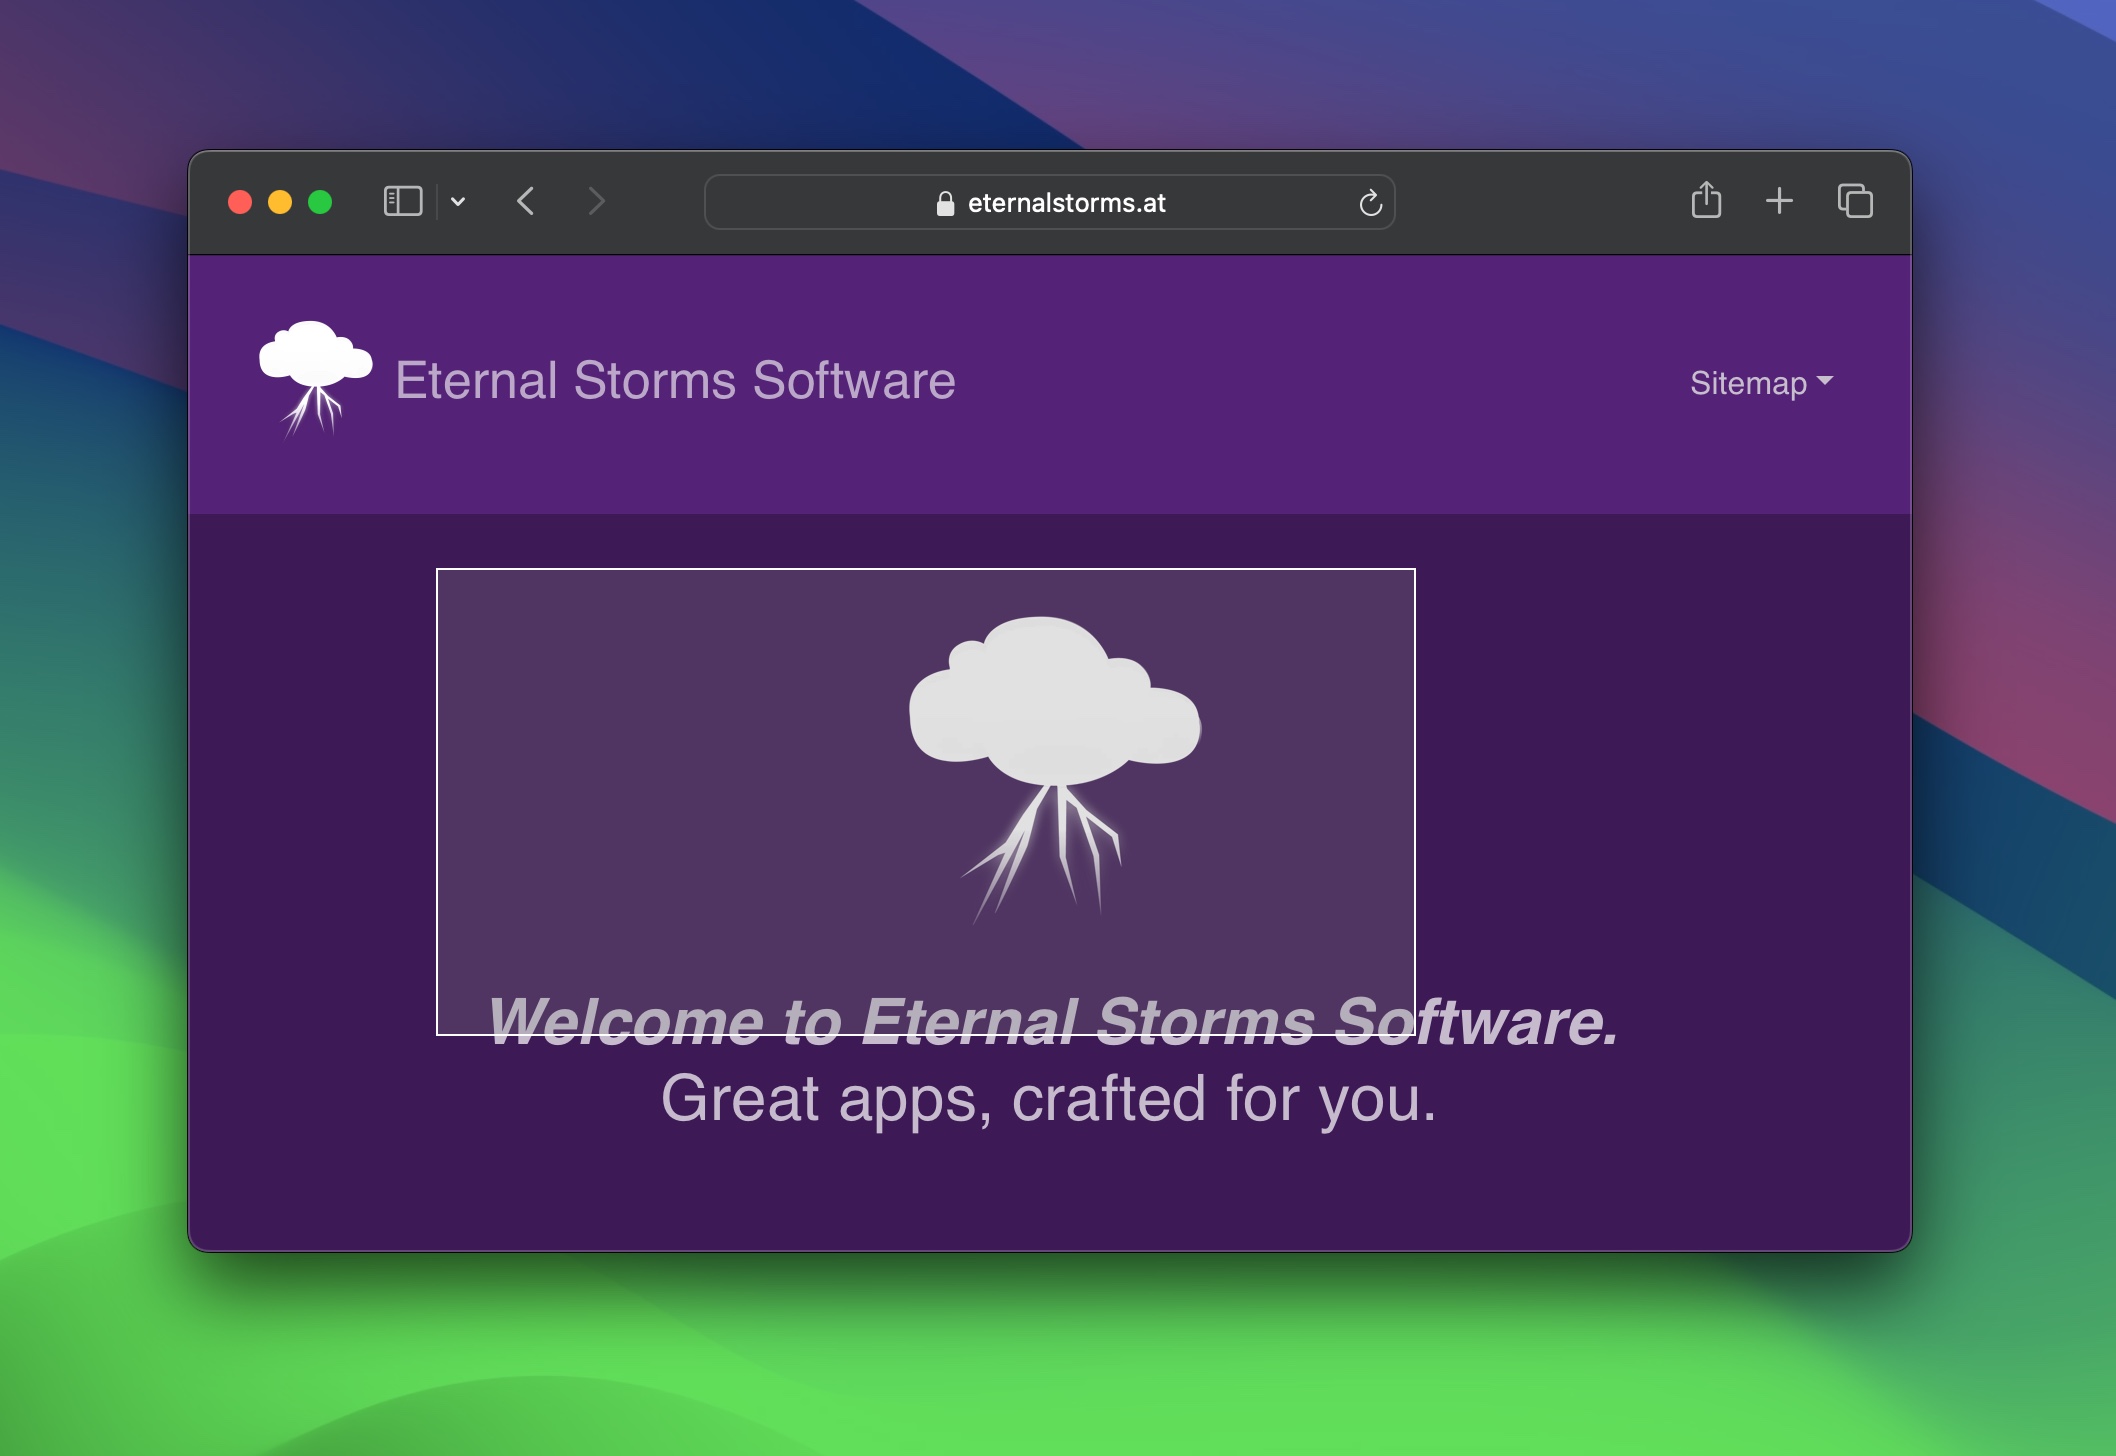
To take a screenshot, use the according keyboard shortcut (by default, command (⌘) – shift (⇧) – 2), or select it from the menu bar icon. You can then select the portion of the screen you’d like to capture.
Recordings
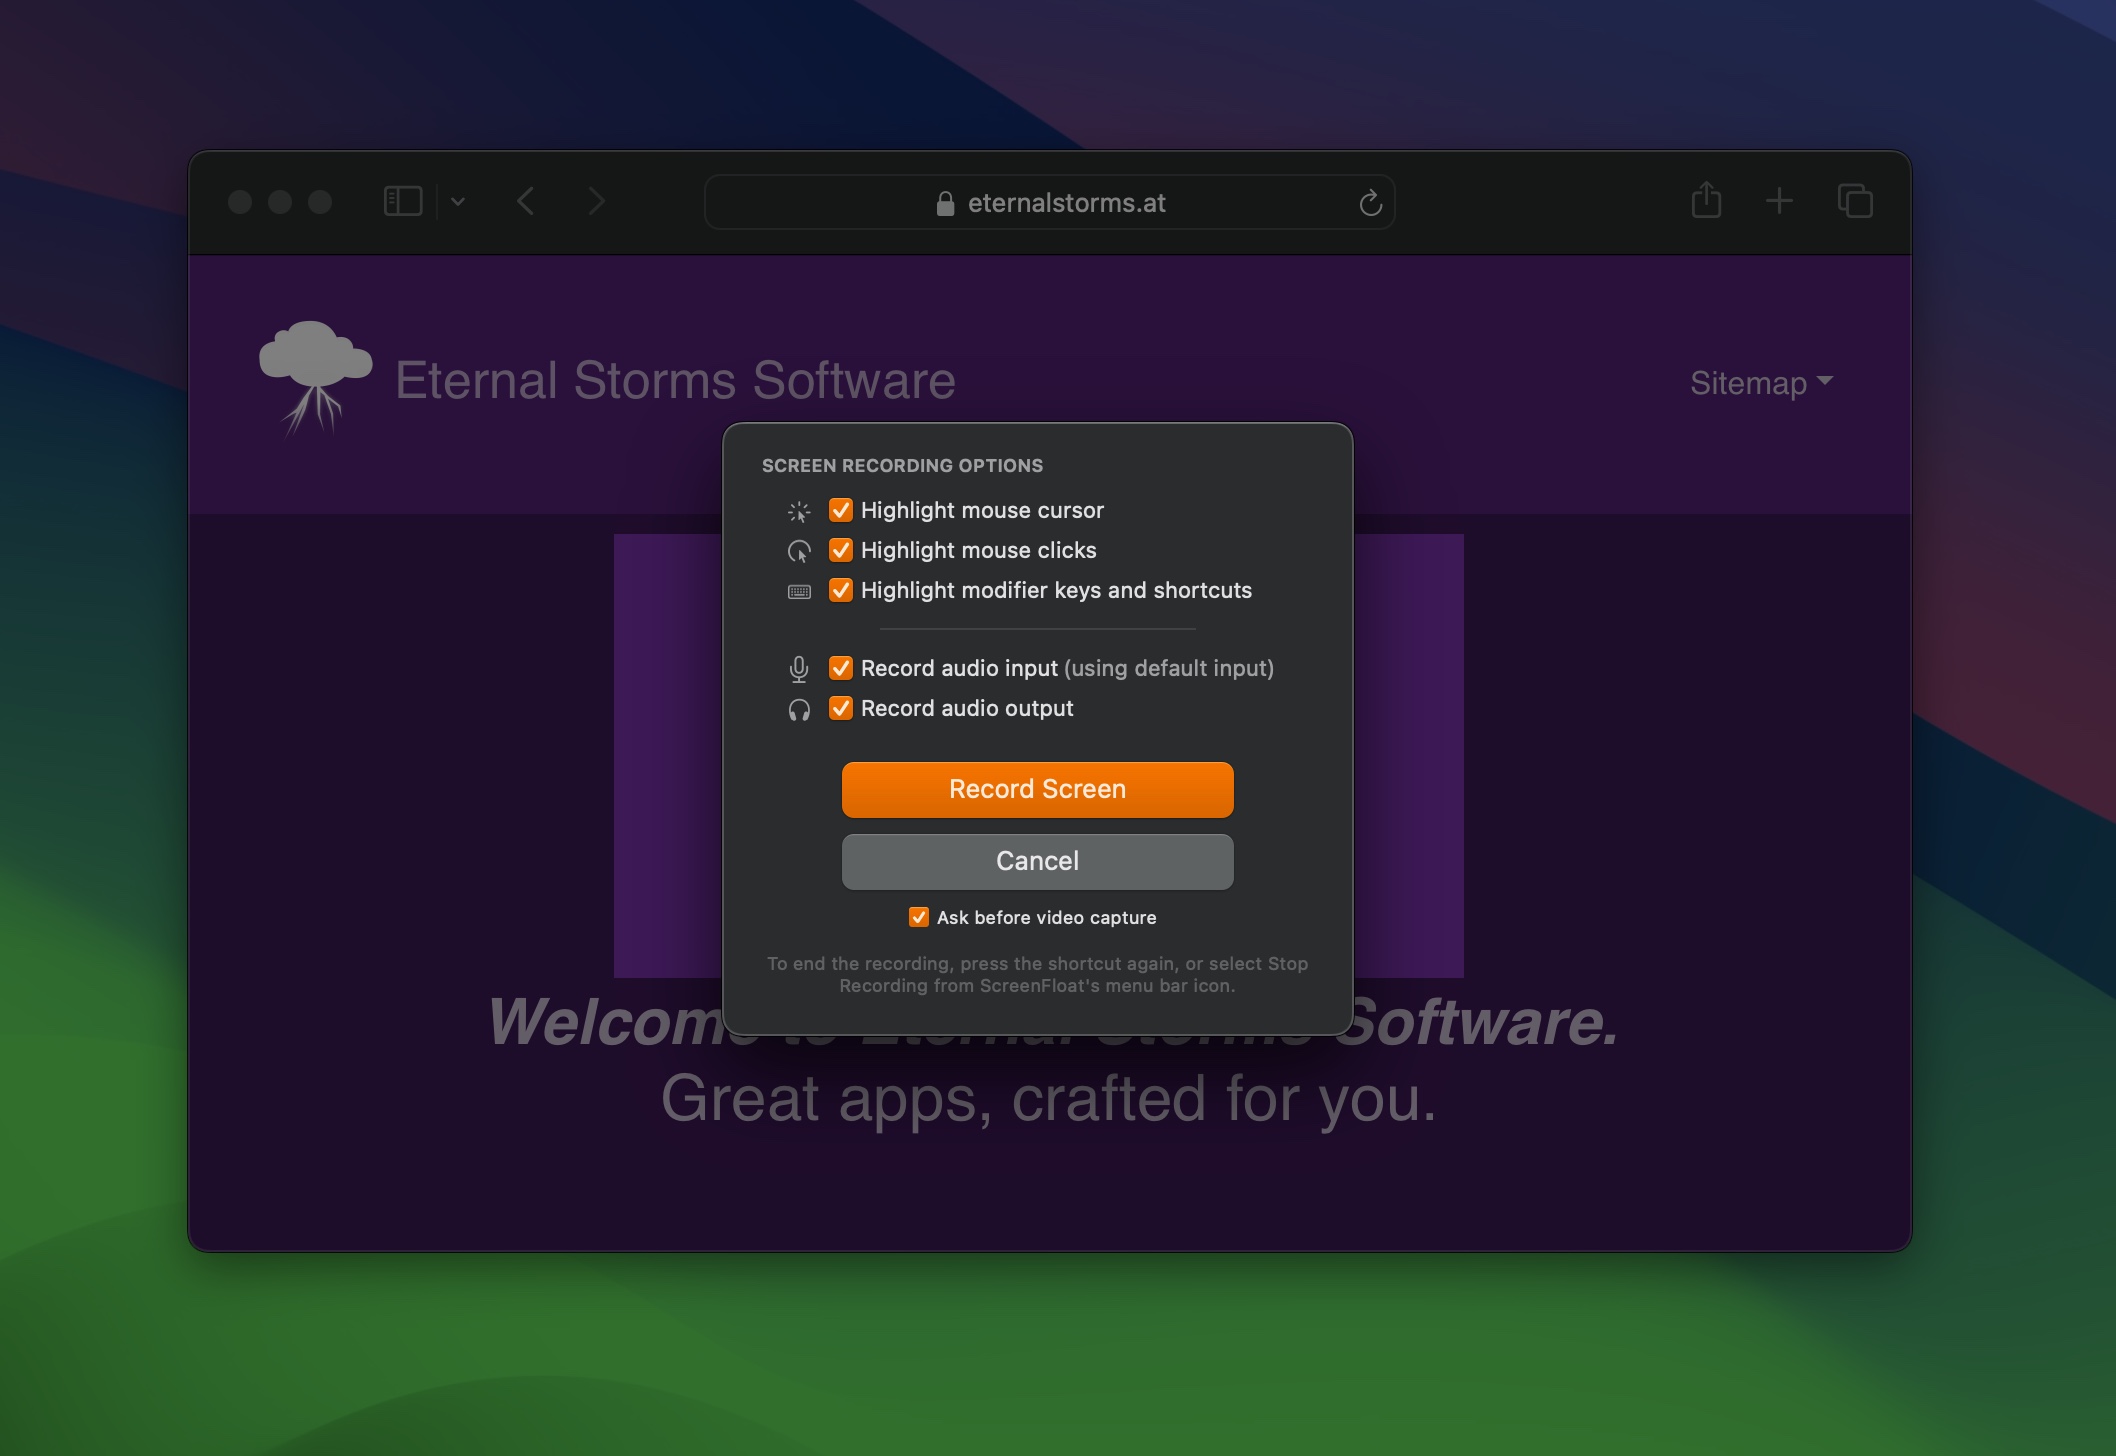
Screen recordings can be started in the same fashion – by pressing its keyboard shortcut (by default, shift (⇧) – option (⌥) – 2), or via the menu bar icon. You have several recording options available to you – whether to highlight the mouse cursor, clicks, and key presses. You can also record your Mac’s audio output (speakers) and input (microphone).
Timed Screenshots

A timed shot is like a screenshot, only that it is taken with a delay. It can be very useful when you need to take a screenshot of something that takes extra steps to get to. You can take one by pressing its keyboard shortcut (by default, control (^) – option (⌥) – 2), or the menu bar icon.
Previously captured areas can easily be re-captured by press-and-holding the relevant keyboard shortcut.
You can copy the shot to your clipboard instead of making it float by holding the control key (^) on your keyboard when you release the mouse button for the capture.
Consequently, you can copy captured text to your clipboard right away after a capture, by holding the control (^) and command (⌘) keys pressed.
Import Shots
Importing files into ScreenFloat is easy. From Finder, you can right-click image and video files and select Open With > ScreenFloat, or Share > ScreenFloat. You can also drag them onto the app’s icon, or onto its symbol in your menu bar, or onto the Shots Browser. Or use a Siri Shortcut.
Tip: Did you know you can create shots of selected text from any app? It’s perfect for remembering stuff. Select some text, the click on the active app’s name in your menu bar and select Services > Create Shot from Selected Text. Alternatively, you can set up a keyboard shortcut for this in System Settings.app > Keyboard > Keyboard Shortcuts > Services > Text > Create Shot from Selected Text.
Or drag selected text to ScreenFloat’s icon in your menu bar.
Floating Shots
Shots and recordings you capture with ScreenFloat float by default. Floating shots float above other windows, and follow you around your apps and spaces, so the shot is always in sight. That can be very helpful when trying to remember something, copying info from one app to another, or as reference material.
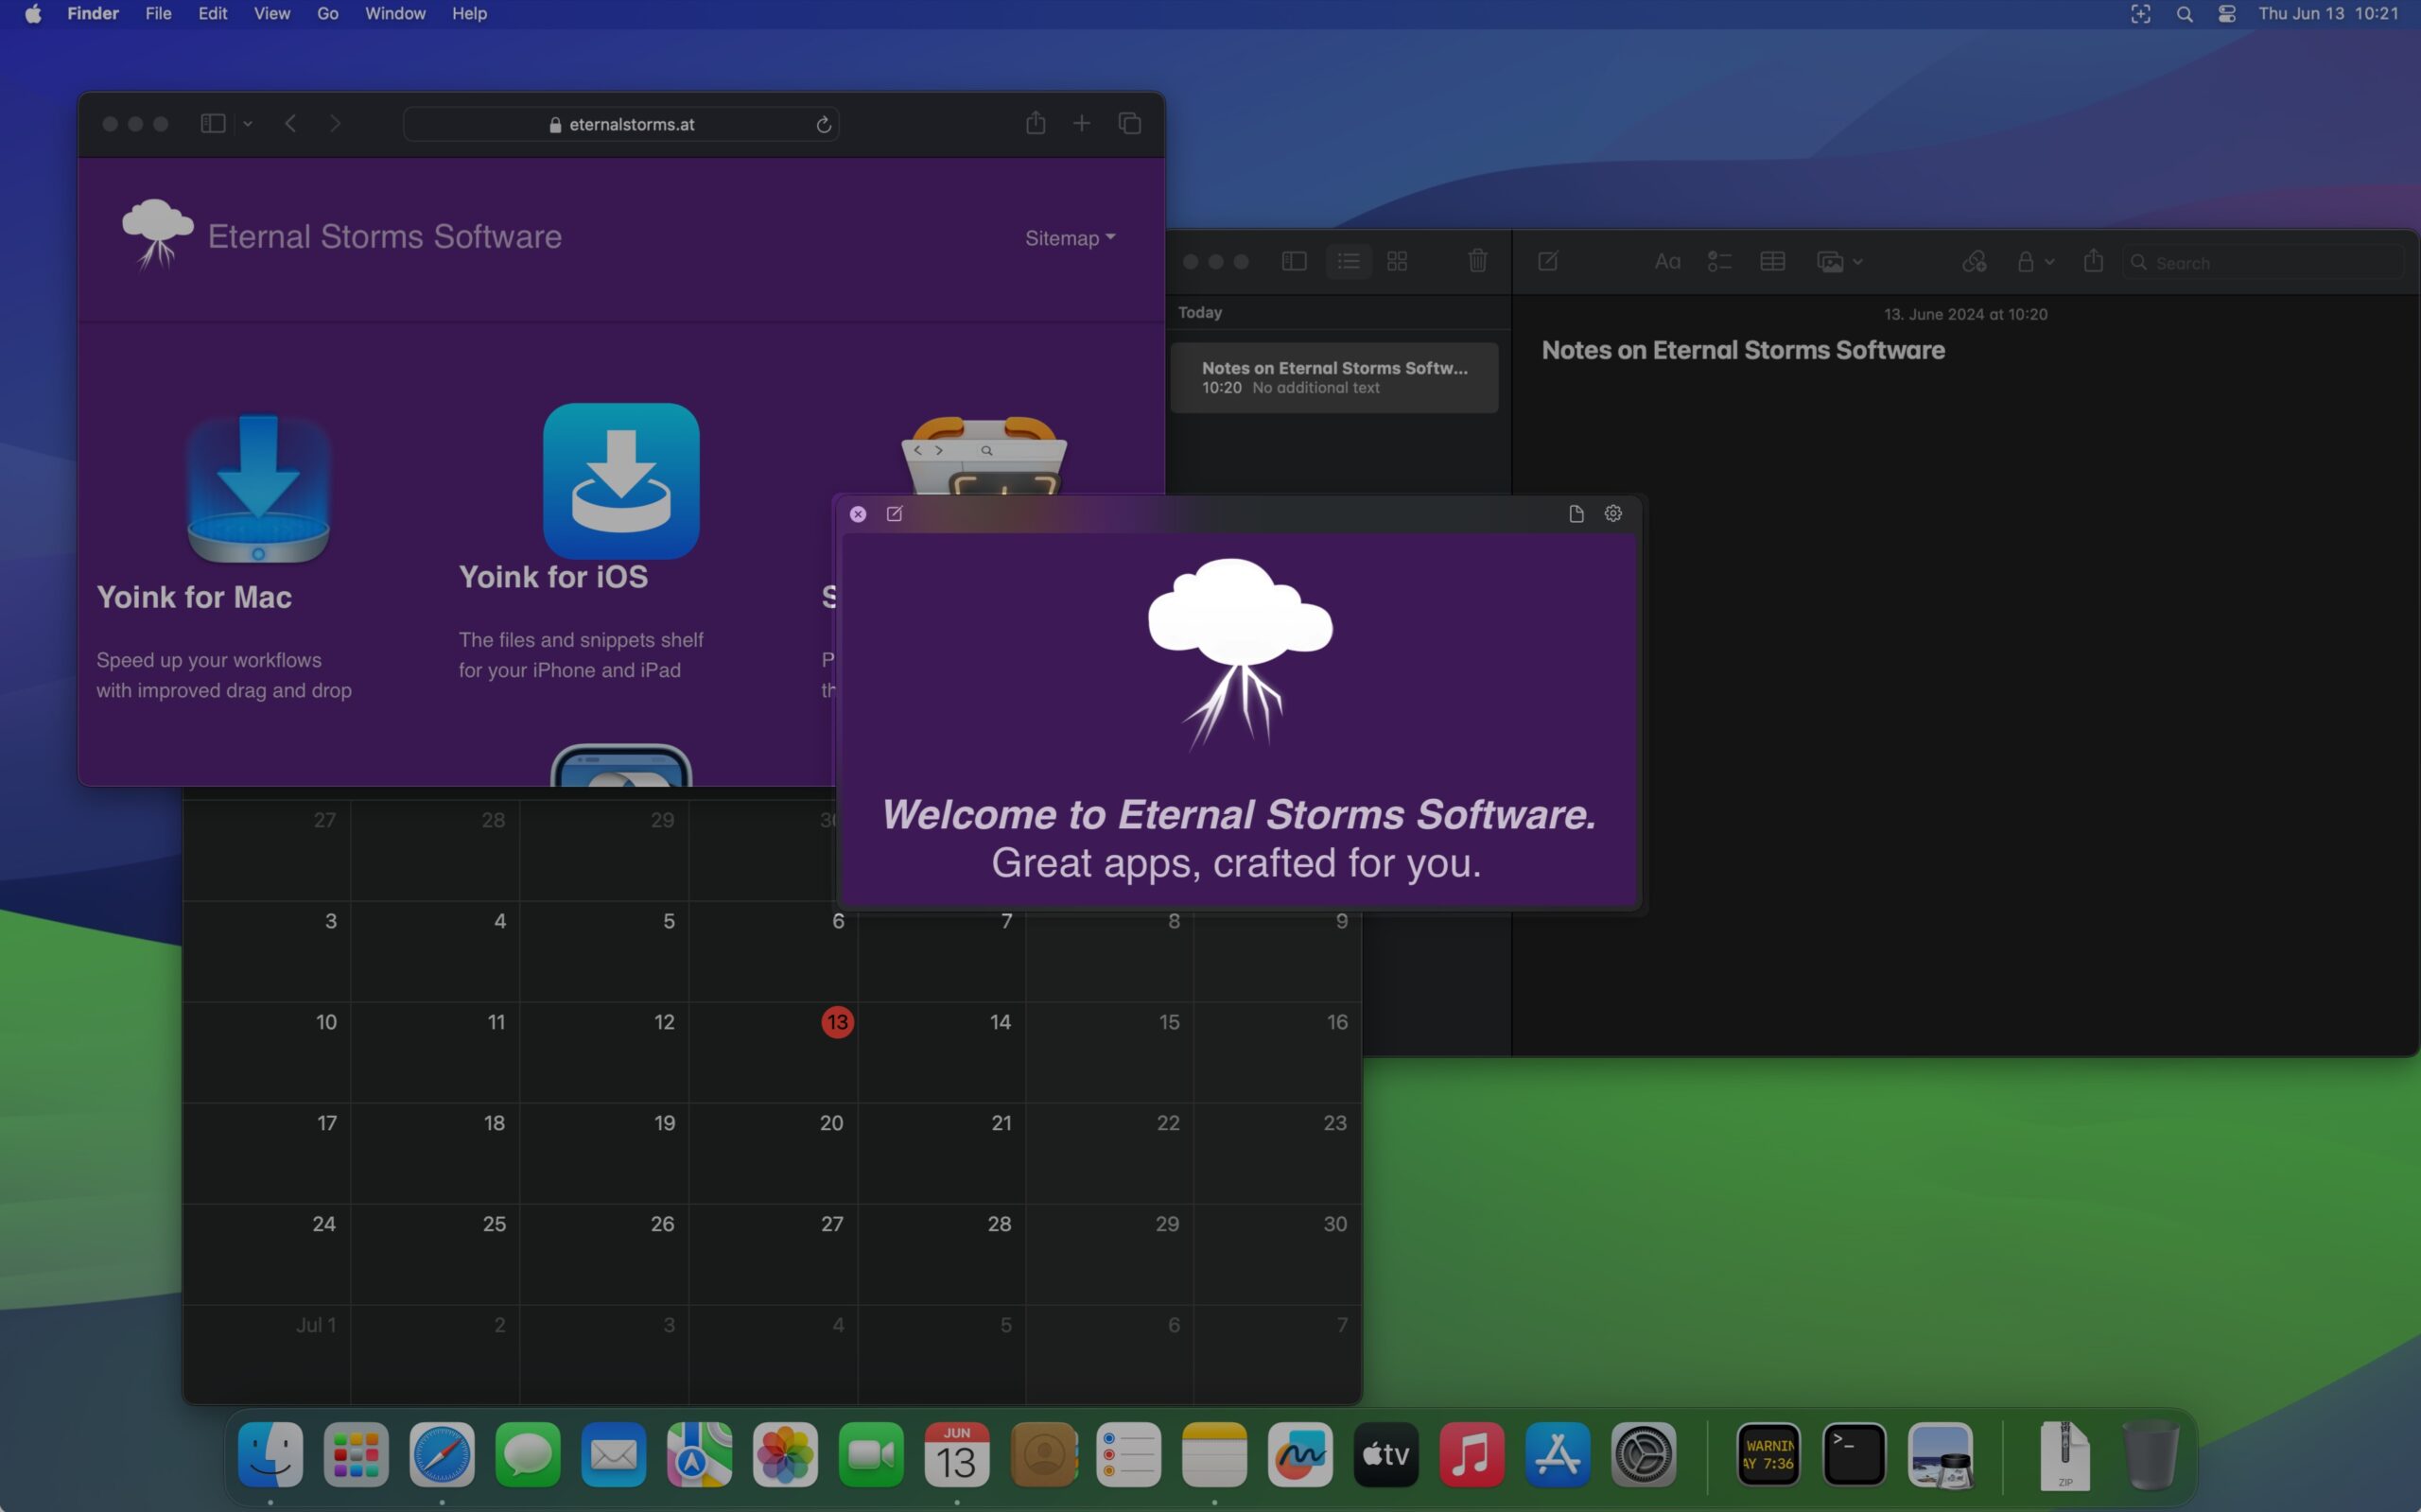
While floating shots follow you around by default, there are more options available to you. You can pin floating shots to a space or fullscreen-app, so they will stay contained in that space, or only have them be visible when a specific application is frontmost.
When a shot is in the way, you can hide and unhide it (or all of them), or you can use “Work mode”, which hides floating shots as you mouse over them, and shows them again when the mouse exits.
You can change a floating shot’s opacity by scrolling up and down within it, and you can even make it ignore mouse clicks, so you can click through them (great for artists, for example).
Naturally, you can also close floating shots. They are stored in the Shots Browser, from where you can make them float again with a double-click.
Floating shots can be resized like any other window, by dragging any of its corners or edges.
A right-click or click onto the gear button gives you access to all editing, OCR and management features.

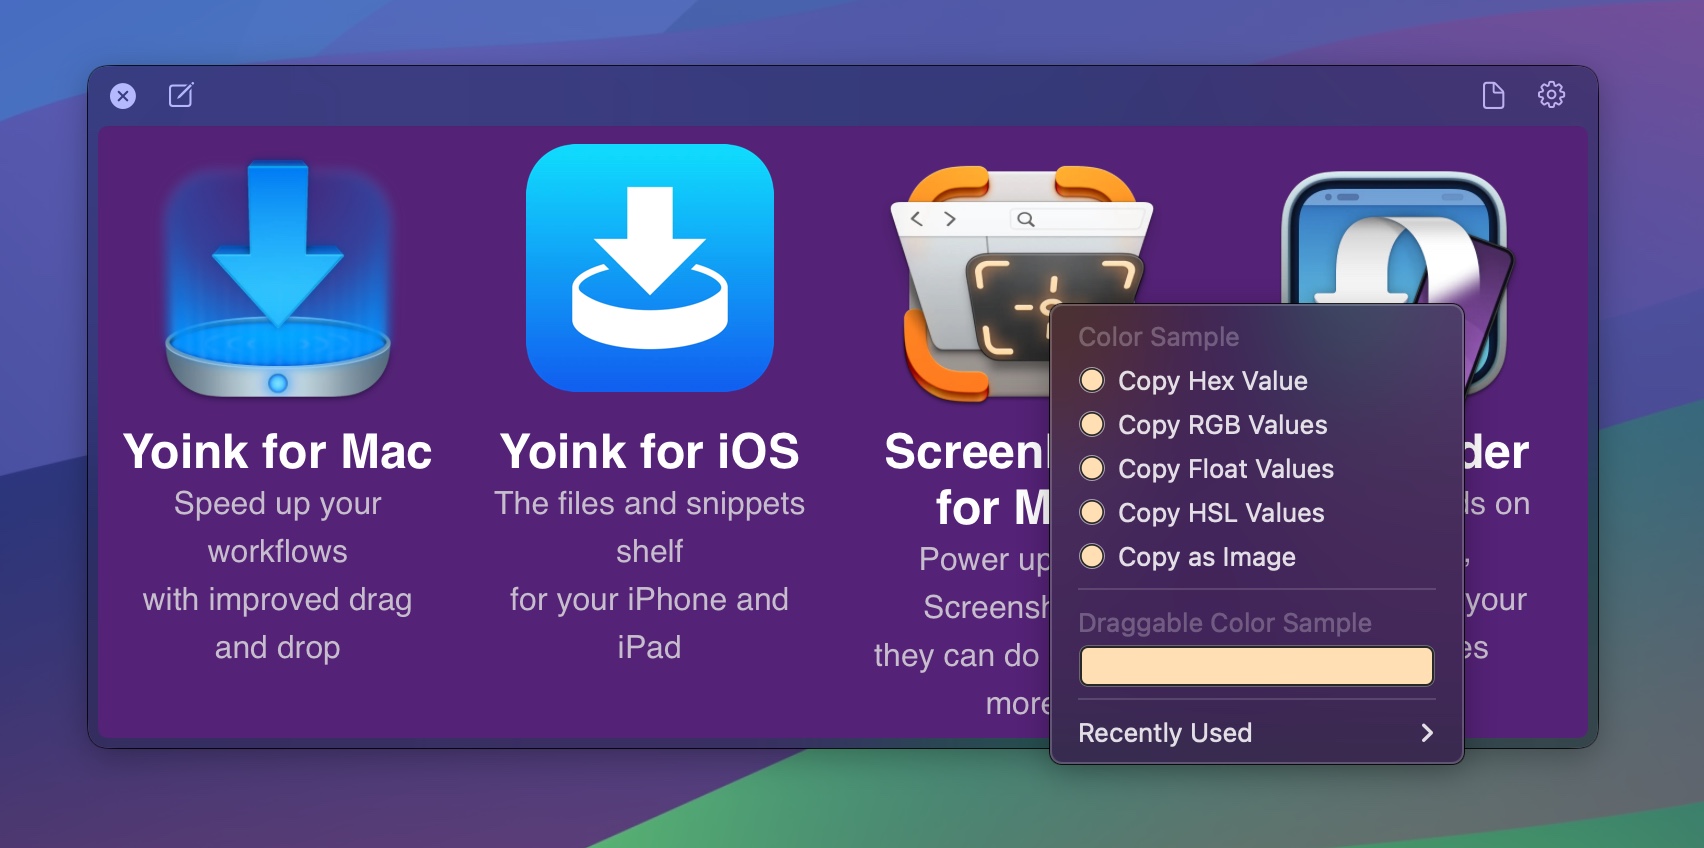
Option-right-click-drag onto a floating shot to use the color picker.
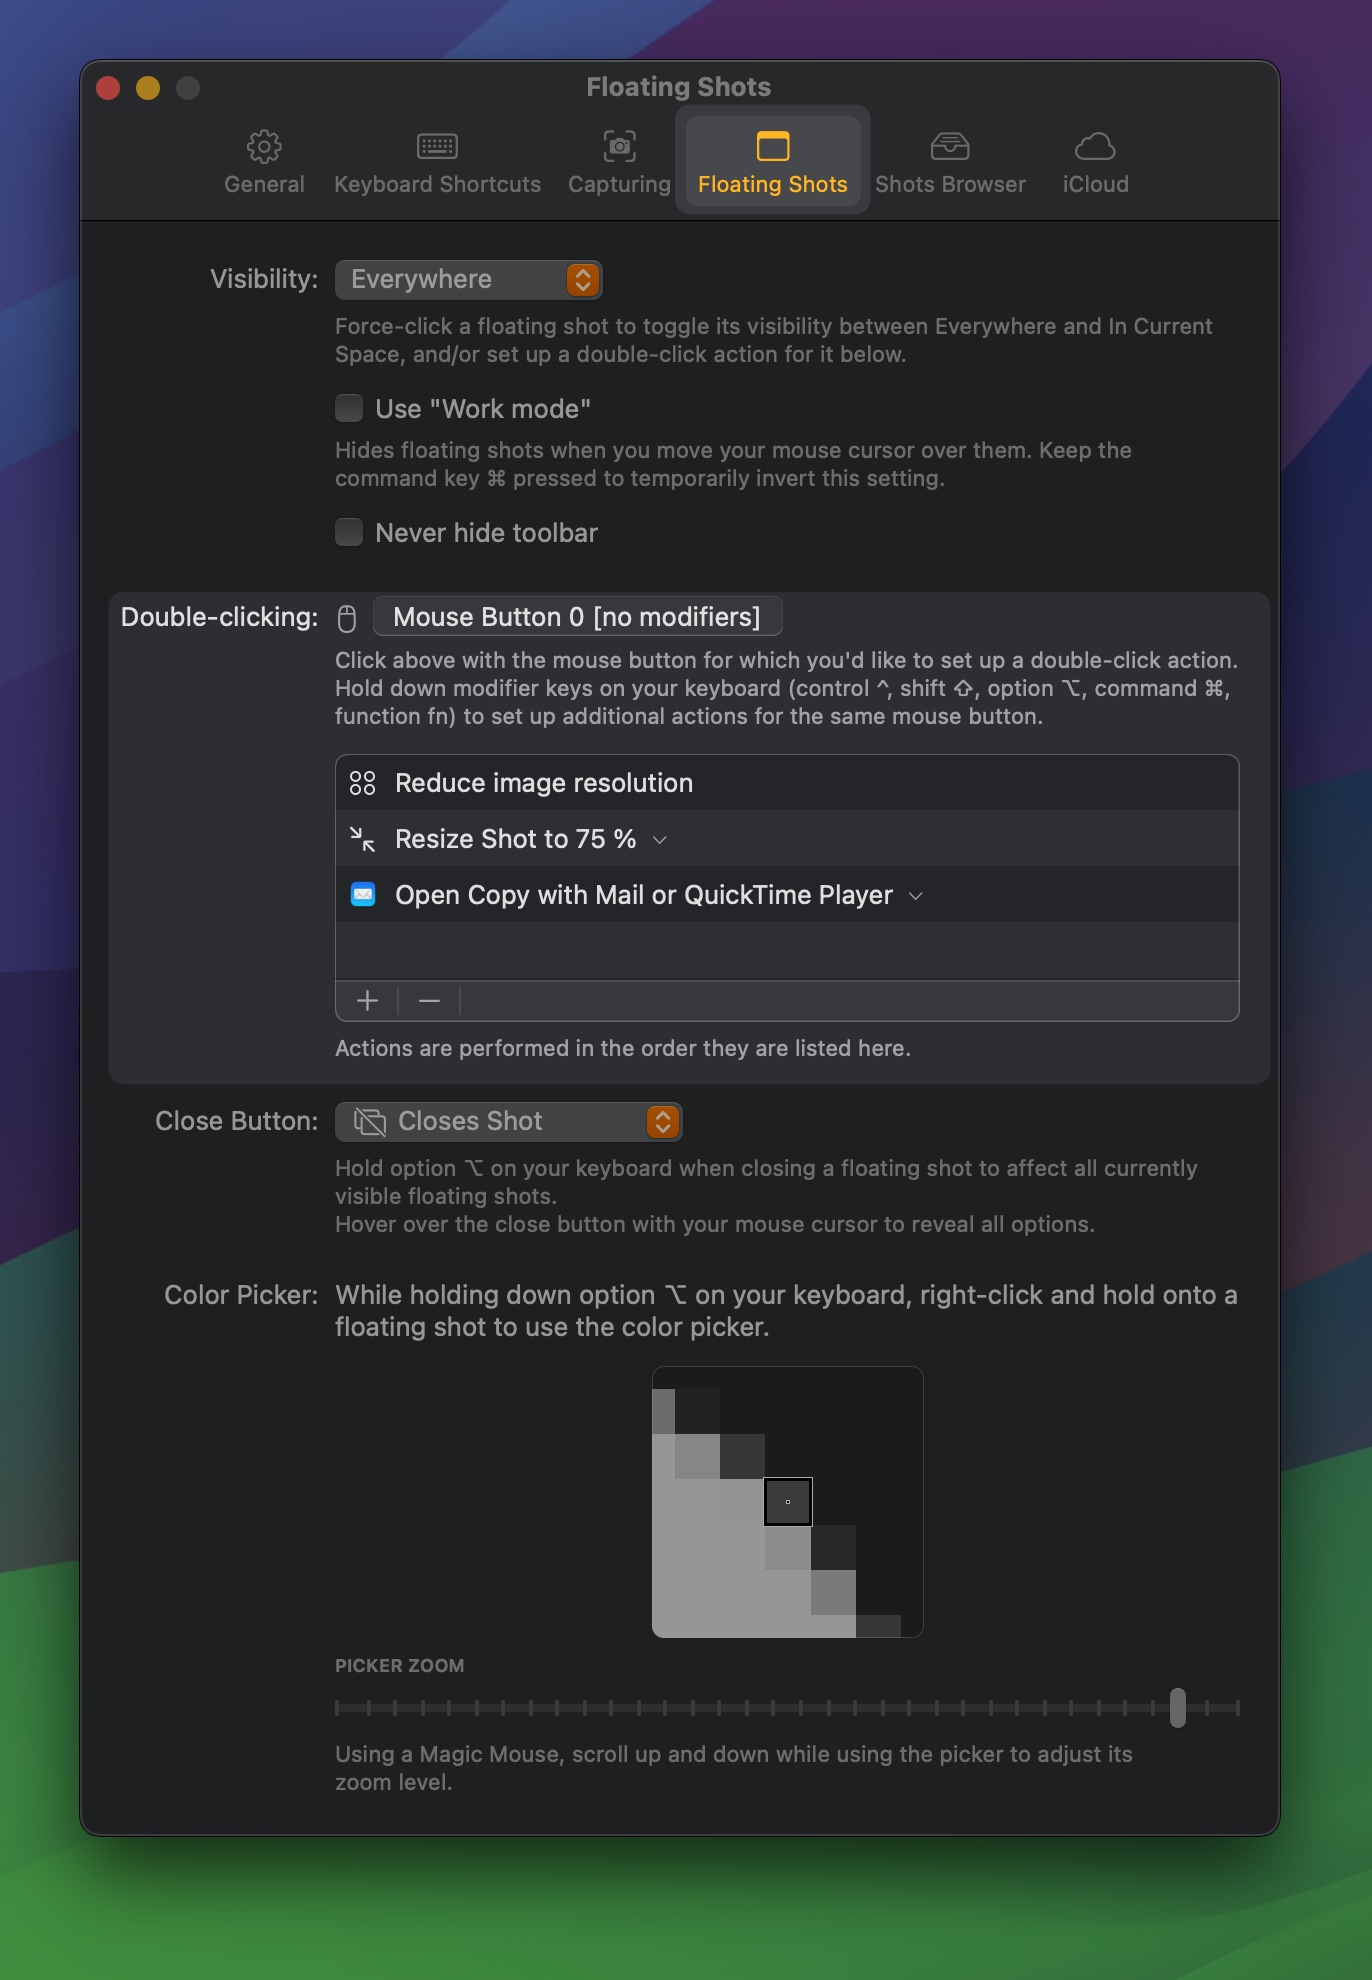
Set up powerful workflows you can run on your floating shots with a simple double-click.
You always resize a shot and reduce its dpi before you attach it to a new Mail? There’s a double-click workflow for that (and more):
Editing, OCR, Redaction, Annotation
ScreenFloat offers a wide range of editing options:
Resize, de-retinize, crop, fold, rotate, trim, cut and mute (you can remove all audio, or the system- and microphone tracks individually).
Annotate, redact and markup your shots with ease.
Every shot you take or import is analyzed for text, barcodes and faces, allowing you to easily copy and view that information, or quicksmart-redact it.
Detected data is indexed, so you can find shots by a certain phrase they depict, or barcode content, within the Shots Browser, and Spotlight.
ScreenFloat lets you annotate, redact and markup your shots to your heart’s content.
Freedraw, rectangles, circles, lines, arrows, stars, checkmarks, x-marks, Text, Smart Numbered Lists, Highlights and Redactions are available to you.

Cutting your video recordings allows you to remove middle sections of your recordings entirely, or just parts of individual audio tracks:
Share
It couldn’t be easier to drag a shot to other apps. Start a drag from the floating shot’s document button, or by long-pressing the shot, or open the on-the-fly options menu and change the format, resolution, dimensions, and whether annotations and metadata should be included.
(You can also Export your shots for even more control).
Link Sharing
A file is too large to send, or you want to send multiple shots at once? Use iCloud Link Sharing to create a download-link, valid for 30 days.
You want to embed an image or video in a Markdown document, or a website? Use ScreenFloat’s ImageKit.io or Cloudinary.com integration to create permanent, shareable and embeddable links:
You want to share your Shot a different way? Use ScreenFloat’s Run AppleScript or Run Shortcut double-click action to upload the double-clicked shot to a service of your choice with an AppleScript or Siri Shortcut.
Store
Anything you capture with ScreenFloat, or import into it, is stored in the Shots Browser, where you can collect, organize, categorize and synchronize your Shots.
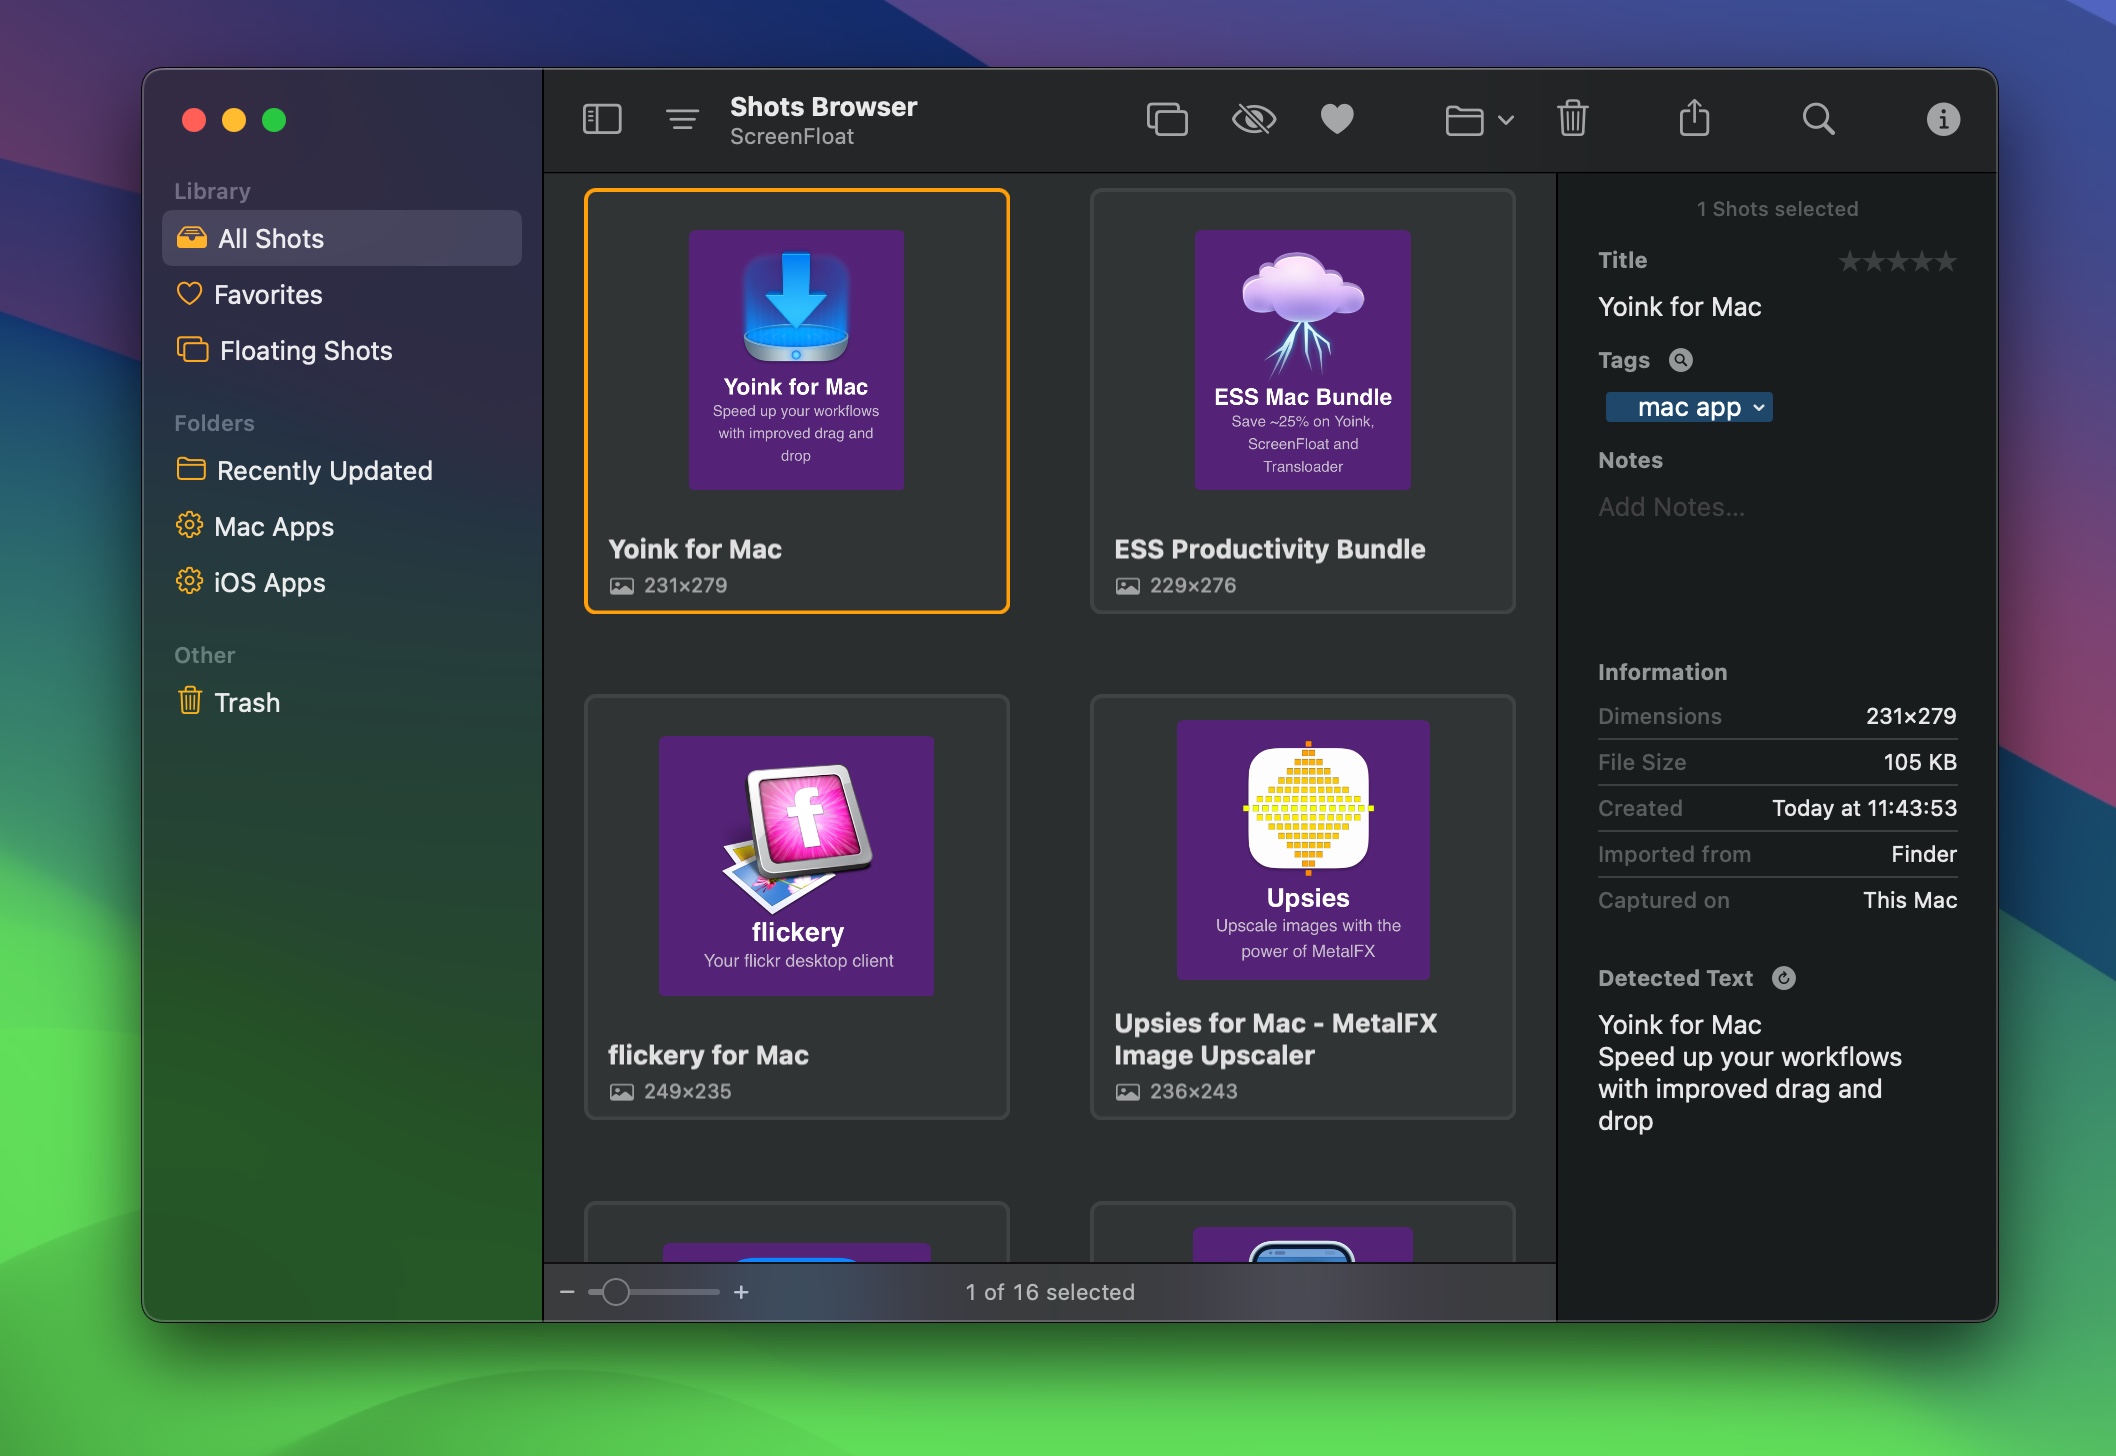
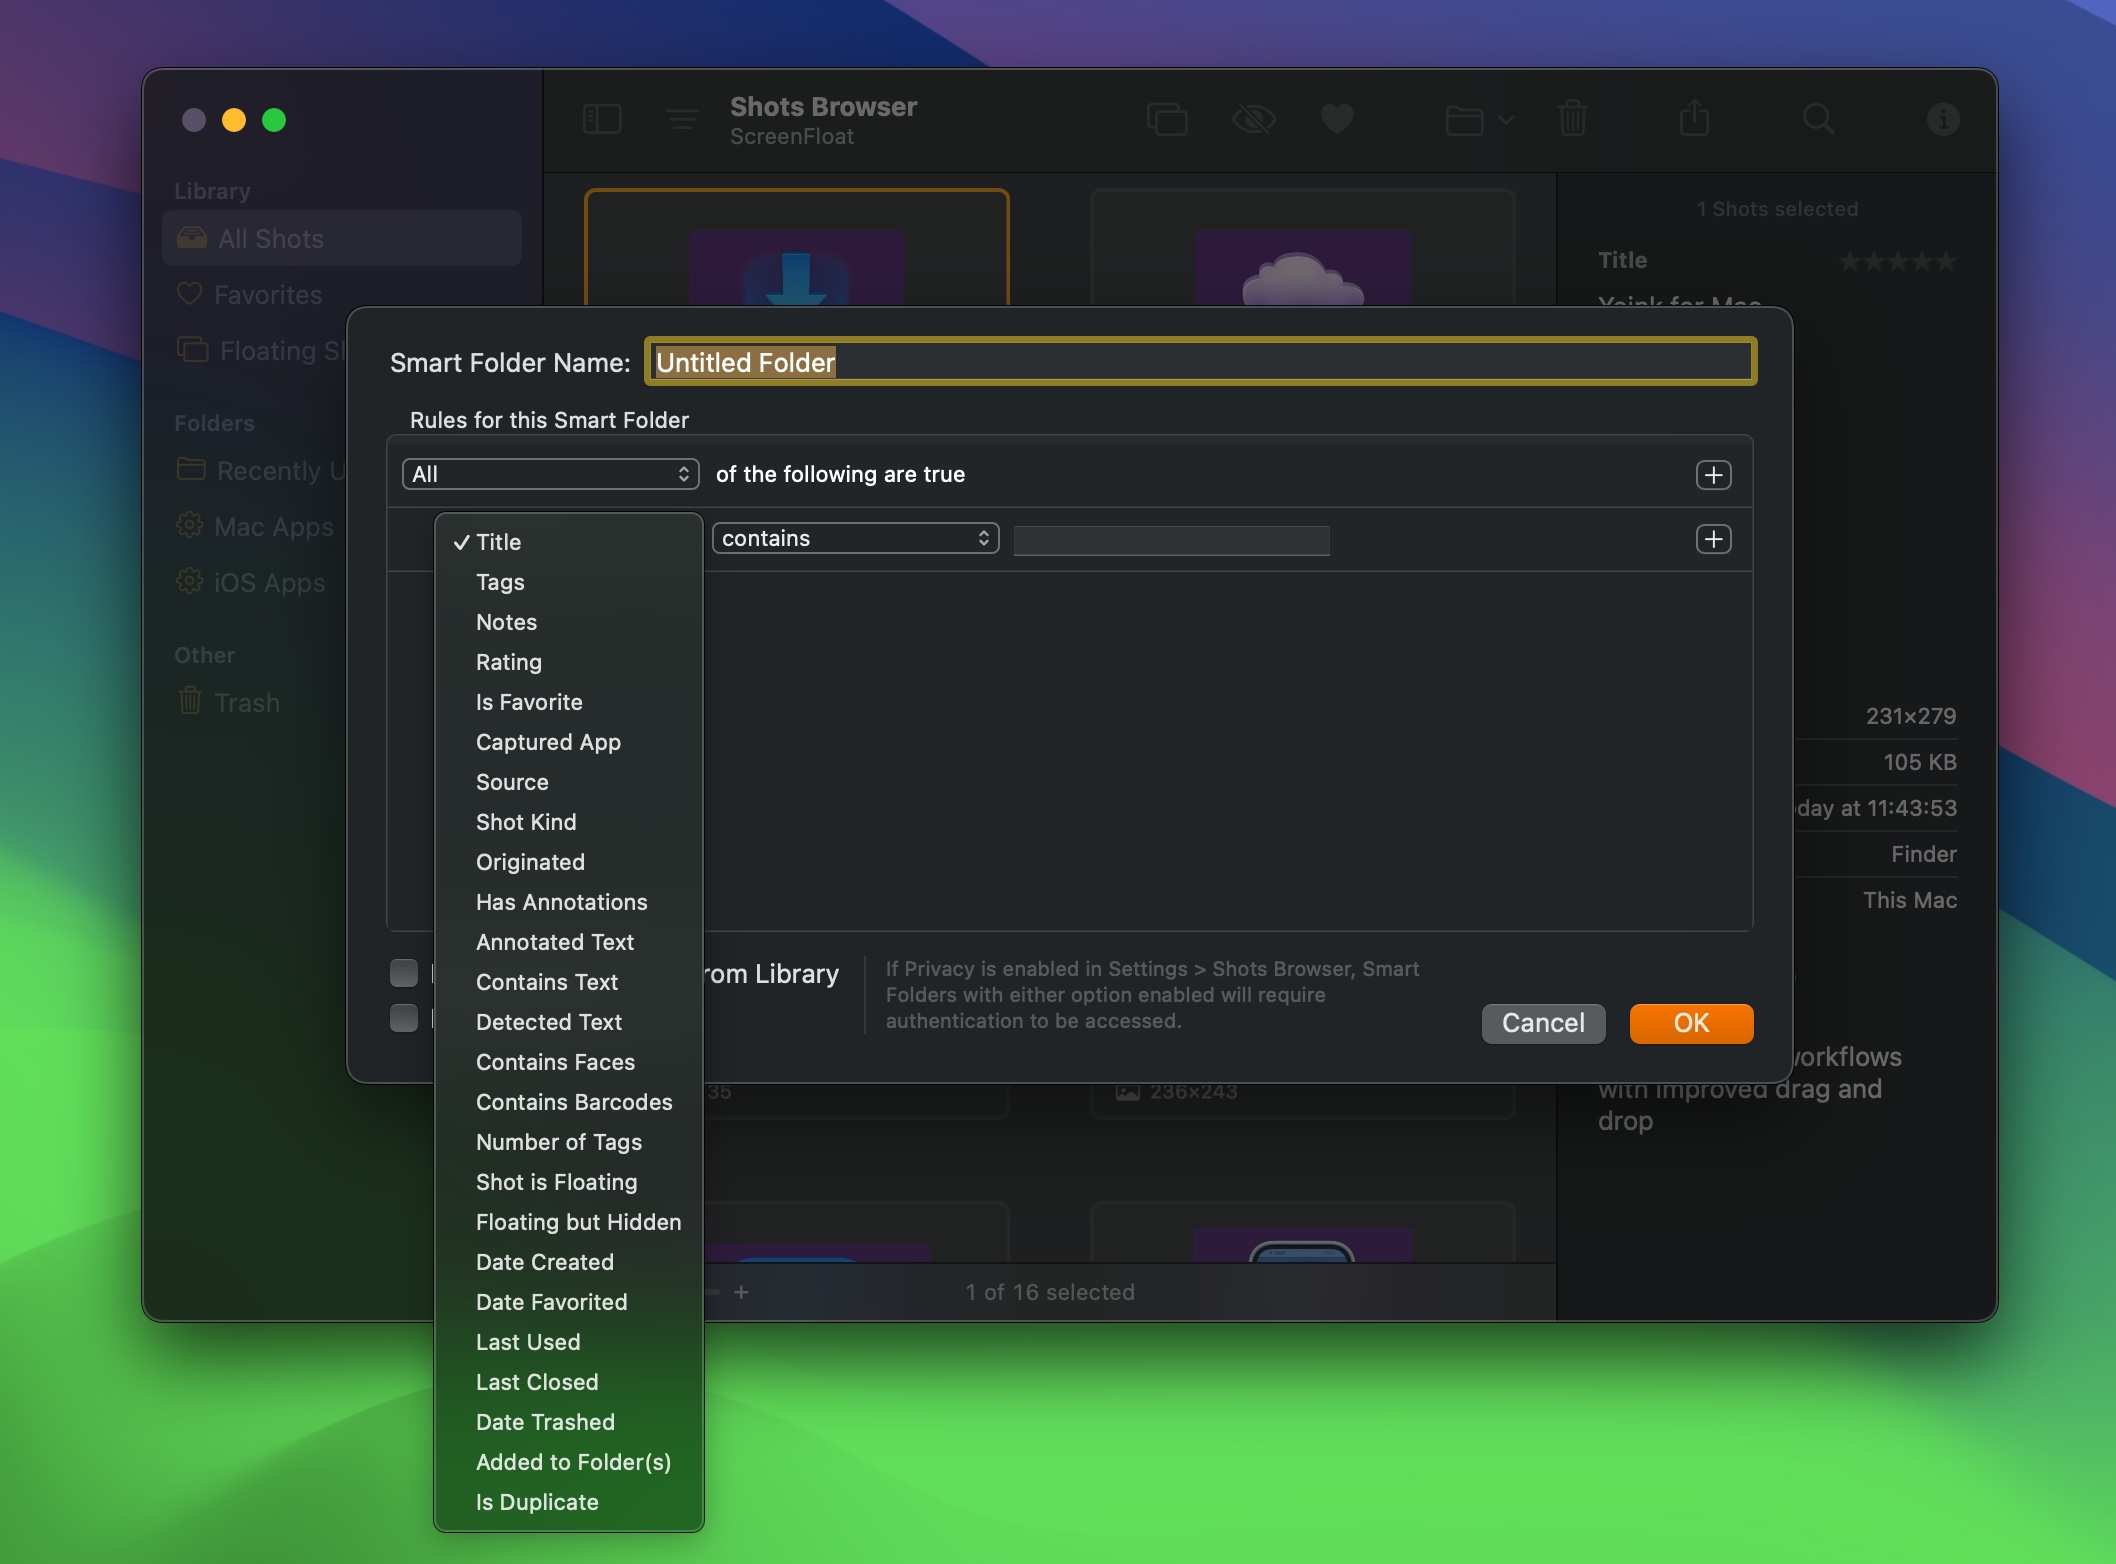
Give shots a name, tag, rate and favorite them. Move them into folders, or use Smart Folders to collect shots that match the rules you specify. An extensive list of detailed options is available, like whether the shot contains a barcode, or you have annotated it with a certain text phrase, to name just two.
You can synchronize your library (that means your shots, your folders, your tags, and metadata) via iCloud across your Macs, making your shots available everywhere your Macs are.
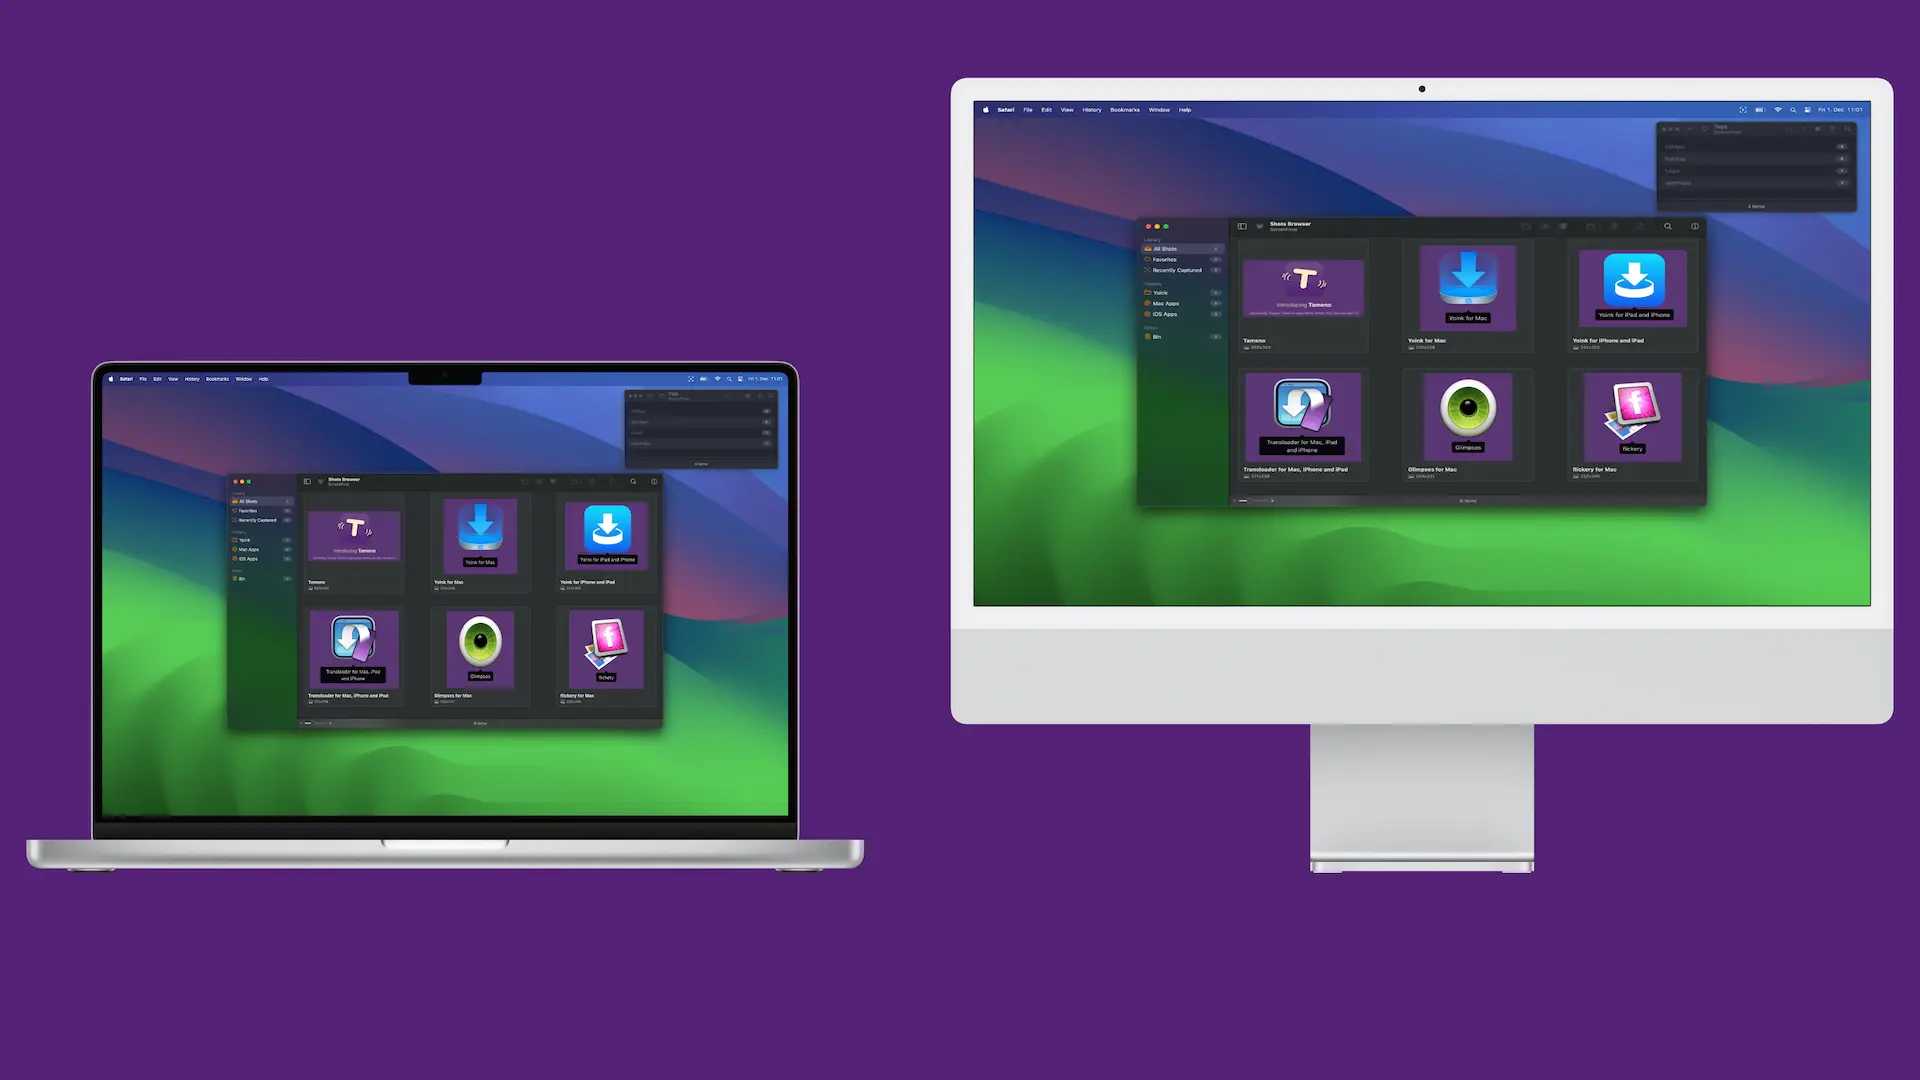
And you decide what gets synced – all shots, only images, or only recordings. Or only shots up to a certain file size.
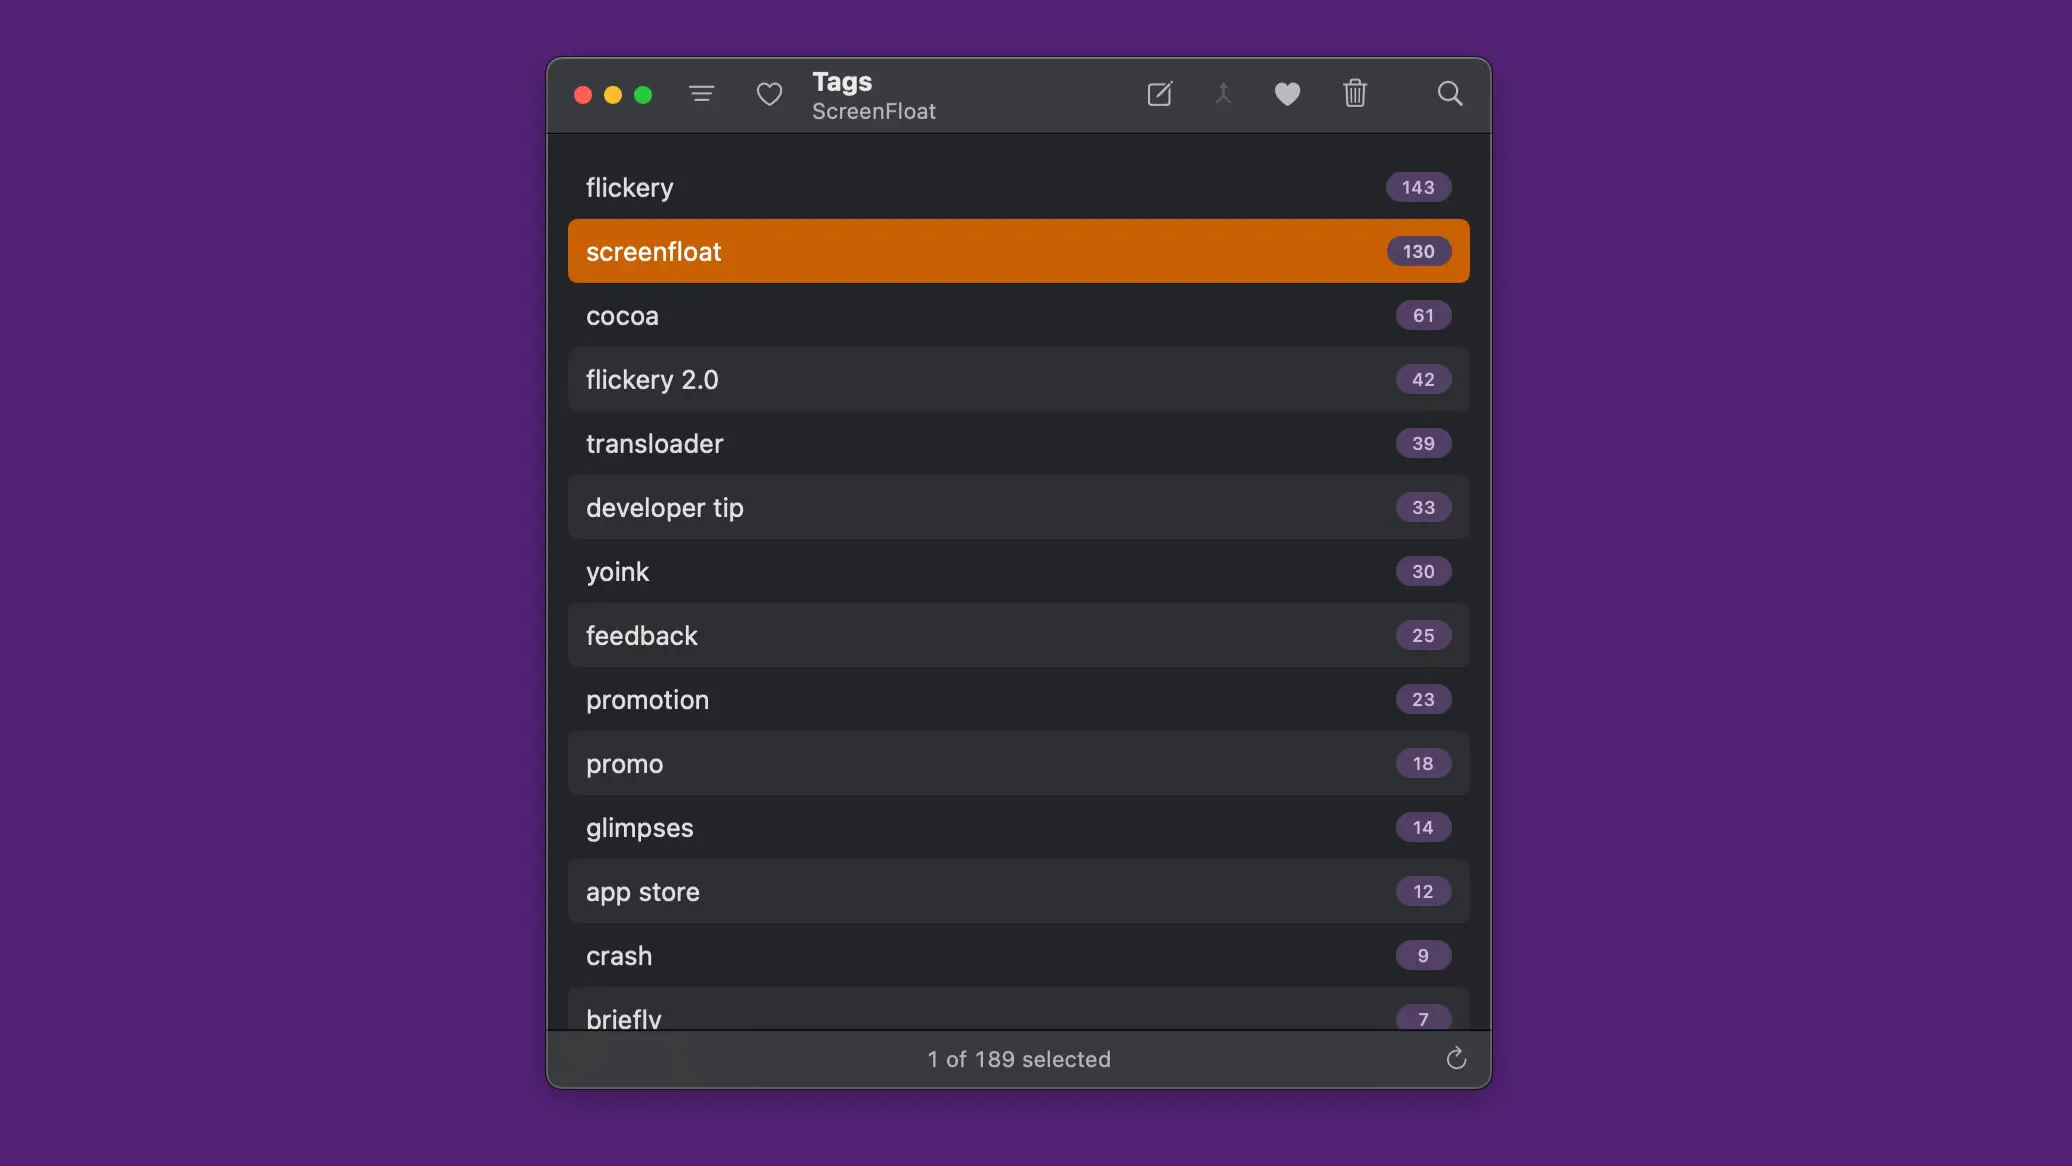
To manage your tags, ScreenFloat has a Tags Browser, where you can rename tags, favorite, merge or delete them.
Integrate
ScreenFloat comes with a wide array of widgets and Siri Shortcuts, so its features are readily available to across macOS.
Control ScreenFloat from your Desktop or Control Center, or access your recent captures, picked colors, and more, with its Widgets:

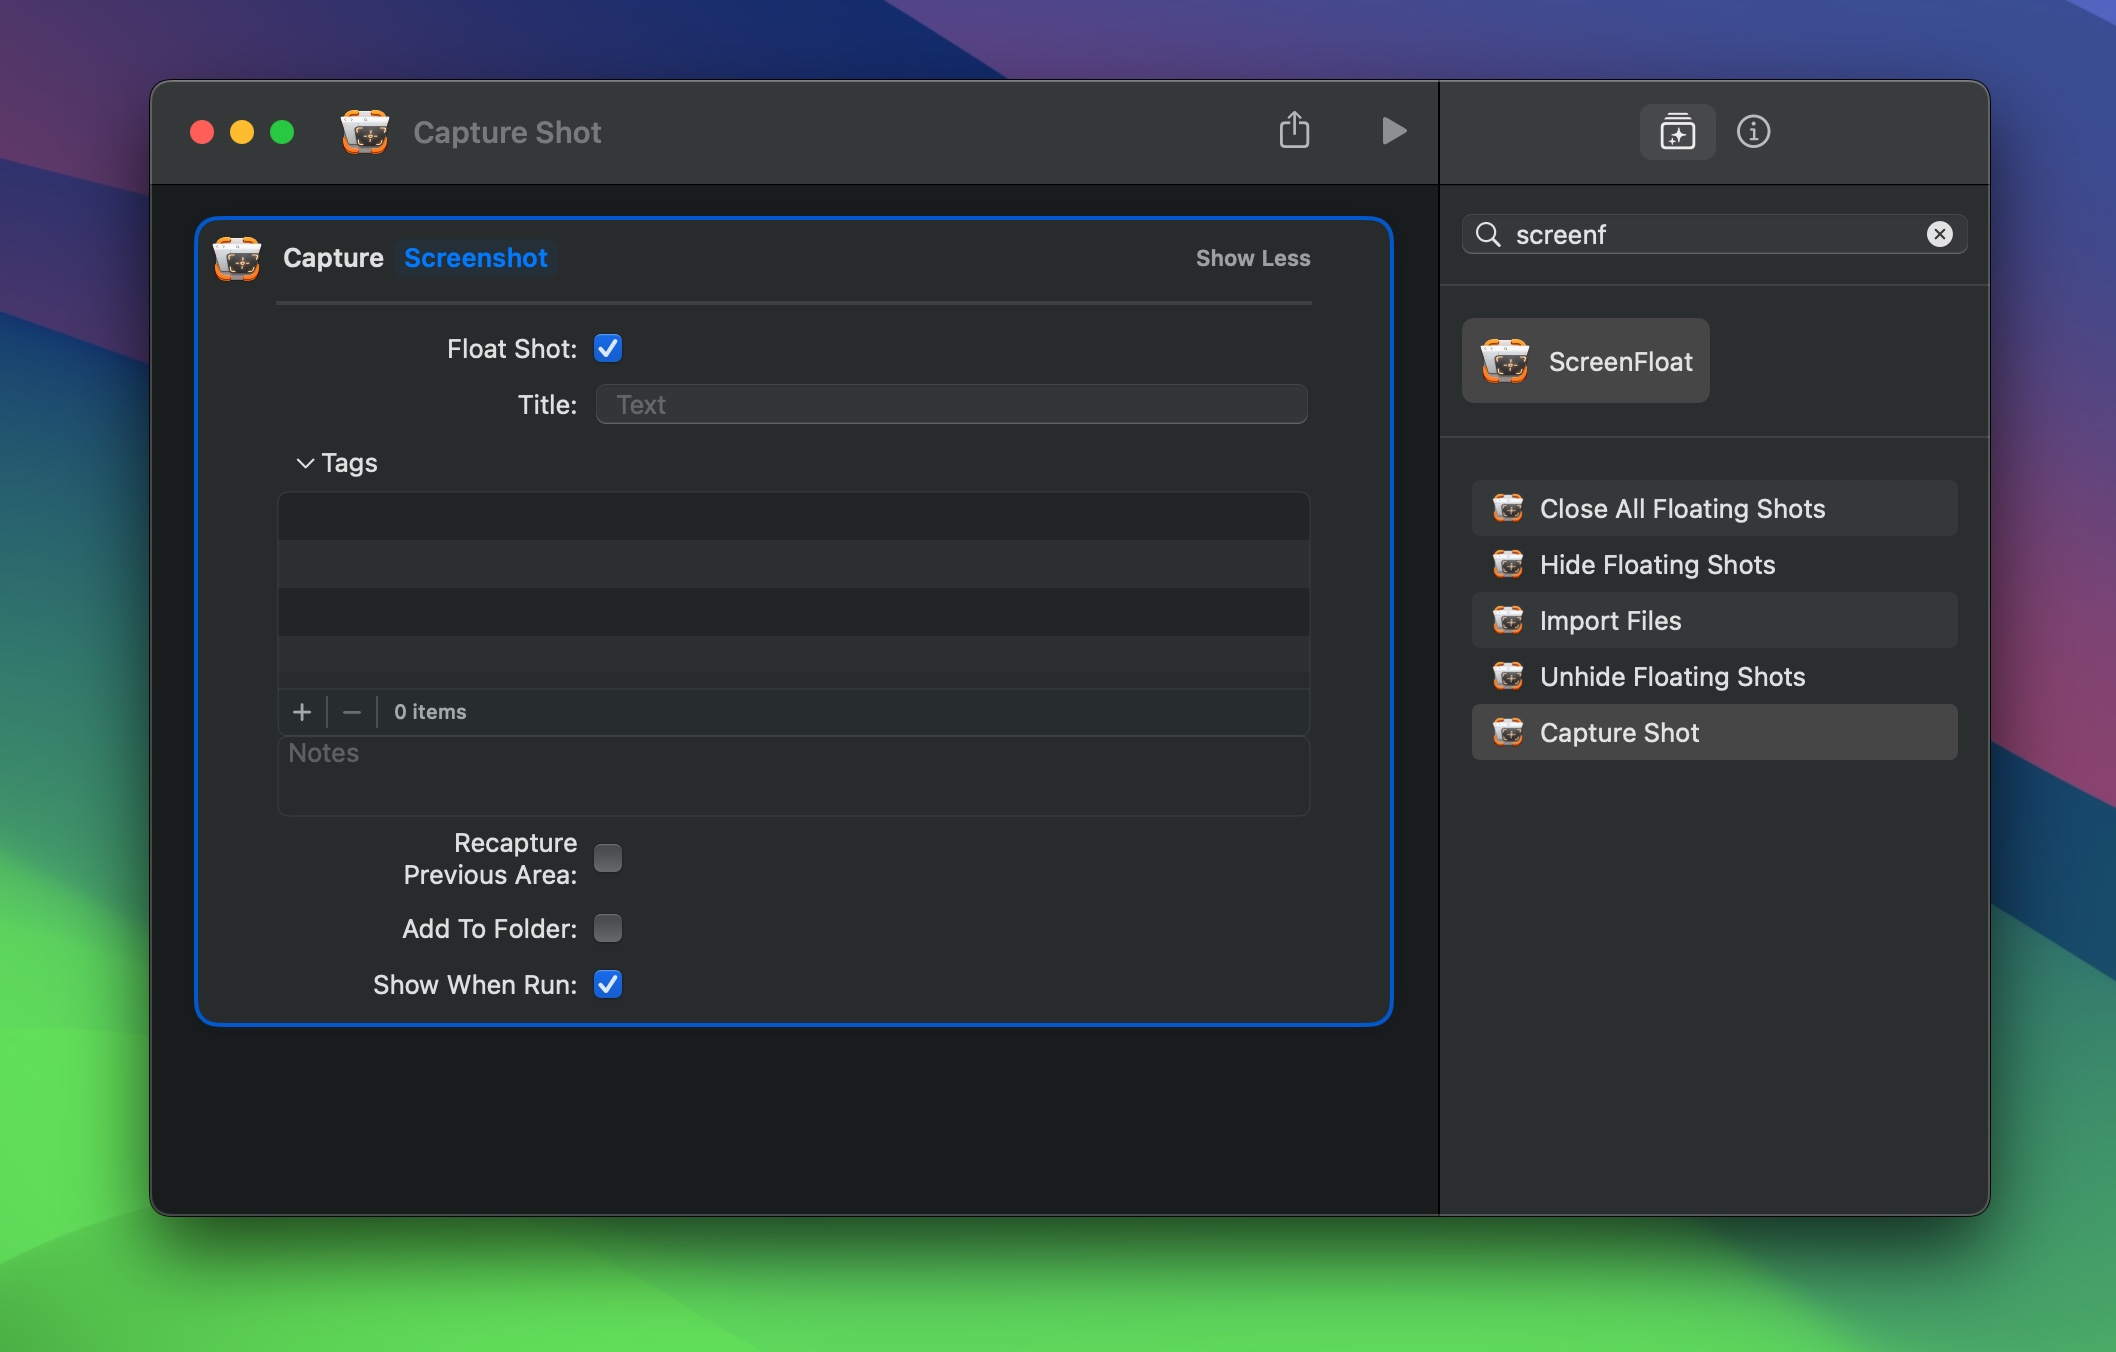
Automate capturing and importing with Siri Shortcuts:
… or with ScreenFloat’s URL scheme.
Find shots with Spotlight, and run AppleScripts and Shortcuts with your shots using a double-click action.
Build custom workflows, executable on your floating shots with a simple double-click.
Up Next
The next part of this series – Part II: Capture – Take Screenshots and Record your Screen – takes a detailed look at all the capturing options ScreenFloat offers you. Definitely take a look, there’s a lot of neat stuff there!
Links
ScreenFloat Website (+ free trial)
ScreenFloat on the Mac App Store (one-time purchase, free for existing customers)
ScreenFloat Usage Tips
Eternal Storms Software Productivity Apps Bundle (Yoink, ScreenFloat and Transloader at ~25% off)
Contact & Connect
Thank you for your time. I do hope you enjoy ScreenFloat!
[…] Visit the ScreenFloat 2 WebsiteCheck out ScreenFloat 2’s Usage TipsGet to Know ScreenFloat 2 – Blog Series […]
[…] Part I […]
[…] Part I […]
[…] Part I […]
[…] Part I […]
[…] Part I […]
[…] Matthias Gansrigler (Mastodon): […]
[…] You can find the blog post here. […]
[…] Website (+free, 28-day trial)Get to know ScreenFloat 2 8-part Blog Post SeriesScreenFloat 2 Usage […]
[…] your shots over iCloud.And more – see my 8-part (and counting) blog post series “Get to know ScreenFloat 2” for an in-depth […]
[…] Part I […]
[…] Part I […]
[…] out the Get to Know ScreenFloat 2 Blog Post series for a deep-dive into its functionality and what it can do for […]
[…] out the Get to Know ScreenFloat 2 Blog Post series for a deep-dive into its functionality and what it can do for […]
[…] Part I […]
[…] Check out the Get to Know ScreenFloat 2 Blog Post series for a deep-dive into its functionality and what it can do for […]
[…] Website (+ free trial)Get to Know ScreenFloat 2 Blog Post SeriesScreenFloat Usage […]
[…] Check out the Get to Know ScreenFloat 2 Blog Post series for a deep-dive into its functionality and what it can do for […]
[…] Check out the Get to Know ScreenFloat 2 Blog Post series for a deep-dive into its functionality and what it can do for […]
[…] Check out the Get to Know ScreenFloat 2 Blog Post series for a deep-dive into its functionality and what it can do for […]
[…] Check out the Get to Know ScreenFloat 2 Blog Post series for a deep-dive into its functionality and what it can do for […]
[…] Check out the Get to Know ScreenFloat 2 Blog Post series for a deep-dive into its functionality and what it can do for […]