In lieu of a software update today – ScreenFloat v2.3.8 is taking me a bit longer than anticipated – I thought I’d share a fun 🙃 story about SwiftUI with you.
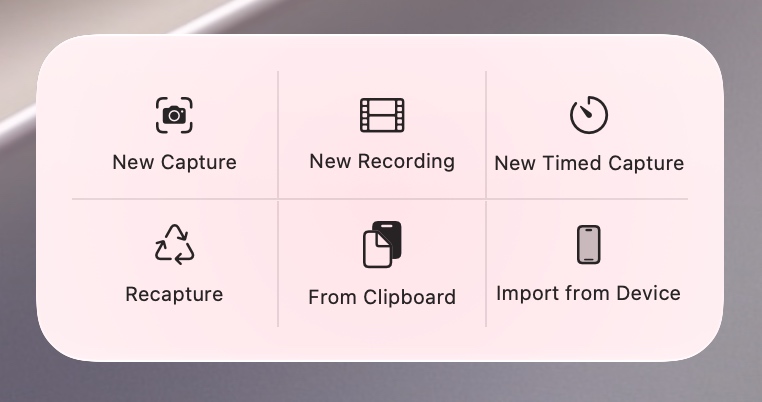
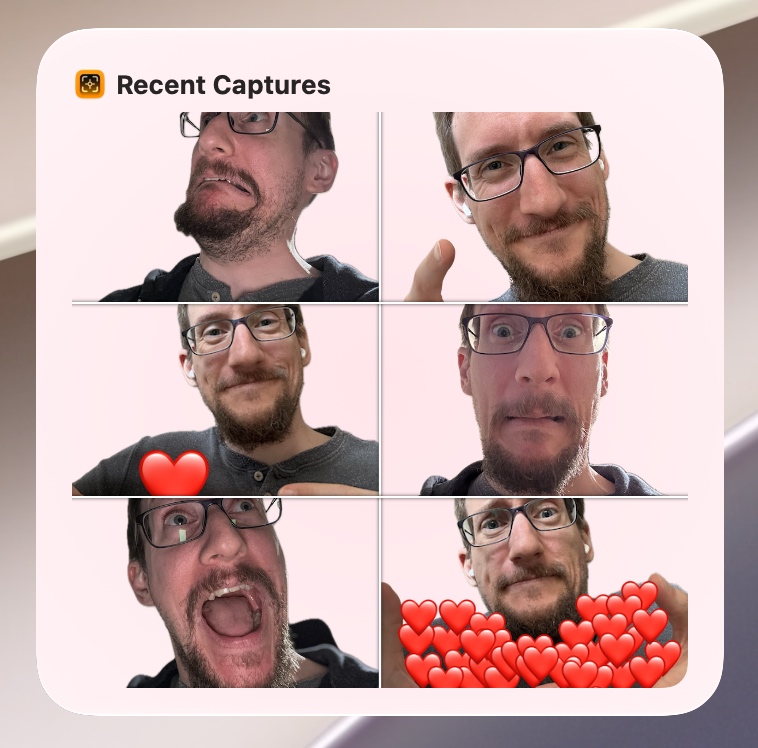
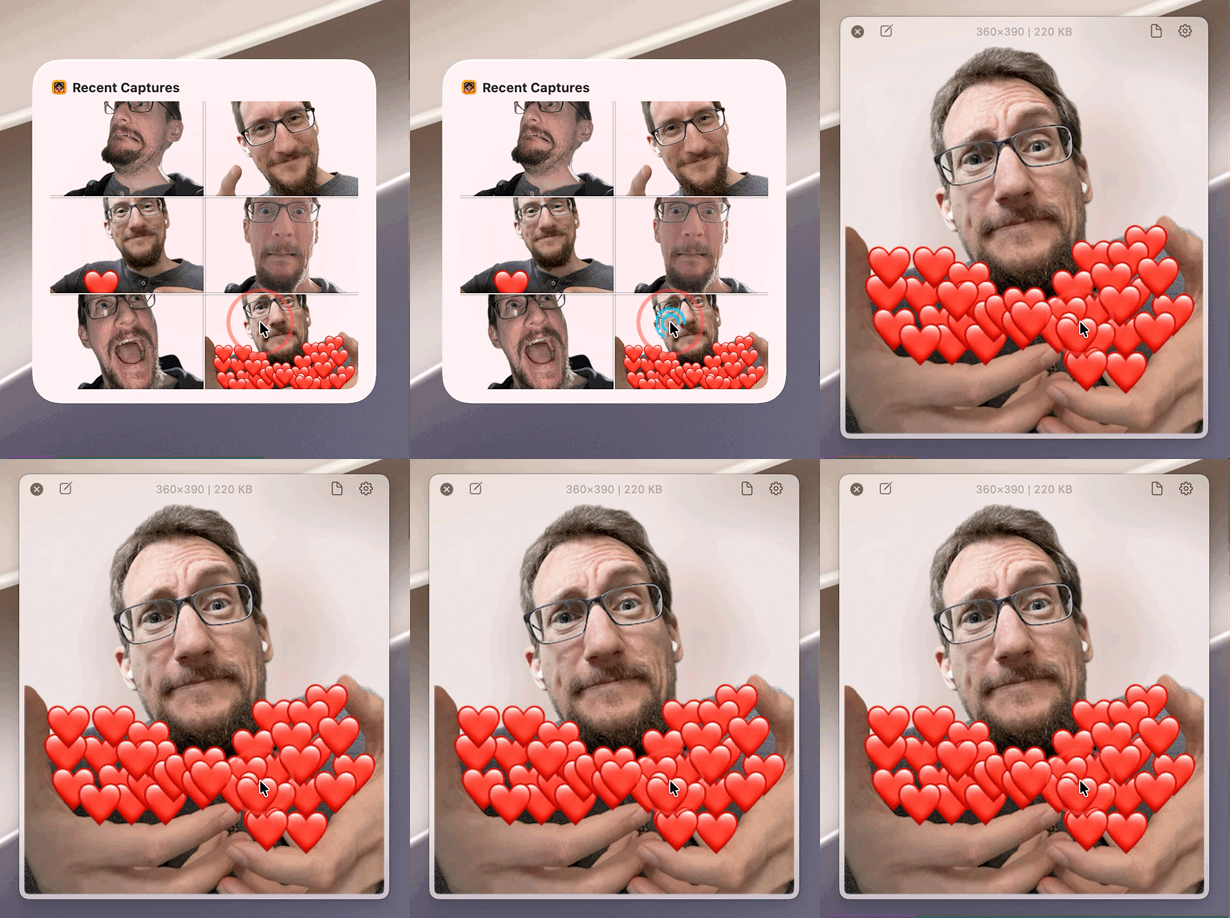
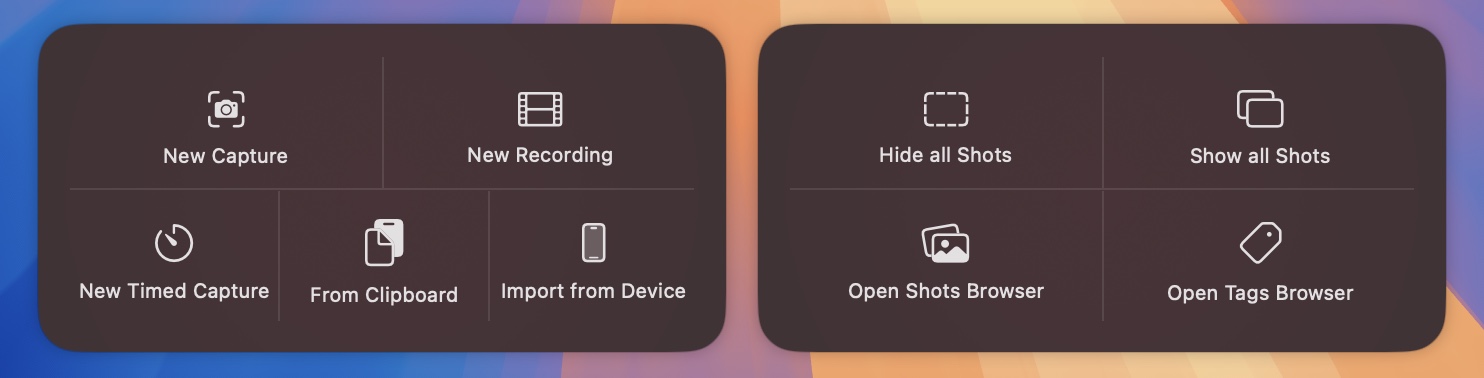
ScreenFloat offers widgets that give you quick access to different things. Among others, you have the Capture widget which allows you to start a screen recording, capture your screen, import from your iPhone, etc. And there’s the Recent Captures widget displays your recent shots so you can easily float them. Or so I thought. But I’m getting ahead of myself.
The Capture widget
The Recent Captures widget
All the actions in these widgets (when a button or a shot in a widget is clicked) are powered by SwiftUI’s Link(), which opens my app with a custom URL that contains whatever information I need to perform the action the user requested. For clicked shots, that would be floating them (such a custom URL could look like this: esssf2://widget.at?shotID=<someid>&action=float).
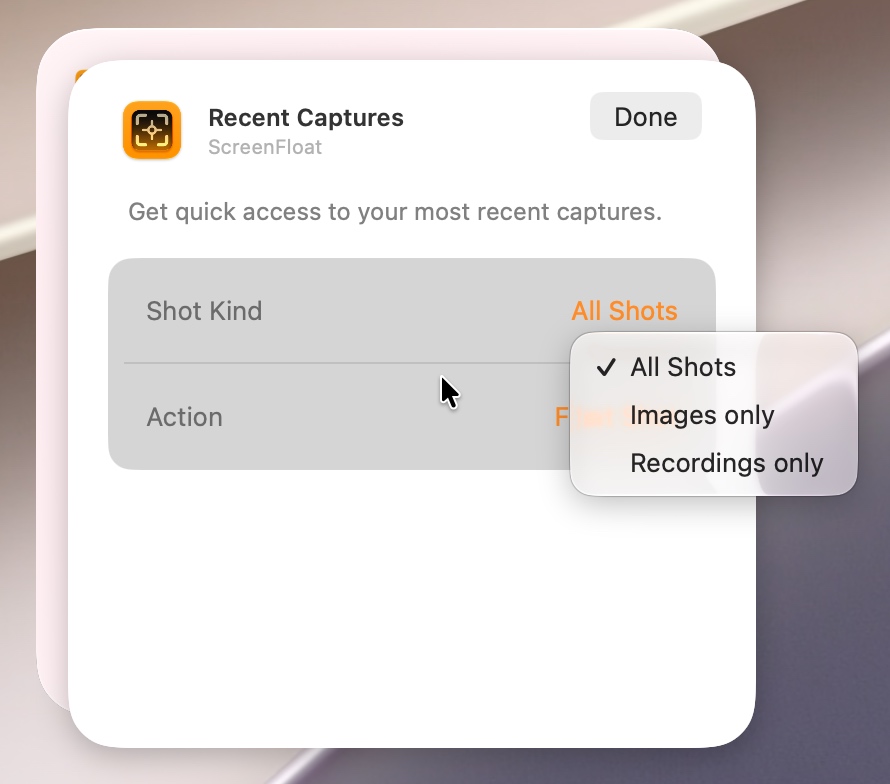
Now, some of these widgets are static (the capture utility widget, for example, can not be configured in any way by the user and always shows the same capture buttons), while others are dynamic (widgets that display shots can be configured to only show images, or only video recordings, for example).
Configuring the dynamic Recent Captures widget
That’s all lovely, but recently I discovered something puzzling. While my static widgets worked just fine – each button in the Capture widget was individually clickable and did the correct thing in my app –, clicking a shot in a widget to float it would not open my app with the custom URL I specified, but with the dynamic widget’s configuration intent instead. No matter which shot I clicked, it always did the same, wrong, thing. (A configuration intent is what internally makes customizing widgets possible; and to make things even more confusing, ScreenFloat’s dynamic widgets are set up internally partially through a .intentdefinition file (Apple’s older way to make widgets configurable), and partially through AppIntents (Apple’s modern approach) ). So instead of my app receiving the correct custom URL which tells it which shot to float, it receives info on how the widget is configured – information not exactly useful in this context.
So I figured it had to do with the widget’s dynamic nature – a logical assumption, given that my app received the configuration intent instead of my URL.
First, I thought perhaps the .intentdefinition file and the AppIntents somehow confused each other, so I temporarily removed the definition file, but the results were the same. Dead end. (Which is good. Otherwise I would have only been able to offer my widgets on macOS 14 “Sonoma” and later, leaving behind two earlier releases of macOS that ScreenFloat supports).
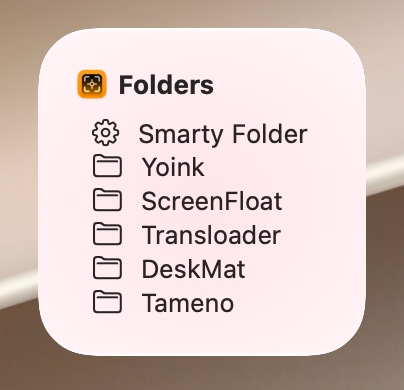
So I set out to test my assumption that the widget’s dynamic nature was at fault. I tried yet another dynamic widget, the Folders widget.
The Folders widget
It can be configured to show all, only smart, or only “dumb” folders, and when clicked, ideally opens the clicked folder in ScreenFloat’s Shots Browser.
With a smirk on my face, confidently clicking on a folder in that widget, absolutely certain it would not result in the folder being opened in ScreenFloat’s Shots Browser, what did my tired, shocked eyes perceive?
The freaking folder opened in the freaking Shots Browser! The Link() with my custom URL worked!
But why!? I couldn’t make sense of it. What was the difference between the Link() in my Recent Captures widget, and the Link() in my Folders widget? Readers dabbling in the arts of SwiftUI might have already noticed that the first consists of Image()s, while the latter is made of Label()s. So I swiftly swapped out the Image() for a Label() to test that this was indeed the culprit, and lo and behold, the widget now worked. A shot was finally floated correctly!
At this point, I was desperate. Close to tears of rage. Ready to rage-quit. Not only Xcode, but also my app’s development. My profession. Coding in general. I was done. Perhaps Image()s in Link()s are just bugged and there’s nothing I can do about it? The thing is, I knew it worked at some point, so I fired up my virtual machines in UTM and went back to see when it started to break. macOS 12? Fine. macOS 13? Fine. macOS 14? Fine. macOS 15? Bingo.
Something on macOS 15 and later broke my widget.
So the first thing I did was to remove all modifiers from my Image() and try again. If it still didn’t work then, I’d have to find a different way to make it work. Maybe hack my own Image() implementation together. Fun times ahead. But I got lucky for once. Removing all modifiers from the Image() did the trick. Now all that was left to do was to go through each modifier and see which one broke things.
“How many lines of code are there?” “About two million…”
Ready? .widgetAccentedRenderingMode(). It was .widgetAccentedRenderingMode() that messes with Link()s. Only specific configurations, though: While .fullColor and .accented work fine, the other two (.desaturated and .accentedDesaturated) render the Link() defunct. Guess which ones I used.
Now why is this happening? Nobody knows. I doubt Apple knows. Or cares. Is any of this documented? LOL. How long has this bug been around for? Since macOS 15, so for about 2 years.
Now that I knew where the bug was, out of interest I googled it, and sure enough found others with the same issue. Not something I found before, because who’d think to google for that particular setup? Nobody, that’s who.
So, there you have it. A Link() containing an Image() with .widgetAccentedRenderingMode() set to .desaturated or .accentedDesaturated will render said Link() defunct 🤷♂️ . I found two ways around this: Don’t use those two properties, or don’t embed the Image() in the Link(), but have the Link() be an .overlay() modifier of the Image(), like so:
var body: some View {
    Image(...)
        .overlay {
            Link(destination: ...) {
                Rectangle()
                    .foregroundStyle(.clear)
                    .frame(...)
            }
        }
}
The downside with the .overlay{} method is that you lose any visual click-feedback, where the clicked Image() would change color on mouse down.
The Shot floats when I click it in the widget!
A radar’s been filed (FB23593239) and is now ready to gather dust in the forgotten depths that is Apple’s Feedback Assistant, never to be looked at again, until some digital archaeologist far into the future stumbles upon it and finally marks it as “works as intended”.
I’ll go now and scream into a pillow some more.
Update July 7th, 2026: I was contacted by a very nice person on the SwiftUI team at Apple notifying me that A) I posted the wrong radar number above (fixed now, mea culpa), and B) they’re looking into it. That’s amazing, I really appreciate that. Thank you, J. and team. I humbly redact my snarky statement about Feedback Assistant.
I’ve got a couple of updates for you today: Yoink for iOS has been updated with new widgets and Control Center access, Tameno gets new Control Center and watchOS widgets, and Yoink for Mac gets a brand new Clipboard History widget.
Yoink for iPad and iPhone
Yoink for iOS – your files and snippets shelf for anything you can drag, copy, share and download – gets a couple of cool new widgets for your home screen and, on iOS 18, your Control Center, while fixing a couple of issues along the way.
What’s New in Yoink for iPad and iPhone v2.5?
+ iOS 18 Control Center Widgets
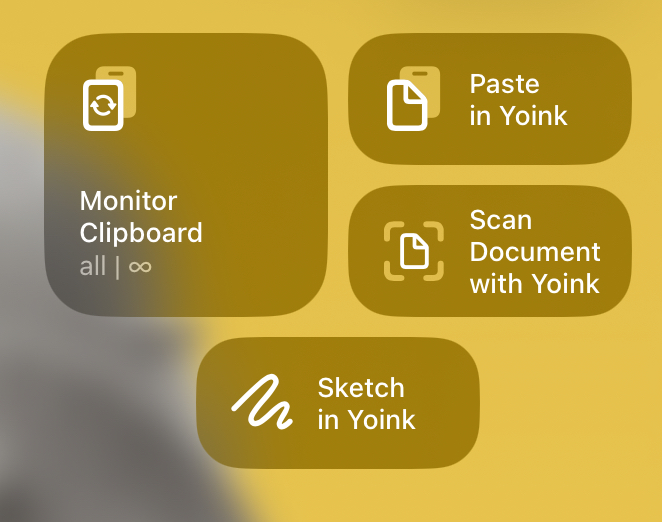
These allow you to: – start monitoring your clipboard with Yoink in the background (configurable with a time-out, and a filter (save everything / only images / only texts / only links) – Paste your clipboard into Yoink manually – Scan a document with Yoink – Sketch in Yoink
+ New File List Widget for your Home Screen
Get quick access to everything you stored in Yoink. It’s configurable, so you can let it only show images, or links, for example. Additionally, you can set it up to open files in Picture-in-Picture, so you can open a PDF, an eMail, or even a website and have it ready in any app you are in the PiP overlay.
+ Bug fixes and improvements
I’ve also fixed a couple of issues with Yoink’s keyboard – which allows you to access files stored in Yoink whenever you’re editing text, the clipboard monitor, and the main list display of items.
Availability and Links
Yoink for iPad and iPhone is exclusively available on the App Store in English, German, Chinese (Simplified), Japanese and Korean. It’s a one-time purchase at USD 5.99 / EUR 6,99 / GBP 5.99 .
Tameno – your auto-repeating tapping timer – now can be started from iOS 18’s Control Center, and has a new interactive widget for your watchOS 11-equipped Apple Watch.
What’s New in Tameno v1.2?
+ iOS 18 Control Center Widgets
Get quick access to your last used and your favorite interval, right from your Control Center.
+ Interactive Widgets for watchOS 11
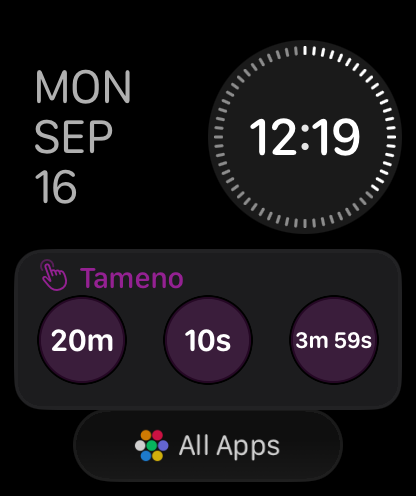
Set an interval right from your Smart Stack and off you go!
There’s also a new “Recent Intervals” widget, giving you access to the last three intervals you used.
Availability and Links
Tameno is available in English and German for Apple Watch, iPhone, iPad, Mac and Apple TV as a universal app on the iOS and Mac App Store. A one-time purchase of USD 3.99 / EUR 3.99 / GBP 3.99 gives you access to all of them.
Yoink for Mac – the app that drastically improves drag and drop on your Mac – has a new Clipboard History widget, making it easier and quicker than ever to re-copy something, place something in Yoink, pin it, or remove it.
What’s New in Yoink v3.6.93?
+ A New and Improved Clipboard History Widget
Click on the image or the file title to copy the item, press the pin to pin, the Yoink icon to send the file to Yoink, or the x to delete it.
Availability and Links
Yoink for Mac is available in English, German, Japanese, Korean, French, Italian, Portuguese and Chinese (Simplified) as a one-time-purchase on the Mac App Store (USD 8.99 / EUR 9.99 / GBP 8.99), or part of a Setapp subscription.
Let’s take a tour through ScreenFloat and see how it can power up your screenshots, too.
ScreenFloat for Mac – Your Screen Capture Power Tool All-Rounder
ScreenFloat powers up your screenshots by allowing you to take screenshots and recordings that float above everything else, keeping certain information always in sight. Its Shots Browser stores your shots and helps you organize, name, tag, rate, favorite and find them. Everything syncs across your Macs. Extract, view and copy detected text, faces and barcodes. Edit, annotate, markup and redact your shots effortlessly and non-destructively. Pick colors any time. And more.
Part VII – Widgets, Siri Shortcuts, AppleScript, Workflows, Spotlight
ScreenFloat integrates perfectly with macOS, so you can easily and comfortably capture and access your shots any way you want to. Read on to learn how.
ScreenFloat offers you a number of widgets, ranging from quick access to capturing your screen and managing your floating shots, over quickly accessing your shots, to folders and picked colors.
Command and Control
These widgets allow you to control all aspects of ScreenFloat – capture new shots and recordings, manage your floating shots and open the Shots- and Tags Browser. These might be especially useful placed on your Desktop, if you’re on macOS 14 Sonoma or newer.
Quick Access to Shots
With “Shot”-family of widgets, you get quick access to:
Favorite Shots
Recently Captured Shots
Shots in a specific folder
Recently closed floating shots
Shots tagged with a specific tag
Clicking a shot will reveal it in the Shots Browser.
Tags and Colors
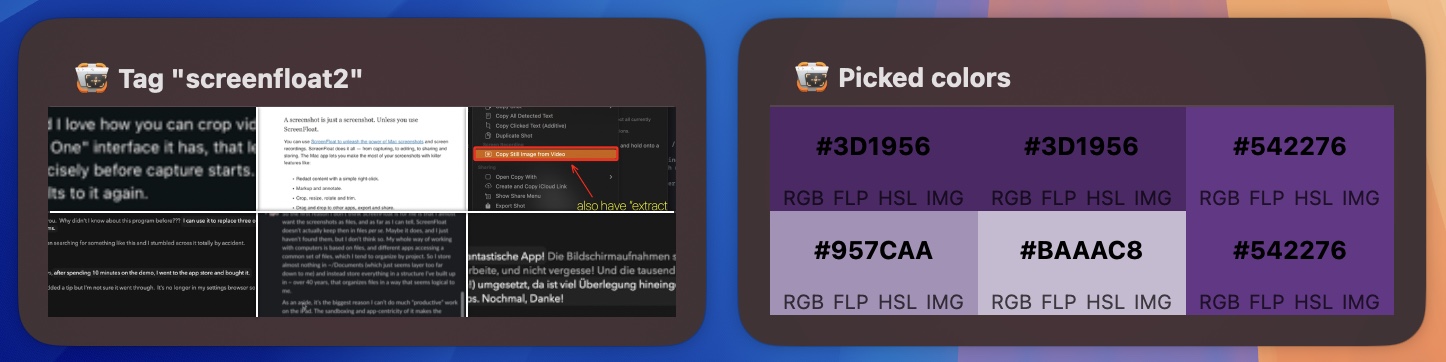
And lastly, you can have quick access to your favorite tags, and recently picked colors. Clicking a tag in the Favorite Tags widget will reveal it in the Tags Browser. The color widget allows you to copy a color’s hex-, rgb-, float- or hsl values, or a sample color image.
Siri Shortcuts
To integrate capturing your screen into a Shortcut, ScreenFloat comes with a couple of useful Shortcuts to help you do that.
Here are ScreenFloat’s shortcuts available to you:
Capture Shot Allows you to automate capturing a screenshot, timed screenshot, or screen recording.
Options include:
Float shot whether to float the new shot after capture or not
Title
Notes
Tags
Recapture previous area if, instead of starting a new capture, the last known screen area should be preselected for the capture
Add to Folder select a folder to add the newly created shot to
After Capture what should happen right after capture. Current options are: do nothing, Annotate Shot, Crop Shot, Resize Shot, Reduce resolution, Trim Recording, Cut Recording, Create iCloud Link, Create ImageKit Link, Create Cloudinary Link
New Shot from Clipboard Create a new shot from the contents of your clipboard: images, videos, or text.
Import Files Import specific image or video files into ScreenFloat, with the same options as Capture Shot.
Hide / Unhide Floating Shots, Close All Floating Shots Manage your floating shots’ visibility.
URL Scheme
ScreenFloat’s URL scheme gives you access to all of ScreenFloat’s capturing functionality from the comfort of a URL, allowing you to automate captures in your own style.
For all the available options and instructions, please click here.
AppleScript
ScreenFloat allows you to run Application Scripts (AppleScripts that reside in a special folder on your Mac) as a double-click workflow, passing in a copy of the double-clicked shot, along with a couple of other parameters. For all the details and instructions, click here.
This opens up a wide possibility of options to you, like creating your own Link Share service, uploading the shot to your server and copying a link to it to your clipboard, or direct-pasting shots into the active app’s window.
As coincidence has it, here are, coincidentally, two sample scripts that allow you to do exactly that.
Sample AppleScript to upload the double-clicked Shot to FTP server and copy link to pasteboard (direct download) Uses the passed-in fileURL and uploads it to your FTP server, copying the link to it to your clipboard afterwards
Sample AppleScript to direct-paste the double-clicked Shot into the active app’s active window (direct download) Emulates a command-v keypress for the active app. Best used together with a Copy Shot double-click action so you don’t have to copy the fileURL in the script.
You can also run Shortcuts with your shots as a double-click action. Read on for more information on both AppleScripts and Shortcuts as Double-Click actions.
Double-Click Workflows
From time to time, you’ll find yourself doing something over and over again, like resize an image before you send it in an email, or crop an image before you annotate it, or duplicate a screen recording before you remove its audio tracks. ScreenFloat speeds that up by providing customizable double-click workflows for your floating shots.
Setting up Double-Click Workflows
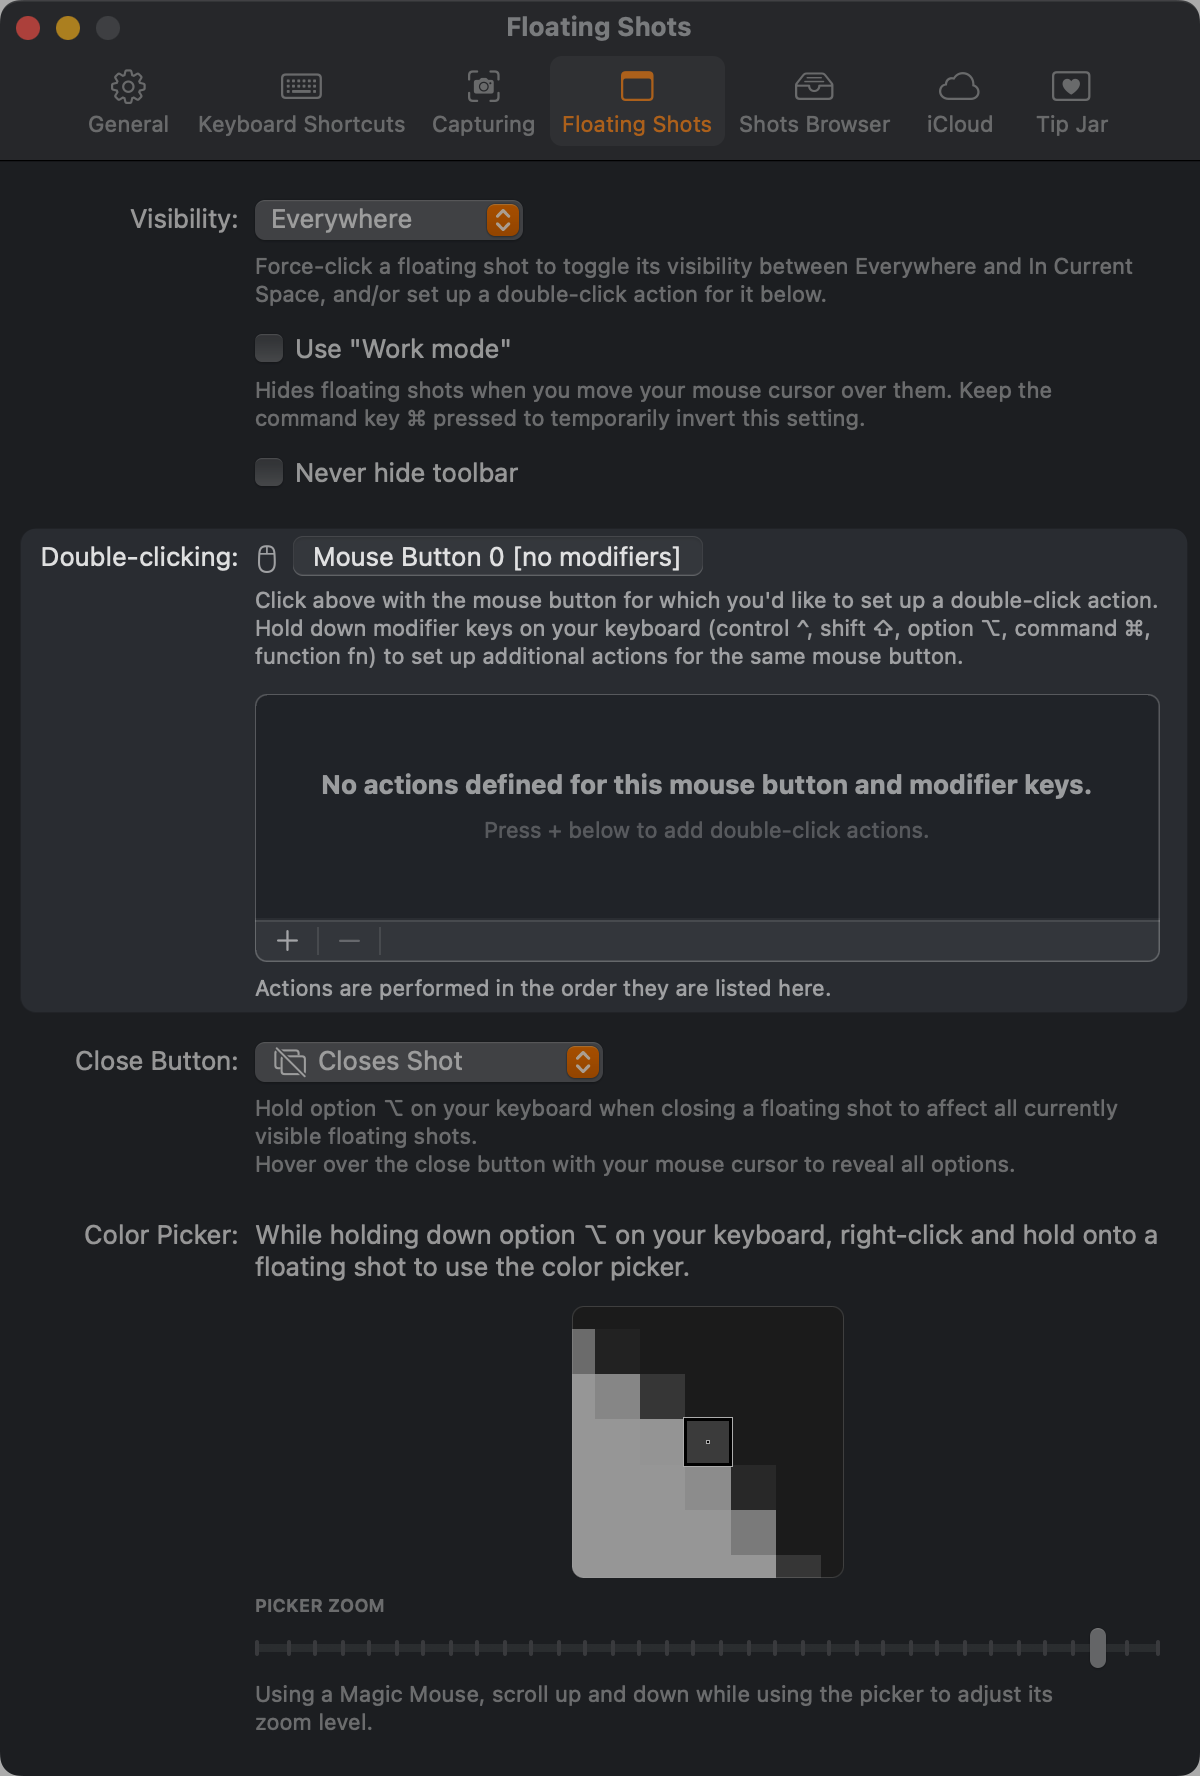
Double-Click workflows are set up in ScreenFloat’s settings. You can reach them by clicking on ScreenFloat’s menu bar icon in the right portion of your menu bar; or by right-clicking any floating shot; or by pressing command (⌘) – , in the Shots Browser. Select Floating Shots, and you’ll be ready to get going:
You can set up double-click workflows for different mouse buttons, and different modifier keys on your keyboard (command (⌘), option (⌥), control (^), shift (⇧) and fn). For instance, you can set up workflows for your left mouse button with no modifier keys pressed (a simple double-click onto the floating shot), or your middle mouse button with command (⌘) and shift (⇧) pressed. This allows you to set up not just one, but multiple double-click workflows, tailored to different situations or requirements.
To add a double-click action to a workflow, hold down the modifier keys of your choice (or none) and press the mouse button area at the top of the list with the desired mouse button. Then press the + button at the bottom of the list to select actions you’d like to perform on the floating shot you double-click.
Switching through a couple of double-click actions for different mouse buttons and modifier keys.
The – button allows you to remove selected actions from the current workflow, remove all actions from the current workflow, or completely reset all your double-click workflows.
Available Actions
Actions in a workflow are performed in the order they appear in the list when you add them. This order is more or less pre-defined and cannot be changed: for instance, the Duplicate Shot action is always added to the top of the list, and thus, performed first when the double-click workflow runs. On the other hand, Copy as File is performed last, so you can have a double-click workflow where you crop, resize and annotate a shot, and after that, that newly edited shot is copied.
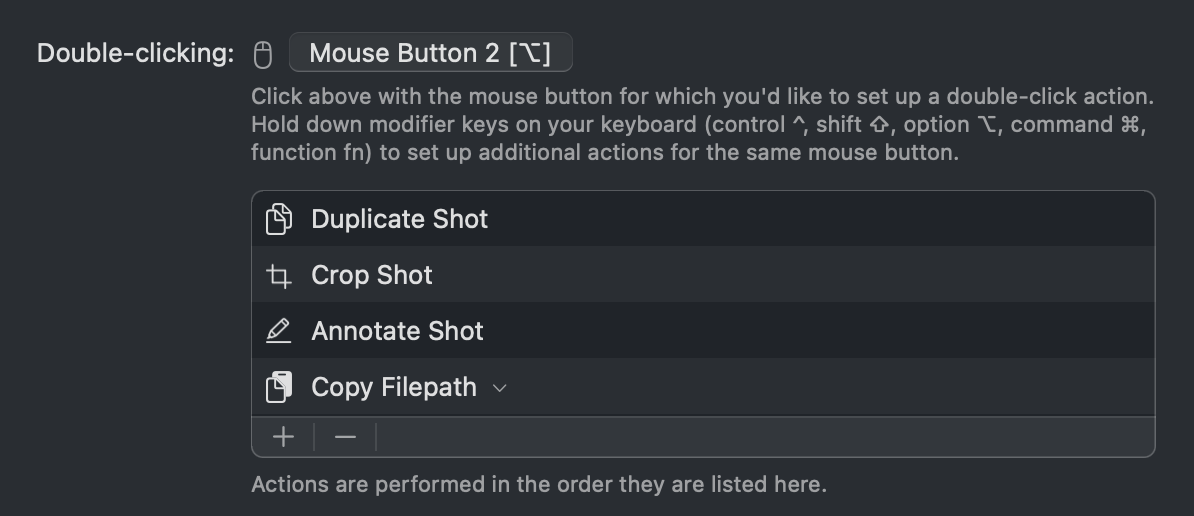
Here, we set up a workflow for when we double-click a shot with the middle mouse button and the option modifier key pressed. It will duplicate the shot first, then allow for cropping and annotation, then copies the resulting image file.
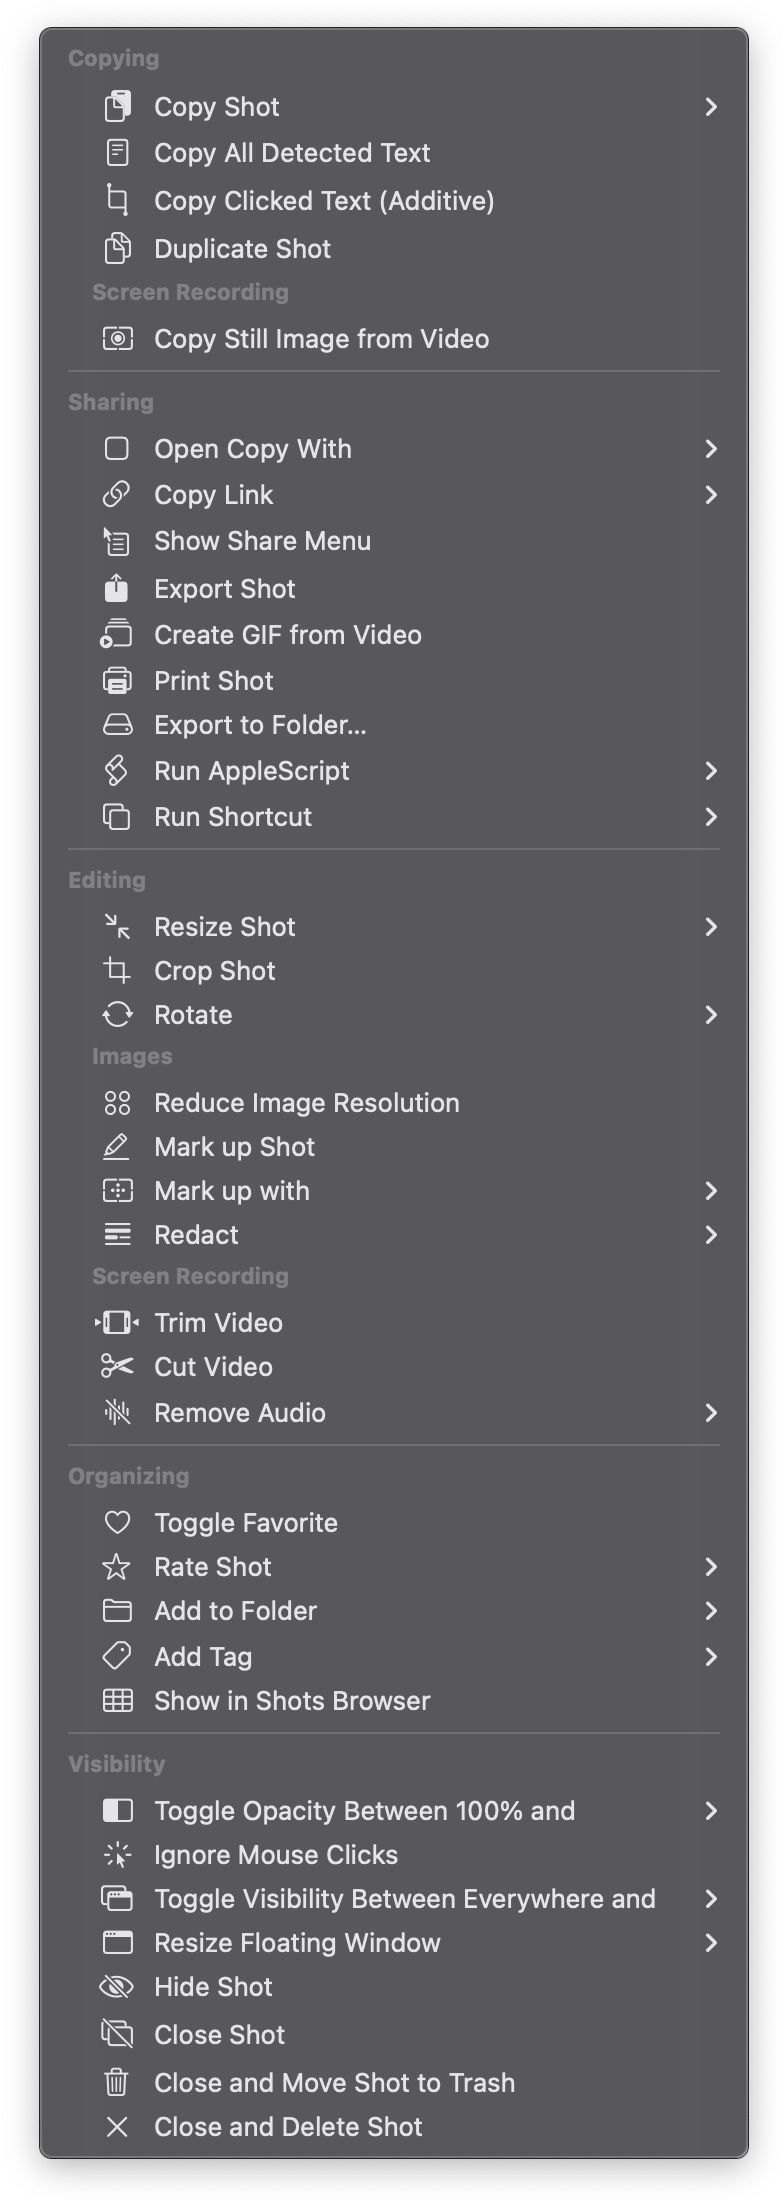
Let’s go over the list of available actions.
Some of these actions are only available when image shots are double-clicked: – Reduce image resolution – Annotate Shot while others are only available for screen recordings: – Copy Still Image from Video – Create GIF from Video – Trim Video – Cut Video – Remove Audio (All, System, Mic)
Let’s go over them:
Copy Shot Copy the shot as a file path, or as data (in the case of images)
Copy Clicked Text (Additive) When you double-click a text line in a shot with this active, that text line gets copied. Double-click another in the same shot, and it gets added to the previous copy.
Copy Still Image from Video Copies the currently displayed frame in a floating video shot.
Open Copy With Allows you to specify two apps: one for image shots, and one for video shots.
Export to Folder Lets you select a folder on your disk to save the double-clicked shot to in its native PNG format right away.
Run AppleScript Run an AppleScript with a copy of the double-clicked shot. Read instructions here.
Run Shortcut Run a Siri Shortcut with a copy of the double-clicked shot.
Resize Shot Allows you to specify a percentage to resize to (25%, 50%, 75%, 125%, 150%, 175%, 200%), or to resize it manually.
Rotate Rotate the shot clockwise, or counterclockwise.
Mark up with Adds the selected symbol (checkmark, xmark, or smart numbered list) to the shot at the clicked location.
Redact Redacts the clicked information, text, barcode or face.
Rate Shot Specify a rating to give the shot when double-clicking it (from no rating to 1-5 stars).
Add to Folder Specify a folder the shot should be added to, or let the double-click show the folders menu so you can select one on the fly.
Add Tag Specify a tag to tag the double-clicked shot with, or show the Tags menu to select one on the fly.
Toggle Opacity Between 100% and Select an opacity level all the way down to 40% to toggle between with a double-click.
Ignore Mouse Clicks Makes the double-clicked shot ignore mouse clicks until reverted.
Toggle Visibility Between Everywhere and Select “Current Space” or “Currently Active App” as an option. Double-click to set it to, say, Currently Active App, then double-click it again to toggle it back to Everywhere.
Resize Floating Shot Window Allows you to resize the floating shot window down or up in increments, or reset it to 100%.
Some actions are mutually exclusive. For instance, you can’t have both Copy All Detected Text and Copy Clicked Text in one and the same action, because one would override the other, and only the last operation would “take”.
Running a double-click workflow on a floating image shot that automatically reduces the shot’s resolution to 72 dpi, then asks me to resize it, then to crop/fold it, and then shows the Share menu.
Spotlight
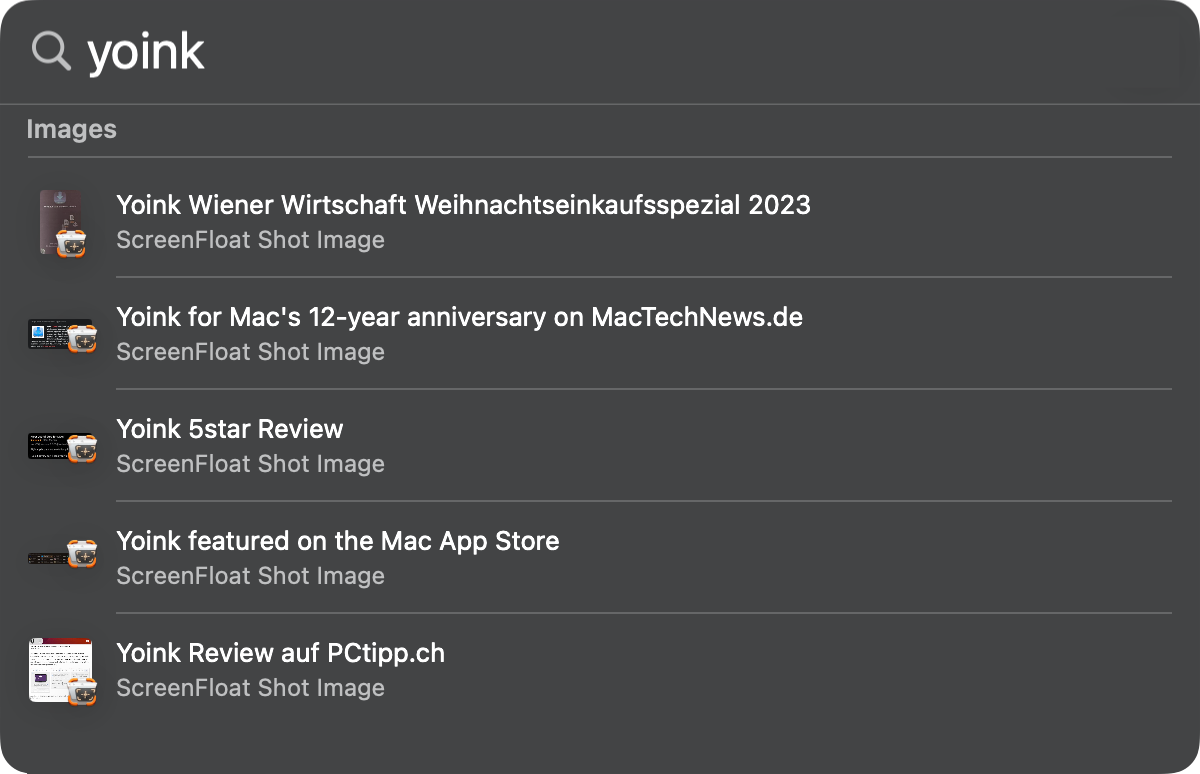
ScreenFloat optionally indexes your shots and their metadata with Spotlight, so you can find them system-wide.
ScreenFloat Shot search results in Spotlight
The neat thing about this is that it not only allows you to search by shots’ metadata (title, notes, tags), but also their detected text/barcode content, as well as any text annotations you have made.
Selecting a search result reveals it in your Shots Browser, where a double-click onto it, or the enter/return key on your keyboard will float it right away if you like.
Application Services
ScreenFloat comes with a couple of system services that make it easier to import and float image or video files, even text, or extract still images from videos.
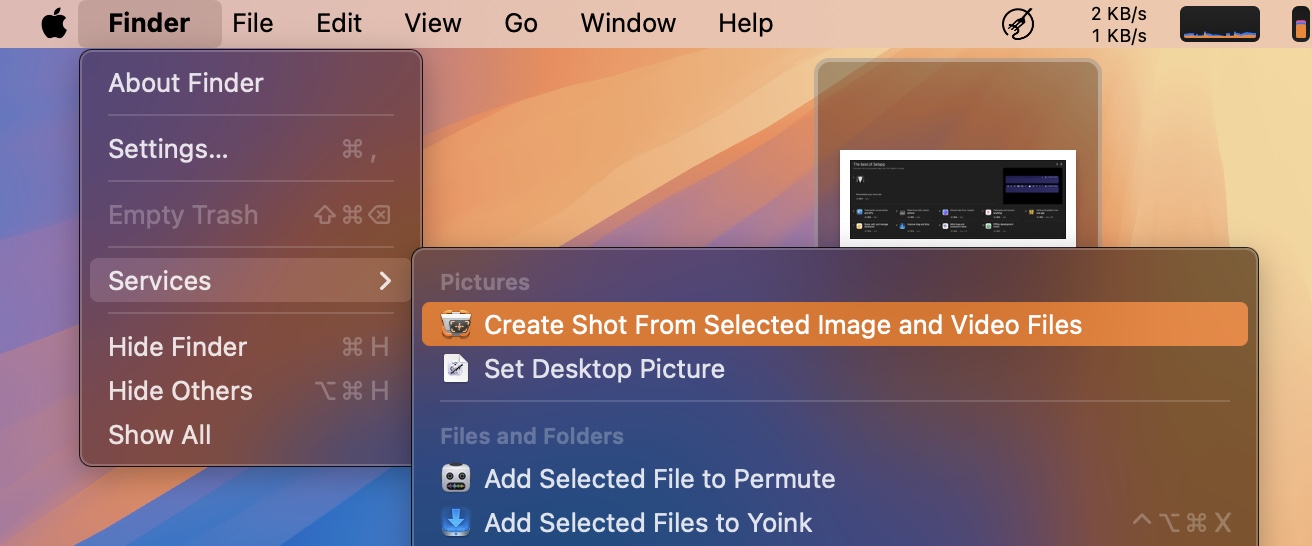
Float Image/Video File from Finder
To float an image or video file in ScreenFloat (and import it along the way), select the file(s) in Finder, then select Finder > Services > Create Shot From Selected Image and Video Files in your menu bar.
Create a Floating Shot from Selected Text
Quickly make a floating note of some text with ScreenFloat – select the text and select Services > Create Shot from Selected Text in the application’s app menu. (By the way, you can also do this for text copied to your clipboard from ScreenFloat’s menu bar icon.)
Extract Still Images from Movies playing in QuickTime Player
It’s easy enough to just take a screenshot of the player window with ScreenFloat to capture a still image of the playing video, but it’s even easier with ScreenFloat’s service. Select QuickTime Player > Services > Extract Still Image From QuickTime Player Movie and ScreenFloat will create a still image of the playing movie at the current playback position.
Capture menus and submenus
Capturing a menu and its submenus on its own has become increasingly difficult – perhaps even impossible – with the more recent versions of macOS. It’s very tricky to capture the menu itself without its host window. ScreenFloat offers a system-wide service that allows you to capture a menu and its submenus in its entirety, or just specific submenus, when you don’t need the entire hierarchy.
Note on how it works: After you select the service “Capture Contextual menu…”, ScreenFloat will wait 10 seconds for a menu to appear (if there’s no menu after 10 seconds, ScreenFloat will cancel the capture). Once a menu appears, you have 3 seconds to navigate to the next submenu, and then again 3 seconds to navigate to the next submenu, and so on. After 3 seconds of no change in menus, the capture will be made.
That’s a Wrap
Whew, what a journey. Congratulations, you now know everything there is to know about ScreenFloat – you can now get the most out of it, I’m sure! Consider these posts living documents that I’ll keep up-to-date with the changes made to the app, so you’ll always know where to go if something’s unclear. Speaking of unclear, if you have any feedback or questions, please do not hesitate to write me – I’d love to hear from you.
Just a quick note that since the betas (!) of macOS Ventura 13.0, configuration of 3rd-party widgets is broken, which, of course, means that Yoink’s widget’s configuration does currently not work, and I cannot do anything about it. Let’s hope Apple fixes it soon, macOS 13.0.1 didn’t bring any improvement in this regard.
Here’s a quick video of what I mean:
Again, in my testing, this not only was the case for Yoink’s widget, but a widespread issue over all sorts of 3rd-party widgets, although I do believe that dynamically app-supplied values work. It might only be static values that are affected by this.
At some point in iPadOS 16’s beta, this same bug occurred, but that was fixed before release. I guess the fix didn’t make it into macOS. Maybe it’s time for another “Back to the Mac” event.
UPDATE (Dec 14th, 2022)
This is still an issue on macOS 13.1 (22C65). Quite embarrassing for Apple.
UPDATE (Jan 24th, 2023)
macOS 13.2 (22D49) seems to have finally fixed the issue – although it *did* take an initial
killall Notification\ Centre
to kickstart the widgets after adding and configuring them. But after that, it seems to work reliably.