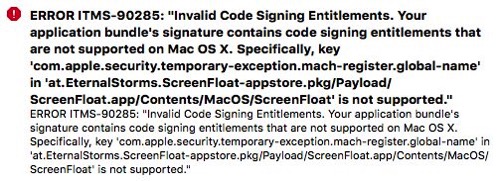
I like to be prepared for worst-case-scenarios.
And when I found out my Mac app ScreenFloat didn’t work anymore on Apple’s upcoming macOS Sierra because of a new sandbox restriction (you can read the backstory here), I knew fixing it could have gone one of two ways:
- Apple fixes it for me in a new beta of macOS Sierra (which, as I now know, is what happened in the form of a new sandbox entitlement), or
- I’d have to write my own solution for creating screenshots, basically reimplementing macOS’ screencapture command line utility
At the time, I didn’t know Apple would provide a new sandbox entitlement, so for me, the only choice was to take a couple of days and reimplement macOS’ screencapture‘s functionality.
Now, when I say “reimplement”, I mean I looked at the features I needed in ScreenFloat and implemented them, leaving those I didn’t need aside (fullscreen screenshots, screenshot sounds or capturing windows’ shadows, to name a few).
Time was of the essence, after all, and I didn’t know how long it would take me to implement this stuff.
Deconstructing screencapture
Before I started working on my own solution, I thought it’d be good to understand how macOS’ screencapture utility was implemented.
I executed ‘strings /usr/sbin/screencapture’ in Terminal thinking I could find a clue as to how capturing the screen was done, but all I could find were references to private APIs, like CGSGetScreenRectForWindow or CGSGetWindowLevel:
…
kCGSMovementParent
CGSGetScreenRectForWindow failed: %d
CGSGetWindowLevel failed: %d
…
I could not find any references as to how capturing the screen is done, but I suspect the CGDisplay* APIs are used, and ‘nm /usr/sbin/screencapture’ seems to confirm that theory:
…
U _CGDisplayBounds
U _CGDisplayCreateImage
U _CGDisplayCreateImageForRect
…
Next, I wanted to know how screencapture draws its selection rectangle and cursor.
Knowing there’s basically no drawing on screen without an NSWindow, I created a small app that would filter out screencapture‘s windows during an interactive screenshot, create an image of each and write them to disk.
In doing so, I learned the following:
- screencapture uses 5 windows to display its selection rect: 4 for the edges and 1 for the fill
- These windows are present even if you’re not currently making a selection (albeit transparent), and they follow around your mouse cursor
- The selection cursor isn’t drawn in its own window, it’s an ordinary NSCursor, using private APIs to set it
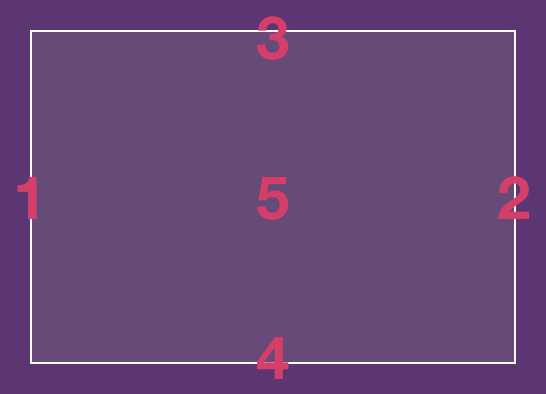
The windows surprised me.
Why would you need 5 windows to draw something you could draw in one, using Core Animation or an NSView?
screencapture has existed since Mac OS X Jaguar (10.2), and there was no Core Animation framework yet, so that’s out of the running.
That leaves NSView’s -drawRect:. Why not use that? Frankly, I don’t know. But I suspect it’s a performance thing – perhaps drawing 5 individual single-colored windows was faster on Mac OS X Jaguar (and still might be on today’s macOS) than one NSView’s -drawRect: and they just kept going with it over the years.
A friend and indie-colleague of mine, Andreas Monitzer (@anlumo1 on twitter) confirmed my suspicions: “Single-colored windows don’t need -drawRect:, and that’s probably just way more efficient.”
Also interesting is that screencapture adds specific Spotlight metadata tags to the screenshot files it creates:
- kMDItemIsScreenCapture – a boolean value indicating whether the image file is a screenshot (YES). Only present when the file is a screenshot, so there’s no case where NO would be specified – the tag would be missing instead.
- kMDItemScreenCaptureType – the type of screenshot: “display” for a fullscreen screenshot, “window” for a window-selected screenshot and “selection” for an interactive screenshot.
- kMDItemScreenCaptureGlobalRect – Not really a rectangular value. As far as I can tell, it only contains the interactive screenshot’s origin point’s x value (where on the screen the screenshot was taken).
To set the cursor, I suspect there’s some private API magic at play.
An app can set its cursor in different ways: via cursor rectangles or directly via NSCursor. But it only works if the app is active and its window is frontmost – something that isn’t the case with screencapture.
‘nm’ reveals the private API CGSRegisterCursorWithImages, and several more:
U _CGSCreateRegisteredCursorImage
U _CGSGetCurrentCursorLocation
U _CGSHardwareCursorActive
U _CGSHideCursor
U _CGSRegisterCursorWithImages
U _CGSSetSystemDefinedCursor
U _CGSShowCursor
U _CoreCursorSet
So much goodness I’m not able to use in a Mac App Store app, just because it’s hidden away in a private API…
screencapture also does another thing I was interested in: When you press ⌘-⇧-4, followed by the space bar, you can move your mouse cursor over individual windows to screenshot them exclusively, and it’ll tint it to let you know about the selection.
I have no idea how it’s done – it’s either a window that gets painted over the selected window, inserted at the correct hierarchy level, or it’s a private API that lets you paint over any NSWindow.
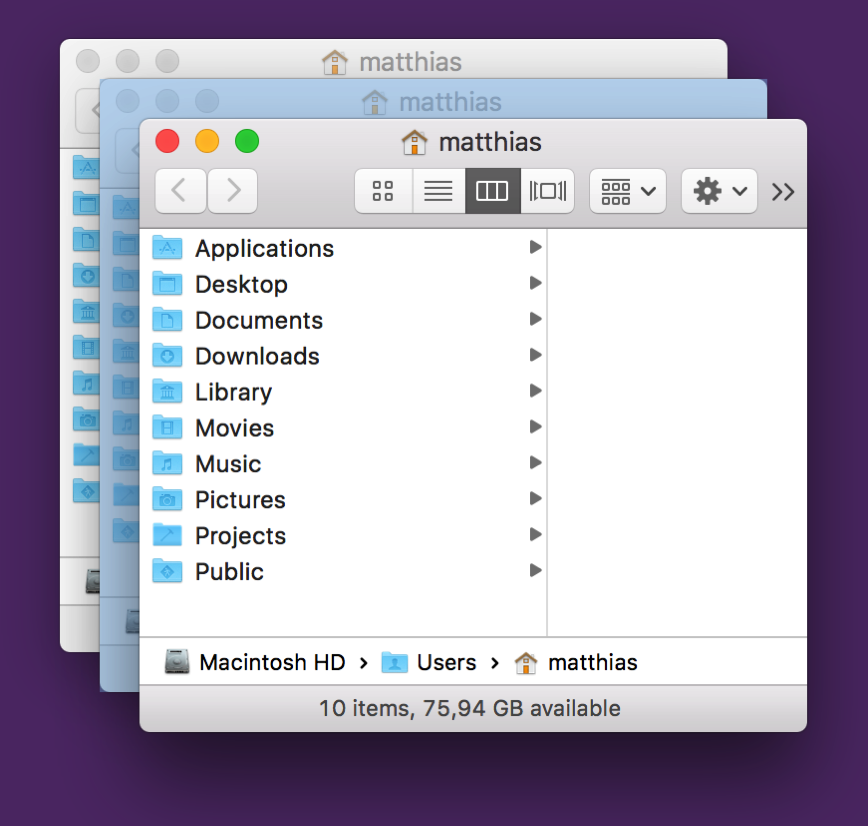
Now I was ready to begin
Reimplementing screencapture
In reimplementing the features I needed, I had to hit several milestones:
Milestone #1: Actually capturing the screen somehow
Because I was using screencapture via NSTask to do all the heavy lifting for me, I had no idea where to start for creating user-selected screenshots.
I started with giving AVFoundation a try, as I remembered a couple of WWDC sessions mentioning capturing the screen – for video. Soon enough, though, issues popped up.
Like the image’s compression. A screenshot created with AVFoundation wasn’t anywhere near the quality a screencapture screenshot has – although it was to be expected, since it’s for videos, and videos are heavily compressed.
When text is involved, it’s especially painful:
 Left: AVFoundation’s output. Right: screencapture‘s
There are different quality settings you can try to play with to improve the shot a little, but it’ll never come close to anything screencapture produces. That’s just unacceptable.
After poking around screencapture, I learned Apple provides APIs for exactly this purpose: CGDisplayCreateImage, to capture an entire screen, and CGDisplayCreateImageForRect, for a manual selection, which is what I was interested in.
#Milestone 2: Drawing into a completely transparent NSWindow
For NSWindow to react to mouse events, it needs to have a colored background with an transparency value of at least 0.05. That sounds very low, but it’s still very noticeable when it’s suddenly put over your screen. You may not be able to pinpoint it, but you know something happened.
 Left: The desktop. Right: The desktop below a white window with an alpha value of 0.05
That’s why I’m very grateful to Nick Moore, indie developer of PilotMoon fame.
He discovered that you can have a completely transparent NSWindow accept mouse events, by setting its contentView’s layer’s contents to a transparent NSImage.
#Milestone 2: Selection Drawing
With that out of the way, I could move on to actually drawing a selection.
For what the selection would look like, I didn’t have to think much. I wanted to keep it consistent with screencapture: white borders with a white-transparent fill.
But the APIs I’d use to draw the selection were up to me.
Since I didn’t want to use 5 windows like screencapture does, I briefly experimented with NSView’s -drawRect:, but discarded that in favor of something more modern and more performant: CAShapeLayer.
In my tests, it’s looks and feels just as the original, and even if it’s not, it’s indistinguishable to my eyes (on a retina MacBook Pro Mid-2012).
The selection’s functionality would have to be the same as screencapture‘s – drag to select, keep the space bar pressed to move the selection, release the space bar to continue the selection, press the space bar once to enter window-selection mode, press it again to exit again. Nothing that couldn’t be done with NSResponder’s ordinary methods.
 My reimplementation’s behavior when using the spacebar to move the selection.
Milestone #3: Custom Selection- and Window Capturing
Because of CGDisplayCreateImageForRect, creating a screenshot of a custom selection is fairly straightforward.
Window capturing is a little more work. You *could* do it with CGDisplayCreateImageForRect, but you’d have remnants beneath the window’s rounded corners of anything that was below it at the time of the capture.
It’s good to know Apple provides an API for those cases as well, then: CGWindowListCreateImage. It will let you define the window you’d like to capture and the “features” it should have (shadows, no shadows, include windows below it, don’t include them, etc).
You can get a reference to the window you’d like to capture using CGWindowListCopyWindowInfo – it’ll give you its rect on screen, its window level and more information about it.
Milestone #4: Window Selection Drawing
That last API, CGWindowListCopyWindowInfo, also comes in handy when drawing the window selection (for when you hit the spacebar).
After all, you need to know where all the windows are and their dimensions on the screen, so you can draw the selection accordingly.
Once I have that information, it’s easy to put up another CAShapeLayer above the selected window.
But wait. What if the selected window is beneath another window, or several windows?
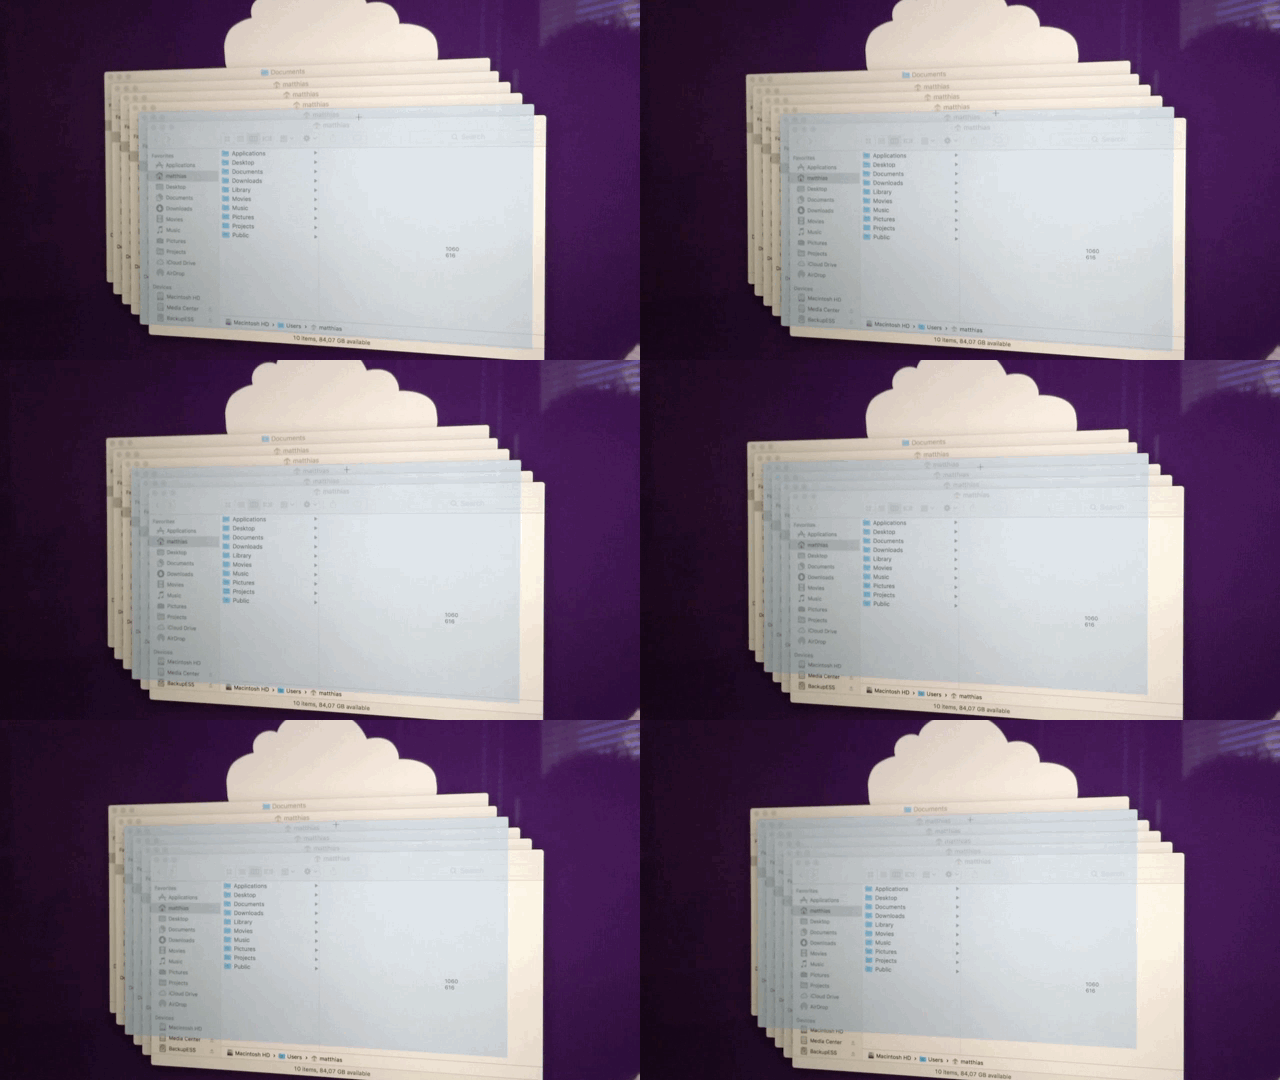 A first try at implementing window selection, clearly failing for windows that are beneath other windows.
That’s where it gets tricky and why I assume Apple is using private APIs here, which lets it either insert a new, selection-color-colored, translucent window into the window hierarchy at the right position or draw directly onto the window.
My solution was to use another CAShapeLayer.
It’s based on CGPath (which I convert to from an NSBezierPath) to draw the colored overlay.
I use the results from CGWindowListCopyWindowInfo to find out which windows are atop the currently selected window, create an NSBezierPath from their bounds, subtract them from my initial NSBezierPath and feed that to the CAShapeLayer.
It works pretty well:
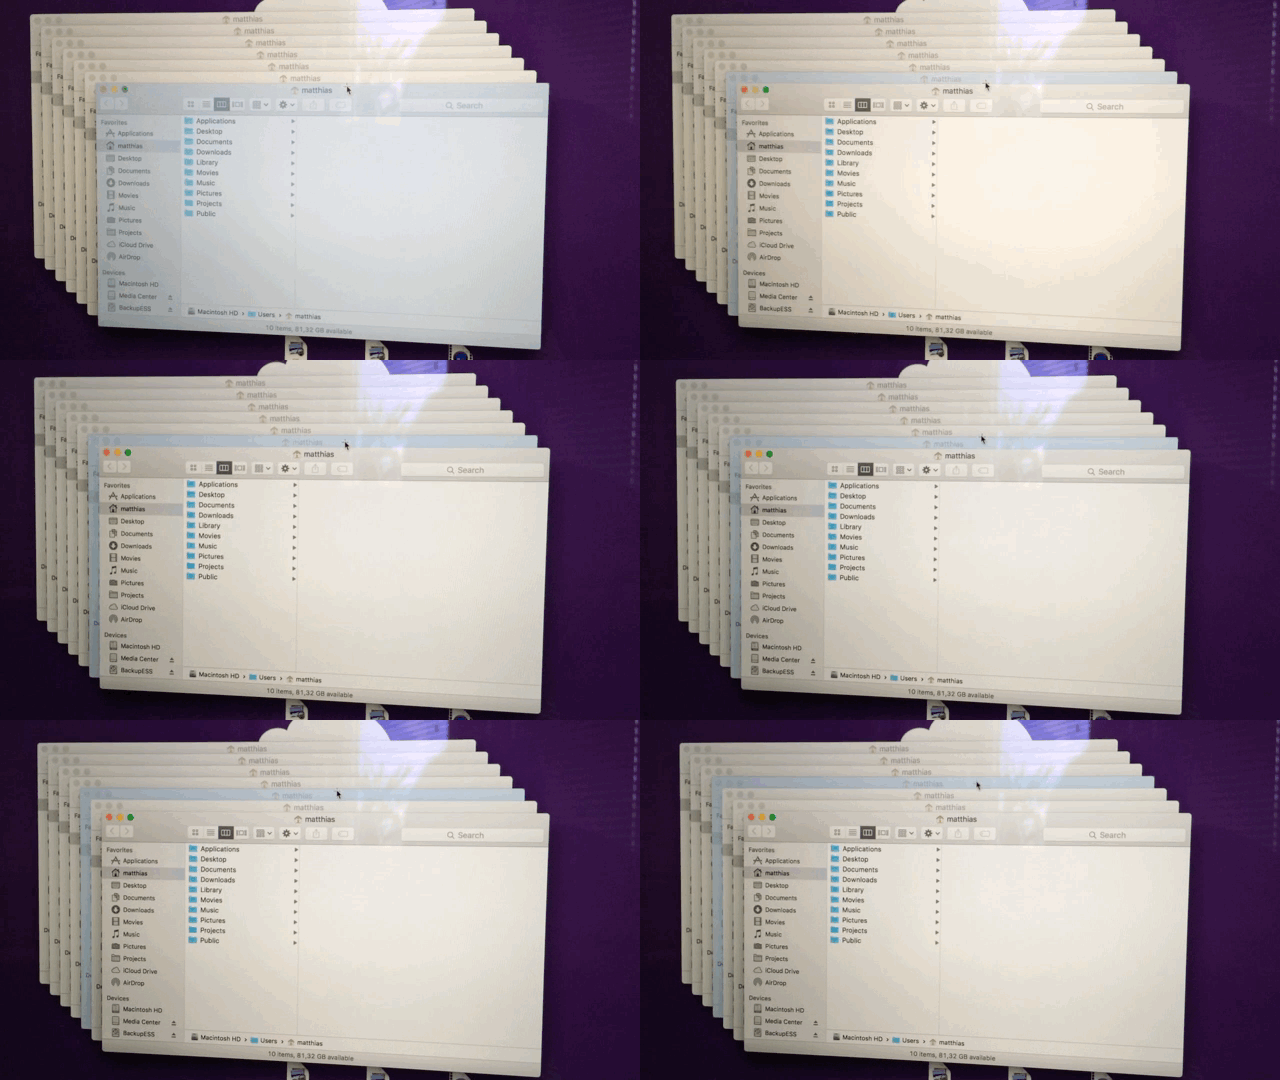
It didn’t work like this right away, though. There was a lot of trial and error, sweat and, yes, tears involved in this. But I think it was worth the effort. Doesn’t it look just like the original?
Milestone #5: Drawing the Cursor
The cursor in screencapture has a unique feature: it displays the coordinates next to it, or if a selection is being made, the dimensions (width and height) of that selection.
I wanted the very same thing, so custom drawing was necessary.
I started out using NSCursor, but for every mouse move I’d need to create a new NSImage with the coordinates (or dimensions) and set it as the cursor – that seemed pretty inefficient to me.
I then moved on to using part NSCursor, part CATextLayer. The NSCursor part would be the crosshair, a constant image, set-it-and-forget-it.
The text layer would be updated in -mouseMoved:, updating its position to be next to the cursor and its contents to reflect the cursor position or dimensions.
Sure enough, it worked, but when moving the mouse cursor around fast, the text layer would “lag behind”, not correctly sticking to the cursor. It’s nothing major, but it bothered me.
With this, we come to my final approach.
I hide the system cursor entirely and draw both the crosshair and the text using CALayers. Since they both are now updated inside the same -mouseMoved: (or -mouseDragged:) call, there’s no noticeable “lag” for the text layer – they now move together nicely, as if drawn in one NSCursor object.
Milestone #5: Focus without focus
The tricky thing about screencapture is that it has mouse and keyboard focus without it taking you out of the app you’re in (the window’s close, minimize and fullscreen buttons are not greyed out, for example).
Again, in my desire to be consistent with the Apple-provided command line utility, I needed the very same thing.
It’s difficult to get certain NSResponder method calls if your window is not key, and it prompted another trial and error session to get the right combination of -isKeyWindow, -acceptsFirstResponder, etc.
It now works, but it’s not as nice as Apple’s implementation.
Which brings us to the Caveats section.
Caveats of my implementation
Caveat #1: “Across-Screens Screenshots”
With screencapture, you can make a selection that spans several displays, due to the way it’s implemented (using NSWindows to draw the selection).
With my implementation, that’s not possible, as I put up one transparent window for each screen that’s connected to your Mac. But I settled – I think it’s very rare you’d make that sort of a selection.
Caveat #2: The Cursor
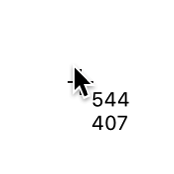
In some cases, the system cursor will pop up again, and it won’t go away until a new screenshot session is started.
This is the hideous result:
Caveat #3: Capturing Fullscreen Windows
When you click the green fullscreen button on a window, it transitions from being one window into being two windows without you knowing about it – one for the the titlebar/toolbar (which moves down a little when you move your mouse to the top edge of your screen to reveal the menu bar), and one for the actual window.
screencapture is somehow aware of this, and when you do a window selection, it will properly draw its selection rectangle above the entire window.
My implementation doesn’t know about fullscreen windows and treats those two windows separately:
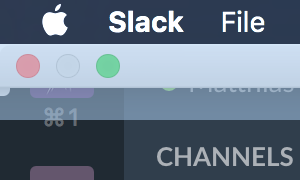 Instead of the entire window, just the titlebar and its shadow are selected.
I haven’t found a solution to this, yet.
Caveat #4: Exposé
When you start Exposé to show all open windows, screencapture can be used to screenshoot them individually.
My implementation falls short of that, as Exposé seems to be a semi-modal mode where other windows can not be moved over it.
Of course, screencapture can.
Pros of my implementation
Apart from these caveats, I also see a couple of upsides to having your own implementation:
Pro #1: Control over the UX
With a custom implementation, I can change anything I want at any time, be it any cursor icon or the behavior in general. I don’t have that luxury with Apple’s built-in tool.
Pro #1 and a half: Timed Shots
Speaking of UX:
Yes, Apple’s built-in tool features timed shots (a screenshot that is not created immediately, but after a small delay). But I think it’s clumsily implemented.
When you start a timed shot:
- You don’t know how much time there’s left until the shot is taken
- You can’t click anything beneath the selection rectangle
With a custom implementation, I can provide a better experience here.
Pro #2: Screenshot placement
Something that concerns ScreenFloat exclusively is the placement of the floating shot after taking it.
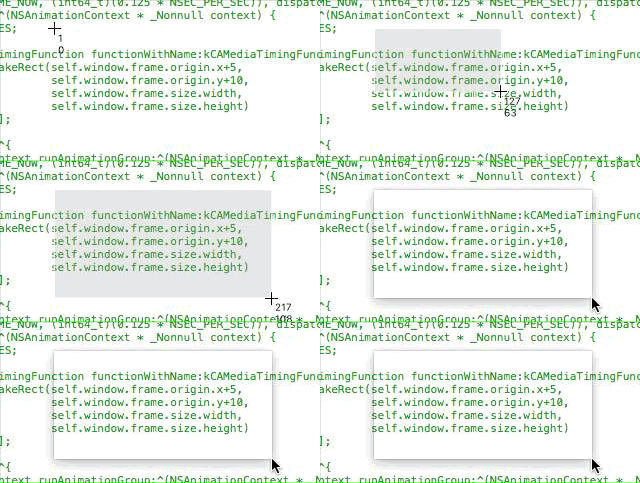
Using screencapture, I just centred the shot at the mouse cursor. It works, but it’s not very nice.
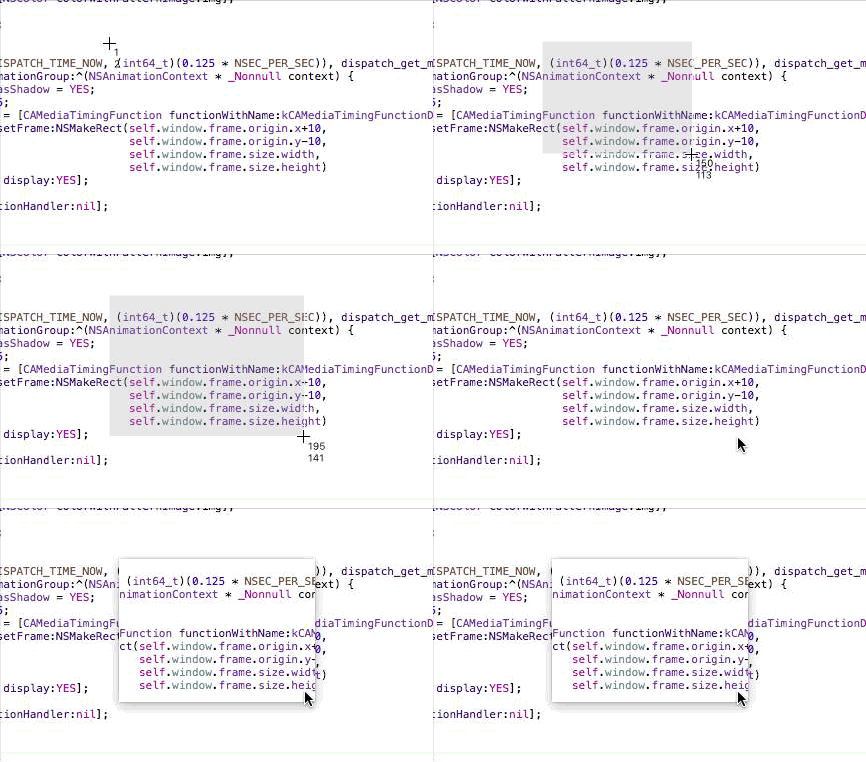
With a custom implementation, I know exactly where the screenshot was taken and can place it accordingly:
or I can do a little animation to make it more clear that a screenshot was created:
Pro #3: Sandbox
With a custom implementation, I don’t need to worry about temporary entitlements – it works without any.
Open Source?
I’m planning on making the source available at some point, but before I do, there’s still a couple of things I need to do, like implement timed shots, which I haven’t gotten around to yet.
Also, so I don’t make a fool of myself, I need to clean up the code, and that’s dependent on the free time I get, which recently is little (I’m not complaining – I love being busy).
Anyway, this has been quite the journey, and if I can manage to fix some of the caveats I described above, I might use my own implementation instead of Apple’s built-in screencapture CLI in ScreenFloat at some point. But for now, I’m happy I’m again able to use Apple’s built-in tool.
 – – – Do you enjoy my blog and/or my software? – – –
Stay up-to-date on all things Eternal Storms Software and join my low-frequency newsletter (one mail a month at most).
Thank you 🙂
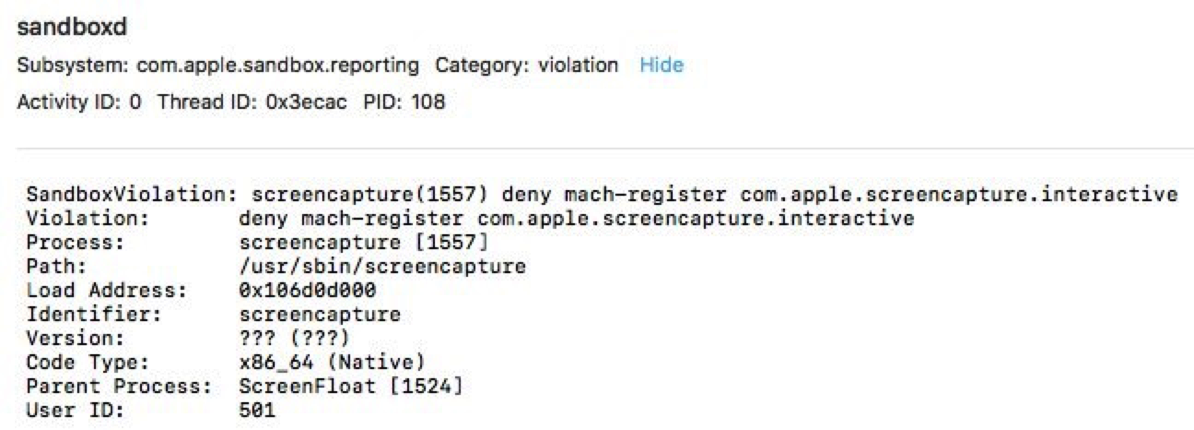 The output in Console.app when trying to launch an interactive screencapture with NSTask.