Let’s take a tour through ScreenFloat and see how it can power up your screenshots, too.

ScreenFloat for Mac – Your Screen Capture Power Tool All-Rounder
ScreenFloat powers up your screenshots by allowing you to take screenshots and recordings that float above everything else, keeping certain information always in sight. Its Shots Browser stores your shots and helps you organize, name, tag, rate, favorite and find them. Everything syncs across your Macs.
Extract, view and copy detected text, faces and barcodes. Edit, annotate, markup and redact your shots effortlessly and non-destructively. Pick colors any time. And more.
Posts in this Series
Part V: Share – Drag and Drop, Link Share, Export
Learn how to get screenshots and recordings out of ScreenFloat and into other apps – fast and easy.
Table of Contents
Drag and Drop
Drag and dropping shots to other apps is quite frankly the easiest and most straightforward way to get a file from A to B. Here’s how to do it:
Drag and Drop from a Floating Shot
We already talked about this in Part III: Float, but it bears repeating, because it’s absolutely crucial.
When you drag a file from the floating shot’s document icon or by long-press-dragging the image, it is exported as-is, as a PNG file (or MOV file for videos).
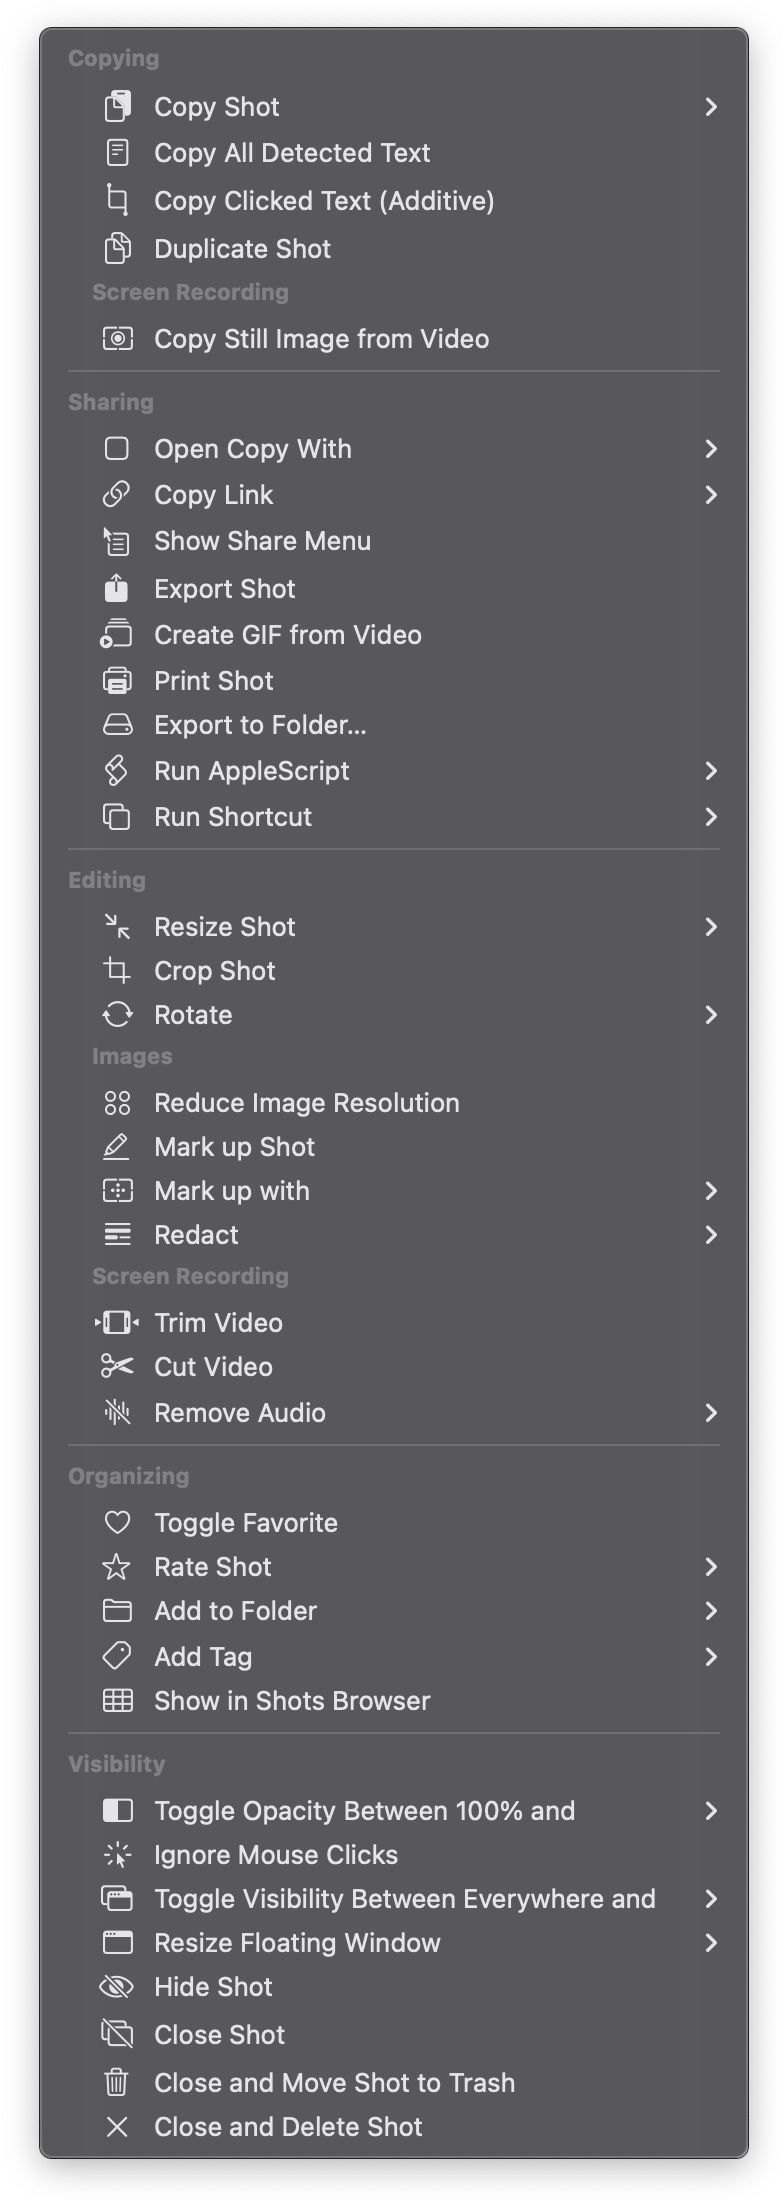
If you need more fine-tuned control, click the document icon, and you’ll be presented with a couple of useful options:
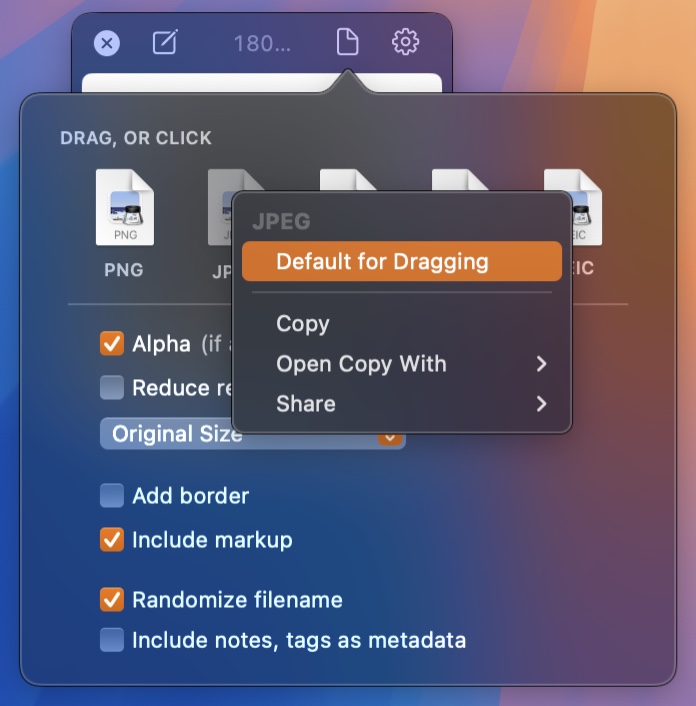
Here, you can:
- Change the default file format (PNG, JPEG, TIFF, PDF, HEIC), or drag out/copy/open with/share a specific file format
- Reduce the resolution (from 144+ “retina” dpi to 72 dpi)
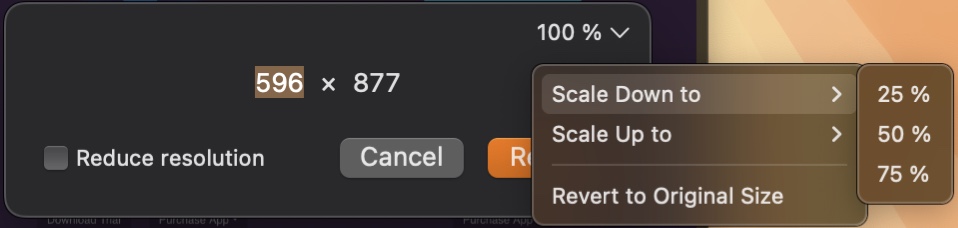
- Resize the image (by longest/shortest side, or width/height)
- Add a border around the image to prevent “bleeding” *
- Enable whether markup and annotations should be included in the dragged file, or the image should be shared without any markup
- Randomize the filename
Instead of the filename as it appears in the Shots Browser, the file name will become “ScreenFloat Shot <RANDOM12CHARSTRING>” - Enable whether notes and tags should be included as EXIF and Finder metadata
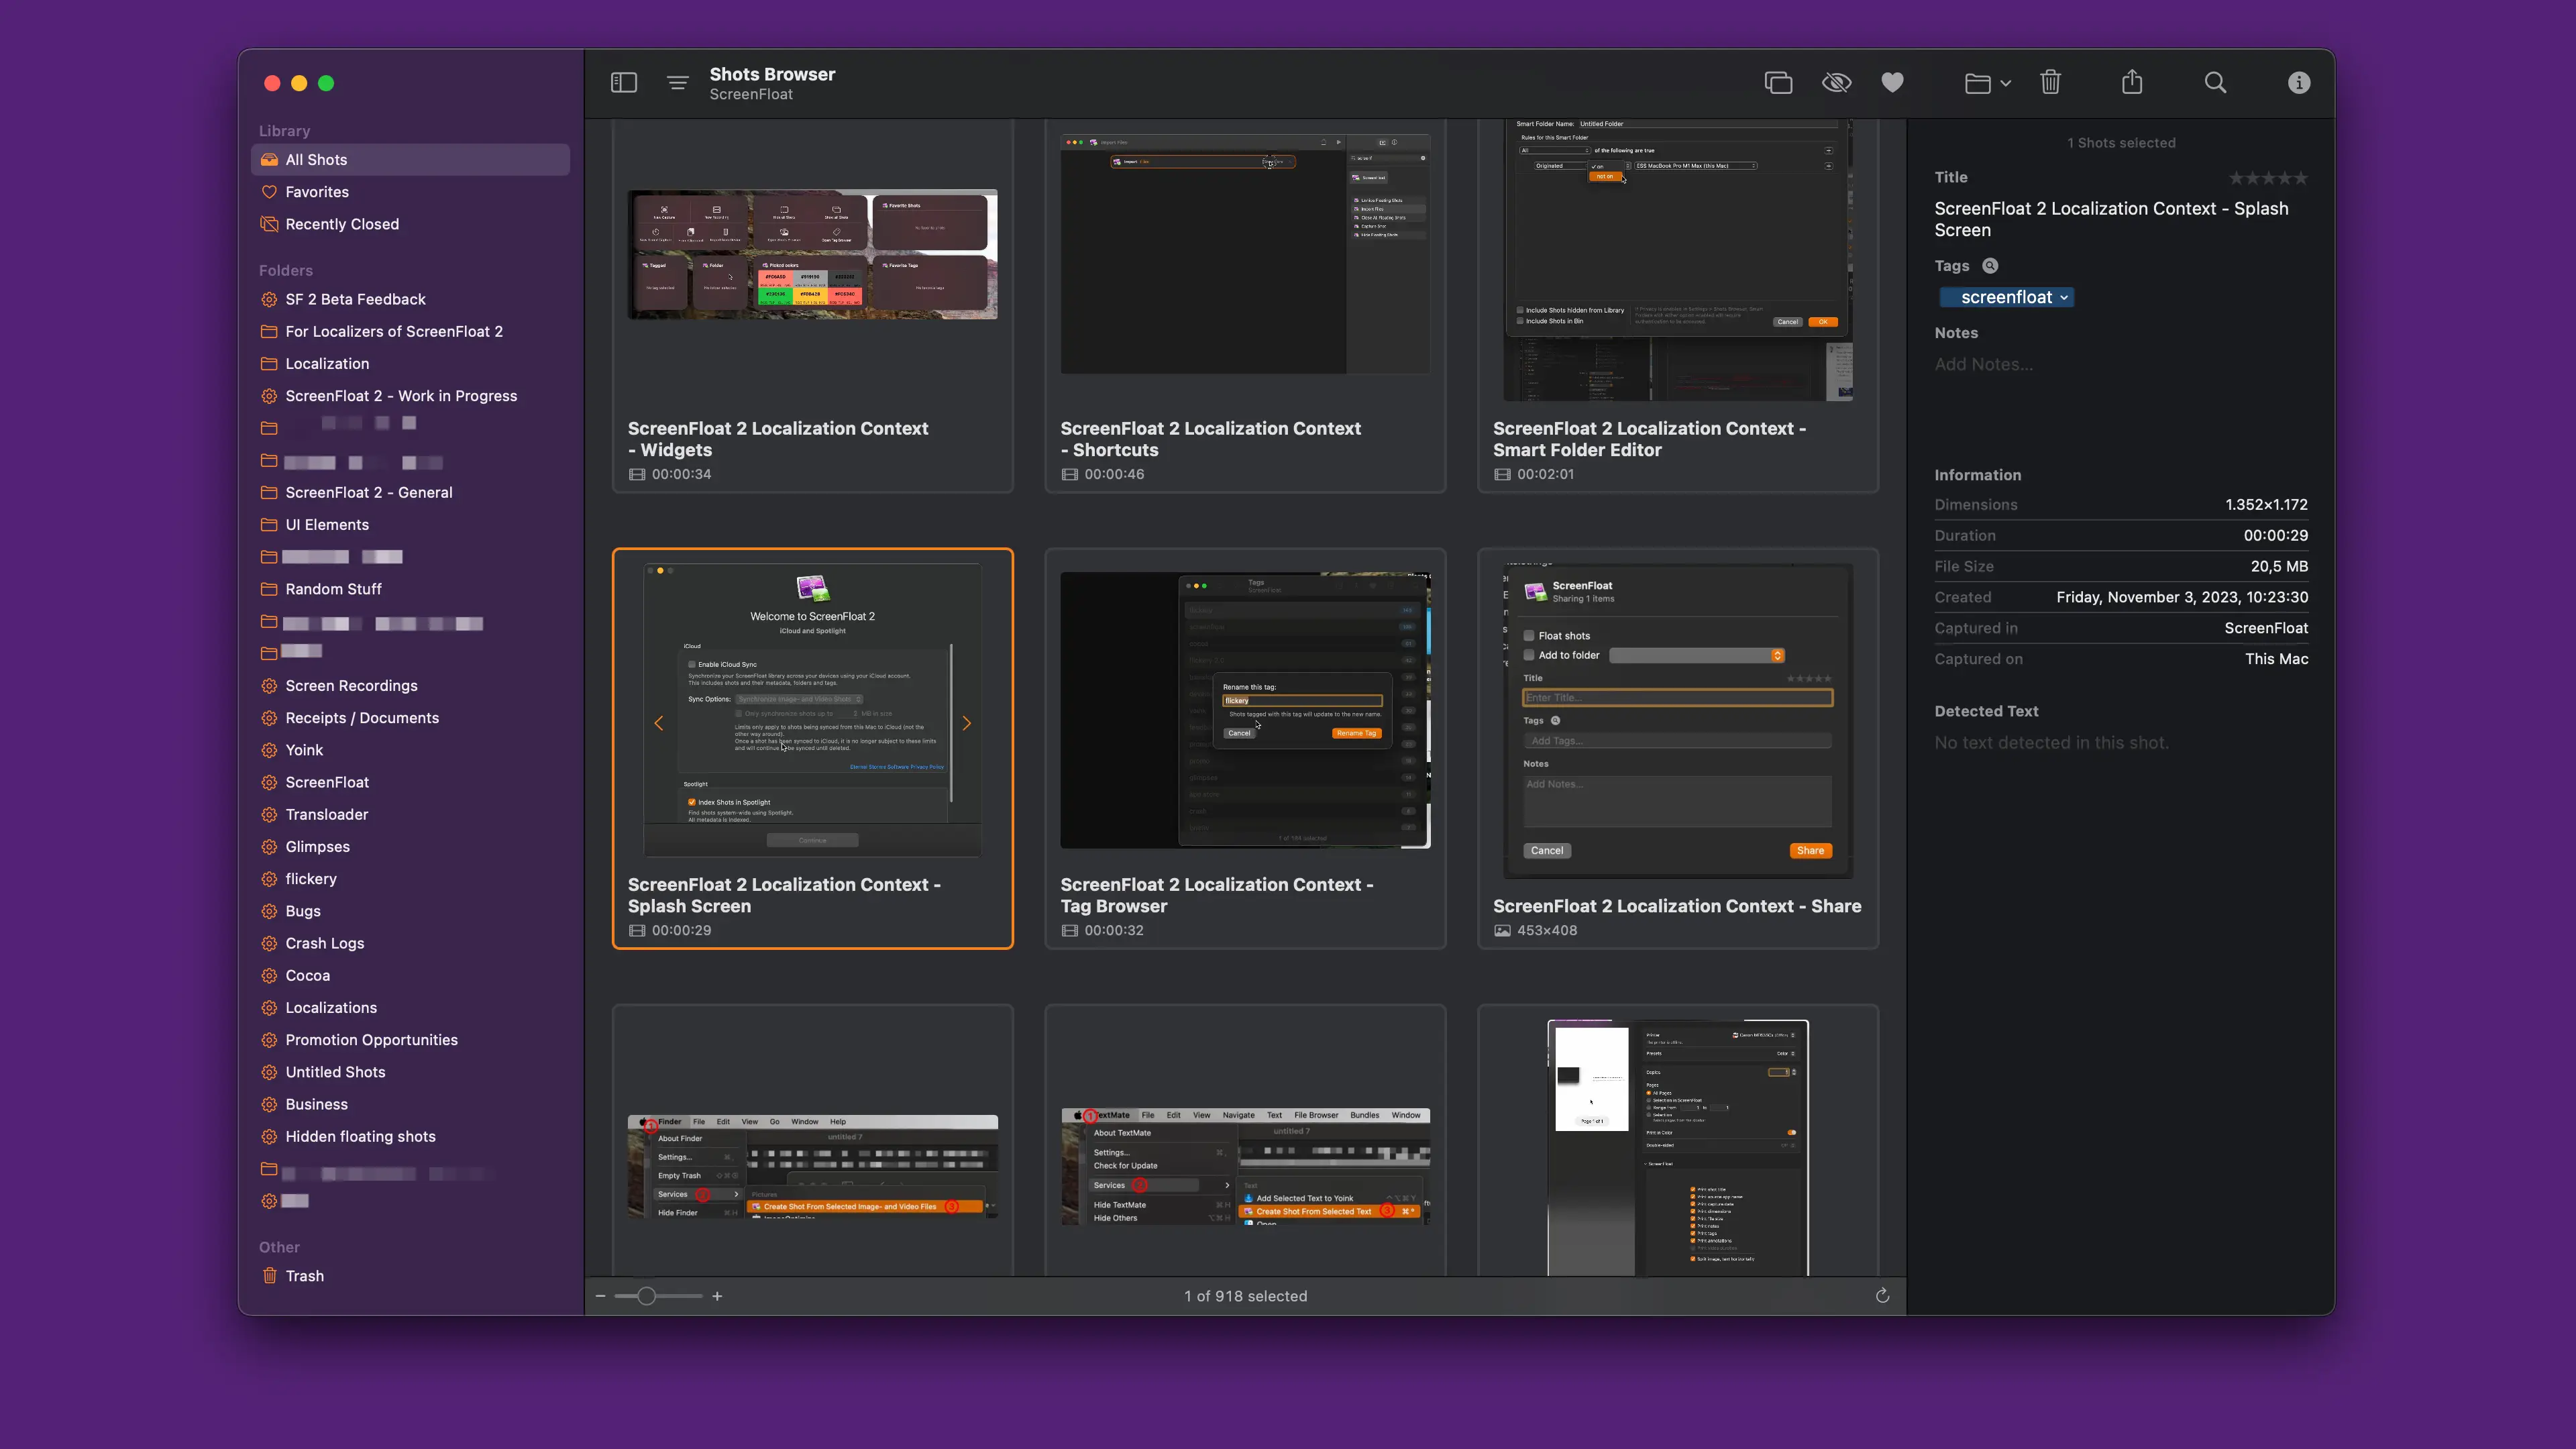
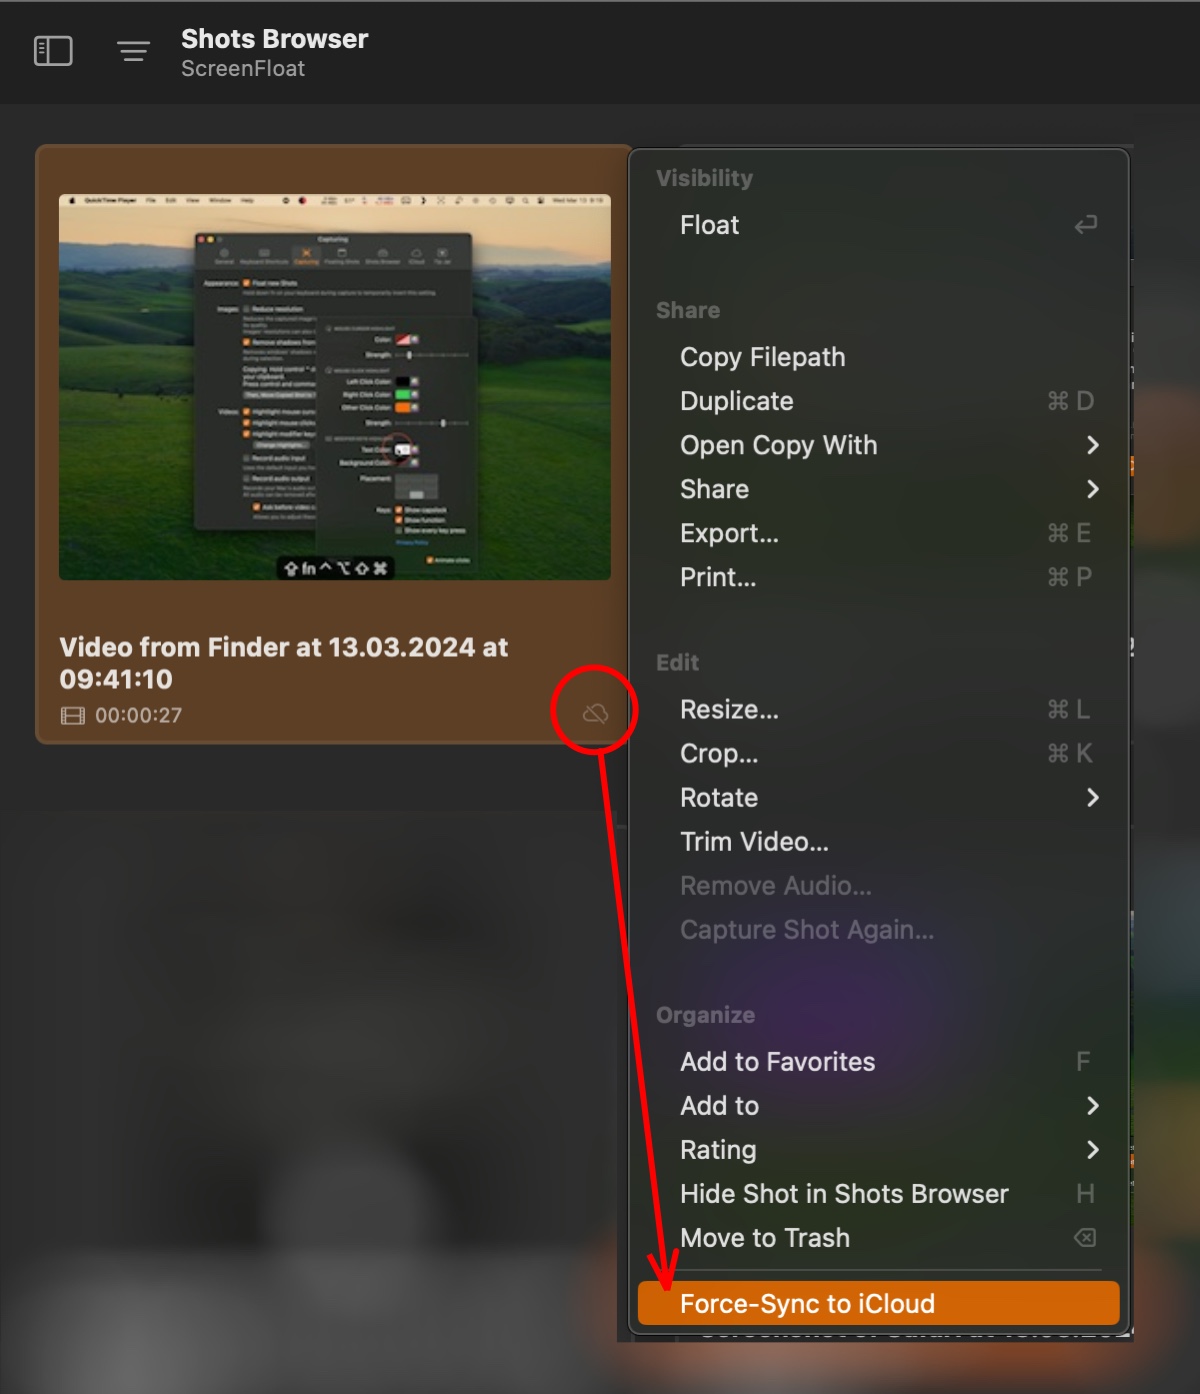
Drag and Drop from the Shots Browser
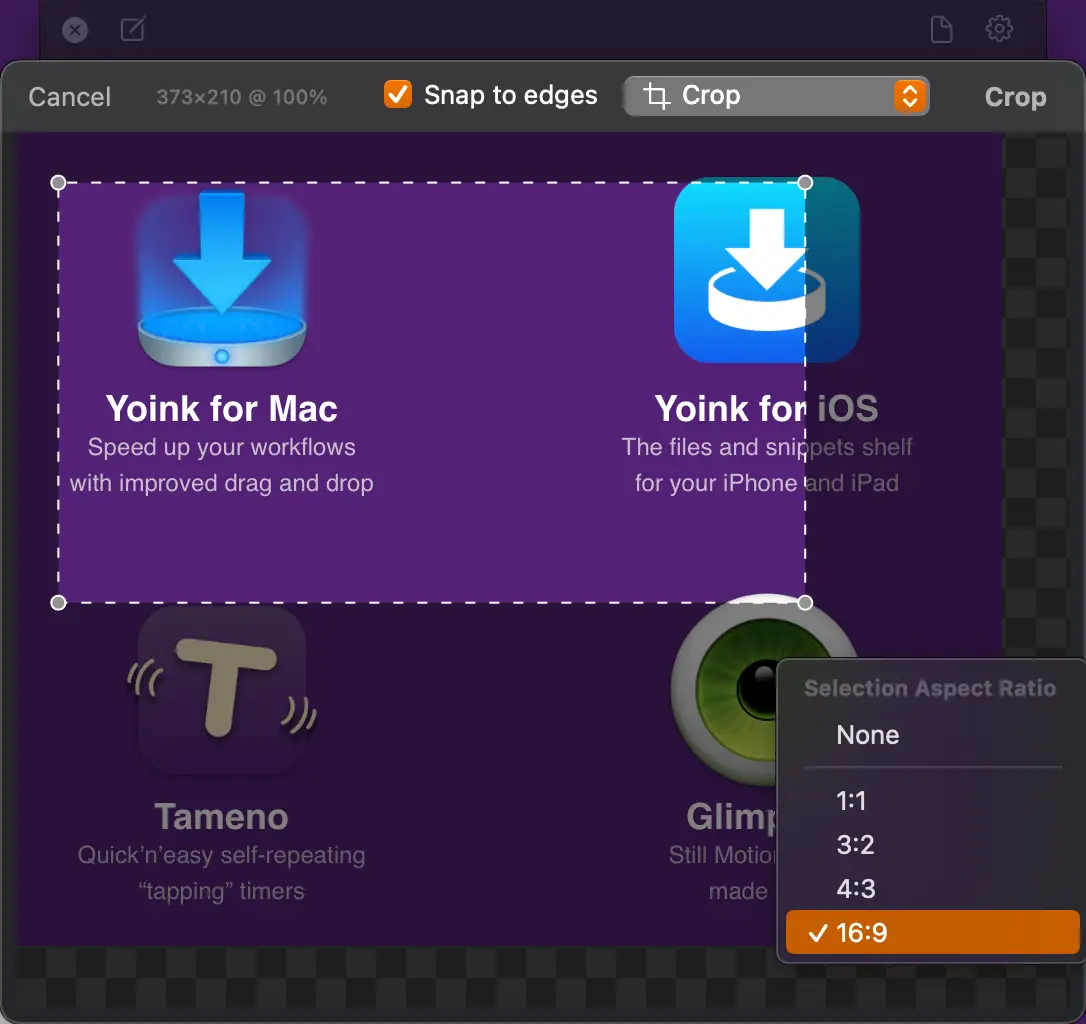
You can drag multiple shots from the Shots Browser to other apps. Select them, and drag them out:
Furthermore, you can drag entire folders out of the Shots Browser:
Export
If you require more advanced options for your files, consider using ScreenFloat’s Export functionality, which allows you to export multiple screenshots and recordings in one fell swoop.
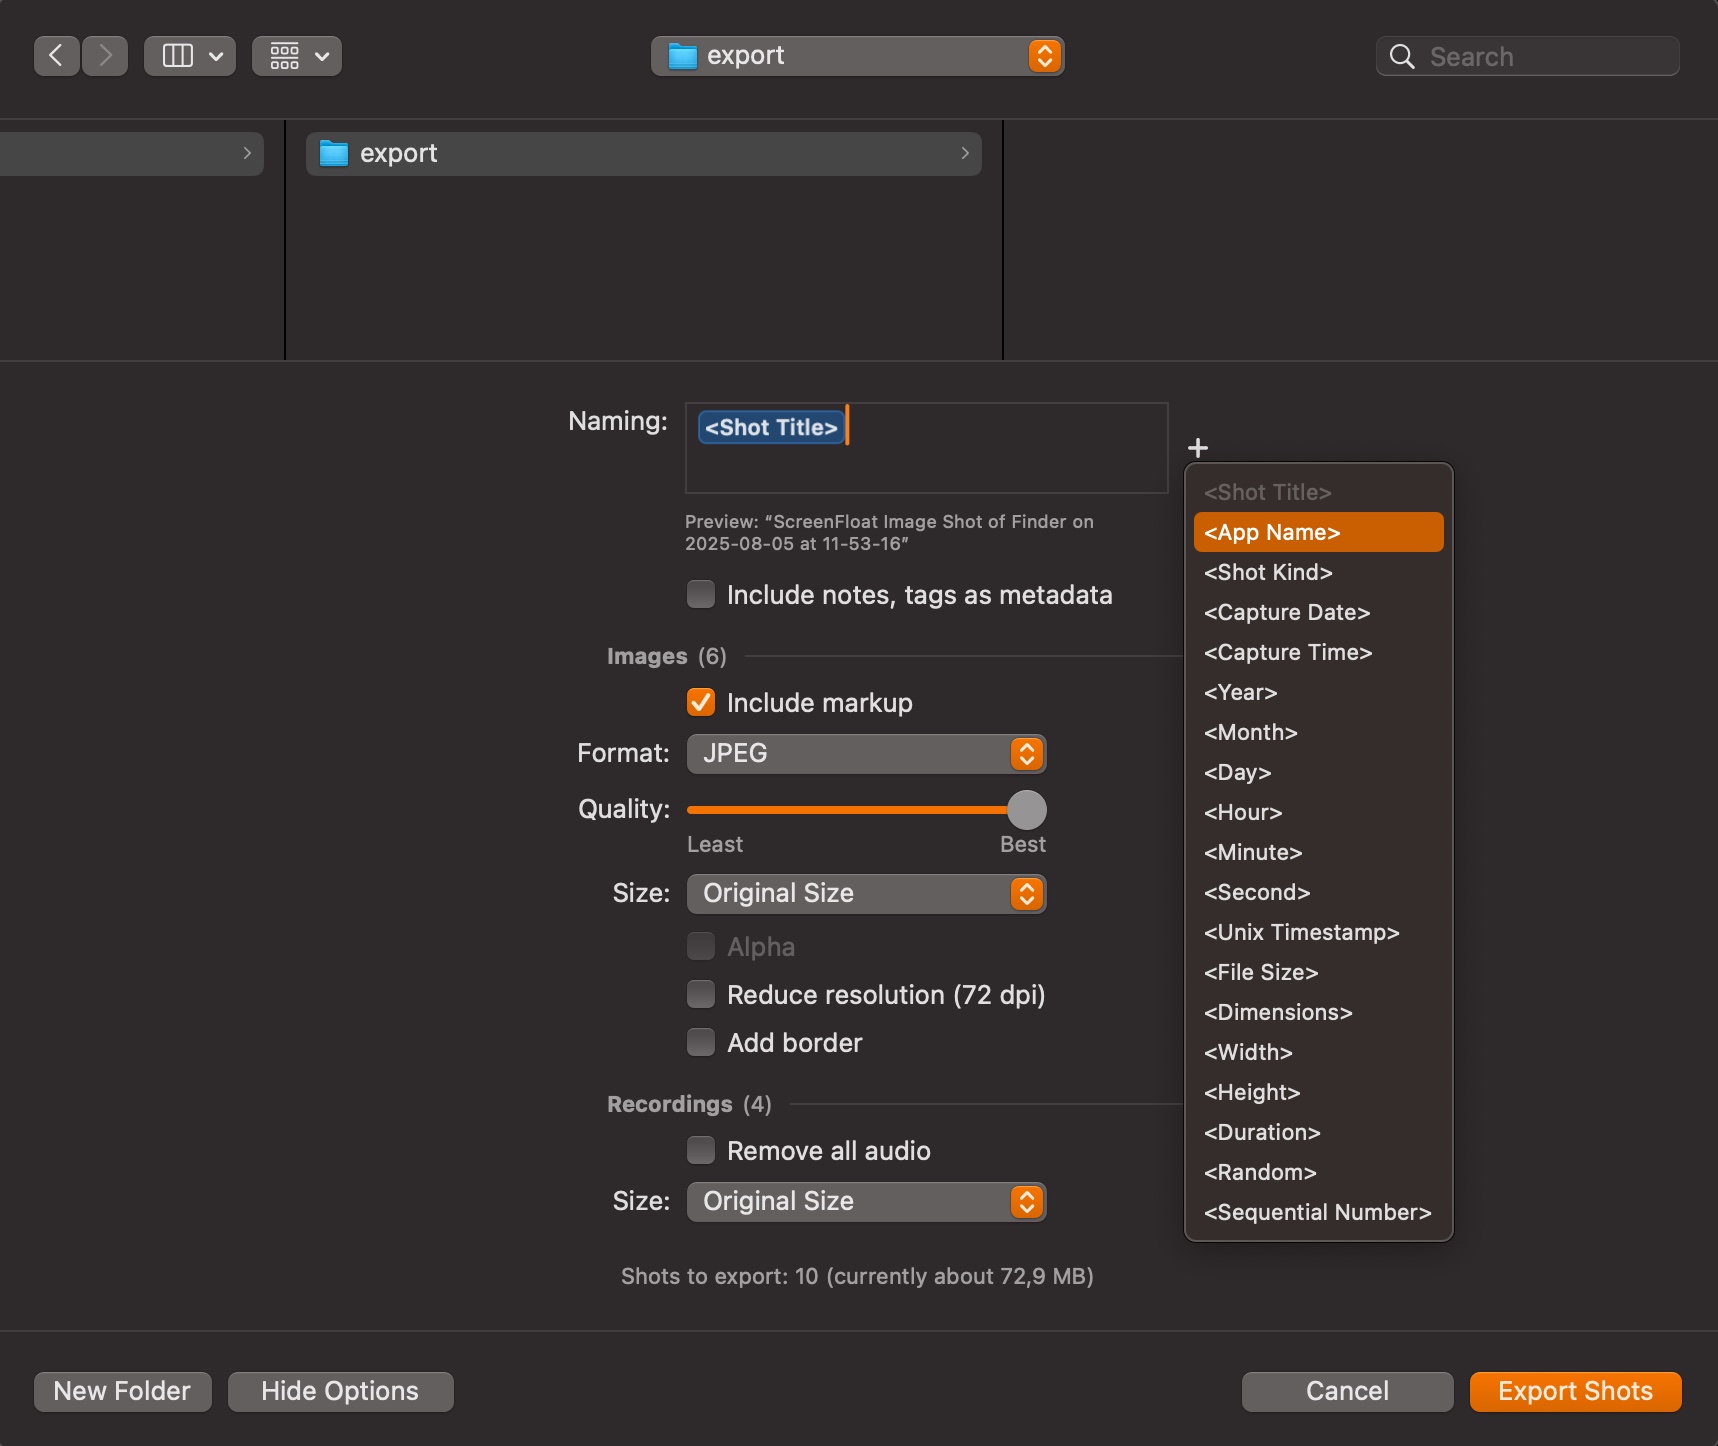
Naming
For exporting, you have the same file naming options available as for storing shots in the Shots Browser (discussed in a future installment of this series). Namely, those are:
- <Shot Title>: The Shot title, as it appears in the Shots Browser
- <App Name>: The name of the captured app
- <Shot Kind>: Like “Image Shot” or “Video Shot”
- <Capture Date>: The date the shot was captured
- <Capture Time>: The time the shot was captured
- <Year>, <Month>, <Day>, <Minute>, <Second>: The components of the capture date/time
- <Unix Timestamp>: A unix timestamp representation of the capture date and time
- <File Size>: The file size of the shot (before the export), like “320KB”
- <Dimensions>: The dimensions of the shot, like “640×480”
- <Width>, <Height>: The components of the dimensions of the shot, like “640”, or “480”
- <Duration>: For recordings, the duration of the video, like “1m22s”
- <Random>: A random, 12-character string
- <Sequential Number>: The running count of the exported file
Include notes, tags as metadata
With this selected, ScreenFloat writes notes and tags you specified for a shot into the shot’s file metadata. In the case of an image format (PNG, JPEG, TIFF, HEIC), it uses the appropriate IPTC fields.
In the case of a PDF, it’s written into the PDF’s subject and keywords fields. If it’s a screen recording, it’s a custom metadata field.
Images
Include annotations
With this selected, the image is exported with its annotations, markups and redactions. If this is not selected, the plain image will be exported.
Format
- PNG
- JPEG
- Offers Quality setting
- TIFF
- PDF
- Offers PDF permission settings
- HEIC
- Offers Quality setting
Size
Restrict the exported image’s size by longest or shortest side, width or height.
Alpha
Whether the exported image file has an alpha channel.
Available for PNG, TIFF and HEIC.
Reduce resolution (72 dpi)
When screenshots are taken on a retina display, they usually have a high resolution, like 144 dpi.
With this selected, all high-dpi-images’ resolution will be reduced to 72 dpi, resulting in a smaller file size, but also reduced quality.
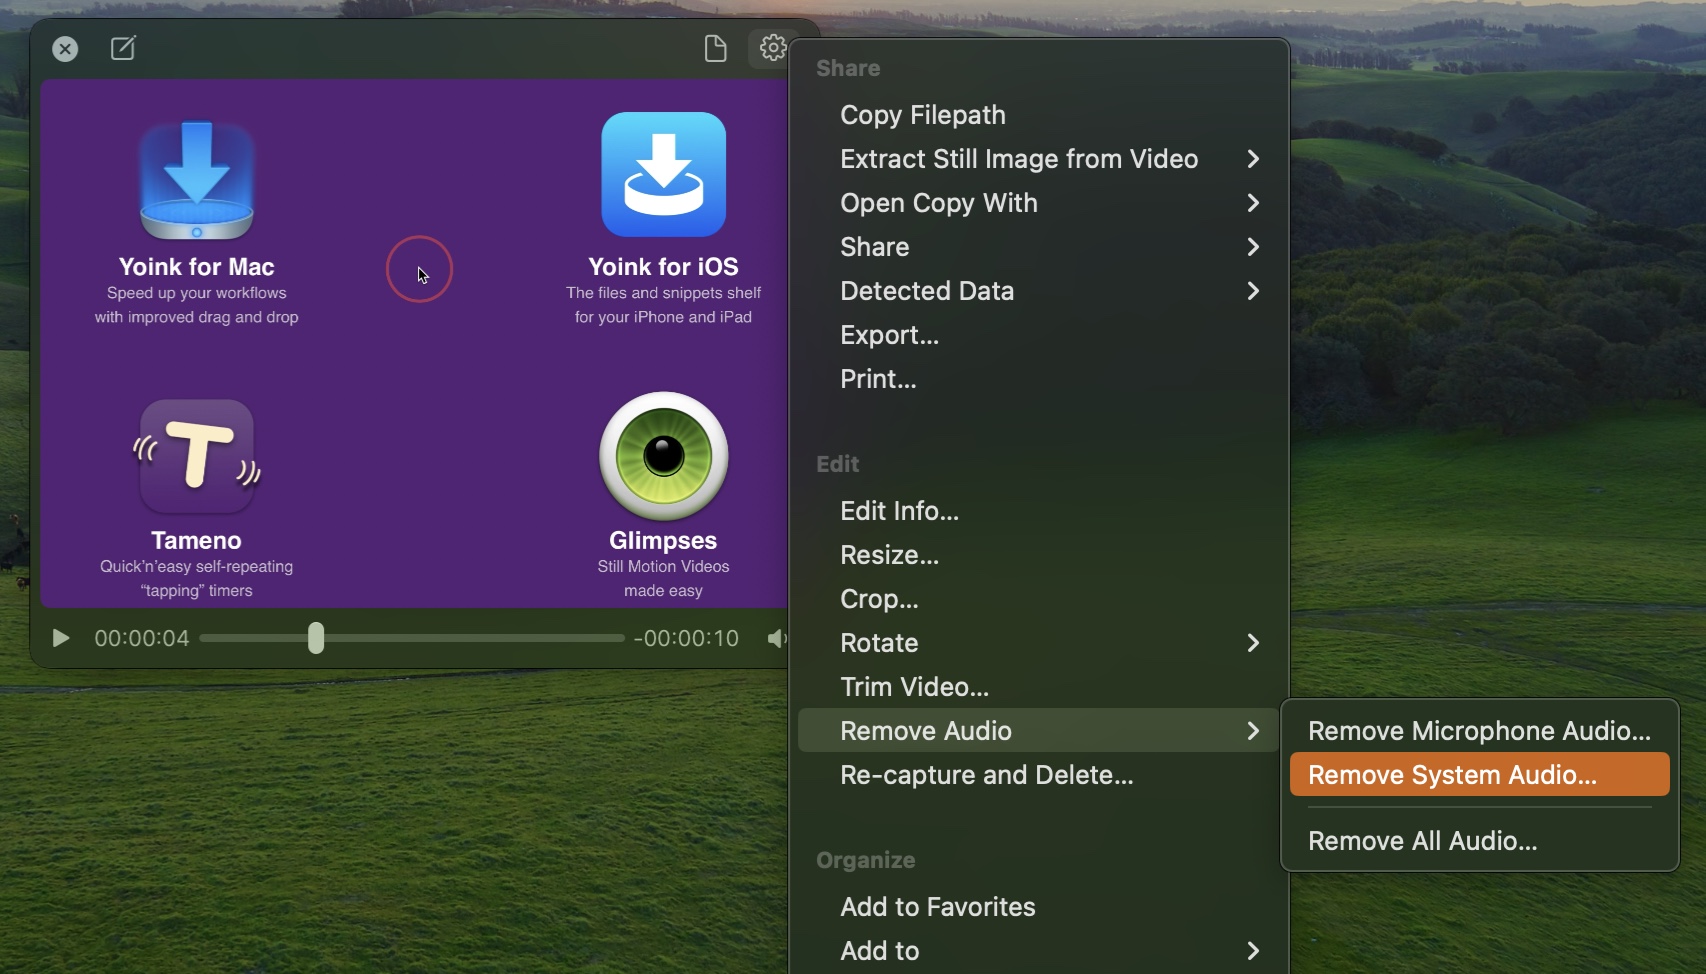
Recordings
Remove all audio
For screen recordings. Will remove all audio tracks from the resulting video file.
Size
Restrict the exported image’s size by longest or shortest side, width or height.
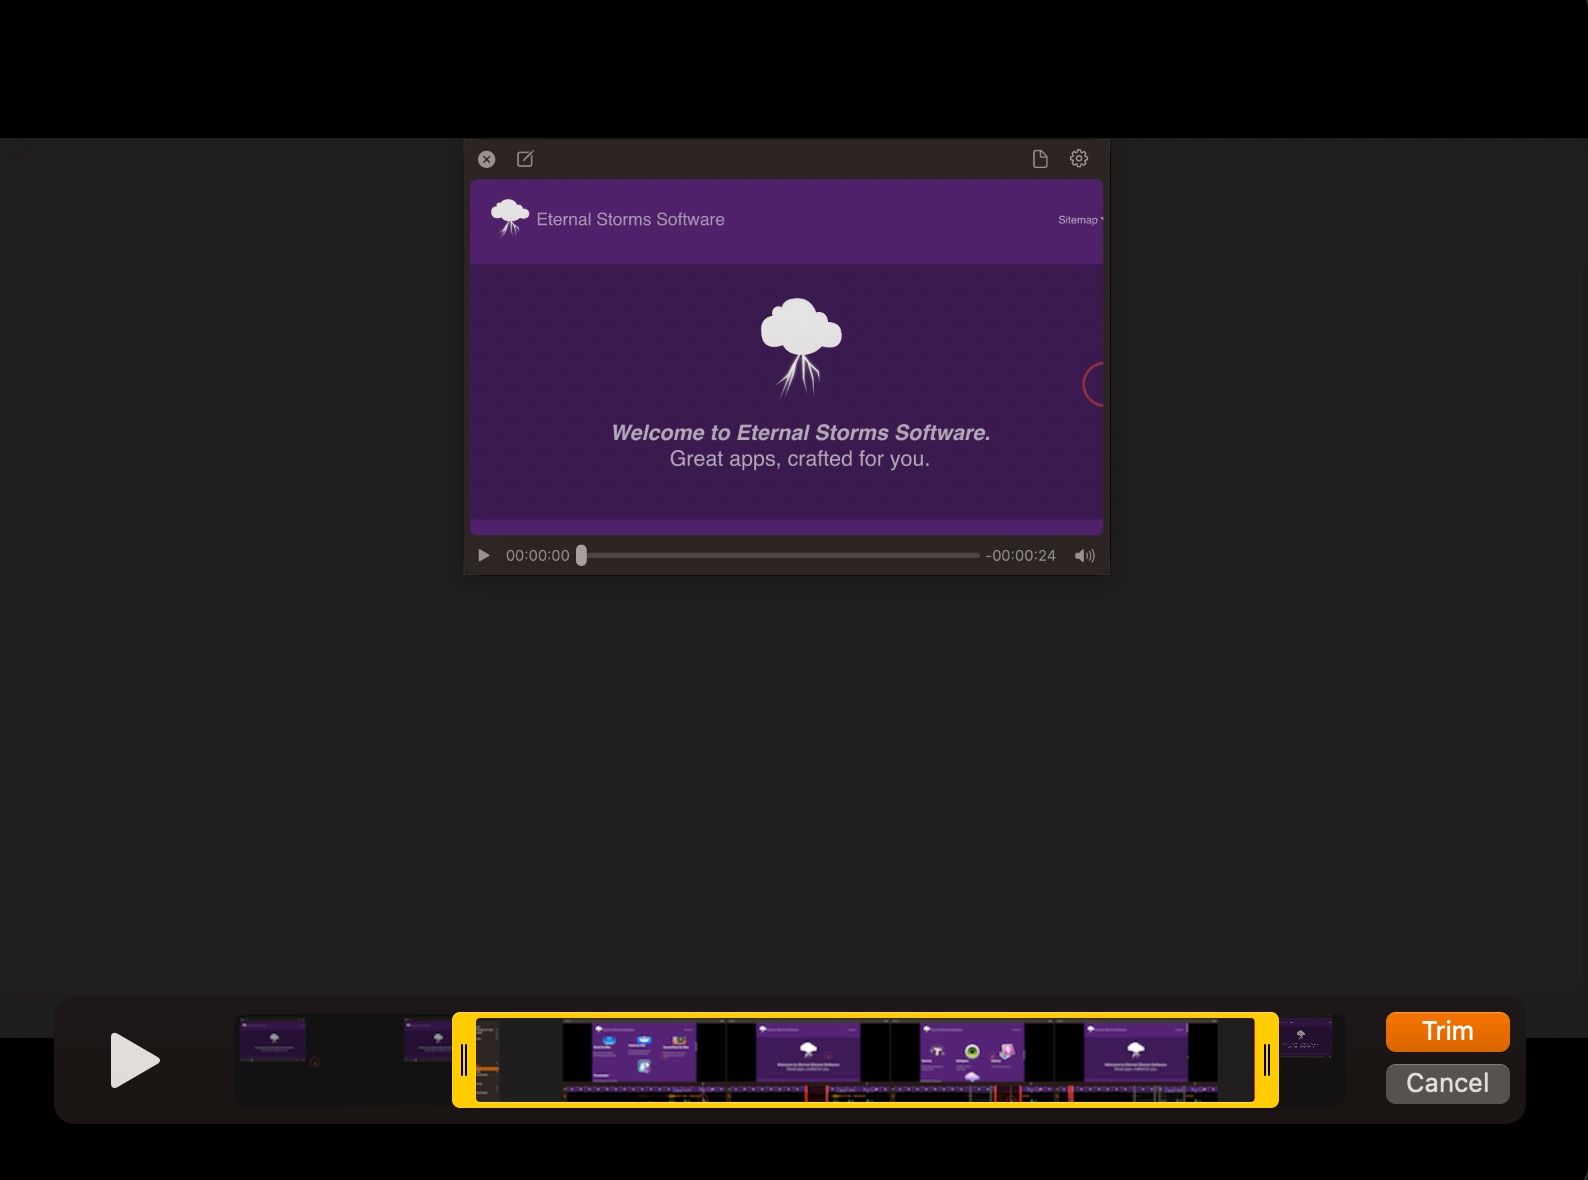
Create GIFs from Recordings
Easily create GIFs from your recordings, with the following quality, sizing, cropping and trimming options:
– Frame Rate: Choose between 30fps, 24fps, 15fps, 12fps, 10fps and 6fps
– Size: Scale the GIF from 100% (original size) to 10%.
– Color Quality: Adjust the color representation of the GIF (to reduce the file size)
– Crop button: Select an area within the video to create the GIF from
– Time Range: Select a portion of the video you’d like to create the GIF of
– Quality Slider: Change the picture quality of the GIF (to reduce the file size)
The live preview shows you what your GIF will look like with your current settings. The Estimated File Size shows you ScreenFloat’s best guess at the resulting file size (not 100% accurate due to different factors during rendering).
Export to Folder, Share with a Double-Click Action
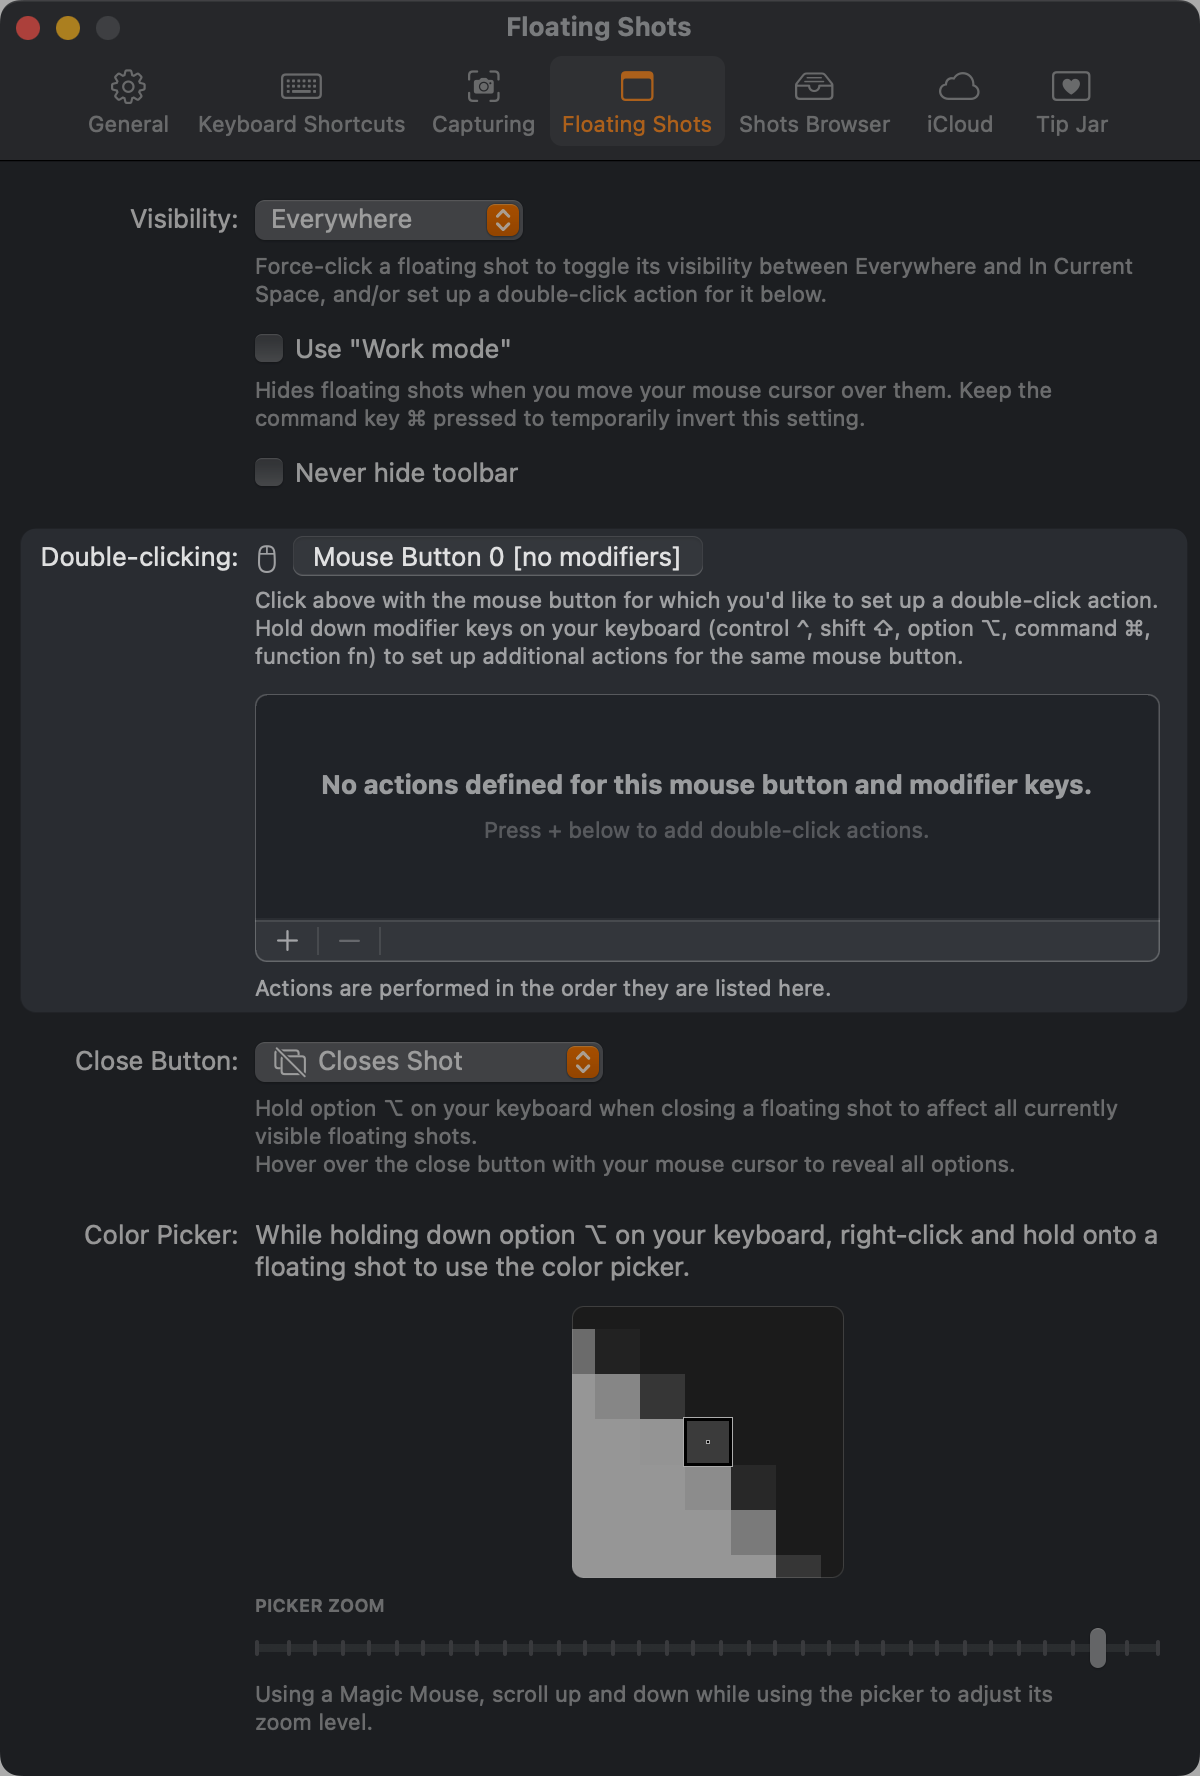
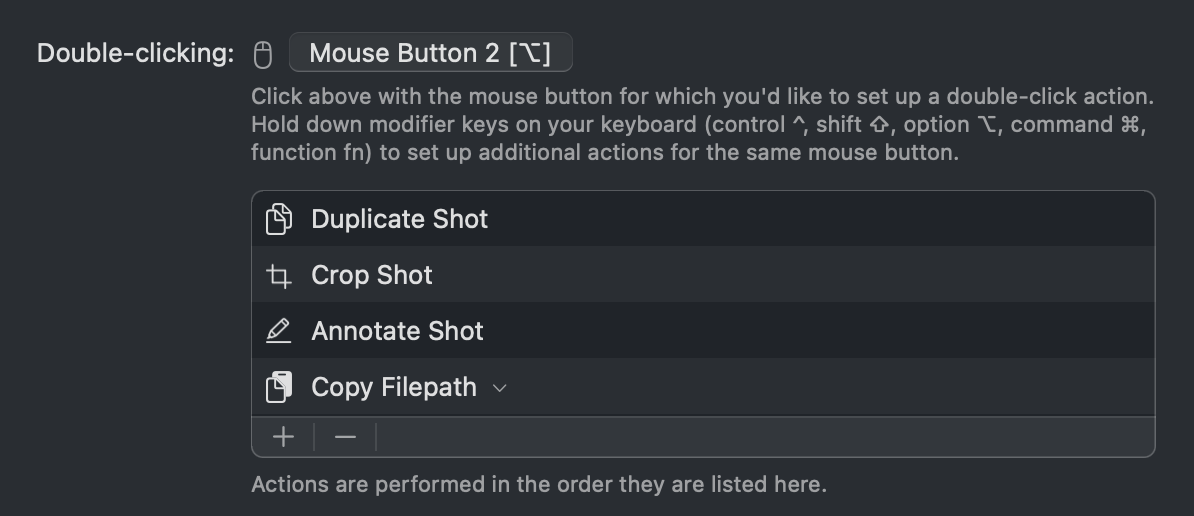
We’ll talk about double-click workflows in more detail in a future installment of this series, but I’d still like to mention this here, because it is, after all, another way to export shots.
ScreenFloat provides a Double-Click Action to export double-clicked shots directly into a folder of your choice:
Set it up in ScreenFloat’s Settings > Floating Shots > Double-clicking.
There are other Double-Click Actions available, like opening the Share menu right away, copying the shot as a file path or image data, open with a specific app, and more!
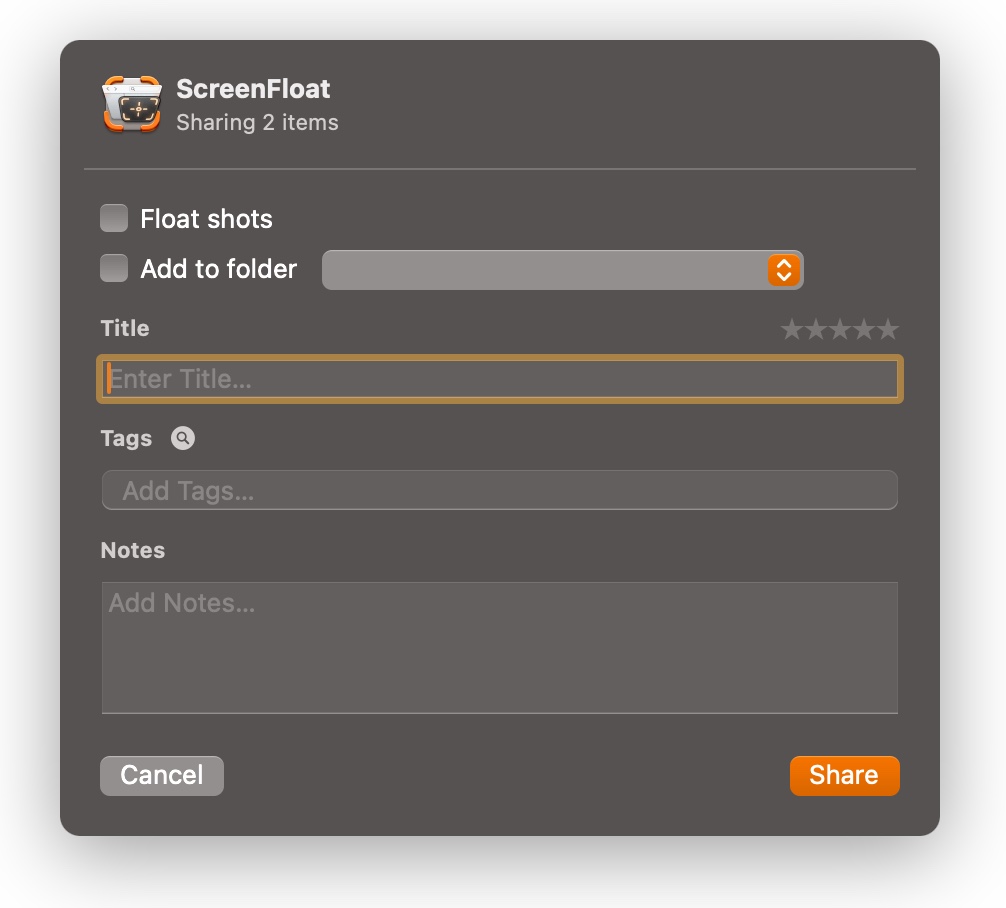
Link Sharing
If you want to share multiple shots, or a large screen recording, it might be easier for you and the recipient to share a download link instead of the actual files.
You’d like to display a screenshot on a website, or embed it in a Markdown document?
Link Sharing allows you to do that.
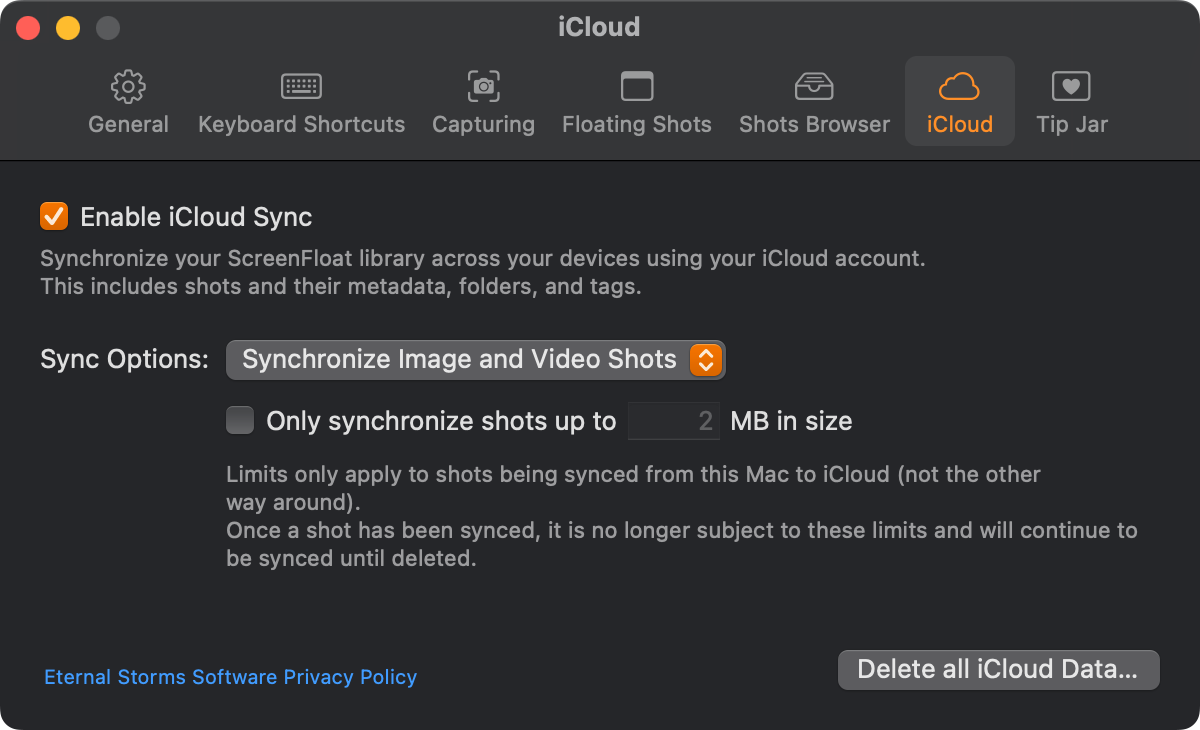
iCloud Link Sharing
Sharing multiple or large shots as a download link can be easily done with iCloud Link Sharing. Right-click the shot(s) and select Share > Copy iCloud Link…, and the files will be uploaded to iCloud and a link to it copied to your clipboard:
Links created with iCloud are be valid for up to 30 days, after which they will no longer be accessible. They can’t be manually invalidated.
In Settings > iCloud > Set up Link Copy…, you can change:
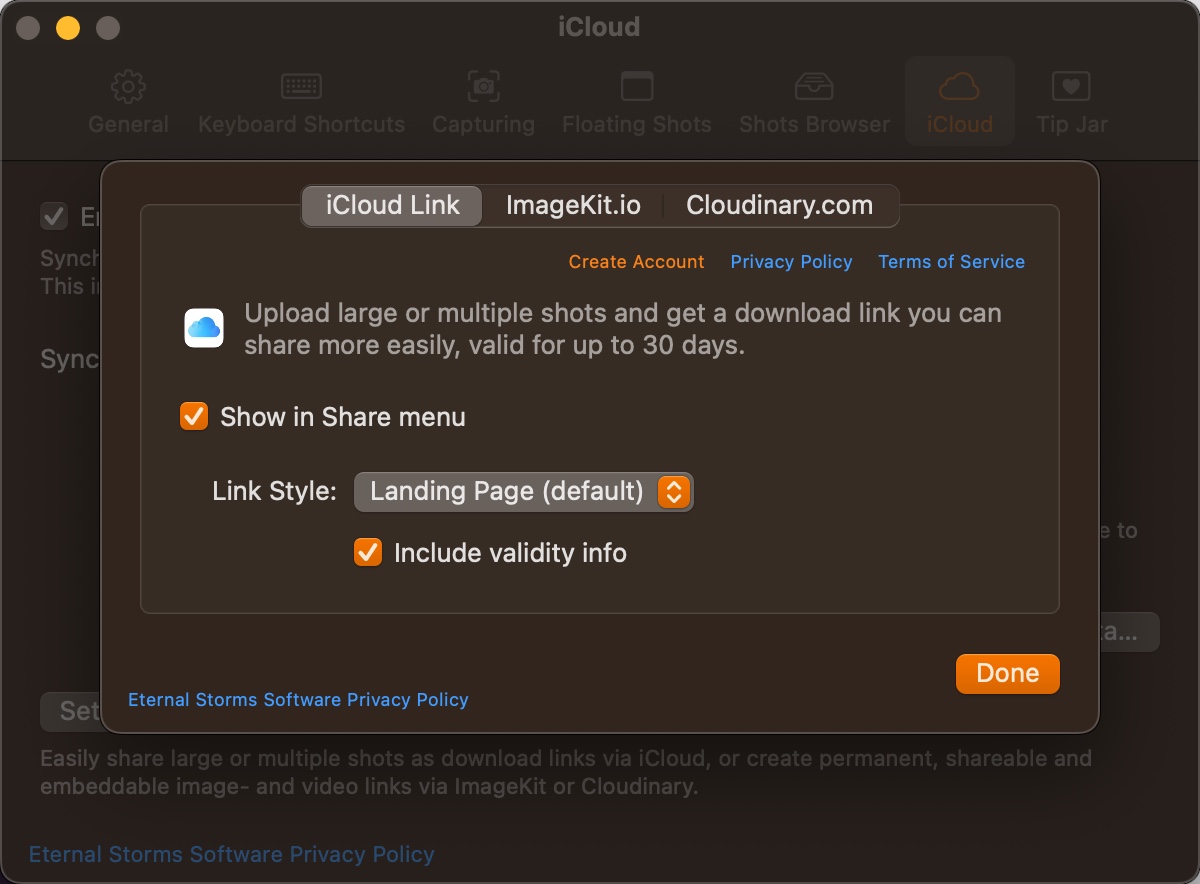
- Link Style
- Landing Page (default): When you open the link in your browser, you see a landing page with a prompt to download the files
- Direct File Link: When you open the link in your browser, the file is downloaded right away. This is also embeddable, but keep in mind that a link created with iCloud is only valid for up to 30 days
- Include validity info
- Whether or not the copied link should include the expiration date, i.e.:
https://linktofile.com (expires on <date>)
- Whether or not the copied link should include the expiration date, i.e.:
ImageKit.io and Cloudinary.com Link Sharing
Permanent, non-expiring links to screenshots and recordings can be created with ScreenFloat’s inclusion of ImageKit.io and Cloudinary.com, so you can embed them in websites, or Markdown documents, for example.
It works just the same as iCloud Link Sharing, but requires you to (1) create a (free) account with the service you’d like to use, and (2) enter your account’s information into ScreenFloat.
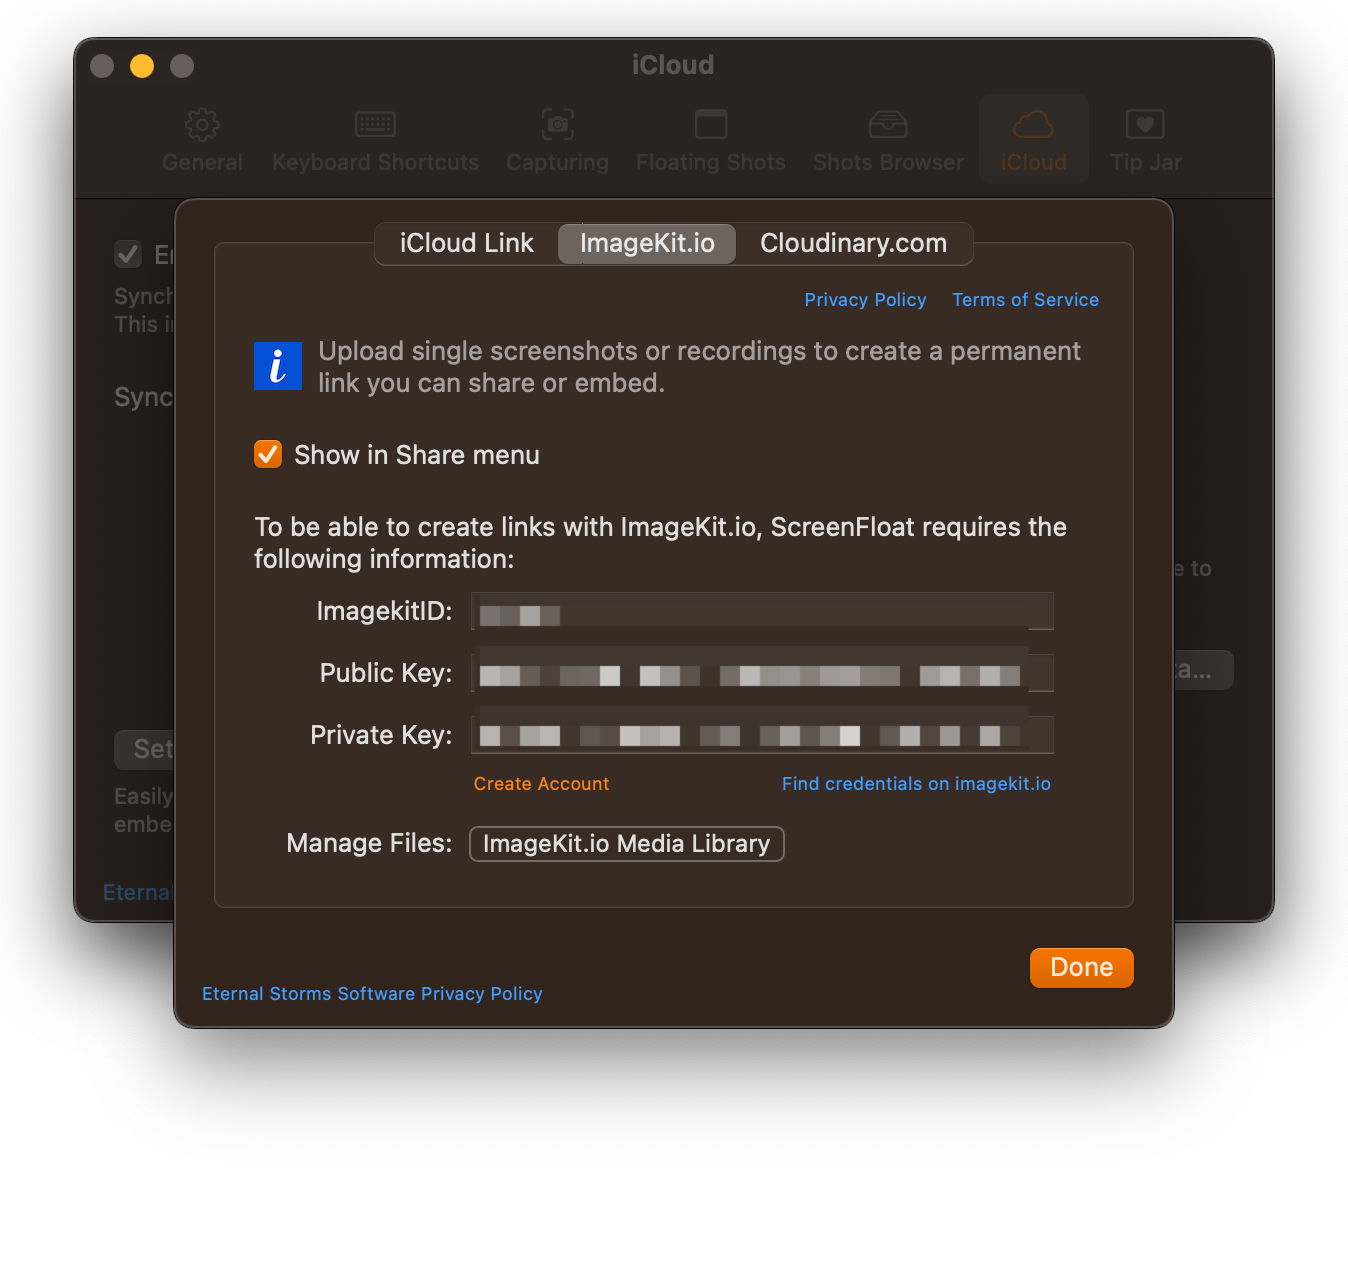
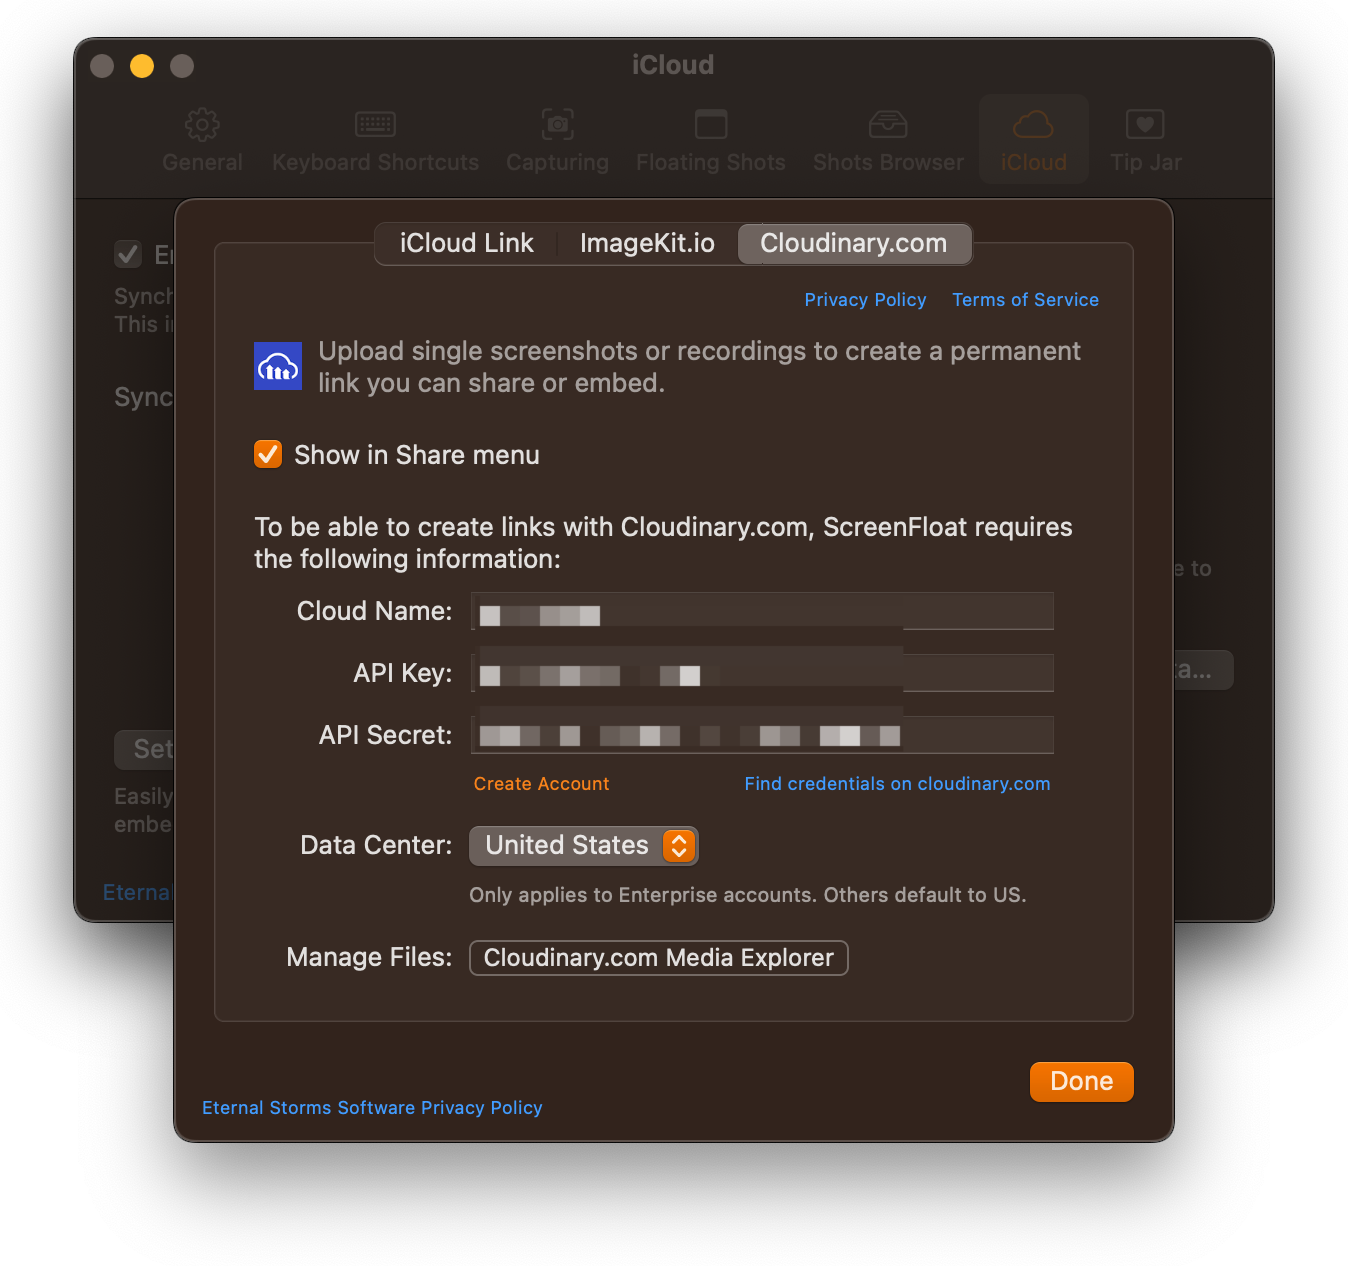
Each service’s Terms of Use and Privacy Policy applies.
ScreenFloat does not offer any other integration with these services, other than uploading them and copying the link. However, you can access ImageKit.io’s Media Library and Cloudinary.com’s Media Explorer from these settings, allowing you to manage (and delete) your uploaded files in your browser.
This can also be triggered with a Double-Click Action.
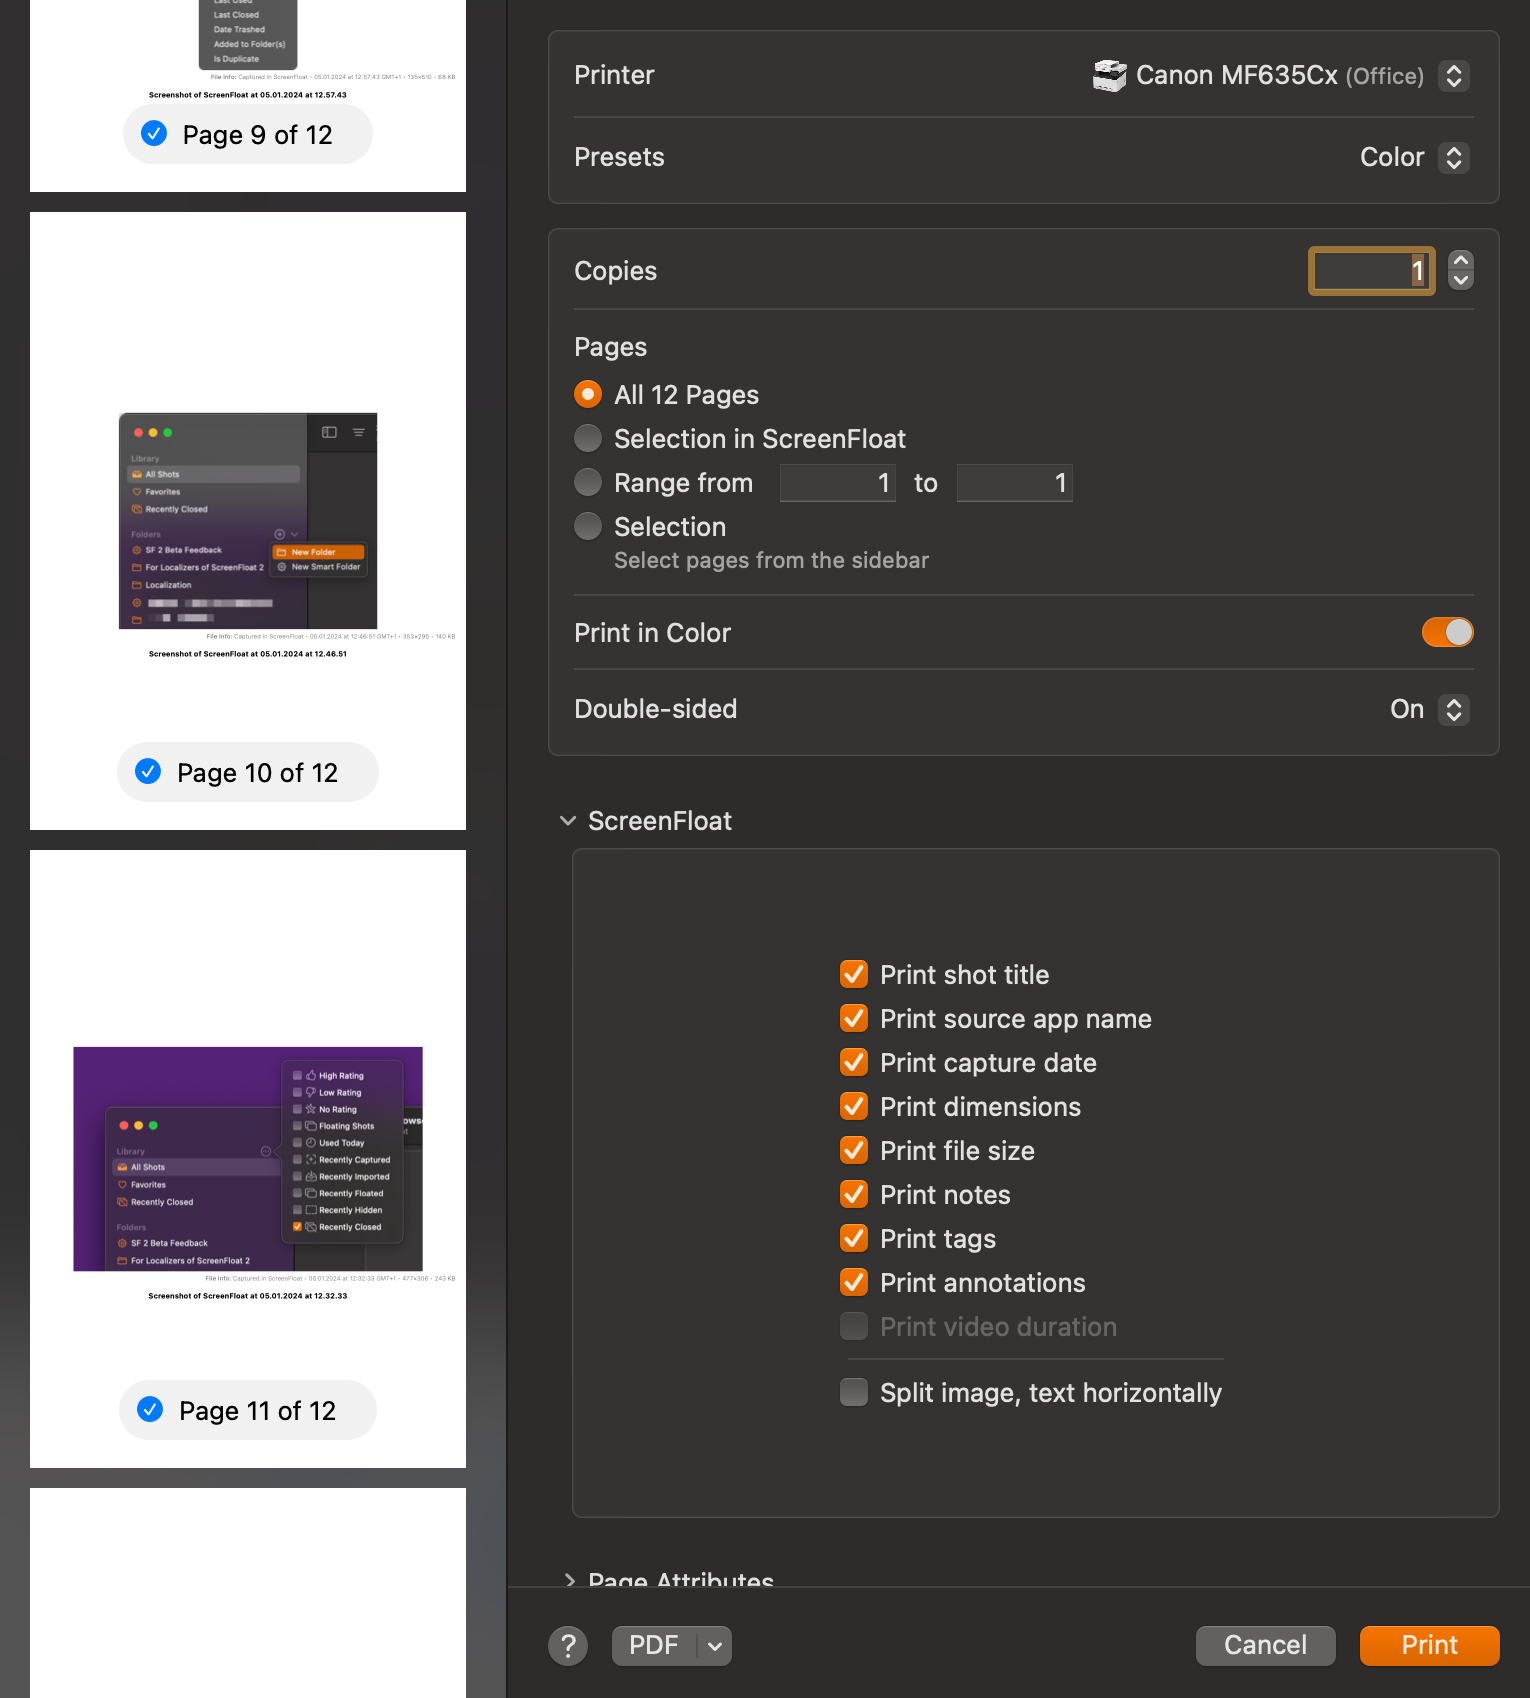
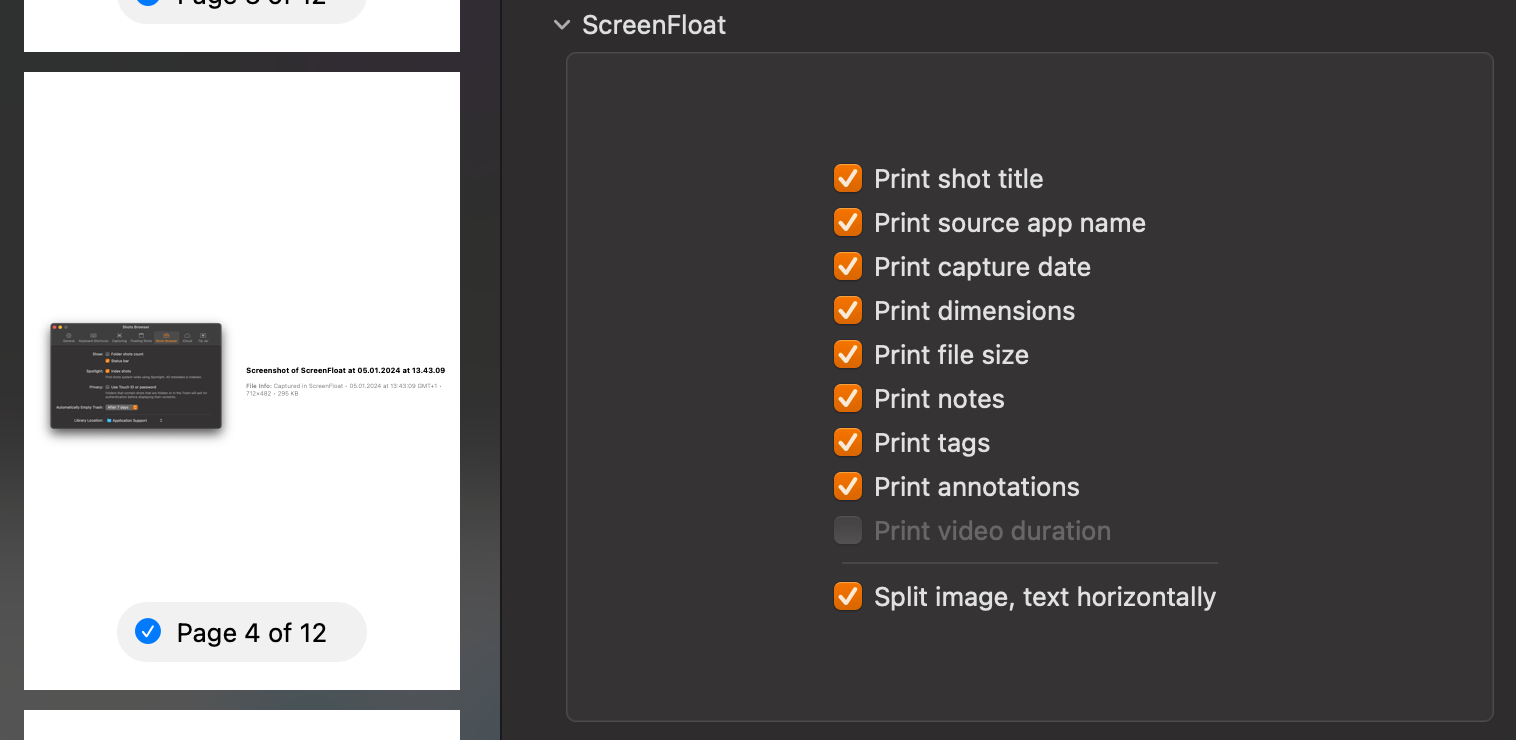
Printing
The settings for printing are pretty self-explanatory, so I’ll just leave you with two screenshots of ScreenFloat’s print dialog:
Up Next
The next part of this series – Part VI: Store – The Shots Browser, iCloud Sync, Tags Browser – takes a detailed look at the Shots Browser, where ScreenFloat keeps your shots and gives you great tools to organize, collect and find your shots.
Links
ScreenFloat Website (+ free trial & direct purchase)
ScreenFloat on the Mac App Store (one-time purchase, free for existing customers)
ScreenFloat on Setapp (7-day trial, then subscription for 200+ awesome apps)
ScreenFloat Usage Tips
Eternal Storms Software Productivity Apps Bundle (Yoink, ScreenFloat, Transloader and DeskMat at ~20% off)
Contact & Connect
Thank you for your time. I do hope you enjoy ScreenFloat!