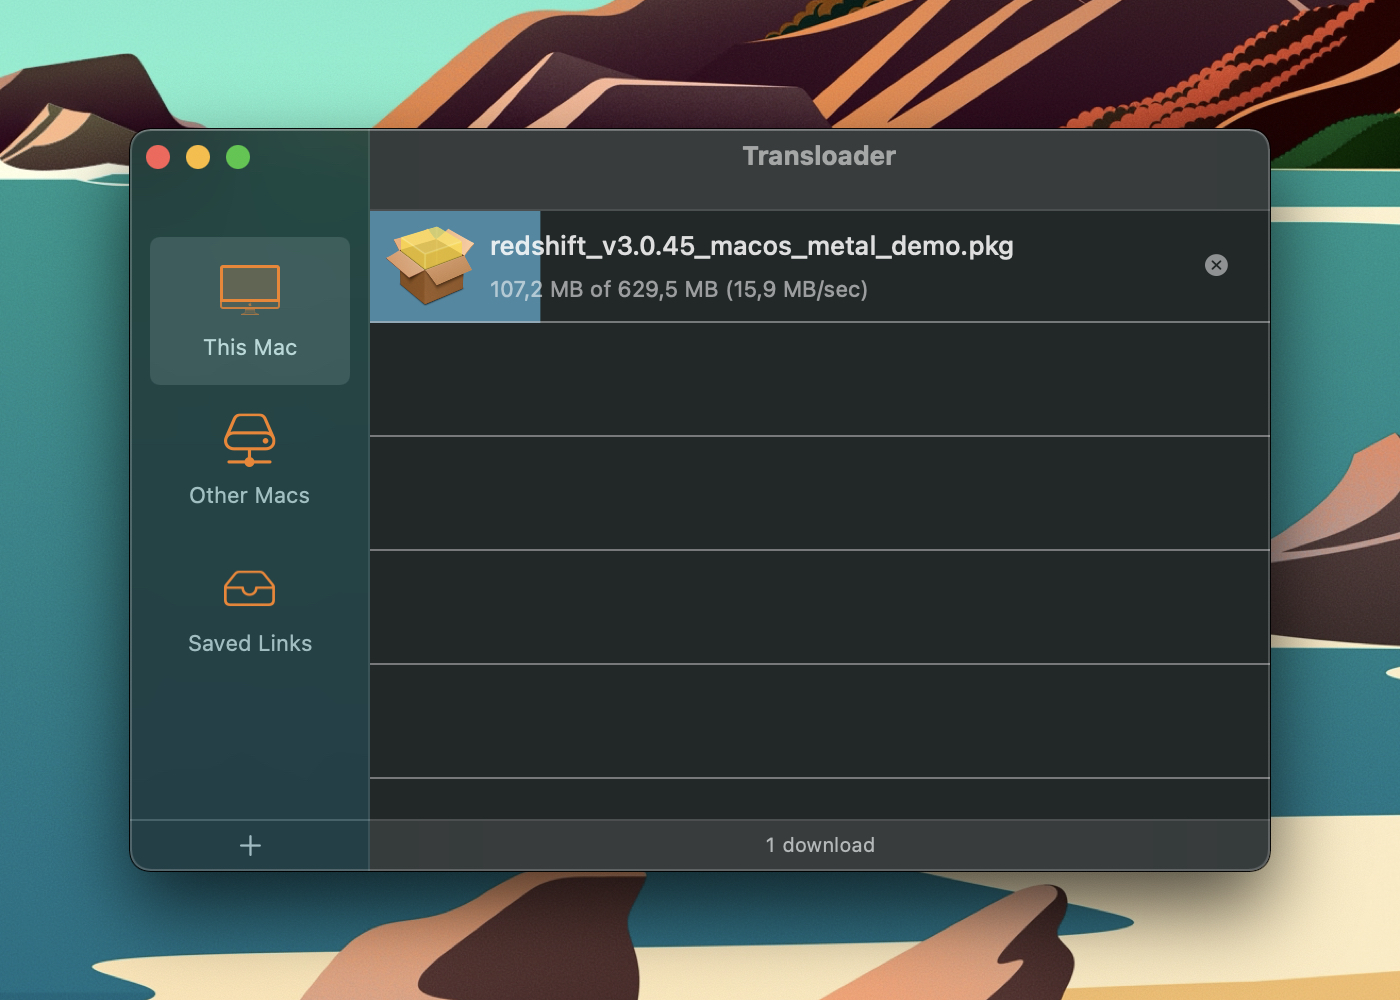
With Transloader 3 finally publicly available, I’d like to invite you on a tour through the app and its functionality.
In Part VI, we created custom Link Actions to change Transloader’s behavior for certain links.
In this Part VII, we’re setting up File Actions to operate on certain files, once they’ve been downloaded by Transloader.
It’s so cool you’re here for this – let’s get crackin’!
Table of Contents
Part VII – File Actions
After Transloader has downloaded a file, you might want to do something with it automatically, like moving it into a specific folder, or opening it with an app.
That’s where File Actions come in. You give it a file type it should act upon, and if the downloaded file is of that file type, the app or Automator workflow you’ve selected is executed.
Let’s say we’d like to move downloaded video files into our ~/Movies folder.
Setting up a File Action
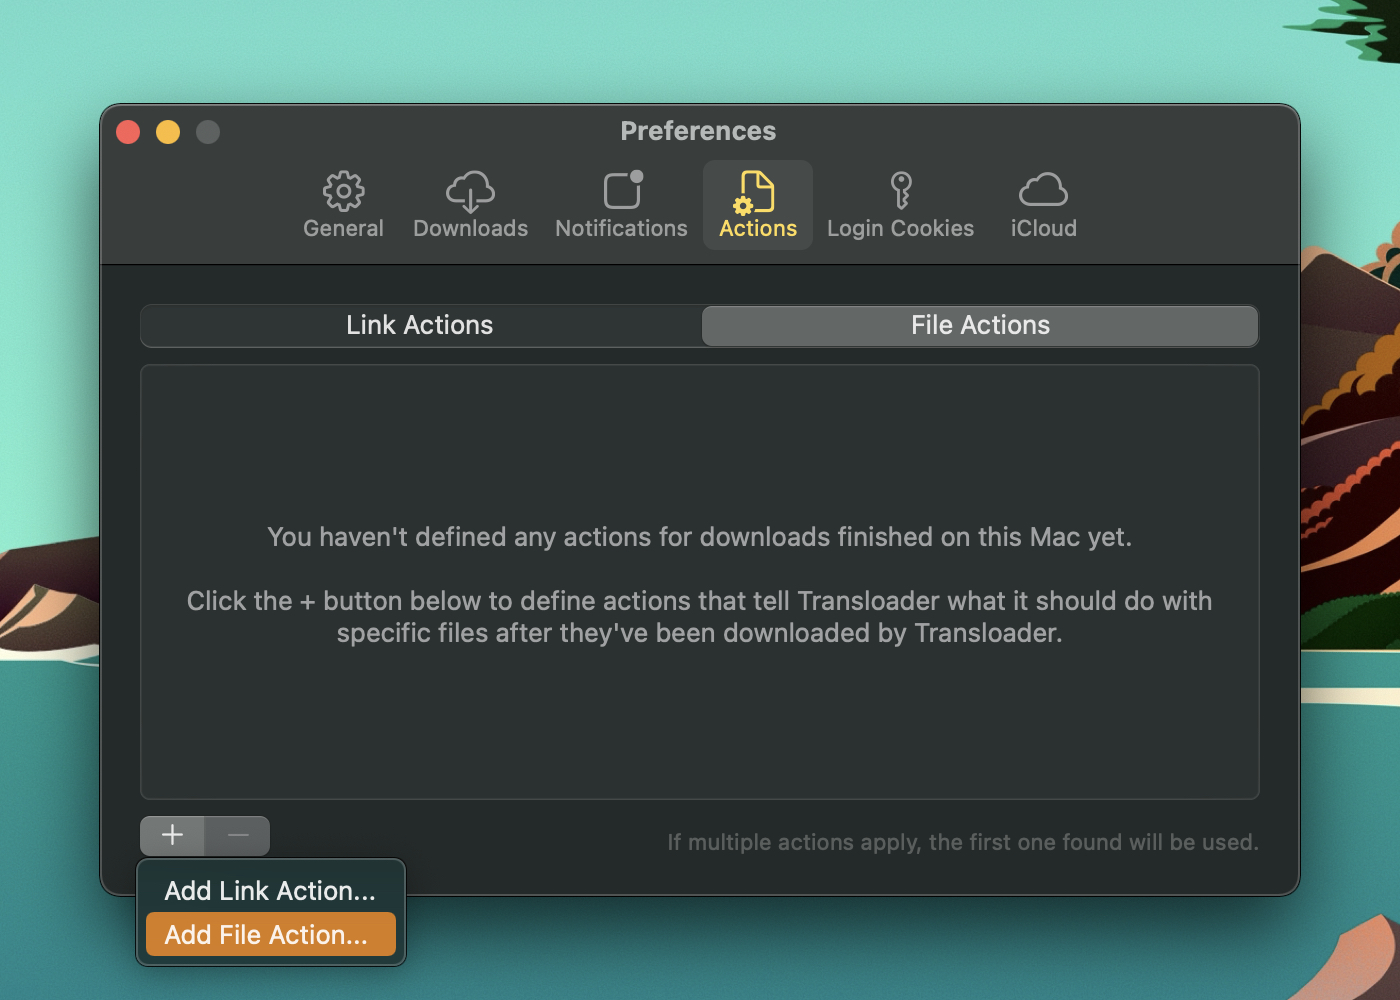
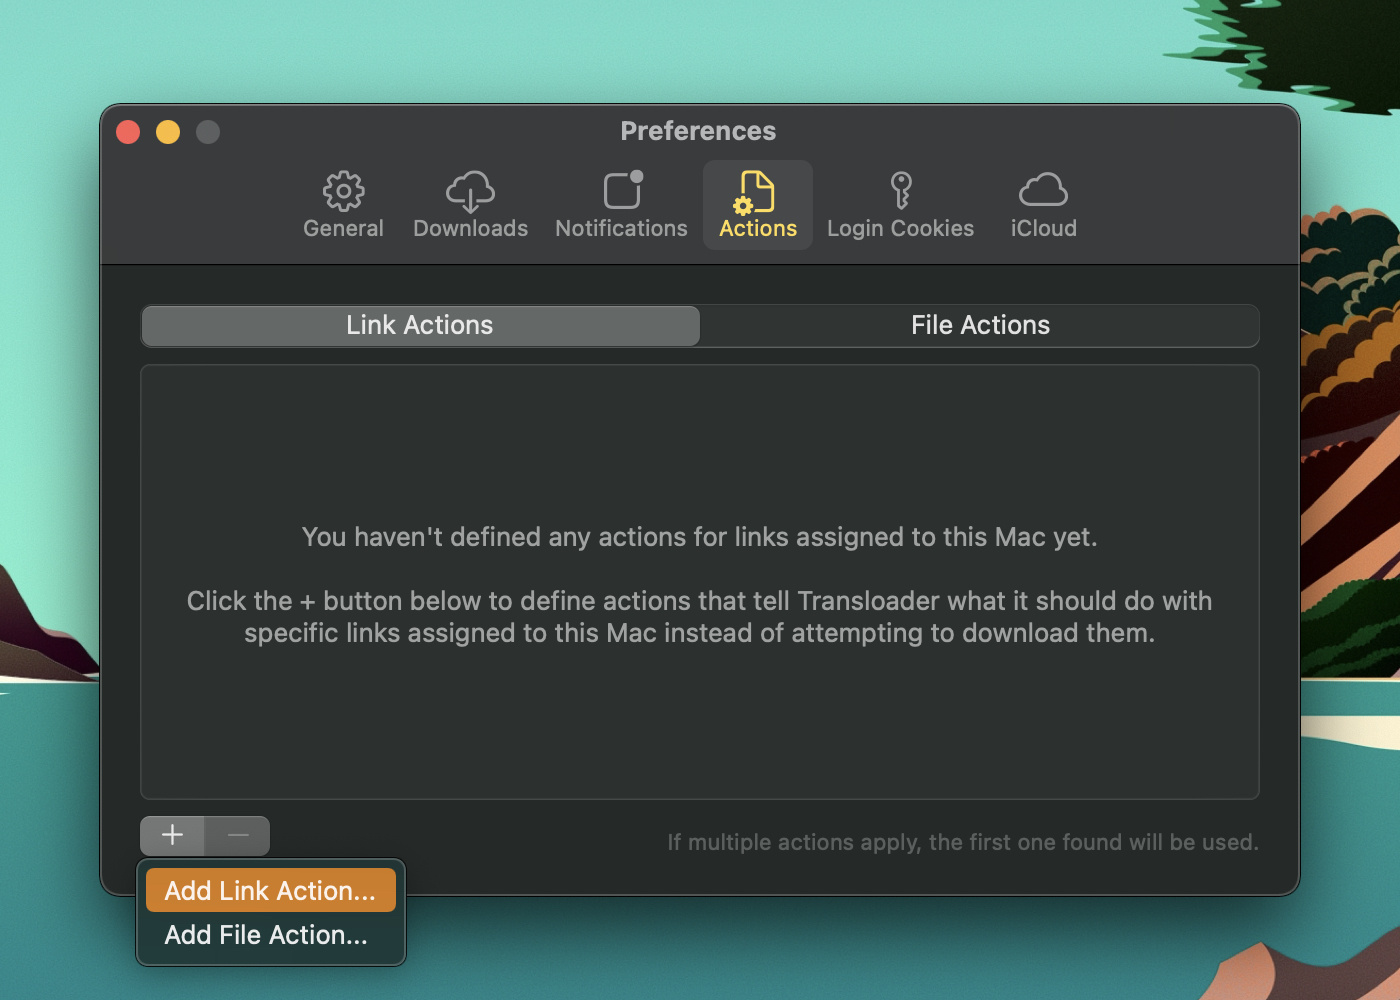
Actions are easily set up. Open Transloader’s Preferences, select Actions, click the + button at the lower left and select Add File Action.
You’ll be asked for a bit of input:

You can make File Actions execute for:
– files downloaded from specific hosts (e.g., “eternalstorms.at”)
For hosts, Transloader uses a partial search, so if you were to specify “youtu”, the File Action would apply to all links containing that string, like “youtube.com”, and “youtu.be”
– files with specific extensions (e.g., “zip”)
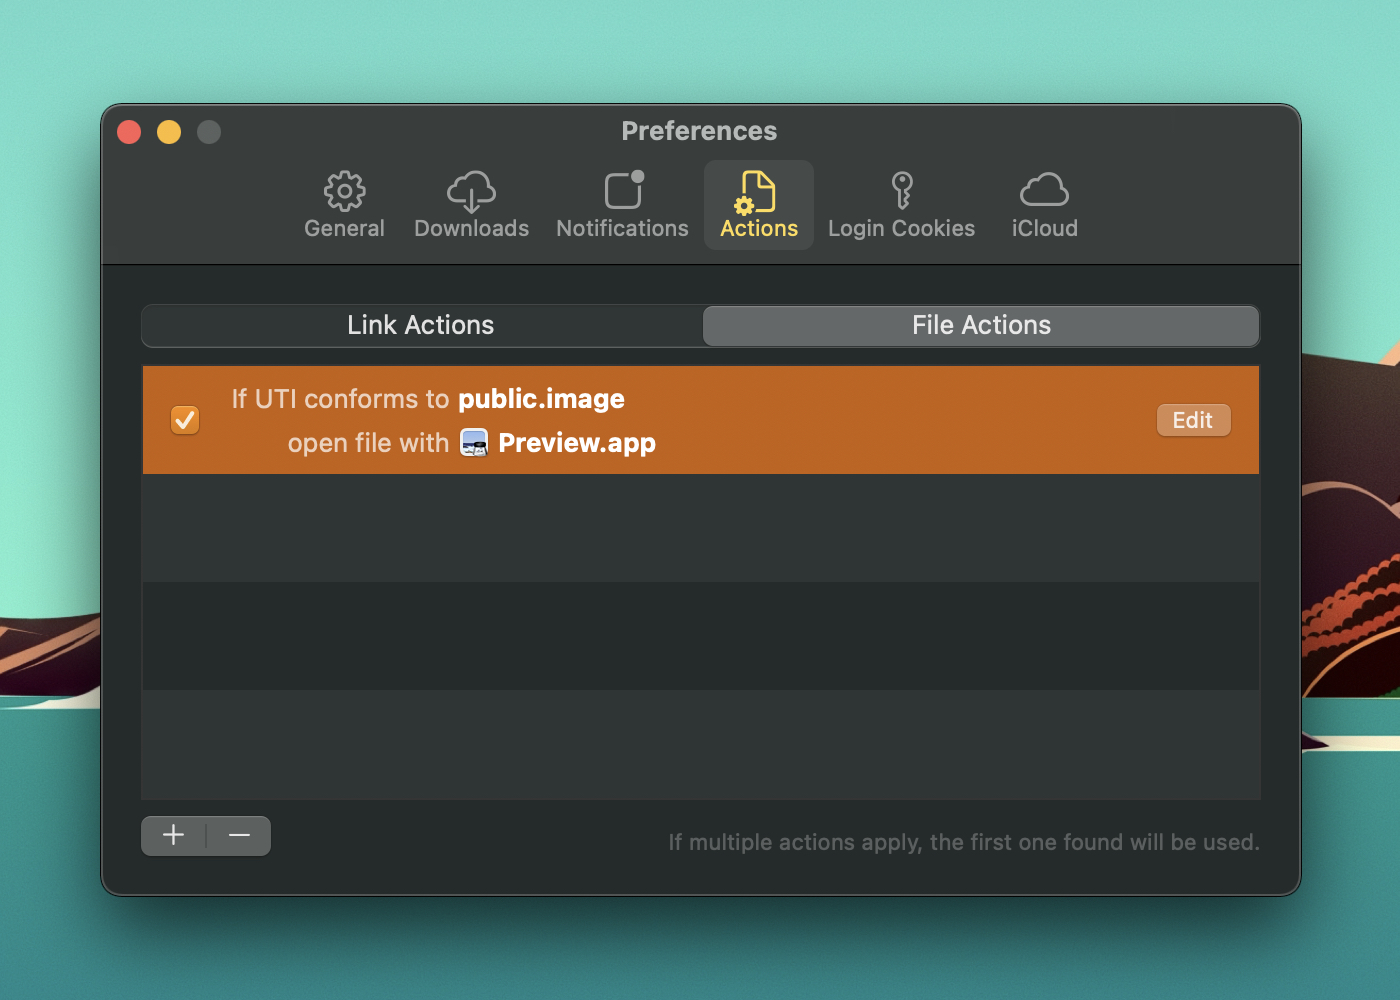
– files conforming to specific UTIs (e.g., “public.image” – which would make the Action execute for all image files)
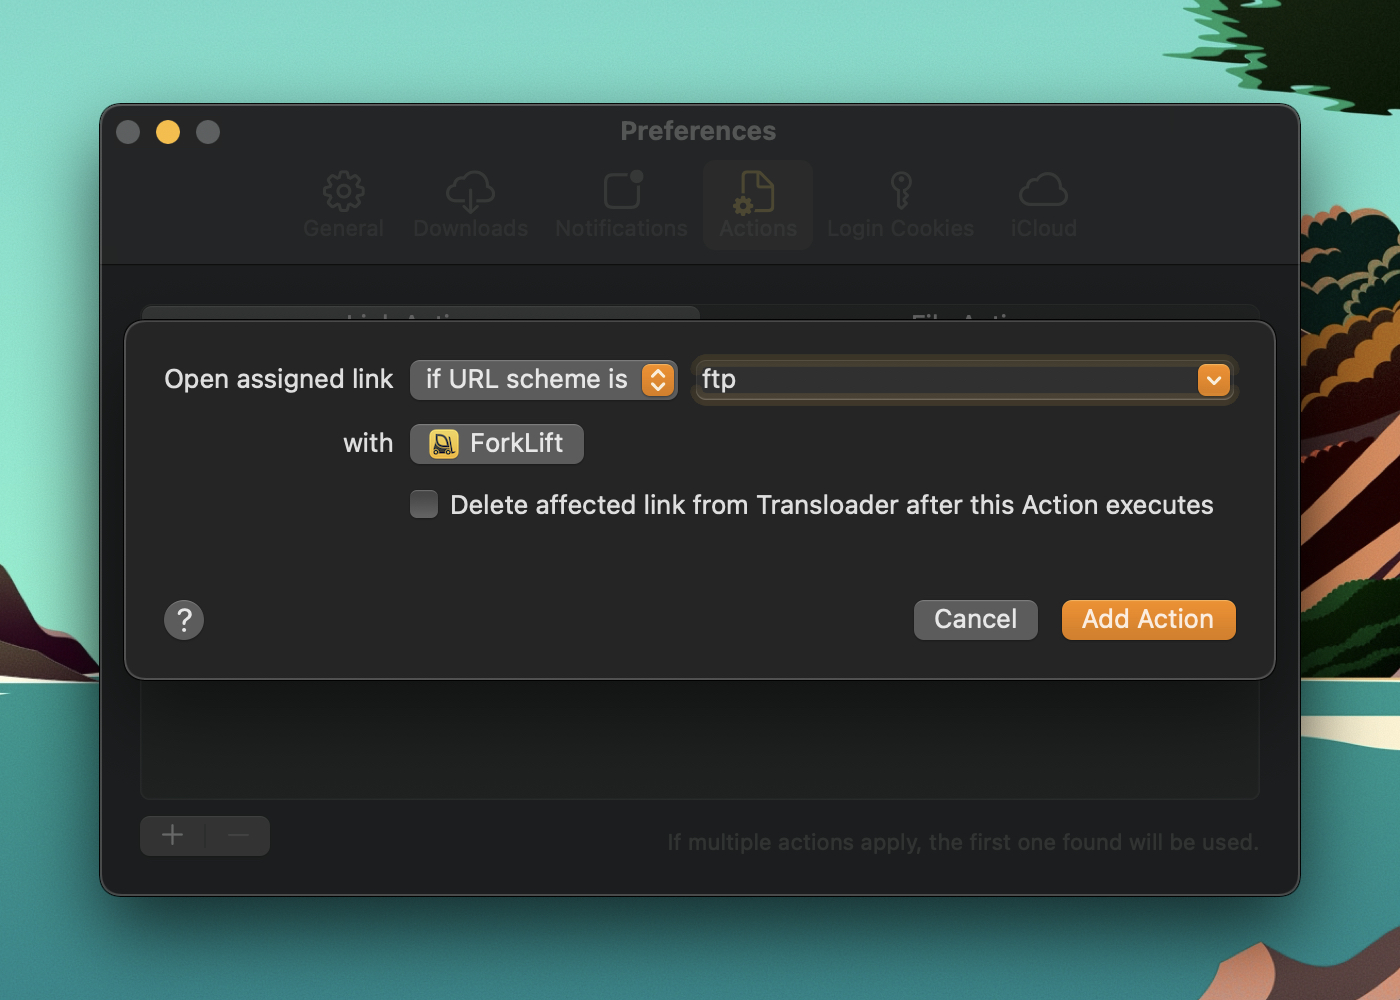
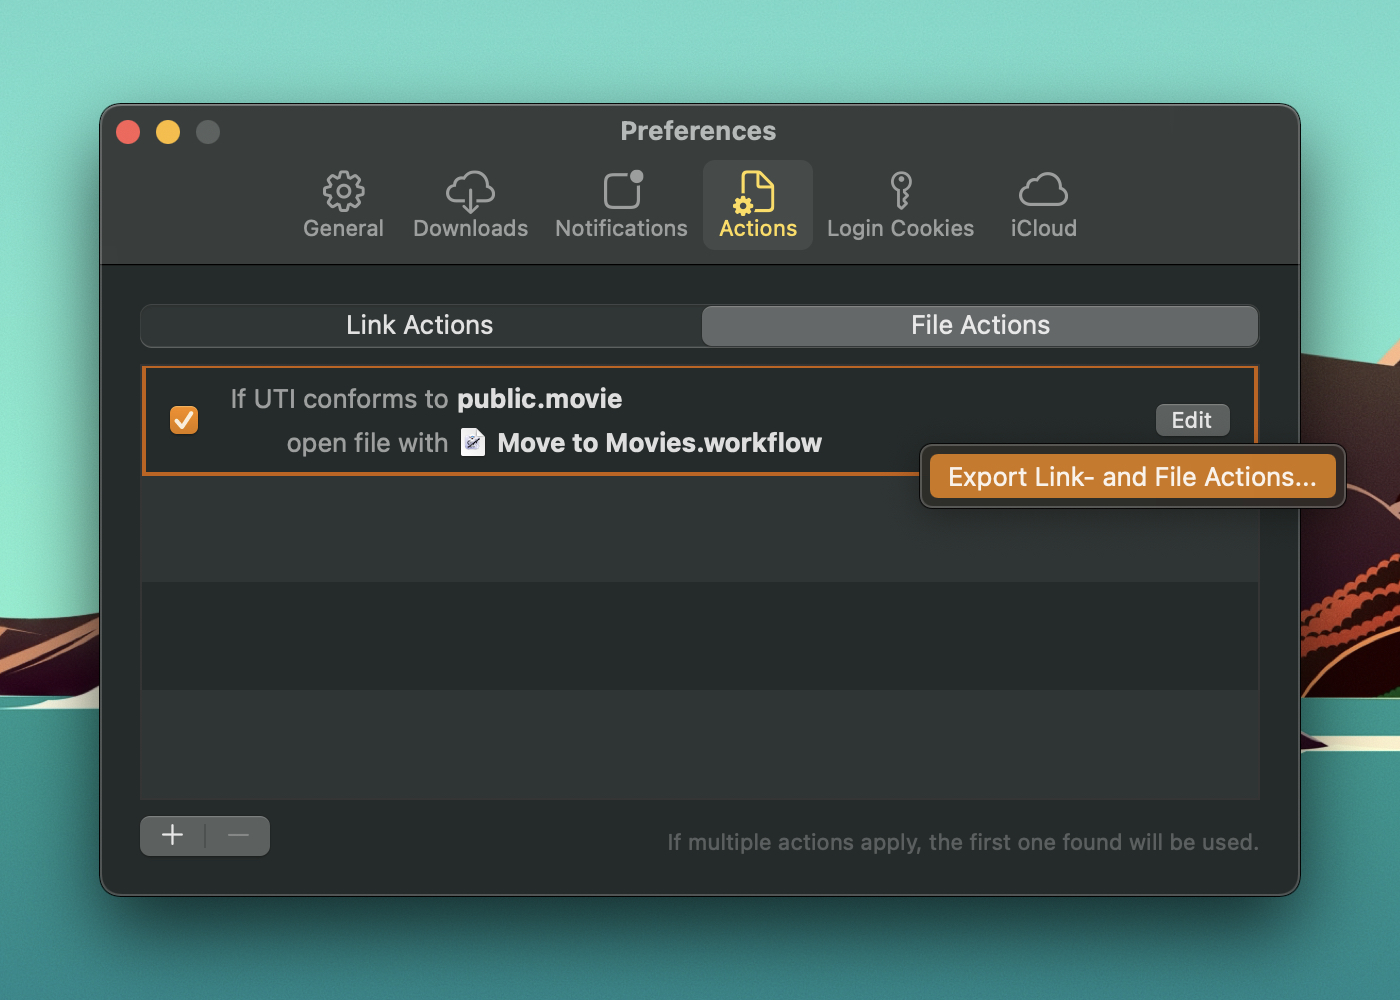
In this example (moving downloaded video files into the ~/Movies folder), select “f it conforms to UTI”, and use “public.movie” as its value. It will make Transloader execute this action for all video files it downloads.
Before we click “Select App or Automator workflow…”, though, we need to create the Automator workflow.
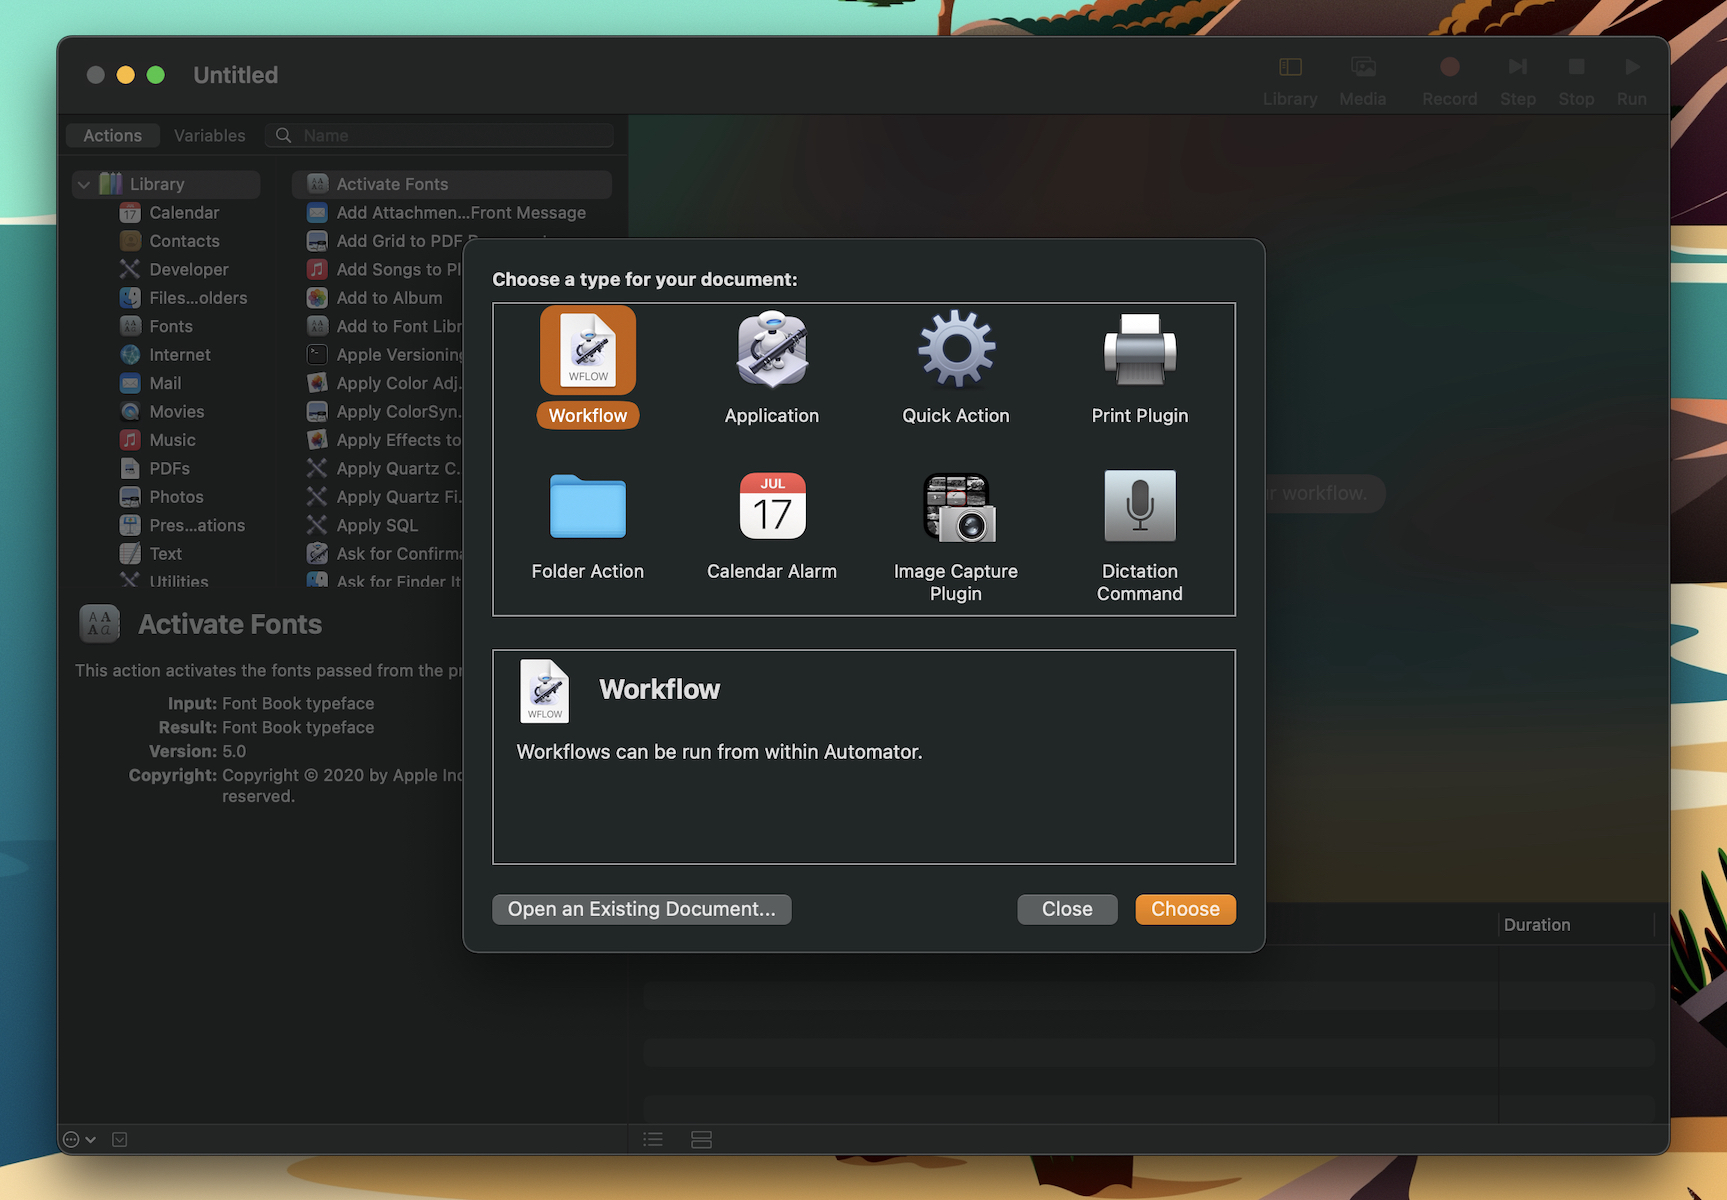
Creating an Automator Workflow

Launch Automator, select New from the File menu and choose Workflow. This will save the file in a format Transloader will be able to run as a custom user script later on.
From the left panel, drag over the “Move Finder Items” action, select the Movies folder in the pop up and save the workflow.
For apps in the macOS sandbox to be able to run user-supplied scripts, they need to be placed in a certain directory, functioning as a form of consent of the user for the app to make use of your script.
Each app has its own folder; for Transloader, it’s /Users/yourname/Library/Application Scripts/at.EternalStorms.Transloader/ .
You can either navigate there manually, or let Transloader help you a bit along the way when you set up a File Action. While it can’t place the script into the folder itself (that would totally circumvent the purpose), it can open that somewhat hidden Application Scripts folder for you:
Back in Transloader, click “Select App or Automator workflow…”, and select “Go to Application Scripts Folder”. Transloader will show a new Open dialog, with the Application Scripts folder pre-selected. Right-click it and select “Show in Finder” to go there directly, so you can place the workflow you’ve just created into it. Afterwards, select the workflow in Transloader’s Open dialog. Save the Action, and you’re done.
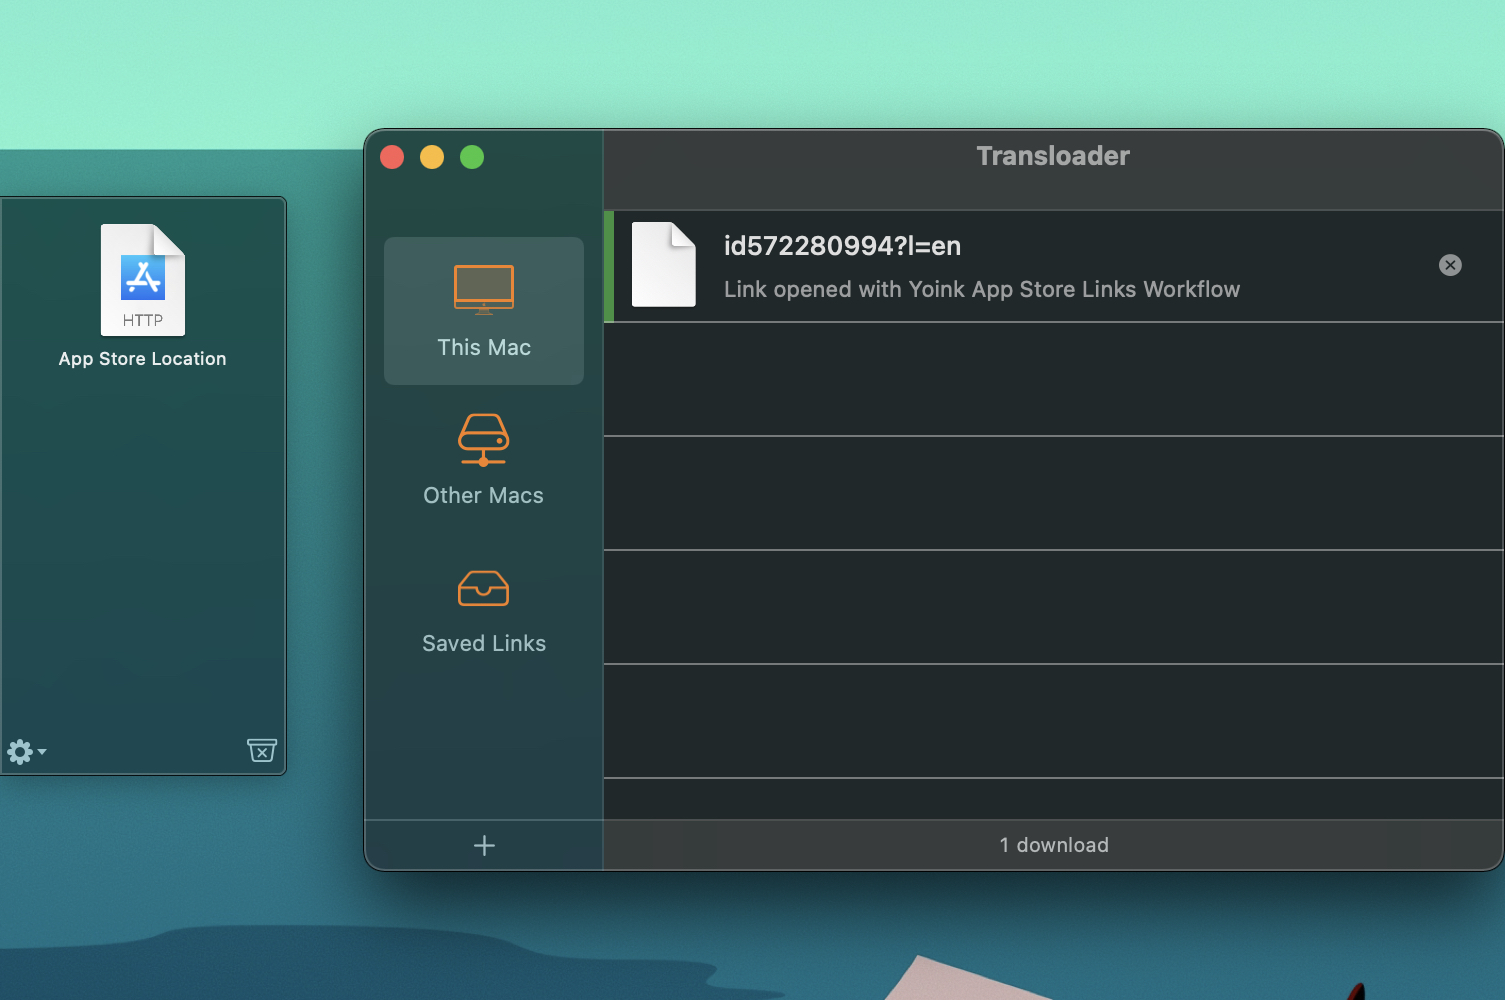
File Action… in Action
Simpler File Actions
While most File Actions will likely involve creating Automator workflows (just because it makes it so easy to work with files), there certainly are simpler cases for using File Actions.
For example, if you’d like to open any image file Transloader downloads with Preview.app, it’s easily done:
Wildcards
If you’d like Transloader to forward all downloaded files to one workflow, you can use an asterisk ‘*’ as the host, file extension or UTI.
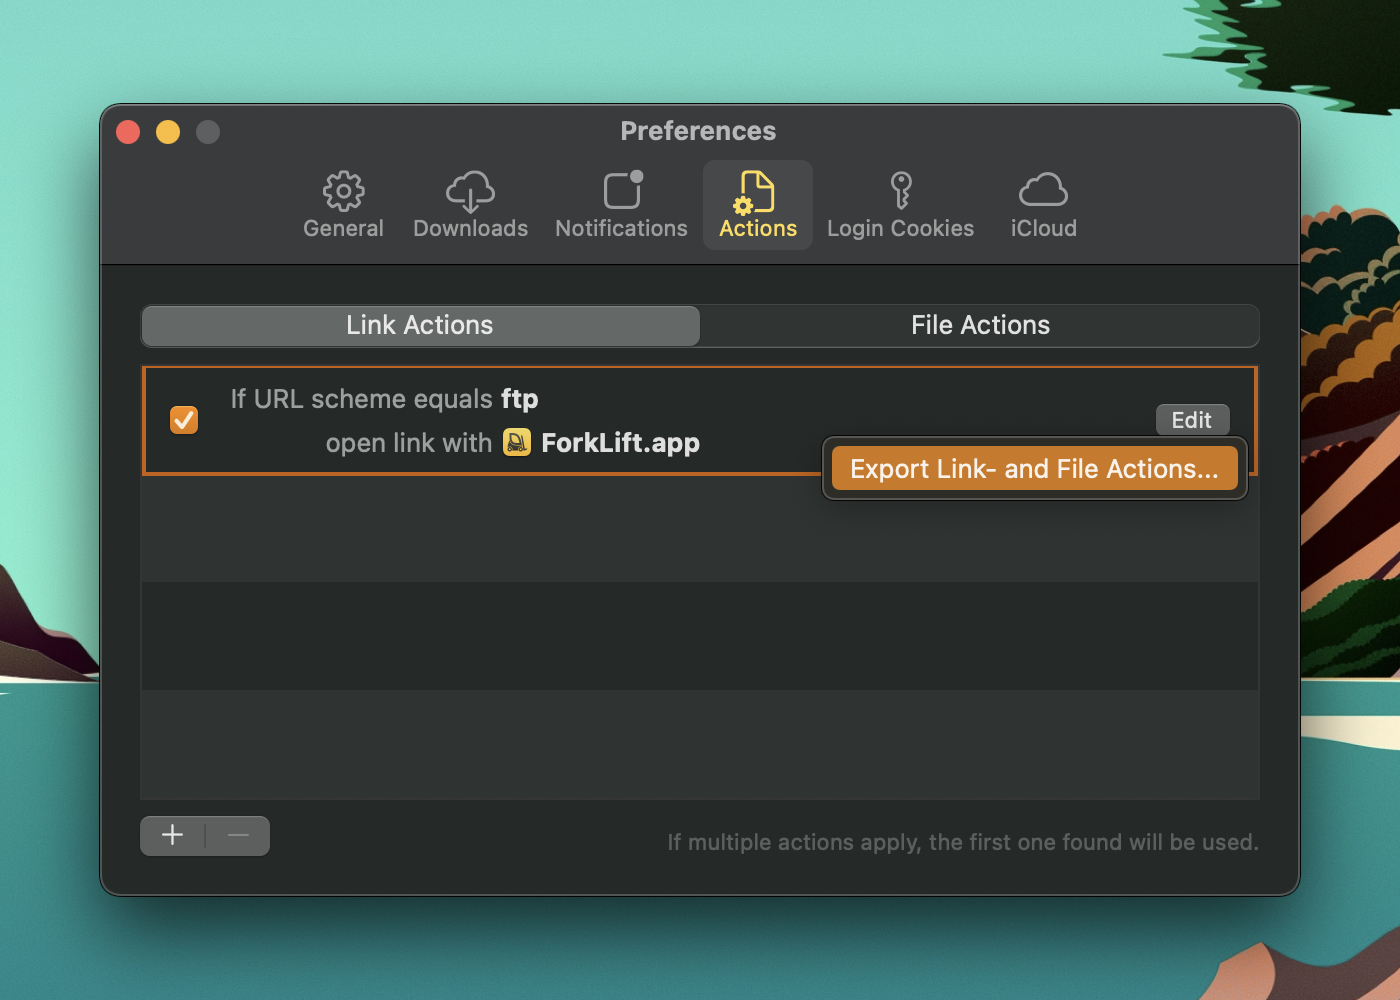
Exporting and Importing Actions
You might notice that File Actions are local to the Mac you set them up on, and won’t sync across your Macs.
There’s a reason for this: Apps or Automator Workflows you select on one Mac might not be available on another, rendering the actions that use them defunct. Now, I want to improve this with a future update, but up until at least v3.1 (work in progress), that’s just how it is.
However, you can manually export and import actions:
For extra convenience, the last 15 values you’ve used in Actions (like “public.movie”, or “zip”) are synced across your Macs, so that when you want to set up similar Actions on different Macs, you won’t have to do everything by hand.
Conclusion
Finally, you know everything there is to know about Transloader 3!
How does it feel? Enlightening? Empowering? Fan-super-freaking-tastic? All of the above? I bet it does.
Thank you for having joined me in this exciting tour through the app. I hope you find it useful, and enjoy it!
Have any feedback or questions? Don’t hesitate to write me!
Links
Transloader Website (with a free, 15-day trial for Mac)
Transloader on the Mac App Store ($4.99 / €5.49 for a limited time)
Transloader on the iOS App Store (free)
Transloader Usage Tips