With Transloader 3 finally publicly available, I’d like to invite you on a tour through the app and its functionality.
In Part I, we were mostly on the sofa, except for the part where we were out grocery shopping.
In this Part II, I’ll show you everything* there is to know about the iOS companion app.
Thank you for joining me again – I’m so happy to see you here!
*not actually everything, but read on
Table of Contents
Part II – Dive Into Transloader’s iOS App
Version 3 is not only a new Mac app, it’s also a new iOS app, and with it comes all sorts of goodness that has become available in iOS since the last time Transloader has seen a significant update (over 6 years ago – whoopsie).
Let’s take a look!
New Icon, New UI
The first thing you’ll probably notice is the new icon. The old one was very long in the tooth for obvious reasons, but Alexander Käßner did an amazing job with the new one – again!
It obviously plays off the Mac version, and I believe it would fit perfectly onto one of your home screens. Preferably the first.
Taking a look inside the app, everything has changed. We have three main views now:
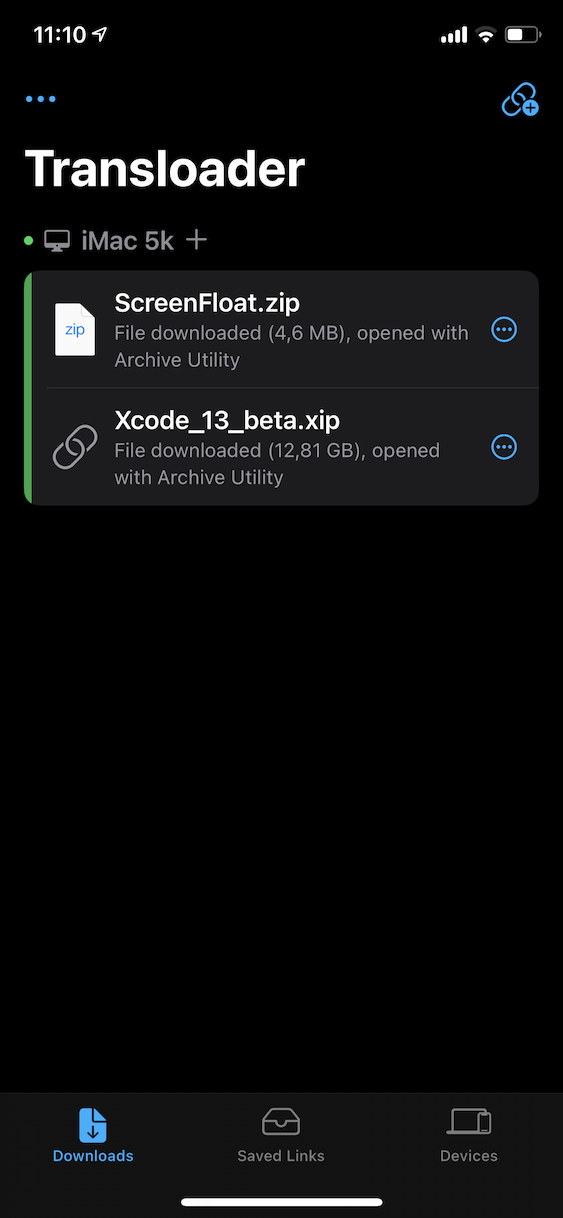
Downloads shows all downloads on your Macs 
Saved Links contains links that you’ve saved for later 
Devices lists all devices you’re using Transloader on
At the top right, you’ll always see the Add Link button. It was my goal to make starting downloads as quick, painless and easy as possible, so there are numerous ways to get downloads started.
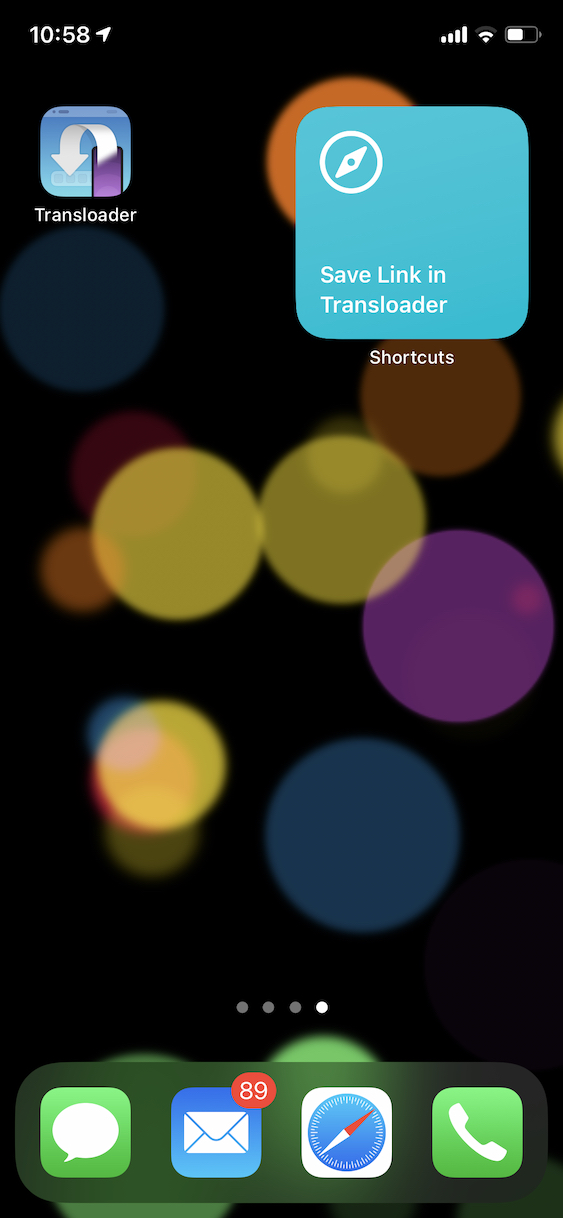
In Part I, we’ve already covered the Share extension, which is available for every link that can be shared on iOS.
But there are more ways than one to skin pet a cat.
When you’re on your home screen, long-press Transloader’s icon to reveal its Quick Actions:
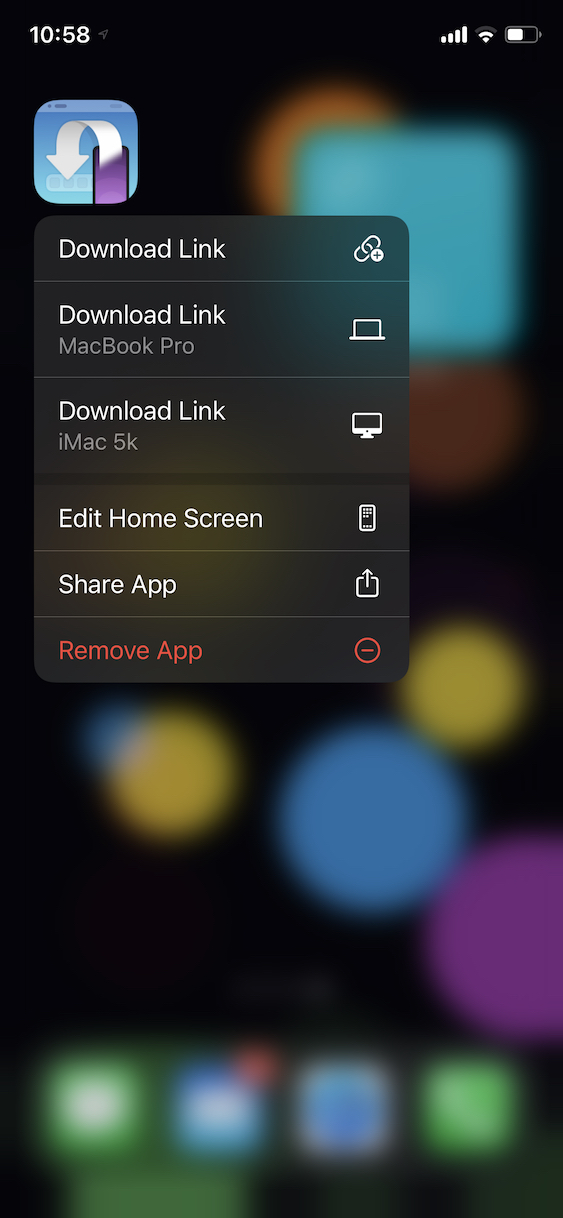
Starting Downloads with Home Screen Quick Actions
Transloader’s Quick Actions consist of a general “Download Link” item, which will open Transloader’s Add Link screen, pre-filled with the link on your clipboard (if you’ve copied one).
It also has one for the last three Macs you downloaded on, which will also open Transloader’s Add Link screen pre-filled with the link on your clipboard, and pre-select the corresponding Mac.
Here it is in action:
Starting Downloads with Gestures
Tap with three fingers into Transloader and you’ll see the quick action bar, which lets you paste any link you’ve copied into Transloader. You can also “three-finger-zoom” to do it a little quicker.
Depending on where you are in the app, this will behave a little differently.
In Downloads and Devices, it’ll open the Download Link sheet, as you can see in the video above.
In Saved Links, it’ll just save the link for later.
Starting Downloads from “Downloads”
You can send links to more than one Mac for download, and you can also assign a link that’s already been sent to a Mac for download to another Mac. In case that sentence makes no sense, here it is as a video – it’s much clearer that way:
Tap the ellipsis button next to a download, and you’ll be able to send the link to other Macs.
Note that the Mac which the link is already assigned to is missing from the potential targets, as it’s unnecessary to be included in this case.
Next to a Mac’s name, there’s a + button. Tap it to assign saved links to it, or to show the Download Link view with that Mac pre-selected.
Starting Downloads with Drag and Drop
Just like under “Downloads”, you can use the ellipsis button to assign links to Macs for download.
You can also use drag and drop, which is, like, way cooler. This also works from Downloads, of course.
When you start to drag a link, note how, at the bottom, Transloader’s Quick Drop Bar™* appears. It’ll let you quickly assign downloads to one, or multiple Macs, simply using drag and drop.
*not actually a trademark
Macs are color coded, so you’ll know if Transloader and the Mac is running (green), the Mac is sleeping (orange), or the Mac is off or Transloader is not running (red).
While you’re dragging, you can also switch to the other screens, if you prefer to assign downloads that way.
Drag and drop works across apps on iPad as well (and with iOS 15, on iPhone too), for when you’re in a hurry to download all the demo versions Eternal Storms Software (it me) has to offer – like I am in the video below ; )
Starting Downloads with Siri Shortcuts
Siri Shortcuts are so cool. And I’ve embraced them with Transloader.
However, this is the topic of the next part of this series, so nothing to see here, moving on…
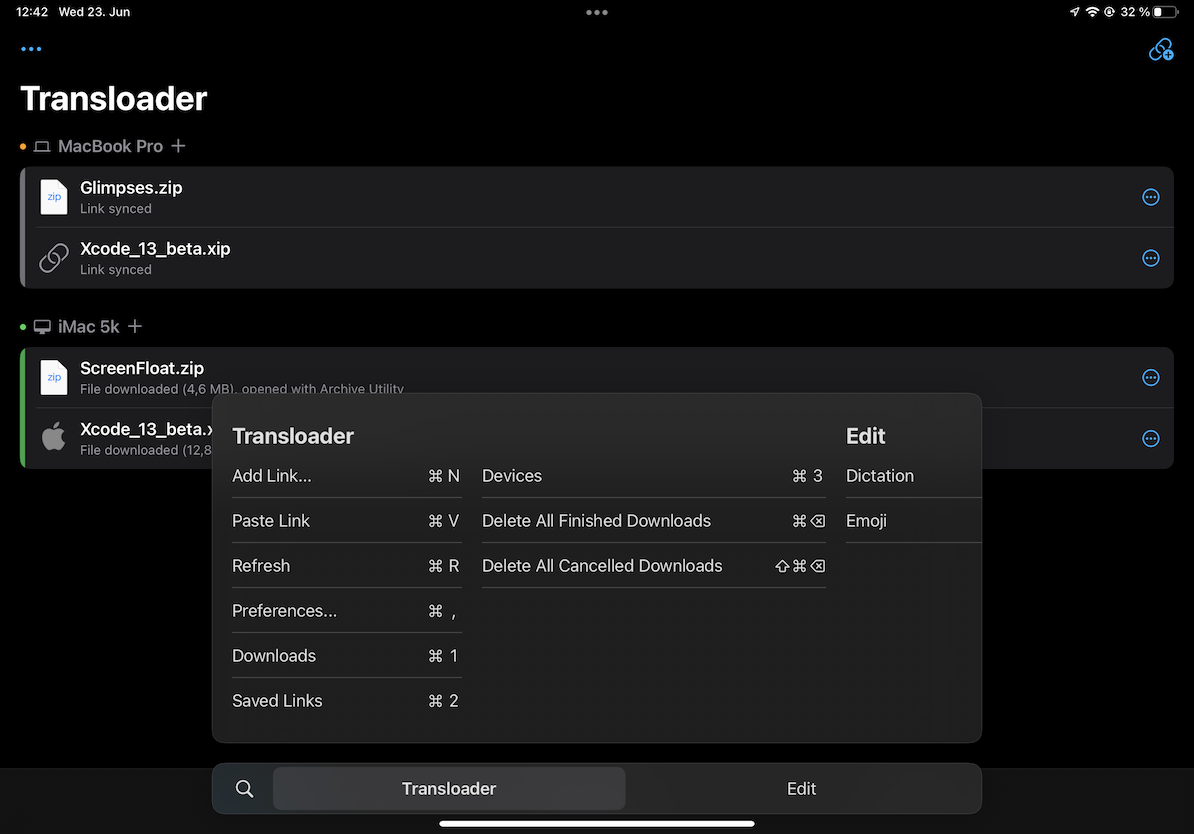
Keyboard Shortcuts
If you’ve got a keyboard connected to your iOS device, Transloader has got you covered.
Summary
Now you know everything there is to know about Transloader for iPhone and iPad.
Well, almost everything, because I want you to keep coming back and read the other parts 😉
Speaking of which, I hope you’ll join me again next time, when we’ll look at Transloader’s Siri Shortcuts on iPhone and iPad, which allow you to create automated downloads.
See you then!
Links
Transloader Website (with a free, 15-day trial for Mac)
Transloader on the Mac App Store ($4.99 / €5.49 for a limited time)
Transloader on the iOS App Store (free)
Transloader Usage Tips
[…] You can find the blog post here. […]
[…] Part II […]
[…] Part II […]
[…] Part II […]
[…] Part II […]
[…] Part II […]
[…] Part II […]