Yoink for Mac Usage Tip #9
The following explains how send screenshots directly to Yoink.
For more Usage Tips like this, click here.
I recently had a very interesting conversation with a customer of Yoink, Bogdan V. He wanted to make Yoink detect screenshots he created so they would show up in Yoink’s window.
Automator to the Rescue
I had the idea of using Automatorto create the screenshot and send it to Yoink. After experimenting around a little bit, I sent Bogdan a very rudimentary workflow (that could, if saved as an OS X Service, also be launched with a keyboard shortcut) and he immediately turned it into something awesome.
The Automator Workflow
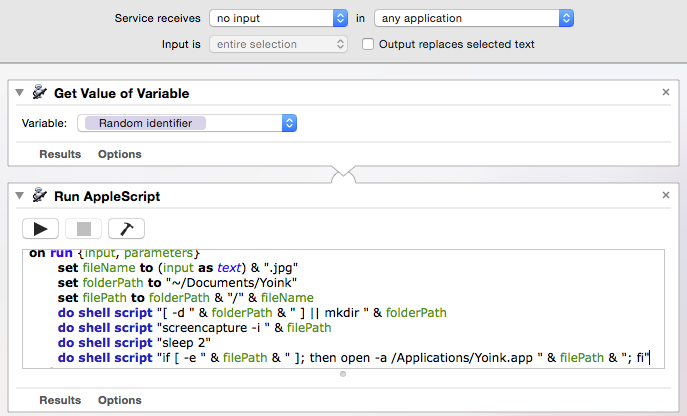
This is the script of the workflow Bogdan came up with:
You can download the Automator Workflow here (~59KB) (tested on OS X Yosemite 10.10.1).
Setting up the Service
- Download the Automator Workflow
- Unzip it and double-click on the resulting screencapture.workflow file
- In the dialog, select Install (except if you’d like to edit the script, then click on Open with Automator)
- It will be installed in your ~/Library/Services/ folder:

- To confirm installation, in Finder, click on Finder in your menu bar, select Services and find Capture Screenshot to Yoink in the list:

- In your ~/Documents/ folder, create a folder titled Yoink (where captured screenshots will reside)
You have now successfully installed the Service to capture screenshots to Yoink. What you can do now is create a keyboard shortcut for it so you can more easily access this
Create a Keyboard Shortcut
- Launch System Preferences
- Click on Keyboard -> Shortcuts -> Services
- Find Capture Screenshot to Yoink in the list, under General:

- Click on add shortcut and enter the shortcut you’d like to use to activate the service.
That’s It
Update (October 14, 2015)
- To make the Automator Script capture the entire display instead of just a selected portion, replace the line ‘ do shell script “screencapture -i ” & filePath ‘ with ‘do shell script “screencapture “ & filePath ‘ (removing the -i option to cause the selection)
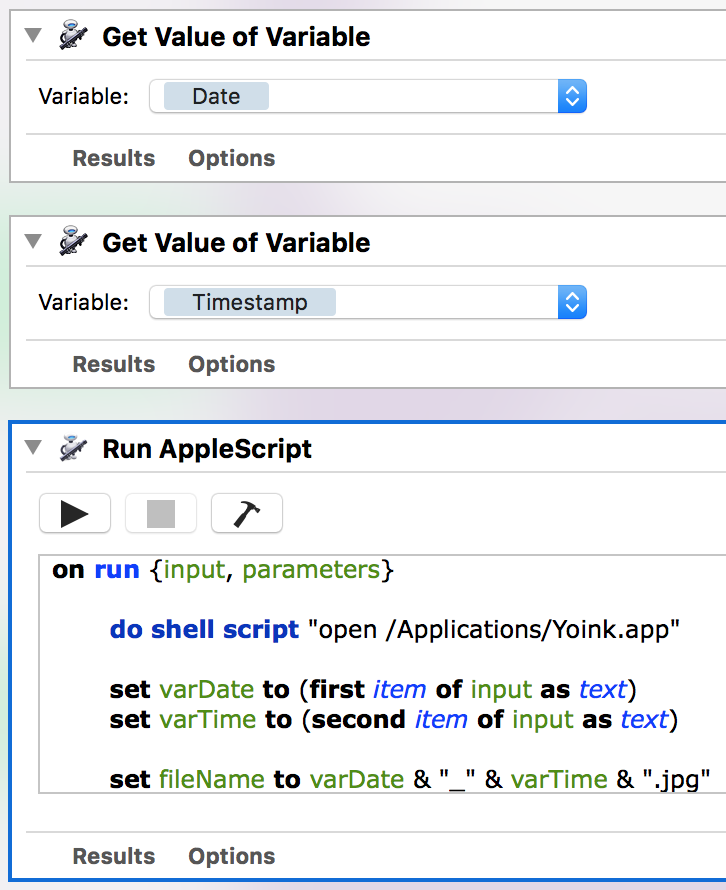
- Jeremy was so kind to provide an updated Automator Workflow that appended a date and timestamp to the screenshot’s filename; add two actions before the actual script (“Get Value of Variable”) with the variables Date and Timestamp and import them into the script – as in this screenshot:

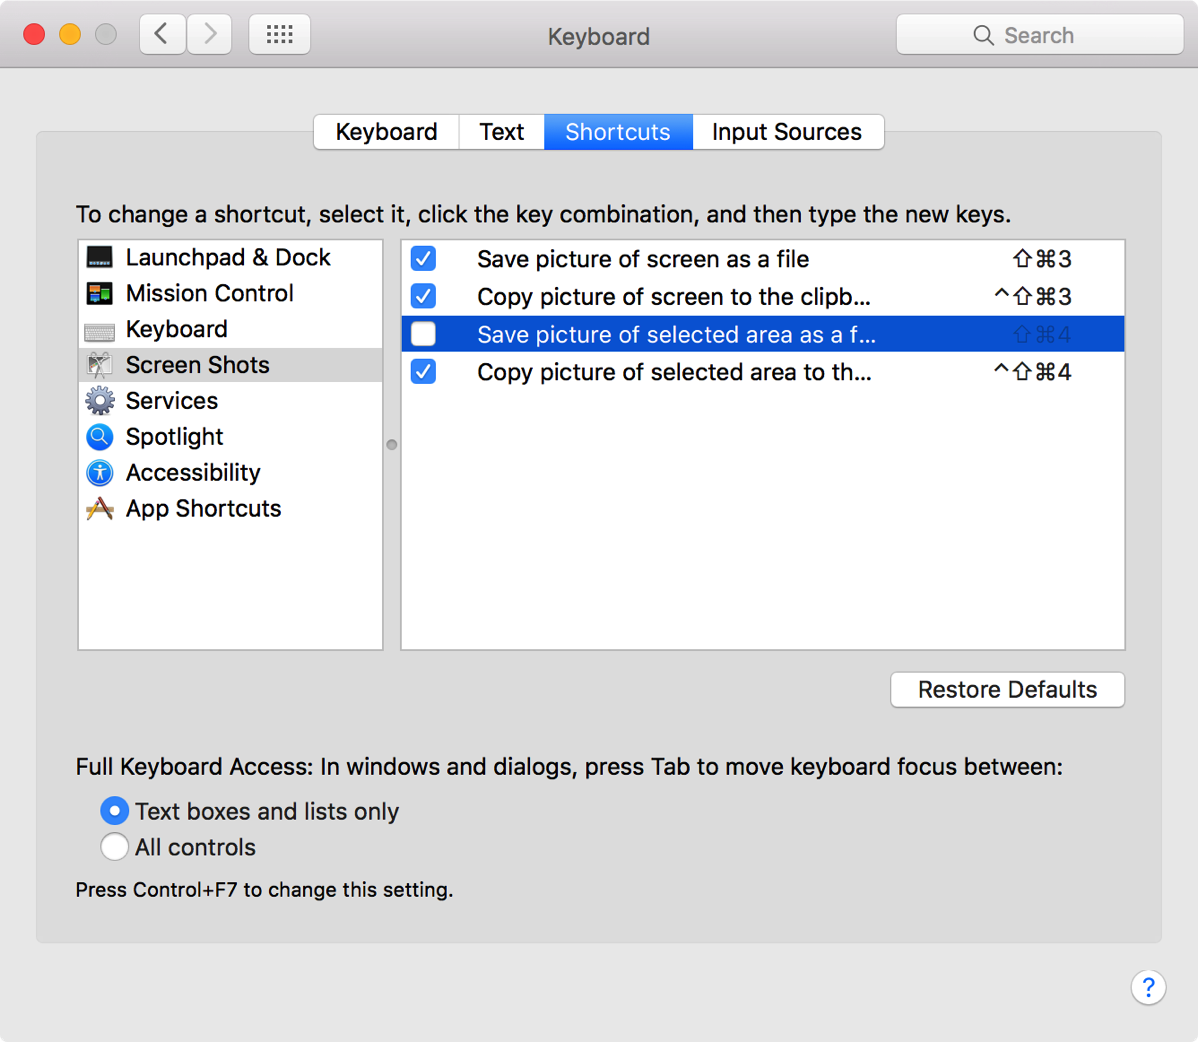
- To use this Automator Workflow with the standard keyboard shortcut command-shift-4, you first have to deactivate the standard action in System Preferences -> Keyboard -> Shortcuts -> Screen Shots, or assign it a different keyboard shortcut:

A ‘thank you’ goes to Jeremy and Pietro for the updated workflows.

Comments are closed.