
Today, Glimpses v2.2, an app that creates Still Motion Videos with just a few clicks, is available for download from the Mac App Store.
It’s a free upgrade for everyone who purchased it before.
A free, 15-day trial is available for download here, even if you’ve tried it before.
What Is Glimpses?
When you want to show your awesome photos from your recent vacation but there are just too many, you can either sort through them and heavy-heartedly decide which ones to toss aside, or you show them all – with a Still Motion Video.
Still Motion Videos show photos in very rapid succession, usually for the fraction of a second. Mix that with a soundtrack, and you can make your video action-packed and powerful, or mellow and soothing. Or even both.
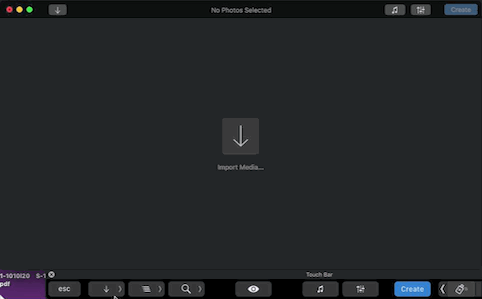
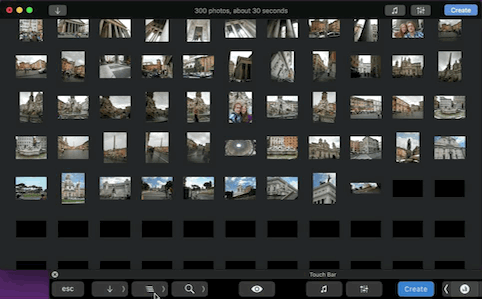
Glimpses lets you create such high-quality videos with just a few clicks. Import your photos (from your Photos.app library, a hard drive, Flickr or Instagram), add one or more soundtracks and you’re set – Glimpses figures out the rest.
The app creates your video in a smart way:
- The video’s resolution (ranging from 240p to 4K) will be calculated by looking at the smallest photos you supply
- Its duration is based on the amount of photos you imported, and the duration of the soundtracks you supplied
- Soundtracks that turn out too long will automatically fade out smoothly at the end of your video, whereas short soundtracks can be looped
- Pillar- and letterboxes can be eliminated, if the photo’s resolution allows for it
- Due to built-in facial recognition, photos are positioned in a way that faces aren’t outside of the video’s frame
However, control is always at the user’s fingertips. For example, soundtracks can be edited so only your favorite part of it is used, in an easy-to-use, yet powerful way:
.png")
Additionally, every other aspect of your video can be manually set up:
.png")
What’s New in v2.2?
The update adds support for the new MacBook Pro’s Touch Bar.
This enables you, without ever leaving Touch Bar, to quickly:
– import photos from flickr or Instagram
– filter, or sort photos in your project
– control QuickLook
![]()
– and adjust your project’s audio- and video settings
P.S.: I’m having issues with these 3 GIFs looping. Please reload and scroll down to them if you’d like to see them. My apologies.
Additionally, the update improves its QuickLook Plugin so Glimpses project previews are generated a little quicker and more efficiently.
And lastly, I’ve improved the connection to Instagram, so that should work more reliably.
Pricing and Availability
Glimpses 2.2 is available for purchase on the Mac App Store for the price of $19.99 / £14.99 / €19.99. It is a free update for existing customers of the app.
A free, 15-day trial is available on the website, even if you’ve already tried the app.
Glimpses runs on Macs with OS X Yosemite or newer.
If you’re interested in writing about Glimpses, you can download its press kit here, which contains screenshots, a short sample video and further information. A limited amount of promotional codes are available to members of the press at press(at)eternalstorms(dot)at.
Links
Glimpses Website
http://eternalstorms.at/glimpses
Glimpses on the Mac App Store
https://itunes.apple.com/app/glimpses/id637565340?mt=12
Glimpses 15-Day Trial Direct Download
http://eternalstorms.at/glimpses/Glimpses.zip
Glimpses Press Kit
http://eternalstorms.at/press/Glimpses-2-Press-Kit.zip
Glimpses Sample Video on YouTube
https://youtu.be/NCa4Fg6uLoI
I’m looking forward to hearing from you and to see what you think about Glimpses 2.2.
If you like the app, please consider leaving a little review on the Mac App Store, it would help me out a lot! Should you have any feedback or questions, please be sure to get in touch, I’d love to hear from you!
Thank you.

– – – Do you enjoy my blog and/or my software? – – –
Stay up-to-date on all things Eternal Storms Software and join my low-frequency newsletter (one mail a month at most). Thank you 🙂

.png")


.png")