I’ve been wanting to make my website a bit more “alive” for a while, and I finally had the time to do something about it.
App’s Prices
For the longest time, I didn’t show the prices for my apps on my website (crazy, I know), simply because I didn’t feel like going into the HTML source, updating the static price, and re-uploading the page every time I had a sale.
Now, I have a PHP script that takes care of it for me. It can load prices for different localities using the App Store API, or from Paddle. I currently just get them from Apple right now, because my apps’ prices are the same on the App Stores and my website. The results are cached for 6 hours so I don’t have to query the API for every page load. For time-sensitive sales, I can easily discard the cache and have the page (and thus, prices) reload for everyone instantly.
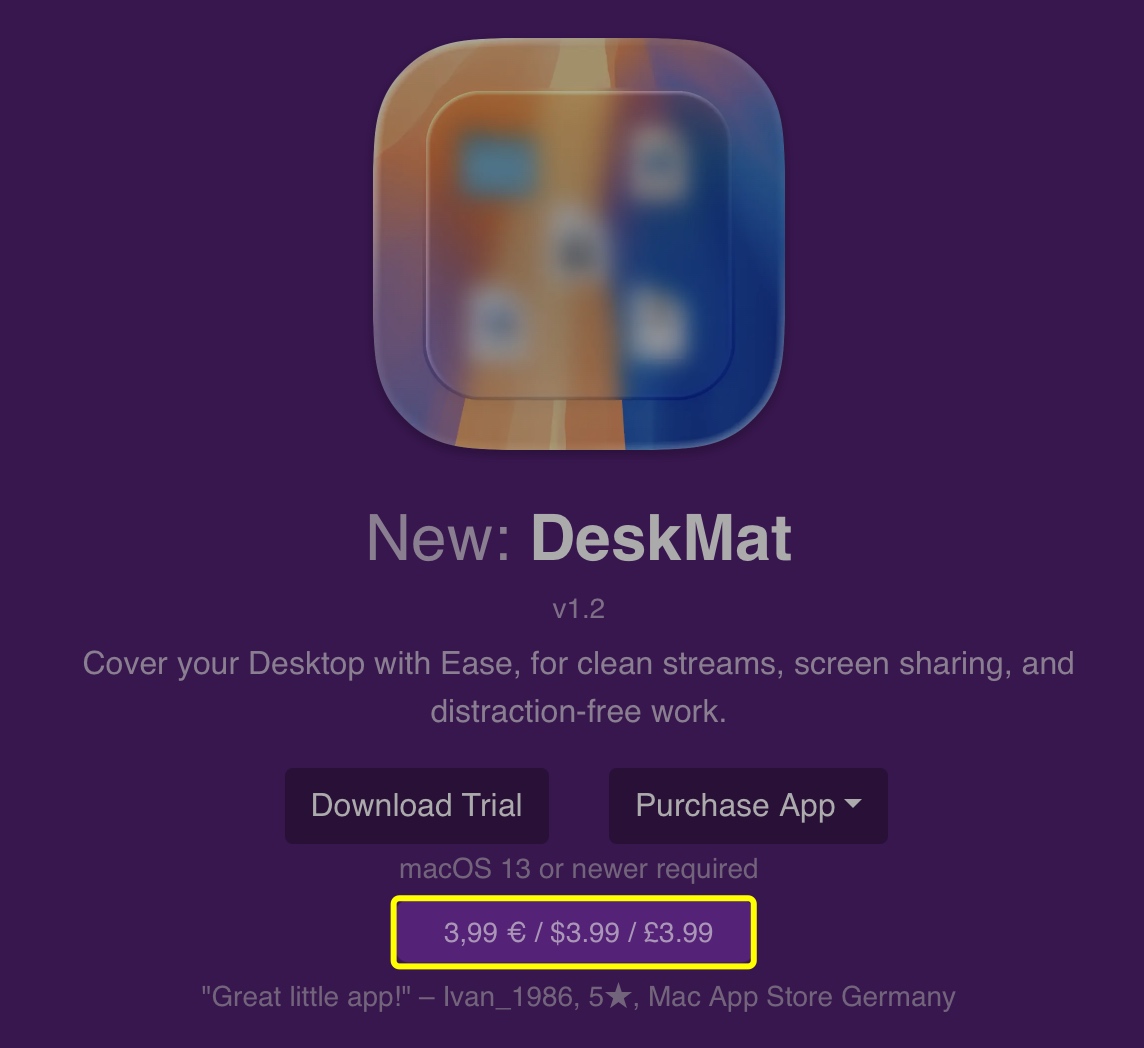
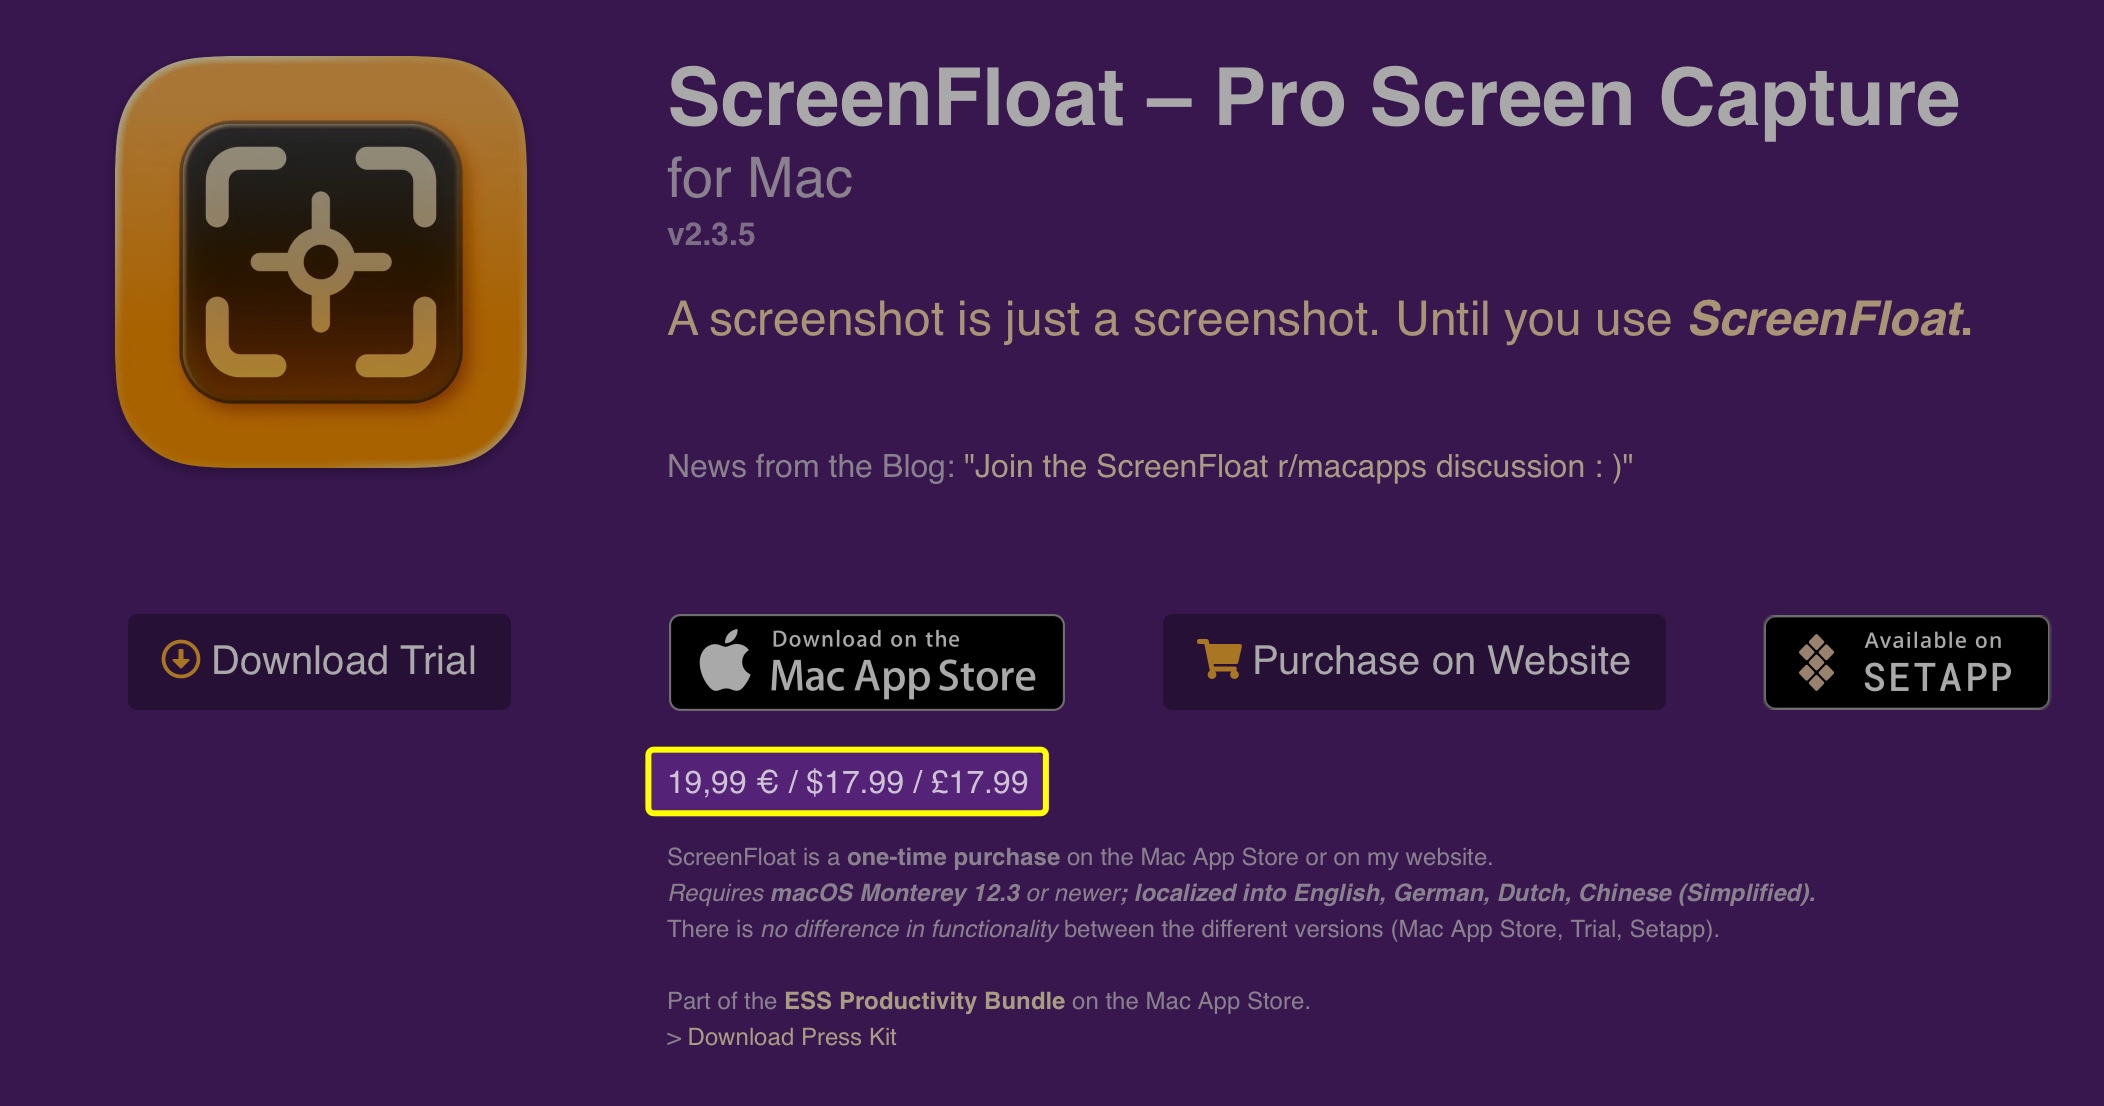
Prices are now shown on the main website (see above), and on each app’s webpage:
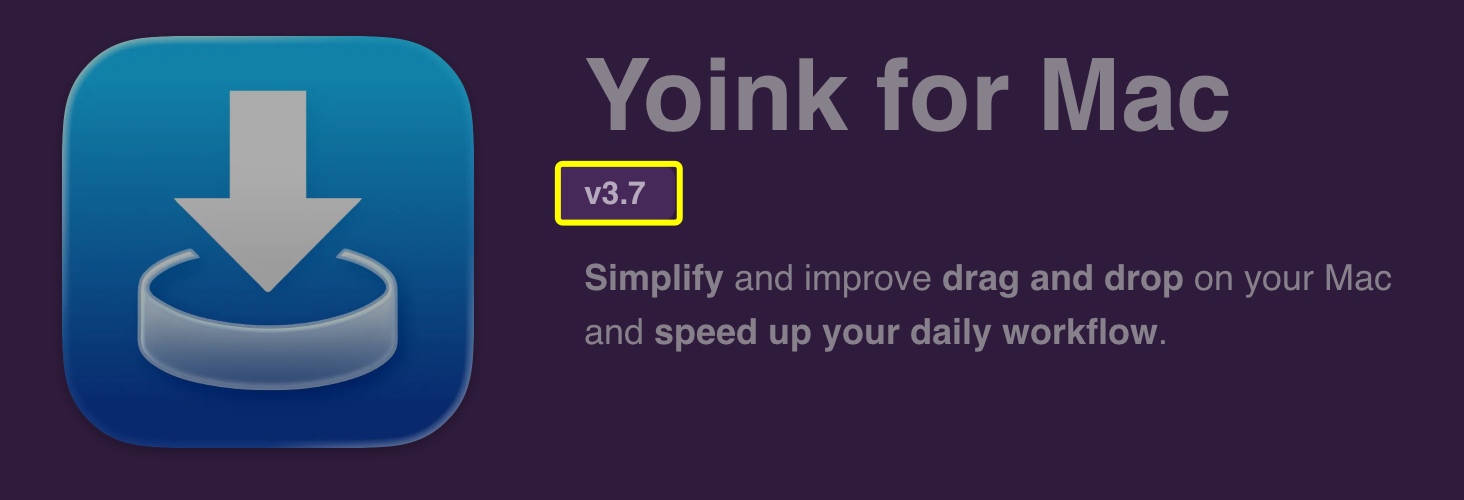
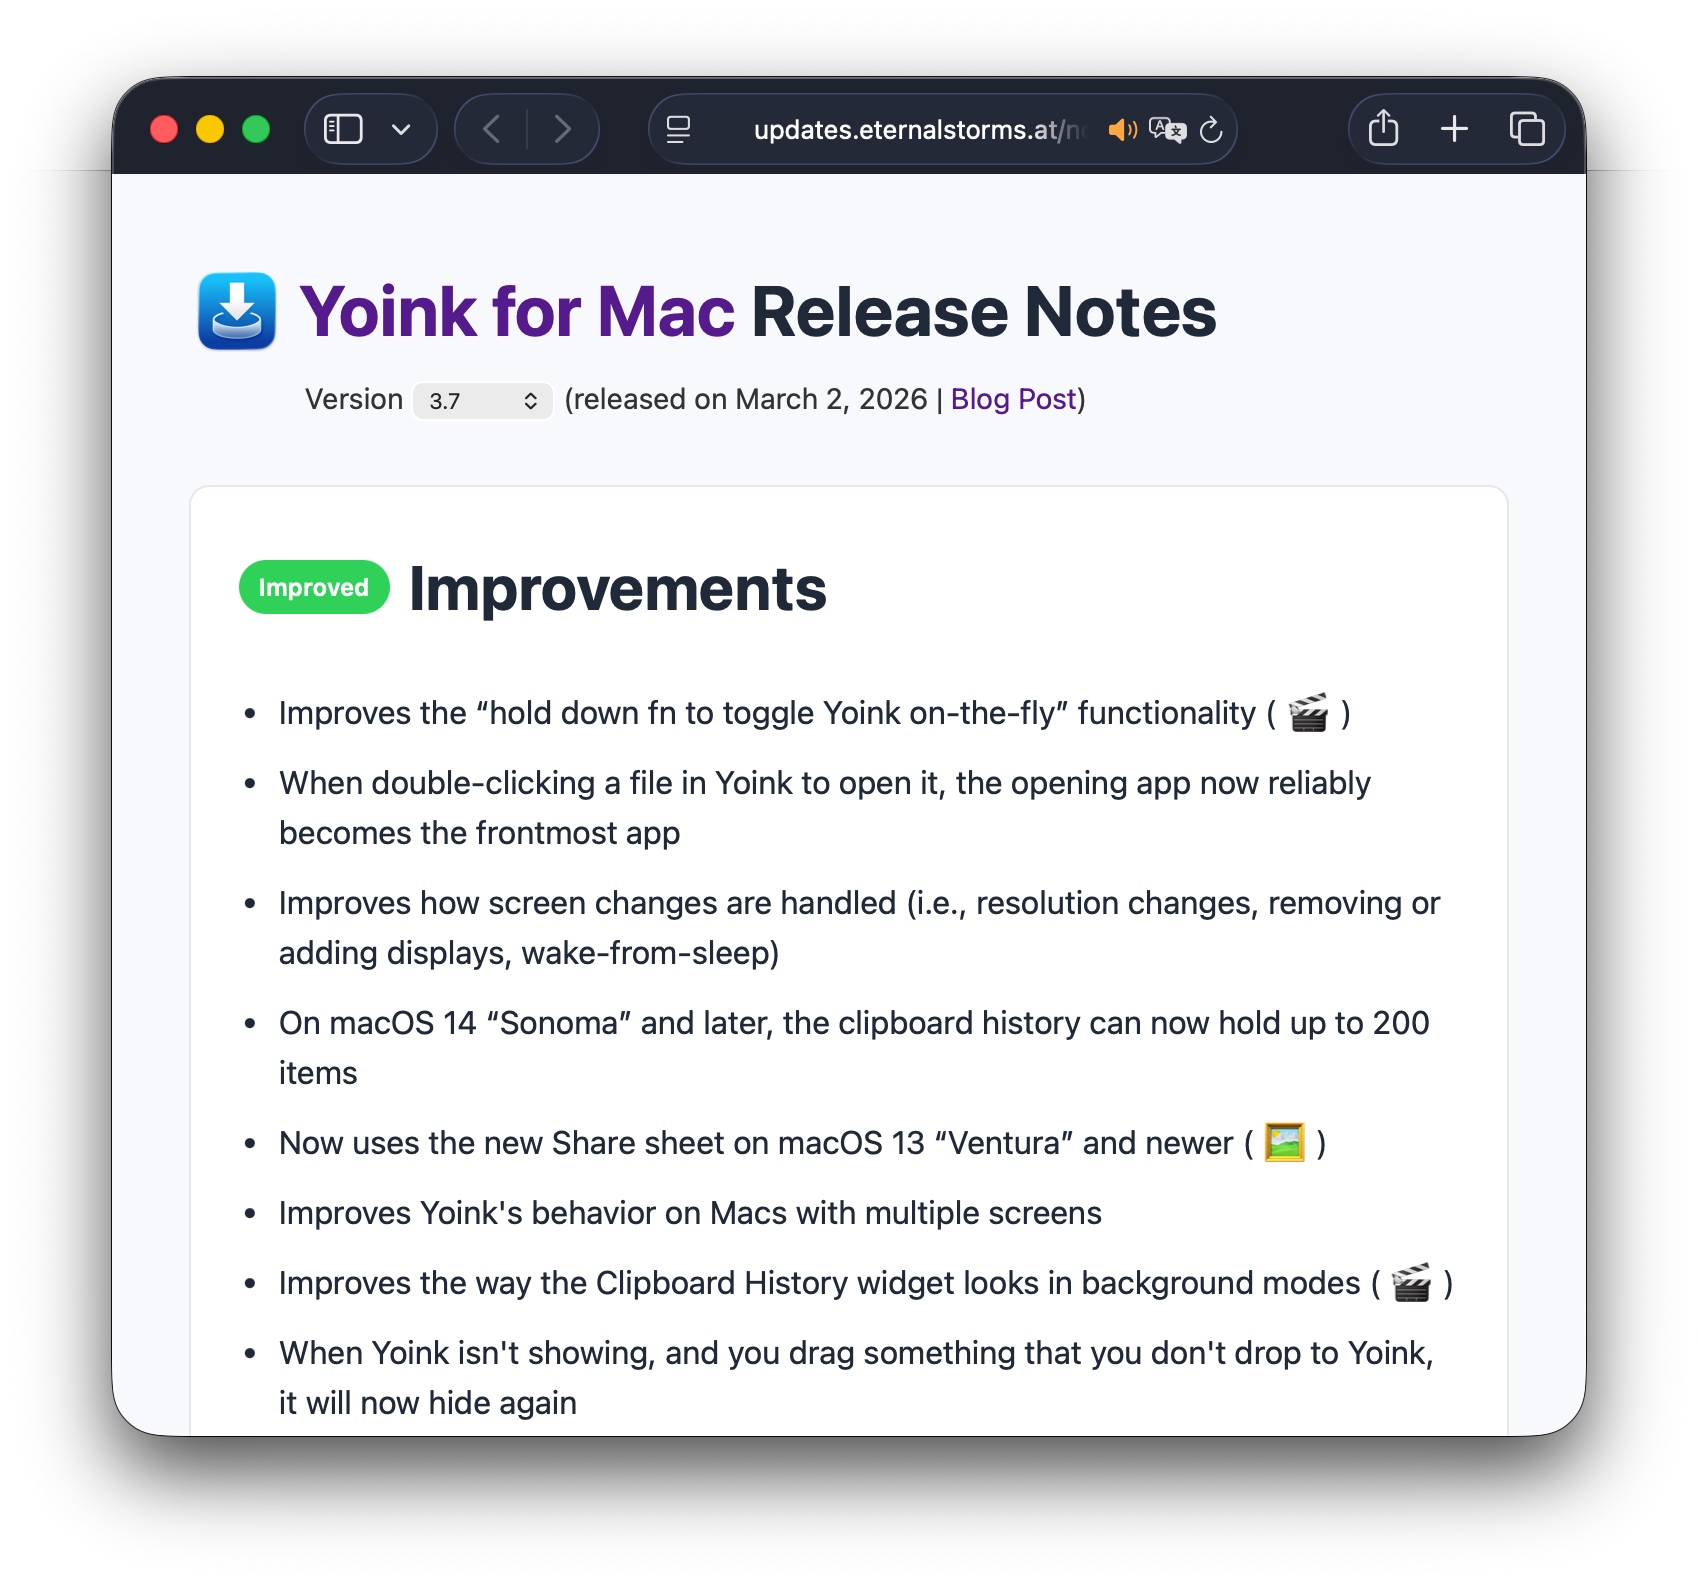
It allows me to get all sorts of information about any release, the obvious ones being version, release date and download file size. This powers my in-app update mechanisms, the in-app release notes you can see above, and now the “current version” of apps on my website (see below), along with a web version of my apps’ release notes.
“Current Version” indicator on Yoink for Mac‘s webpage. Come to think of it, perhaps I should also include the release date…
A click onto the version brings you to the web release notes. I tried to replicate the in-app release notes as closely as possible, with image- and video previews of features, etc. You can switch between English and German, rich- and plain text, and browse through the release history.
The web-version of Yoink for Mac’s v3.7 release notes
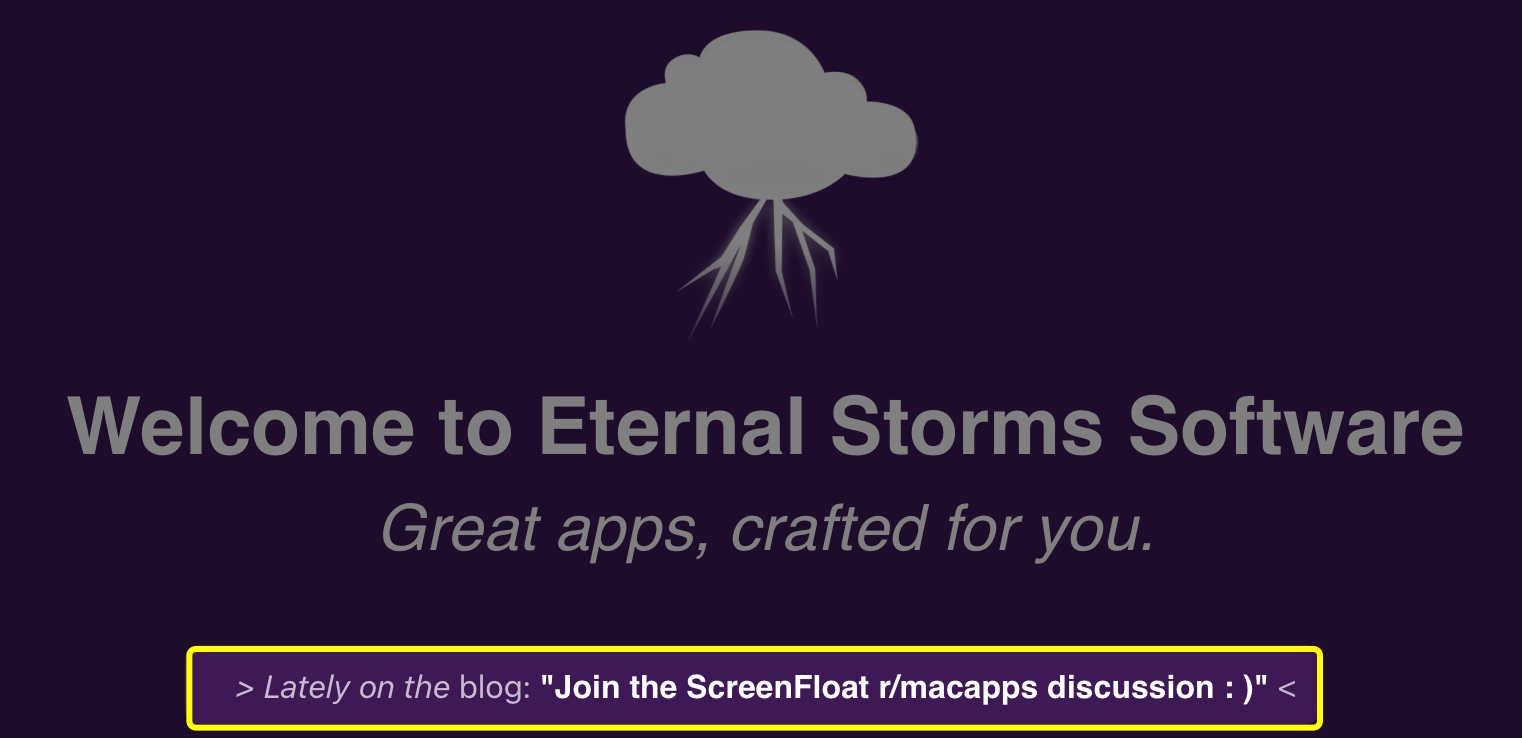
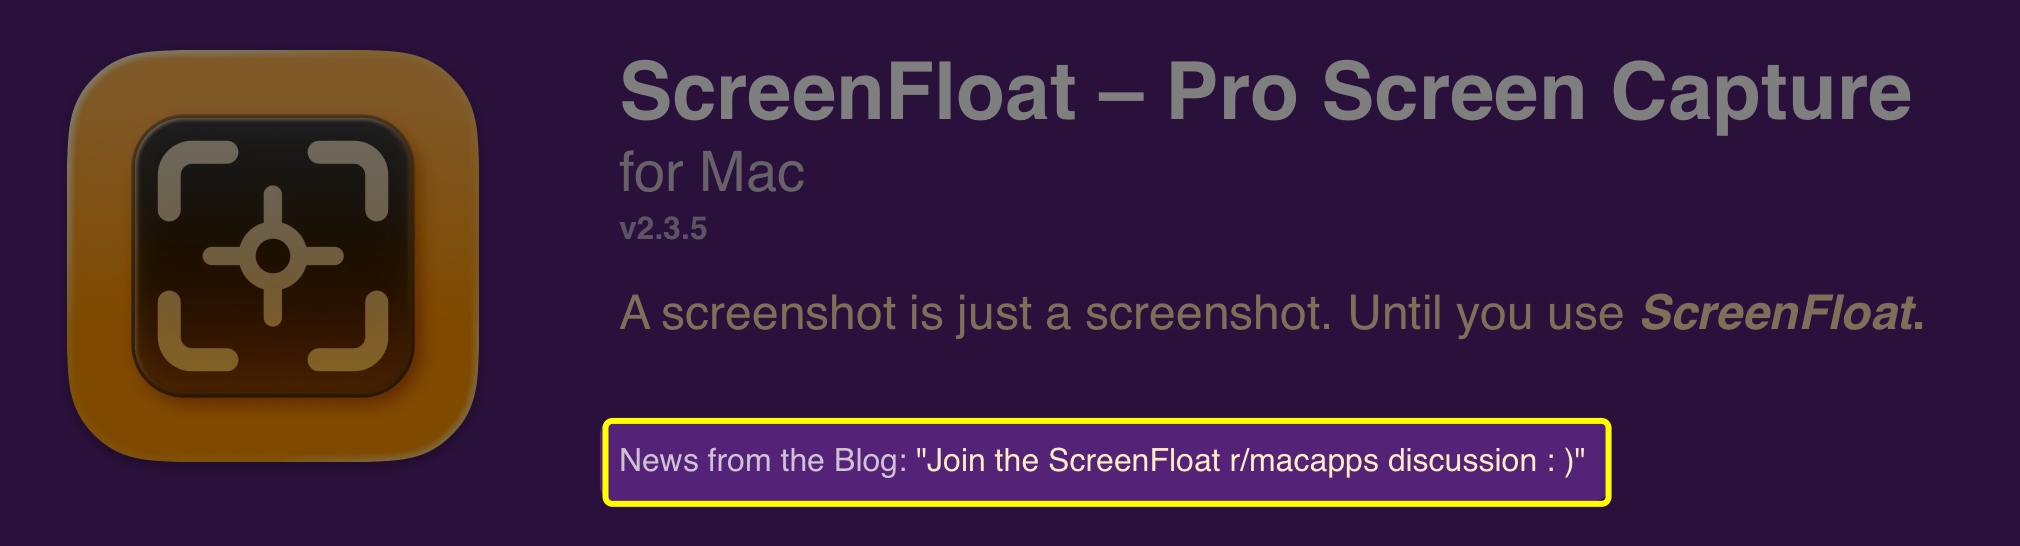
Highlighted Blog Posts
Though I’ve always linked to my blog from my website, I thought it would be neat to feature the newest blog post on the main page and the latest app-related post on the app’s webpage. I hope this is more enticing to click than a simple “Blog” link.
Blog Post Header on the main page
App-specific blog post on the app pages
This uses the basic WordPress API. It looks for posts with specific tags or within specific categories, published within the last 2 months. If there aren’t any blog posts with that criteria, nothing is shown. I thought that better than showing old, outdated posts. I don’t want to give off “deserted” vibes.
Friends Page
I have a new Friends page where I highlight a few long-time friends of Eternal Storms Software. I still need to find a way to include that into the main website better.
Auto-Applying Discount Codes on my Web Store
Probably a no-brainer for anyone else, but I coded my web store myself, and only for Black Friday 2025 had the idea of auto-applying discount codes. That way, everyone gets the benefit of a discount when a sale’s going on, even if they don’t know about it. The way it works is, I have a specific naming scheme for site-wide and app-specific discount codes, and the web store looks for them and applies them automatically.
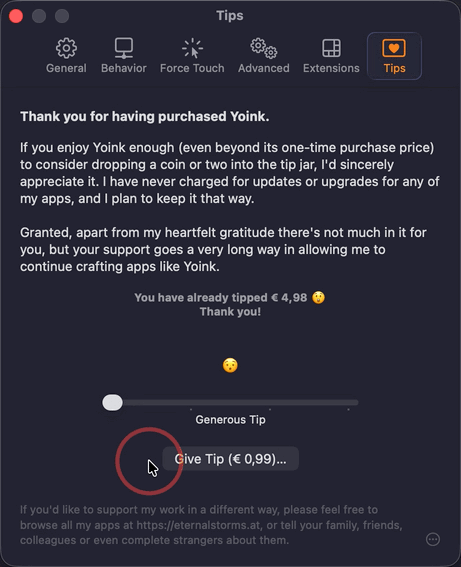
Tip Jar
Recently, I’ve been implementing Tip Jars into my apps, for anyone who’d like to completely voluntary further support my work, beyond the app’s one-time purchase price (I don’t offer subscriptions).
Tip Jar in Yoink for Mac
Since I implemented it for both the App Store and via Paddle for the direct-purchase versions of my apps, I figured I’d implement a small web version of the latter, too. I’m linking to it from my blog, but I’m still undecided about adding it to the main page. Probably going to leave it out.
Things Still In the Works
For now, there are two things I still haven’t gotten around to including.
Dynamic App Reviews
I do include reviews from the App Stores on the main and app pages, but they’re static. I’d like it to be a bit more dynamic, where I’d show random 4- and 5-star reviews. Apple offers APIs for that, so it shouldn’t be too much of a hassle.
A “Sources” Page
I’d like to have a page up indicating official sources for my apps: my website, the App Store, Bundlehunt (on occasion), MacUpdate, etc. Basically a single source of truth for figuring out if a website offering a download of or licenses for my apps is official and legit.
Now back to work. Since I’m not vibe-coding, my apps don’t develop themselves!
I am impulsive sometimes. Like recently, when I came across this reddit post by chance and thought to myself: I could write this. And so I did; and before I knew it, I had a new app on my hands.
This is a little behind-the-scenes recap of the app’s inception.
Researching existing apps
I didn’t do any research of other apps – I never do when I set out to write a new app. Why? I’m not sure. I feel like I’d get put off creating my own thing when I know there’s already a few options out there. Or that my idea might get diluted by what other apps are doing, swerving me off my original “vision” for the app.
And in the time it takes to research existing apps and their functionality, I could whip up my own tech demo – time much better spent.
So I skipped all that boring business and market research stuff and just did what I love doing most: code. The market’s huge, and it will take care of the rest by itself – people either like the app, or they don’t. And that’s the case even if I spend a day researching existing solutions.
Proof of Concept
I knew what I wanted: an app that covers your desktop with the click of a button with your current desktop wallpaper.
Now, there’s this “neat” API on macOS that, on first glance, appears to be made for this: NSWorkspace.shared.desktopImageURL(for: ). But it’s completely useless. Maybe it actually worked for a short while after its introduction with macOS 10.6, but it’s obvious nobody at Apple ever took another glance at it again after that, ever. Instead of returning the URL to the currently used wallpaper image file, it sometimes returns the wrong image file, or a URL to the folder containing the image file… I just couldn’t get it to work reliably – especially when a dynamic wallpaper, or a shuffling wallpaper is set, it just straight out poops its pants.
But that didn’t bother me. In fact, I approached the entire thing from a different angle, that’s much better suited to the needs of the app. With my experience in ScreenCaptureKit and general screen capturing and window mechanisms in macOS (because of the work on my app ScreenFloat), I immediately had some pseudo-code in my head, so when I sat down to write the app, I knew how I was going to approach it.
If you’re wondering what ScreenCaptureKit has to do with your desktop’s wallpaper: absolutely nothing. But it’s a means to an end in my case. Basically everything on your screen is a window: your menu bar, each icon in the right portion of your menu bar, the desktop wallpaper image, the files and folders on your Desktop, the widgets on your Desktop, your actual windows… And if it’s a window, it can usually be screenshotted. That’s where ScreenCaptureKit comes in.
All I had to do is find the correct window (the one that displays the wallpaper) to take a screenshot of, then find out the window levels of the Desktop and the Desktop’s files and widgets, and then create a new window with my screenshot of the wallpaper as its content and place it delicately over the Desktop, Desktop files and Desktop widgets, below any app’s windows, and I’m set.
Luckily – and to my genuine surprise – that’s exactly how it worked out. The proof of concept took maybe half a day. Now came the actual work.
The Actual Work
… by which I mean putting it all together into a nice app. Obviously, I wanted users to be able to select a custom wallpaper, or a solid color, or just blur the background, in addition to their currently set wallpaper – that’s just a given for such an app.
I also wanted users with multiple screens to be able to cover Desktops individually. Maybe they want to keep one Desktop accessible for files, while covering up the other one they screen-share, for instance. With that I had to make sure that DeskMat reacts correctly when screens are disconnected or connected to the Mac.
I also had the idea of Auto-Triggers, where DeskMat would automatically cover the desktop when user-specified apps are launched, or come to the foreground. One gotcha here was that I did not want Auto-Triggers to interfere with a cover the user activated manually on for a Desktop, so I added an activationSource to my cover windows to know what triggered it – a user, or an auto-trigger (or, in v1.1, a Focus mode).
There’s also a lot of busy-work involved with a new app. For my apps, that involves setting up a release notes database to display what’s new, update checking, update-installing for the website-bought version, license creation on the server and handling in the app for the website-bought version, setting up the app in the Mac App Store, having a nice About window, creating a website… All this took longer than developing the actual functionality of the app, which ultimately spawned an internal project I call ESSLibrary – a Swift Package which, going forward, will make it so much easier to implement all that stuff with just a few static variables in a plug-and-play system. But that’s another story.
So, after maybe 3 days of creating the core app came another three-and-a-half days (!) of setting up the app’s infrastructure. What a pain (and, hopefully, with ESSLibrary, a thing of the past).
I wish I could have supported versions of macOS older than Sequoia 15.0, but due to certain API only available on 15+, it would have been too much work to have it support older versions, for such a small app.
The Icon
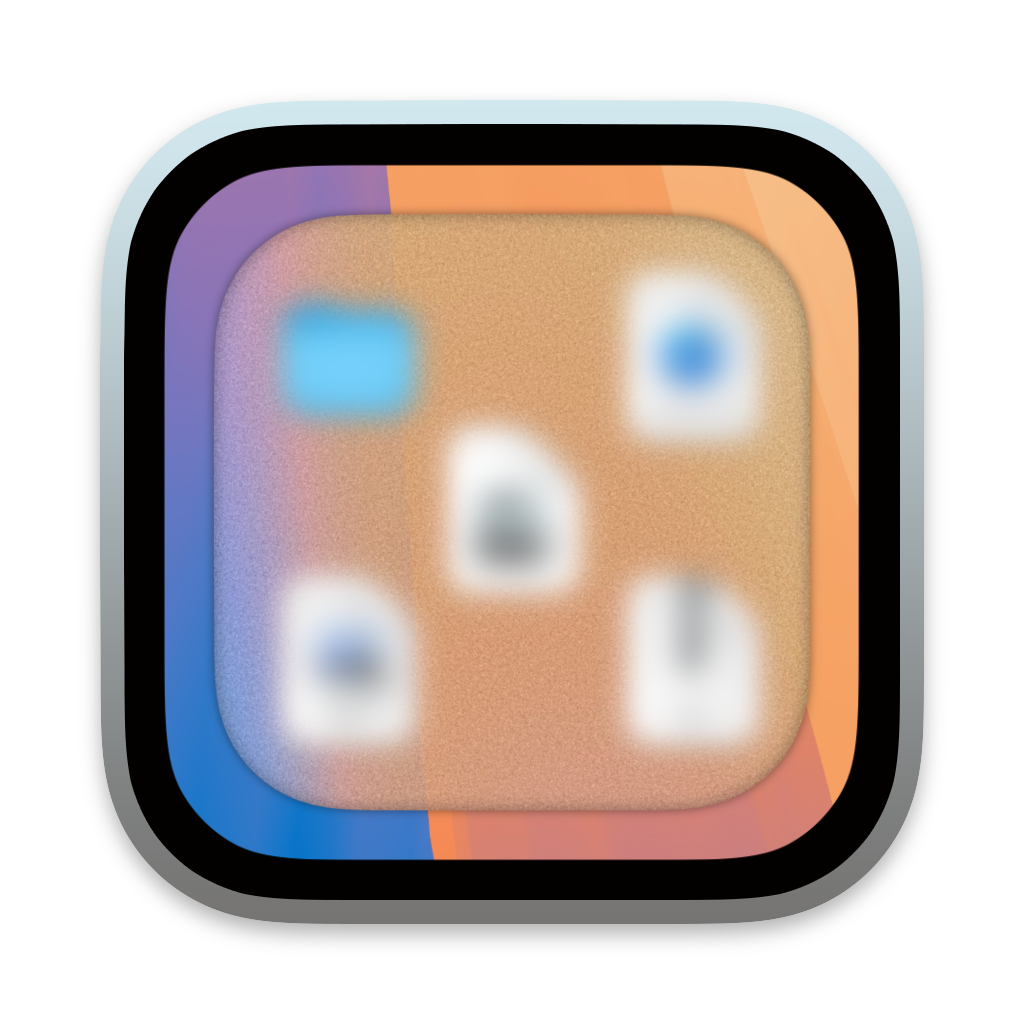
I didn’t want to spend, to be frank, any money on a professionally designed icon, so I “designed” it myself.
It’s a Terminal.app-like frame, with Sequoia’s standard desktop wallpaper with file and folder icons, and a “protective cover” on top of it – the kind you’d put underneath your desk chair so it doesn’t ruin your hardwood floors – which was the actual inspiration for this. I know, it’s a floor mat, then, not a desk mat, but I figured… what the heck. For comparison’s sake, here’s my IKEA floor mat:
I think it turned out okay. I do like the grainy / noisy texture of the cover in the icon and I feel it conveys what the app does nicely.
A small tidbit: Blurring your Desktop with DeskMat (in addition to having a wallpaper image cover) wasn’t originally planned. But because the cover in the icon does blur it, I thought it could be conceived as misleading if the app didn’t actually offer a way to do that, so I went back in before release and added that option.
Trial Limitations
I like to be lenient with my apps’ trials. I do have a 28-days time limit, that’s true, but I also grant an additional week of trial time every couple of months (and for every update) so that people who tried the app before but didn’t like it (or had an issue with it) can try it again after a while and see if it works for them now.
I’m torn on doing a freemium app on the Mac App Store (my apps are paid up-front, with a notice that there’s a free trial on my website). I just dislike the look of “free with in-app purchases”. It feels like I’ve got something to hide.
How much does this actually cost? You won’t know until you scroll all the way down to the obscure and easy-to-miss “In-App Purchases” field.
Instead of “Get”, it should say something like “Free trial, then x,xx €”.
It’s clear up-front how much this app costs.
Ah, much better. This immediately tells me that when I pay for the app, I get to use it (or at least that version) indefinitely, without limitations.
Pricing
My apps are one-time-for-life purchases (with optional tipping for those who feel so inclined), and I didn’t want to change that with DeskMat. I had originally planned to sell the app at a discount for EUR 3.99 and then, two weeks later, raise it to EUR 5.99, but because it was so well-received at that discount, I decided to keep it for the time being.
Publicity
Like I usually do with new apps and bigger updates, I sent out press releases to all the major Mac news publications and posted here and there. Being a small kind of niche app, I did not expect a lot of coverage, but it did fairly well, especially in German publications. Here’s a little selection:
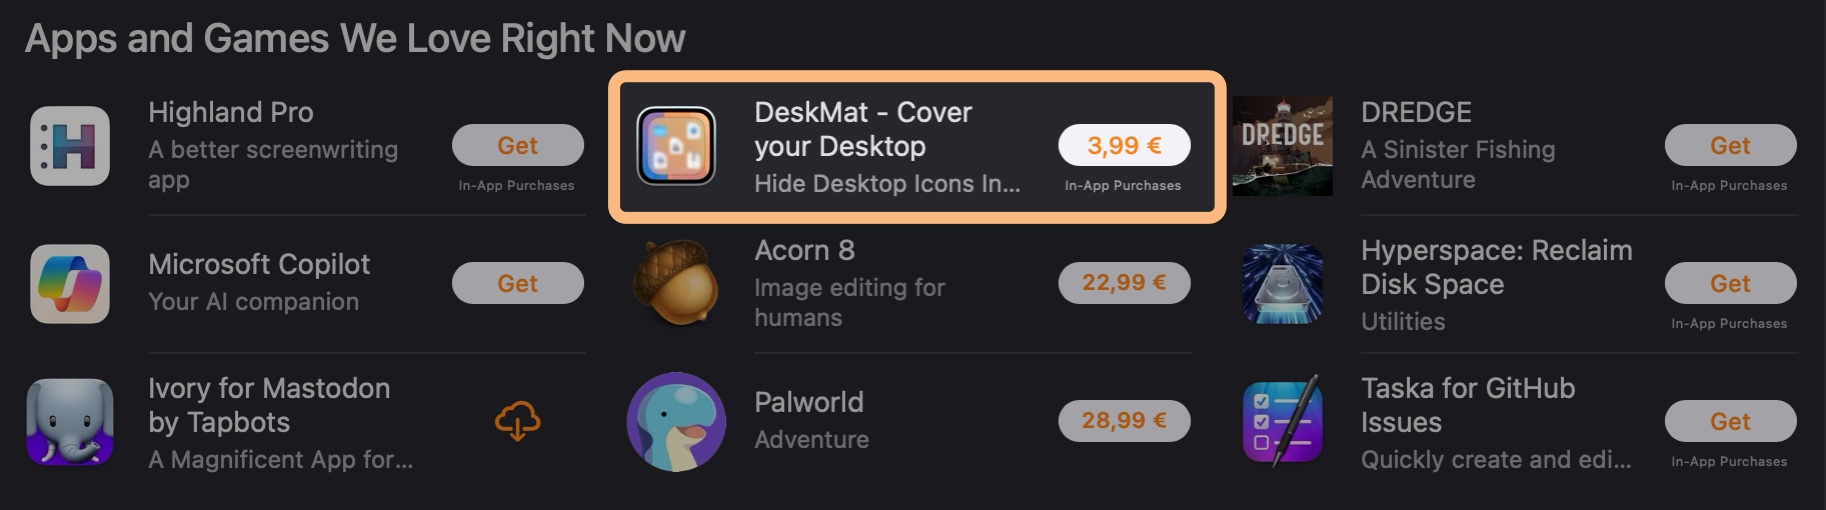
It also got featured on the Mac App Store in “Apps and Games We Love Right Now”…
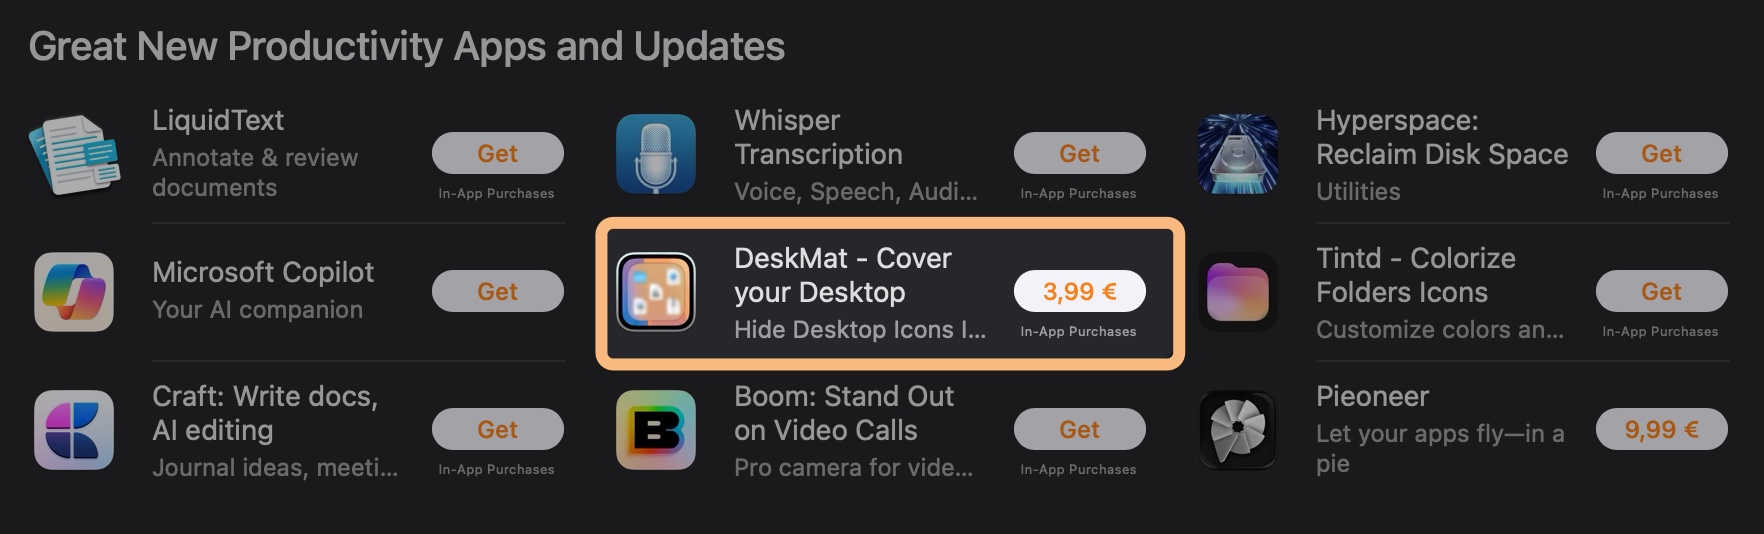
… and in “Great New Productivity Apps and Updates”
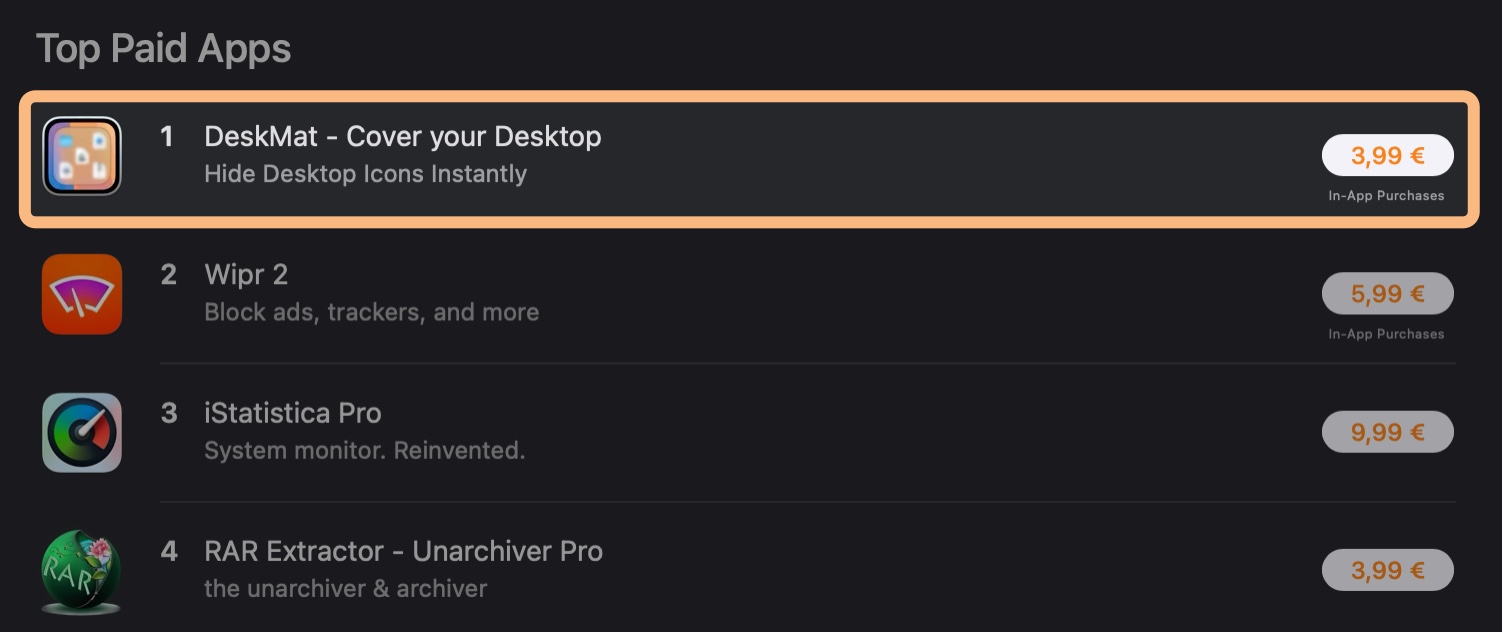
And, in Austria 🇦🇹, it even reached the #1 spot in Top Paid Apps! (which means about one person bought it here 😛)
Customer Reception
Like I wrote above, reviews by publications have been very favorable. As was the feedback I received by mail from customers. Commercially, the app has done well so far – I didn’t expect too much from it, but it exceeded my expectations quite a bit.
Comments on articles and on reddit, however, have been quite the opposite, interestingly: From “who needs this”, to “who uses their Desktop anymore”, to “this is a scam” (somebody gift this person a dictionary) and “AI can write this in five minutes” (I’d *love* to see them try, ’cause … AI … lol) and “app x can do this and more” (fair enough, a valid point for once), comments have been generally negative.
I attribute some of this to the times we live in. Seems like people love to tear down other peoples’ efforts while not producing much – or anything – themselves. And hating is just so much cooler (and faster) than giving constructive feedback.
To vent a little bit: I don’t get it. Personally, I’ve never felt inclined to leave a “who needs this” (or any plain negative) comment on anybody’s work. Okay, so you don’t need this app. Fine. But there are others who might, and the app wasn’t written with only you in mind. Who needs this “who needs this”-comment, is what I’m saying. And don’t get me started on the “this is a scam” comment. If you use a five-dollar word like “scam”, you damn well better know what it means.
But let’s not end on a negative note. I like how the app turned out and that people who actually tried and even purchased it seem to enjoy it – and I want to thank you all for it. I love little side projects (i.e. distractions) like these : ), especially when they turn out useful.
Links and Availability
DeskMat is available as a one-time purchase directly from my website, and on the Mac App Store. It is currently available in English and German and requires macOS Sequoia 15 or newer. It costs €3,99 / USD 3.99 / GBP 3.99 A free, 28-day trial is available on the website.
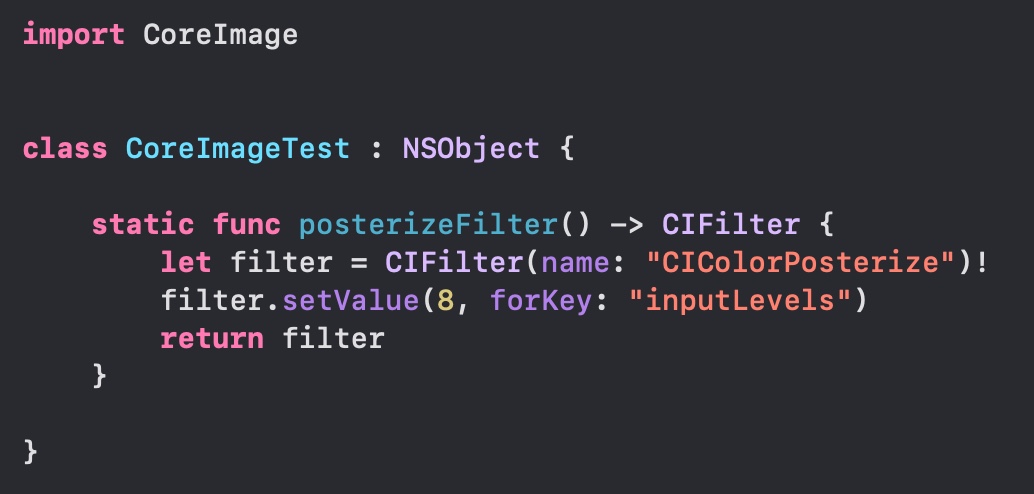
Maybe this is common knowledge and everybody knows this, but I’ve only recently come to learn how this works, so I thought I’d share.
I’ve been setting up Core Image filters like this for god knows how long:
The downsides are obvious: 1) I have to know the exact name of the filter (“CIColorPosterize”) 2) I have to know the keys and values it accepts (“inputLevels”)
Browsing the Core Image headers, I did find functions for these filters where you could just call let filter = CIFilter.colorPosterize()
Yet every time I tried, it never worked and would give me an error that CIFilter has no member 'colorPosterize'. Well, “Crap!“, I thought, this must be something that will become available eventually.
How wrong I was. This has been available for a while, you just need to know how to do it! The “trick” is to not only import CoreImage, but also (why!?) import CoreImage.CIFilterBuiltins:
And lo and behold, it works. I’m so happy, I could cry. I’m off to refactor some stuff now.
Having implemented the backend and licensing mechanism, there was still an important part missing: a way to download and install updates for the app.
A “safer” download
My app trial downloads have always been just a direct file download. But because I wanted the auto-updating mechanism in my app to use that same download path, I needed to add a little layer of validation/safe-guard there. Step 1: sign the zip file cryptographically with a private key, and upload the signature data alongside the zip file. Step 2: write a download PHP script. Instead of just initiating a direct file download, the script starts the download, only if the zip file’s signature could be verified with the public key. If there’s a signature mismatch, an email is sent to me so I know there’s something going on. Step 3: implement the download and signature check in the app. The app downloads the update zip file using the PHP script, with the signature of it passed along as a header. That allows the app to verify the zip file’s signature with the public key, before unzipping it. If the signature can’t be verified (because it was tampered with, or the download got corrupted somehow), the zip file is discarded and an error presented.
I got you, “gotcha”s
With the PHP download script, I encountered two “gotcha”s. One was that, no matter what I tried, I couldn’t set the Content-Length header, which lets the downloading client know how much data to expect (so a download progress can be displayed properly). A lot of googling later (I also tried ChatGPT for fun, but it was no help here), there’s an environment variable that needed to be set on my server:
SetEnv ap_trust_cgilike_cl 1
With that, it miraculously started working.
The second “gotcha” was resumable downloads. For a file that is only a few megabytes, it’s not that big of a deal, but for larger downloads, it is convenient and responsible to have resumable downloads. If a download halts because of, say, a loss of connection, the downloader is able to later pick up the download from where it left off, instead of discarding what it had already downloaded and having to start over. It took a bit of trial and error, but thankfully, there are lots of code samples for this available, this one being a prime specimen, and I eventually got it working.
Release the Notes
I just recently revamped my release notes to be more interactive:
It gives a nice overview of new features, improvements and bug fixes, I can display a nice header or footer if I like, and I can show users new features in action on-the-fly as a video, an image, display a website for instructions, or take users to features or settings in-app right away.
But I hadn’t thought it through enough. All this had been powered by a single JSON file. For multiple releases, over the years, that file would become larger and larger. And to display information for one release, I’d have to download the entire file. So I had to go back in and change that. Instead of a single JSON file, I now have it in a database, each release in a row, so I can obtain information for individual releases, instead of having to download all of them at once. Interacting with this database is powered by a custom PHP API. It lets me retrieve all version strings for an app, alongside their release dates and build numbers – crucial for self-updating. I can then request an individual release’s information as an on-demand created JSON. I use this in the Mac App Store version to show what’s new after an update has happened, and in the non-Mac-App-Store version to display what’s new before an update. Additionally, it can return more than one row of releases. That allows me to show multiple releases in the “Update available” screen: Say a user is on version 2.1. Versions 2.1.1 and 2.2 have already been released, but the user never updated to them. Now version 2.2.1 is out, and the user gets notified. Not only does the update dialog show what’s new in version 2.2.1, users can also see what was new in v2.2 and v2.1.1. Yay.
For feeding information into the database, I wrote a little PHP web “app”:
I can add localized release notes for a feature, improvement or bug fix, and manipulate the JSON (on the right side) directly, too, if I need to change the order, or fix a typo. I can go back into any version, any time, in an organized manner.
Lastly, I can download a nicely-formatted .txt file for each localization I can copy-paste into the App Store’s What’s New section (or anywhere else I like):
Release notes on the Mac App Store for ScreenFloat, powered and created by my release notes PHP api.
Self-Updating App
The simple and sane thing to do would have been to go with Sparkle. It’s fantastic. It can work with zips and other compression formats, dmgs, can do diff updates and all that stuff. It’s really good, and if you need any of that, or just want an easy way to do updates, save yourself the headache and just use Sparkle.
All I needed, though, was to unpack a zip file and install that update. And with all that custom code I wrote on the backend, to perfectly integrate and take advantage of it all, I figured I’d write my own updating mechanism.
The app has to: 1) Check if a new version is available 2) Display to the user what’s new and ask whether they’d like to download the update 3) Download the update 4) Verify the zip file’s signature 5) Unzip the zip file if the signature is okay 6) Verify that the new bundle is code signed, and that the code signature’s team of the new bundle is the same as the old one’s 7) Replace the old copy with the new one 8) Relaunch
Items 1 through 4 were easily done – all the heavy lifting is already taken care of by the server. Item 5 – unzipping – is where it began to become tricky. Actually, it already became tricky zipping up the app in the first place. Like I stated before, I upload a zip file and its signature. To create both, I use a Shortcuts.app shortcut – I select the app produced by Xcode, it gets zipped up, a signature file is created, and I manually upload both to my server. Alas, the “Make Archive” shortcut is teh suckage when it comes to apps. Try it yourself: Create a “Make Archive” shortcut that creates a zip archive from an app, then unzip that archive and double-click – it won’t work (or, even worse, it’ll work on your Mac, but on a different one, it won’t. Thanks to UTM, I was able to figure that out). So instead, I use a Run shell script phase with the ditto CLI:
Unzipping that and running the app worked right away both on my Mac and in the UTM virtual machine, so the first hurdle had been taken. Unzipping, then, in the app, also had to be done using that CLI:
ditto -xk <zip-file-path> <unzip-file-path>
Because I didn’t test each step right away and implemented the flow in one go, when I first tried it, I wondered where my mistake was when the app didn’t launch. It was only after quite a bit of backtracking and research that I came to the conclusion that my way of zipping and unzipping was the culprit.
My current iteration of my self-updating mechanism isn’t complete yet. It can update itself when the user account that first installed the app is also the one updating it. But if a different user account runs the update, it fails, because of insufficient privileges. I had one implementation where it worked once, and then nobody could update anymore – yikes. I had another implementation where, when replacing the old app with the new one, for some reason the /Contents/MacOS/ folder could not be replaced (but the files in MacOS were deleted), corrupting both the old and the new copy. Let’s just say, I hit some weird edge cases here.
This is obviously something I’m working on still, but in the meantime, when I suspect it’s a different user account attempting the update, I present the user with the new version of my app in Finder, and show instructions on how to manually update. It’s nowhere near a perfect user experience yet, but it was a trade-off I was willing to accept for the time being (on behalf of the user, I’m afraid), knowing the upside of having control over the entire thing and eventually figuring it out.
It’s my main drive at work – figuring stuff out.
Next Time
Next time, I’ll talk about how and if it all worked out. I hope to see you then!