
I’m happy to tell you that today, Yoink 3.2 is available for download from the Mac App Store.
It’s a free upgrade for everyone who’s purchased it before.
You can download a 15-day trial for the app here, even if you’ve tried it before.
What Is Yoink?
Yoink simplifies and improves drag and drop on your Mac.
Simplify.
It simplifies drag and drop by providing a temporary place for files you drag, so you can navigate more easily to the destination of the files.
It’s especially useful when trying to move or copy files between different windows, Spaces or (fullscreen) applications.
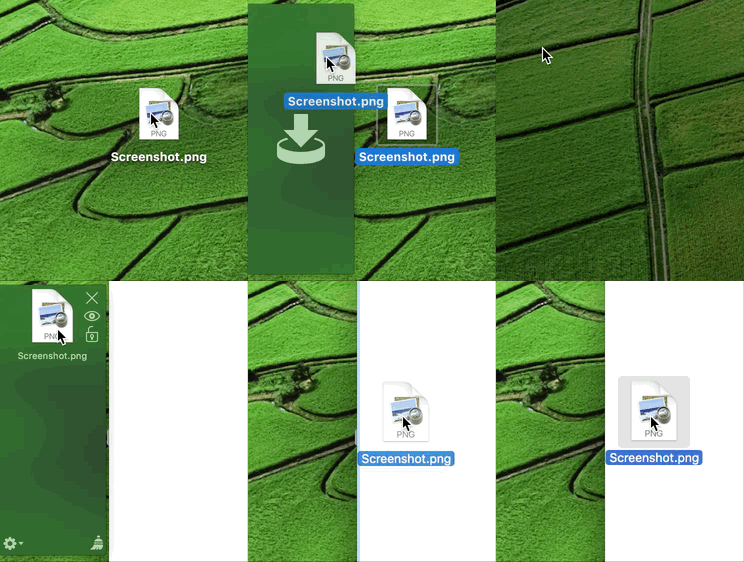
When you start moving a file in Finder, or app-content like an image from a website, Yoink appears at the edge of your screen, offering a temporary place for you to drag the files to.
Without having to keep the mouse button pressed, you can now get to the destination of your file quicker and easier.
Improve.
Drag and drop is improved in several ways, including:
- Collect multiple files from different locations you’d like to move to one destination without having to go back and forth
- Split up a multiple-files-drag so you can move files to different places without having to go back and forth
- Copy files to multiple locations more efficiently
Customize.
You can customize Yoink’s behavior so it fits in perfectly with your workflow. Aside from having to option to show it at either edge of your screen (at the top, center or bottom), you can set it up to only appear when you drag files to the edge of your screen or to appear directly at your mouse cursor when you start dragging, making drag and drop even faster.

For applications where you don’t need Yoink, add them to a “blacklist”, so Yoink doesn’t interfere with your work.
A keyboard shortcut (by default, F5) lets you manually show or hide it, should you need it anyways.
What’s New in Yoink 3.2?
Force Touch Support
Force Touch in Yoink allows for quick actions, i.e. selecting all files, revealing files in Finder, QuickLooking files, splitting up Stacks and pinning files to Yoink, all available with one Force Click.
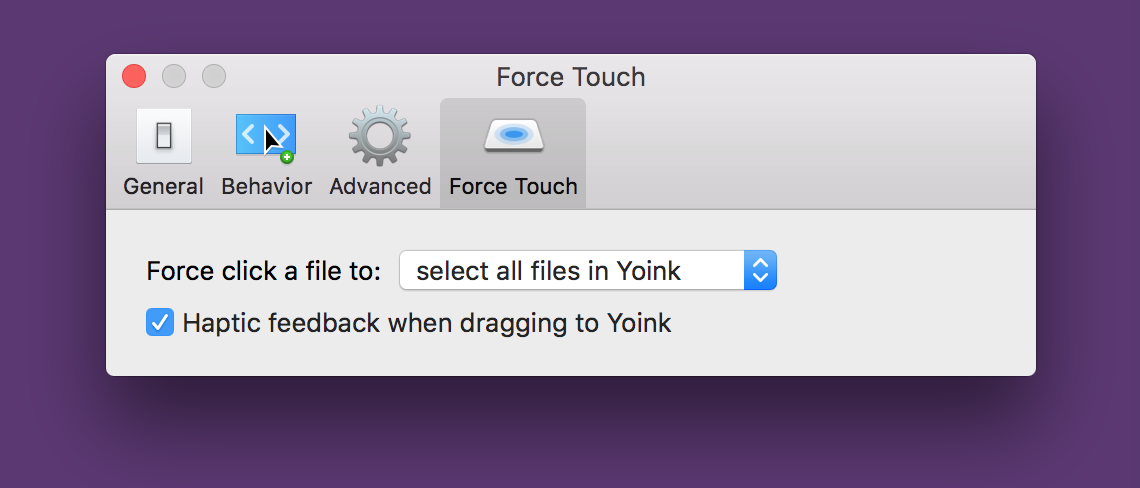
For instance, Force Touch makes dragging out all files at once a much nicer process than before. Force Click onto one file and all are selected. Ease up one pressure level and start to drag, and you’ll drag all files instantly.
Additionally, Yoink can give you haptic feedback when dragging to it, so you know when you’ve entered Yoink’s window with files.
Deletion Warning
Yoink does not keep a copy of the files you add to it behind the scenes, so it’s important for users to know that if they Trash a file that’s in Yoink, it will be gone if it’s deleted.
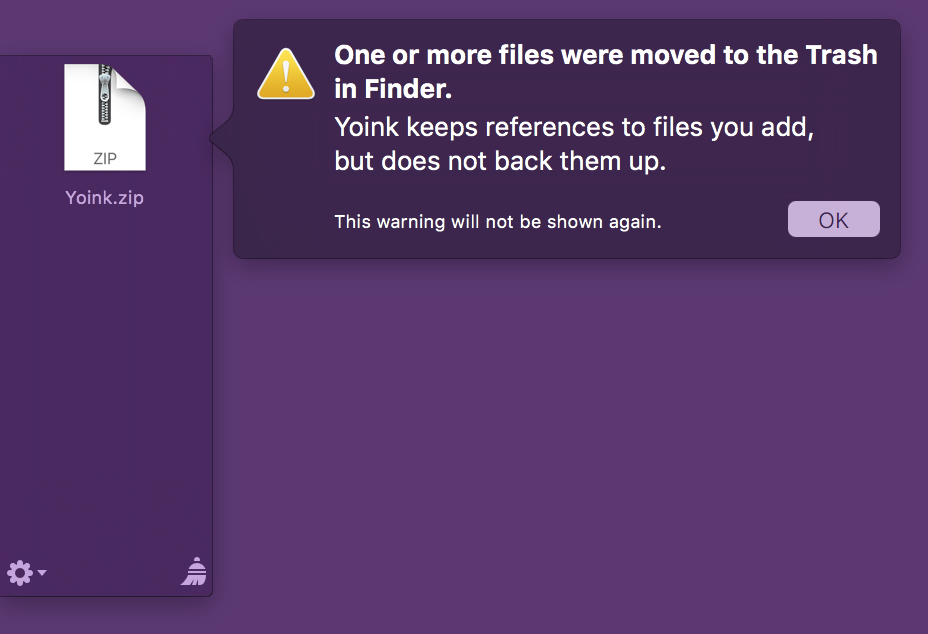
This one-time-per-app-launch warning notifies the user about what’s going on.
UI Enhancements
In previous versions of Yoink, when you moved your mouse cursor over a file, this happened:
![]()
Some users felt that this results in a moving target (as the icon moves away), and that is definitely a bad user experience (in my defence, I didn’t think of it creating a moving target, because not only the icon, but also the background can be dragged).
Anyway, point taken, I’ve changed it to a simpler, and in the end calmer, animation:
![]()
What you can also see in the two GIFs above, I’ve changed the lock icon so it’s easier to tell if a file is pinned to Yoink or not.
Speaking of the lock, I’ve added a new animation that will let you know that the file can not be removed because it’s currently pinned to Yoink:
![]()
Further Improvements
- File paths can be copied from Yoink’s contextual menu
- Reduce Motion Setting
- Text snippets can now contain images
- Performance and resource management improvements when accepting files, dragging files out, clearing all items, splitting up stacks, opening the “Open With” menu
- When Yoink is shown on a different screen than the mouse cursor, the keyboard shortcut (by default, F5) summons it to the screen of the cursor
- Yoink reflects changes in the Finder’s “Show all filename extensions” setting
- Mails dragged from Yoink work again with all applications. To create an event in iCal from a mail message, keep the option-key pressed as you drag the mail out of Yoink
- When a file is re-saved in Finder, Yoink updates its QuickLook Preview Icon
- When a snippet is added to Yoink, it has a proper filename instead of “Snippet”
- And many more improvements and bug fixes throughout the application
Pricing and Availability
Yoink 3.2 is available for purchase on the Mac App Store for the price of $6.99 / £4.99 / €6,99.
It is a free update for existing customers of the app.
You can download a free, 15-day demo version here, even if you’ve tried Yoink before.
Yoink runs on Macs with OS X Lion 10.7.3 or newer. OS X Yosemite or newer is recommended.
If you’re interested in writing about Yoink, you can download the press kit here, which contains screenshots, links to a short video and further information. Promo codes are available to members of the press at press (at) eternalstorms (dot) at.
Yoink Usage Tips
To get the most out of Yoink, I’m collecting useful tips and tricks for you on this website.
I’m looking forward to hearing from you and to see what you think about Yoink 3.2. If you like the app, please consider leaving a little review on the Mac App Store, it would help me out a lot!
Should you have trouble with it or have any feedback or questions, please be sure to get in touch, I’d love to hear from you! Thank you.

– – – Do you enjoy my blog and/or my software? – – –
Stay up-to-date on all things Eternal Storms Software and join my low-frequency newsletter (one mail a month at most).
Thank you 🙂

 ScreenFloat