Yoink v3.6.5 re-introduces its clipboard history feature and the accompanying widget.
Here are a few details about its implementation for macOS Big Sur and newer.
Widgets on macOS Big Sur and up (and iOS, for that matter) can’t really react to a user’s click on them by themselves, so you cannot run any logic from a user’s input.
A click onto a widget will always bring you back to its containing app, where you can then run logic accordingly.
On iOS, that’s obvious, as it’ll open up the owning app and put it front and center.
On macOS, that can be a little more subtle, because macOS allows apps to run in the background (like Yoink does, mostly).
When you click on an item in Yoink’s widget, it’ll tell Yoink to run the logic to copy the clicked item (or pin it, or add it to Yoink, or reveal it in the browser, depending on the modifier key you pressed during the click).
But there’s a problem with that in the case of Yoink:
The Foreground Conundrum
No matter where you click on a widget (either the background of it, or a SwiftUI Link() object), it will bring its containing/owning app to the foreground.
For many apps, that will be fine. But Yoink is an app that runs in the background and only very rarely needs to actually become the active, keyboard-input-accepting app.
So I thought, perhaps I can have another application inside Yoink’s app bundle, which is LSBackgroundOnly, with a custom URL scheme that would be called from the widget using a SwiftUI Link() object. An app that has LSBackgroundOnly set to YES in its Info.plist cannot present any user interface, and cannot become “key”, even if the system tells it to.
But there’s another roadblock – even though only the secondary app inside Yoink’s app bundle should be able to open the custom URL scheme, the widget will send that Link() to its containing/owning app only, no matter the url scheme. In this case, the main Yoink app.
The point of the widget is to quickly re-copy something and then paste it somewhere right away.
Say you're editing text in TextEdit, then open the widget, click on it to re-copy something and then press command-v to paste it into TextEdit only to hear a beep because the app isn't active anymore (because Yoink is). So you have to click into the TextEdit document to make it active, and only then can you paste. That can (and will) become annoying very quickly.
In order to have Yoink never become the active app from a click on its widget, I’d have to move the widget plugin/appex bundle out of the Yoink app bundle’s PlugIns folder, into the secondary target one’s.
Only that way would the widget attempt to make the secondary target(and thus, not Yoink) frontmost – and fail because of LSBackgroundOnly, leaving the currently frontmost app active – and send the custom URL scheme link to it. The secondary target would then forward the link to the main Yoink app bundle.
Tada, it works. But that lead to yet another problem. (When did “it just works” turn into “it just won’t”? And while I’m at it, what’s with those widgets? They feel quite… neutered to me compared to what they were able to do before.)
So far, I managed to have Yoink not become active when an item in the widget is clicked.
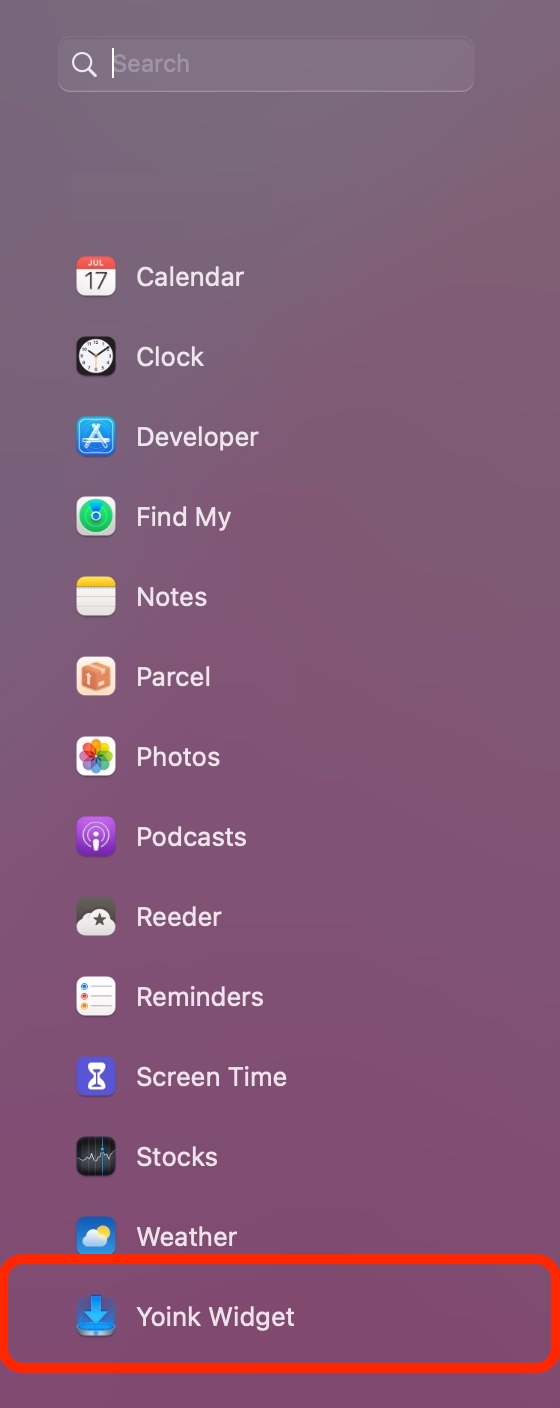
But now, with the Yoink app containing the secondary target containing the widget, macOS was unwilling to recognize and show the widget in Notification Centre.
Interestingly, a double-click onto the secondary target in Finder would make it show right away.
Infuriatingly, launching the secondary target quietly from within Yoink at launch won’t – and I had a lot of different approaches:
– Launching the secondary app directly with NSWorkspace’s -launchApplicationAtURL:…
– Launching the secondary app via its URL scheme
– Having Finder open the secondary app
– Running an NSTask open -a <secondaryapp> /path/to/somefile
– Registering the app using LSRegisterURL
None of it worked. I figured, the problem was that it was Yoink launching the secondary app, not the “system” or “user”, like it was the case when double-clicking it in Finder.
Which made me think of login item helper apps.
Inside the macOS app sandbox, an app cannot set itself as a login item. It needs to have another “helper” app inside its Library/LoginItems folder which it designates as a login item, and that app will then in turn launch the containing app. Nuts, but there it is.
The point is, the system launches those login item helper apps, not the containing app.
Heureka. In Yoink, at launch, I set my secondary app, which contains the widget bundle, as a login item with SMLoginItemSetEnabled, causing the system to launch it. Now, finally, Notification Centre recognizes and shows Yoink’s widget.
What a needless journey.