Yoink simplifies and improves drag and drop on your Mac by providing a temporary place to store your files so you can freely navigate to the actual destination of your files without having to keep the mouse button pressed.
Developing flickery 2.0 – Part 2: Upload
(I apologize for the delay with this post, I had to work on updates for Yoink, ScreenFloat and Briefly and of course lots of work happened on flickery 😉 ).
To finally continue with my promised series of blog posts about flickery 2.0’s development, here I am back with: Uploading.
A minor disclaimer before we start: Any interface you see below isn’t anything near final, subject to change, etc etc.
If there is one part that’s integral to any flickr client, it has to be uploading. So with 2.0, I want to make darn sure that it’s the best you can get.
Let’s dive in!
Activity (Background Uploading)
In flickery 1.x, uploading blocked the entire app so you couldn’t do anything else but wait. Sure, you got a beautiful sheet window to look at with the currently uploading image slowly transitioning from blurry to focused representing the upload progress, but it wasn’t very user-friendly.
I wanted to change that with 2.0, so now uploads will be in the background, in the app-wide Activities panel where you can track the progress and potential errors of Up- and Downloads.
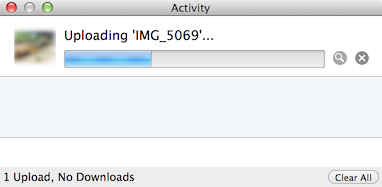
It’s out of the way, you can close it and leave it running in the background (and of course the little image also transitions from blurry to focused 😉 ). When the activity (Up- or Download) is finished, you’ll get an OS X notification letting you know the activity is done.

Another advantage of background uploads is that you can queue them up. You can begin one Upload and while that is running work on the next. And when you start that one, it will wait for any previous Uploads to finish and then begin uploading.
Adding to Photosets and Groups
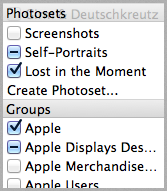
Adding to Photosets or Groups for uploads is not very straightforward in flickery 1.x for Uploads. You can’t assign photosets right from the Upload view but have to wait until the upload finishes and the button bar at the bottom changes to “Add to Set” and “Add to Group”. By the time the upload is finished, you might not know anymore which photos you’d like to add to which photoset or you forget altogether. It’s not really a “set it, then forget it” approach.
This is going to change in flickery 2.0. Here, you’ll be able to set everything up beforehand and once the upload itself is done, photos are added to the photosets and groups you have set. So you can set everything up and leave it to flickery to do its thing.
Location and Maps
In flickery 2.0, it will be even easier to assign locations to selected items (both photos and videos) using Apple’s MapKit features.
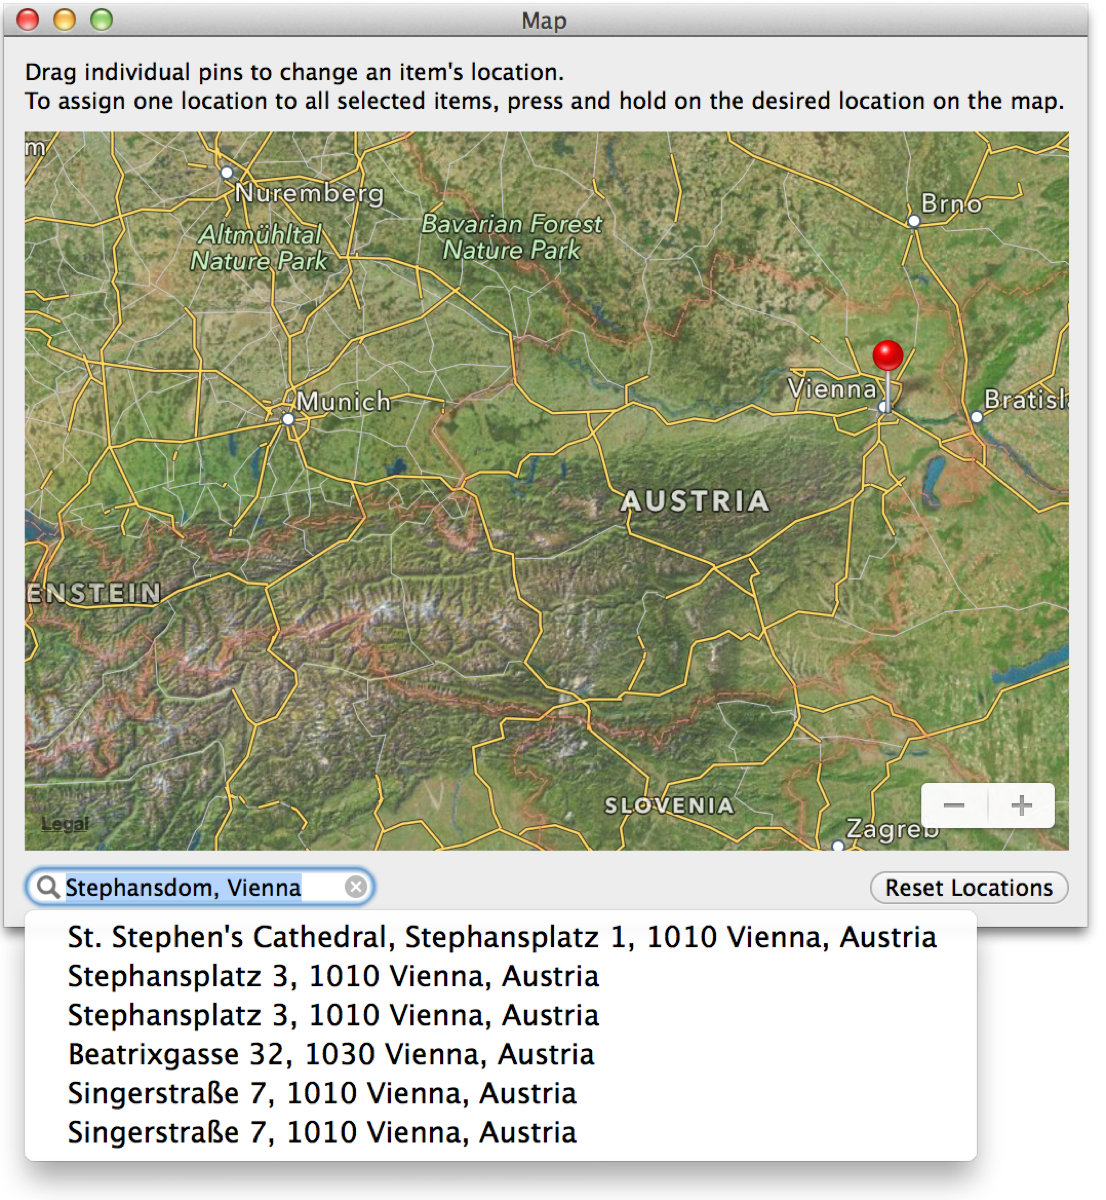
The big improvement here is that you can now search for locations and flickery will reverse-geocode that info into a latitude/longitude pair that Maps can understand. If you have a camera without GPS and want to assign a specific location, this comes in very handy.
Sorting
I’m adding better sorting to flickery with version 2.0. As you can see in the screenshot below, you can sort by Date and Title (booooring) but also by location, for example, based on the distance from the selected item. Items without a location will be sent to the end of the list.
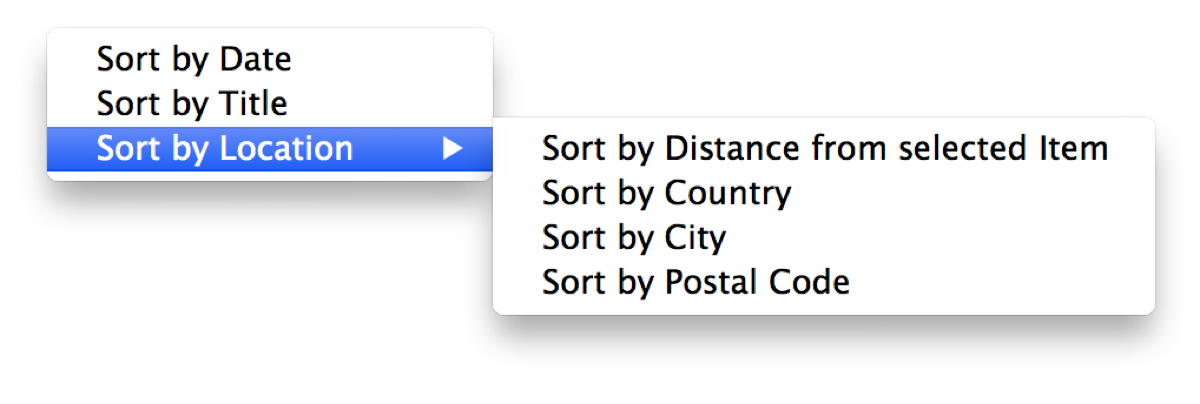
Using Google’s Maps APIs (because Apple’s reverse-geocoding is a little bit limited), flickery will also let you sort by Country, City and ZIP/Postal Code.
This comes in very handy when you’re deciding which photosets to add to, for example, or just for the general order of the uploaded items and how they will appear on flickr.
Sadly, Google’s APIs are limited as well (2,000 requests per day per IP address), but it’s better than Apple’s limitation (which gives out after about 50 consecutive requests – bug report filed! – and yes, I am not geocoding all items at the same time but one after the other, as “demanded” in Apple’s CoreLocation documentation). But I don’t think too many will run into issues with that.
Filtering
Dealing with many items for upload, it can become overwhelming trying to keep track of everything. With flickery 2.0 I want to simplify that by implementing filters, so you can quickly view only photos or videos, items with or without description, tags, location and if you’ve assigned a photoset/group or not.

That wil make it easy for you to keep on top of everything and make sure you’ve done everything you had planned for your upload.
Importing unsupported files
Just like in flickery 1.x, flickery 2.0 will let you quickly convert RAW files (which flickr doesn’t accept) to JPEG files, trying to keep as much EXIF data as possible (which is new in 2.0).

Trimming videos has been in flickery 1.x as well, but is now done with AVKit instead of QuickTime and is quicker and more reliable. It offers the same trimming interface you already know (and hopefully, love) from QuickTime Player:

Editing
I’m not sure yet about how deep I want to go into editing (if at all) with flickery 2.0. I figure, most items will come from iPhoto or Aperture anyway, already post-processed by an app that can do it better and is focused on it more than flickery ever would be.
Perhaps I will include very basic editing functionality like rotating and mirroring, but I think that will be about it.
Quick Uploads
With all this detailed uploading stuff, there needs to be a way to quickly upload something into your stream, a photoset or a group.
So with flickery 2.0, when you drag an image- or video file onto your stream, a photoset or a group it won’t fuzz about and just directly, quickly upload it without you having to do anything else.
I think that’s it for this time, I’ll see you next time with some more insights on flickery’s development 🙂
Thank you for reading!
Take care and I hope to see you again next time 🙂
—-
My name is Matt, and I’m the developer of Eternal Storms Software. You can follow me on twitter here: [twitter-follow screen_name=’eternalstorms’ show_count=’yes’]
Developing flickery 2.0 – Part 1: The Past
As I am now back working on flickery after a short hiatus – sometimes you need a little distance from a project to be able to reflect on it and maybe get a new perspective on some things, I figured I’d talk about the process as I am working on it, not after, in a so-called “post-mortem”, as my memory is now fresh and “in medias res”.
Before going into about what’s coming though, allow me to go back to see what’s been.
A New Beginning
Starting from scratch is usually admitting to having screwed up before. In flickery’s case, I wouldn’t say I screwed up completely. I am, however going to say that I could have done some things better. In some parts, a lot better.

I started developing flickery 1.0 in early 2008. That’s a long time ago. I’ve become (I hope) a better programmer with a deeper understanding of how things work and are supposed to work. I have (a lot) more experience in Cocoa and a better understanding of UX and UI. I don’t let myself get away with things that work ok but could be better that easily anymore.
This is a good time to start from scratch.
Why start from scratch?
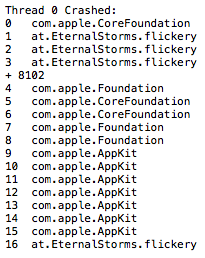
They say the way your desk looks, your mind looks. If you apply that to the code base of flickery 1.x, you’d commit me. It is not a pretty sight.
It’s really hard to look at, it’s difficult to follow and understand… it’s a fine mess, to be honest.
So one part of the reason why I started from scratch is that I didn’t see the forest for the trees (the app for the code) anymore.
Additionally, things have changed a lot in OS X since 2008. Which makes version 2.0 a good point to get rid of all the legacy code (individual code paths for OS X Leopard and every iteration that came after) and create clean code for OS X Mavericks and newer. (Mavericks is a no-brainer, it’s a free upgrade, everyone should go and get it.)
There’s blocks, ARC and Objective-C 2.0, just to name few. Going back to flickery 1.0’s code and re-working all the parts might very well have taken just as long (if not longer) as starting anew. It was totally worth it.
New Back-End
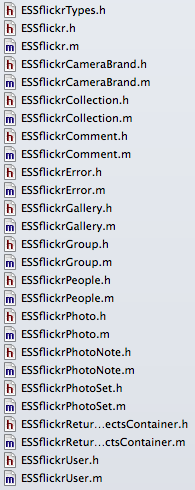
Absolutely essential for flickery is it’s communication with flickr’s API. Incidentally, in flickery 1.x, that was the #1 cause of crashes and bugs.
I’m not going to tell you how I did it back then; it’s just too embarrassing.
This time around, I’m not making the same mistakes again (all the while hoping I’m not making any new ones).
Let’s just say, in the old backend, I handed NSDictionaries et.al. back and forth. I didn’t use any XML or JSON parsing, I did it all with NSString’s rangeOfString, etc., not always checking if a range existed before working with it. As I said – embarrassing.
So the first thing I did was switch from getting XML from flickr’s API to JSON and not parsing it myself, but letting the system do it. That’s a huge load off my mind right there.
Secondly, I’m done with handing NSDictionaries, NSArrays, etc., around. The new back-end returns proper objects that contain the necessary info in an easily accessible and understandable way.
There are a few Objective-C wrappers for flickr’s API out there, but I didn’t like any of them. They let you do this (pseudo-code)
NSDictionary *responseDict = [SomeFlickrWrapper executeMethod:@“flickr.photos.search” withParameters:someDictionary];
Aside from also handling OAuth and signing methods, etc., this is all they let you do. So you have to remember the methods, the parameters – it’s really not a wrapper, it’s an access point to the API.
What makes my back-end different is this:
- (ESSflickrGallery *)createGalleryWithTitle:(NSString *)title
 description:(NSString *)description
 primaryPhoto:(ESSflickrPhoto *)photo
 error:(ESSflickrError **)alert;
You call the method and the back-end does all the parameter and method stuff for you. It’s much neater. In this example, you can also see the use of custom classes instead of dictionaries. ESSflickrGallery, ESSflickrPhoto and ESSflickrError are all wrappers for responses from the API, neatly packed up in an easily accessible class.
I guess I could have used one of the available back-ends as a back-end for my back-end, but I figured, if I’m going through the trouble of matching all available flickr-API-methods, I might as well do the OAuth and signing stuff myself as well.
This new back-end doesn’t only make things easier to develop, read and understand, it also improves the app’s stability and performance (mostly because it’s easier to develop, read and understand 😉 ).
As you can imagine, this has taken up the most time up until now. Now comes the fun part of using it to create the next version of the app.
I hope you’ll enjoy this upcoming series of posts about the development of flickery 2.0 and some of the design decisions behind it.
Upcoming in Part 2
In part 2, I’ll talk about uploading to flickr with flickery 2.0. Lots of suggestions will make it into the new version 😉
Thank you for reading. Enjoy your day!
My name is Matt, and I’m the developer of Eternal Storms Software. You can follow me on twitter here.
Presenting Yoink 2.0 – the drag’n’drop helper app for OS X Lion

Presenting Yoink 2.0
A picture usually says more than a bunch of words.
What is Yoink?
Yoink is an created to make “drag’n’dropping” files easier.
It shows a “shelf” when you start dragging files or content from applications so you can drop them onto Yoink. This way, your mouse is free for you to move between Finder windows, apps, spaces, fullscreen applications, etc.
Once you are where the files are supposed to go, you can drag the files out of Yoink again to drop them to their destination.
What’s new in version 2.0?
I got a lot of feedback on Yoink 1.0 from customers (thank you very much, by the way) and the changes you see in Yoink 2.0 are a direct result of it.
As you can tell from the image above, there’s a new look – done by the very talented Dietmar Kerschner.
Secondly, you can finally drop content from application onto Yoink – meaning images, text passages or links from within websites, for example. Or files on a server from the FTP client Transmit.
Also pictured in the image image above is a file stack. New in Yoink 2.0, when you drag multiple files onto Yoink at once, they’re not separate items in the list but just one item so you can easily drag them out at once again.
I’ve added a hotkey so you can manually show Yoink’s window so you can drag files from a Dock’s stack or applications like iTunes or Adobe Bridge that don’t trigger Yoink’s window for technical reasons – they use a non-standard NSPasteboard instance to do their dragging duties.
There are four new positions available – left, pinned to the top, left, pinned to the bottom, right, pinned to the top and right, pinned to the bottom (additional to the already existing left center and right center).
Availability and Pricing
Yoink is available exclusively on the Mac App Store for $2.99. But as usual, there’s a free, fully functional 15-day trial available at Yoink’s website (direct download). There’s also a quick screencast that shows exactly what Yoink does, and how it does it.
Feedback Appreciated
I really appreciate your feedback, input and criticism, so please do not hesitate to write me if you have any comments on my apps. Thank you kindly 🙂
[twitter-follow screen_name=’eternalstorms’ show_count=’yes’]
