mac

Yoink Mac App Icon

Just a quick note to let you know that Yoink 3.4.1 is now available for download from the Mac App Store. It’s a free upgrade for everyone who’s purchased it before. You can download a 15-day trial for the app here.

Yoink simplifies and improves drag and drop on your Mac.

Moving a file with Yoink

When you start moving a file in Finder, or app-content like an image from a website, Yoink appears at the edge of your screen, offering a temporary place for you to drag the files to. Without having to keep the mouse button pressed, you can now get to the destination of your file quicker and easier.

What’s New in Yoink v3.4.1?

This version is a maintenance update, improving compatibility with a lot of apps (like Apple Mail and Photos, and many 3rd party apps) and increases the overall stability and performance of the app, for example, it fixes a bug that caused Yoink to no longer work until a restart of the app in some cases.

Pricing and Availability

Yoink 3.4.1 is available for purchase on the Mac App Store for the price of $6.99 / £6.99 / €7,99. It is a free update for existing customers of the app. You can download a free, 15-day demo version here, even if you’ve tried Yoink before. Yoink runs on Macs with OS X Lion 10.7.3 or newer. OS X Yosemite or newer is recommended.

If you’re interested in writing about Yoink, you can download the press kit here, which contains screenshots, links to a short video and further information.
Promo codes are available to members of the press at press (at) eternalstorms (dot) at.

Yoink is also available for iPad and iPhone.

Yoink Usage Tips

To get the most out of Yoink, I’m collecting useful tips and tricks for you on this website.

I’m looking forward to hearing from you and to see what you think about Yoink v3.4.1. If you like the app, please consider leaving a little review on the Mac App Store, it would help me out a lot! Should you have trouble with it or have any feedback or questions, please be sure to get in touch, I’d love to hear from you! Thank you.

Eternal Storms Software Logo

– – – Do you enjoy my blog and/or my software? – – –
Stay up-to-date on all things Eternal Storms Software and join my low-frequency newsletter (one mail a month at most).
Thank you 🙂

Read more

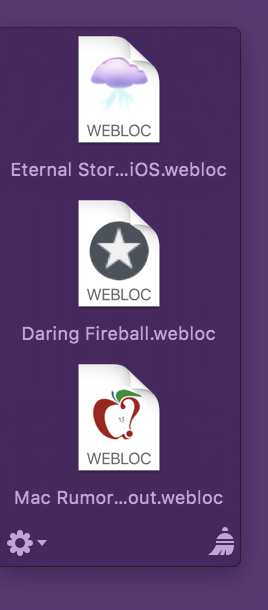
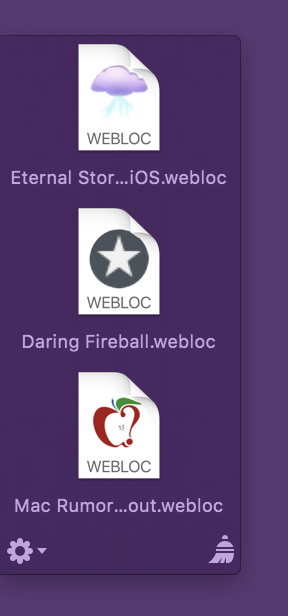
One of Yoink v3.3‘s new features is the detection of favicons for webloc files dragged into the app, making it easier to quickly identify individual weblocs at a glance. (A webloc file is something Finder creates when you drag a URL/link to it).
Think of it as QuickLook icon previews, just for websites:
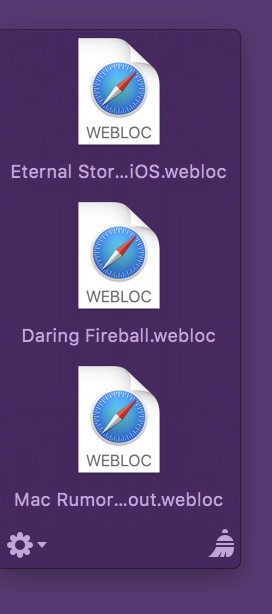
Yoink with webloc files without favicons

weblocs without favicons

Yoink with webloc files with favicons

weblocs with favicons

The advantage is obvious right away, that’s why I jumped on it the second the feature was suggested to me.

Optional Setting

Even though I really like favicon detection and have it enabled on my Mac, I decided right at the start that favicon detection would be opt-in (disabled by default), for a couple of reasons:

  1. It requires an internet connection
  2. It uses data (very little, but still)
  3. I thought I’d use a Google Service for this (which I discarded after the prototype) and wasn’t comfortable having users use it without their “consent”

1) Internet Connection

Yoink is not an app that should require an internet connection at all.
It’s a “local” Mac app, it helps you with drag and drop, why need an internet connection?

As a side note, the connection itself actually doesn’t happen in the main Yoink app, it’s an XPC service that has the sandbox privilege, so the main app isn’t affected.

2) Data Volume

A Mac usually connects to the internet over WiFi or an Ethernet connection, and the data transferred for favicons *is* very small.
But there’s still a chance you’re using weblocs like crazy on a Mac connected to the internet via your iPhone’s Personal Hotspot on a data plan, which also makes it obvious why the user needs to be able to turn this option on and off.

It just made me more comfortable to have users opt-in to this option, instead of opt-out.

3a) Google?

Google has a nice favicon detection service, which is just a URL you pass another URL into to receive the image data:

http://www.google.com/s2/favicons?domain_url=PERCENT-ESCAPED-URL

There’ no need to parse the HTML yourself for the URL to the favicon, Google does it all for you.

3b) So Why Not Google?

What if the service goes away?
With Google having a bad rep for some users, would they use this feature?
What about privacy? (I don’t know, but they might collect your IP and then know what URL a favicon was loaded for, etc.)

So even though it worked very nicely, I decided to implement it myself.

Getting the Favicon

With Google out of the picture, I had to roll my own detection and parsing.
What I do is actually very, very simple.

I load the webloc’s URL’s HTML content, and then look through the header part.
In particular, I look for one of the following lines:

rel=“apple-touch-icon”
rel=“shortcut icon”
rel=“icon”
rel=“apple-touch-icon-precomposed”

in that order. (I’m sure there are more I could go through, but those were the ones that I came across while testing.)
Should none of those exist, I just try something like:

•) http:// … /favicon.ico
•)  …/favicon.png
•) rinse and repeat for every image format you can think of

If I have no luck there, either, I bail and return macOS’ default webloc icon.

If I am lucky and I find a “rel” I’m interested in, I figure out what the href contains (an absolute link to the image, a relative path to the image, or just the name of the image file itself). Once I know that, I can load the image file and composite it into the final icon.

The final icon is cached so Yoink won’t have to connect to the internet and re-download favicons for weblocs that point to the same base URL.

Drawing the “personalized” webloc icon

I went through three iterations, each at its own, unique laziness level.

Iteration 1, laziness level 3 (extremely lazy)

Just show the favicon:
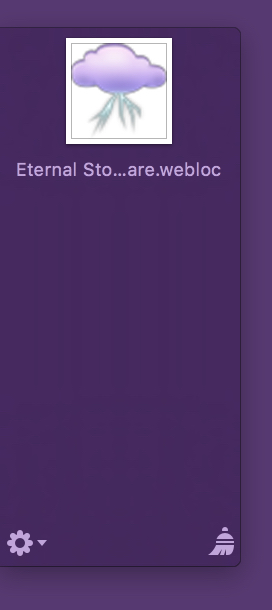
Iteration 1 of Favicons in Yoink

No wonder I didn’t use it. It’s so lazy.
Second, it doesn’t even remotely resemble a webloc file anymore. It actually looks more like an image file’s QuickLook preview icon, and that’s a bad thing, as it could very possibly confuse users.

So I went on to

Iteration 2, laziness level 2 (pretty lazy)

Show the favicon super-imposed on the webloc icon:

Yoink Favicon Icon Iteration 2

That’s better. But not good, either. Favicons can be transparent, like the one here, but they can also be opaque, blocking the WEBLOC text in the icon and making the overall icon look more blocky and less nice.

Onwards and upwards!

Iteration 3, laziness level 1 (not that lazy)

Crop out the “Safari” part of the webloc icon and paint the favicon below it:
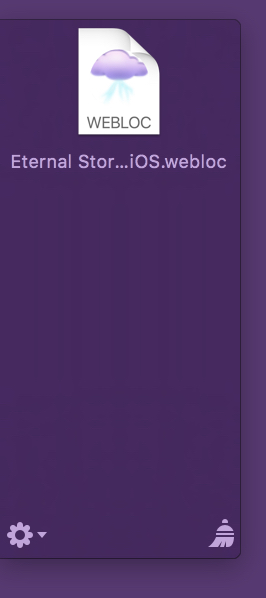
Yoink Favicon Icon Iteration 3

If the favicon is transparent, I draw it on top of a white background (so it would fit with the rest of the original webloc icon), if it’s not transparent, the favicon’s background is used, solving everybody’s problems. And you can still see that it’s a webloc file, at first glance!

Eternal Storms Software Logo

– – – Do you enjoy my blog and/or my software? – – –
Stay up-to-date on all things Eternal Storms Software and join my low-frequency newsletter (one mail a month at most).
Thank you 🙂

Read more

Yoink Mac App Icon

I’m happy to tell you that today, Yoink 3.3 is available for download from the Mac App Store. It’s a free upgrade for everyone who’s purchased it before. You can download a 15-day trial for the app here.

What Is Yoink?

Yoink simplifies and improves drag and drop on your Mac.

Simplify.

It simplifies drag and drop by providing a temporary place for files you drag, so you can navigate more easily to the destination of the files.
It’s especially useful when trying to move or copy files between different windows, Spaces or (fullscreen) applications.

Moving a file with Yoink

When you start moving a file in Finder, or app-content like an image from a website, Yoink appears at the edge of your screen, offering a temporary place for you to drag the files to. Without having to keep the mouse button pressed, you can now get to the destination of your file quicker and easier.

Improve.

Drag and drop is improved in several ways, including:

  • Collect multiple files from different locations you’d like to move to one destination without having to go back and forth
  • Split up a multiple-files-drag so you can move files to different places without having to go back and forth
  • Copy files to multiple locations more efficiently

Customize.

You can customize Yoink’s behavior so it fits in perfectly with your workflow. Aside from having to option to show it at either edge of your screen (at the top, center or bottom), you can set it up to only appear when you drag files to the edge of your screen or to appear directly at your mouse cursor when you start dragging, making drag and drop even faster.

Yoink appearing at the mouse cursor

For applications where you don’t need Yoink, add them to a “blacklist”, so Yoink doesn’t interfere with your work. A keyboard shortcut (by default, F5) lets you manually show or hide it, should you need it anyways.

What’s New in Yoink 3.3?

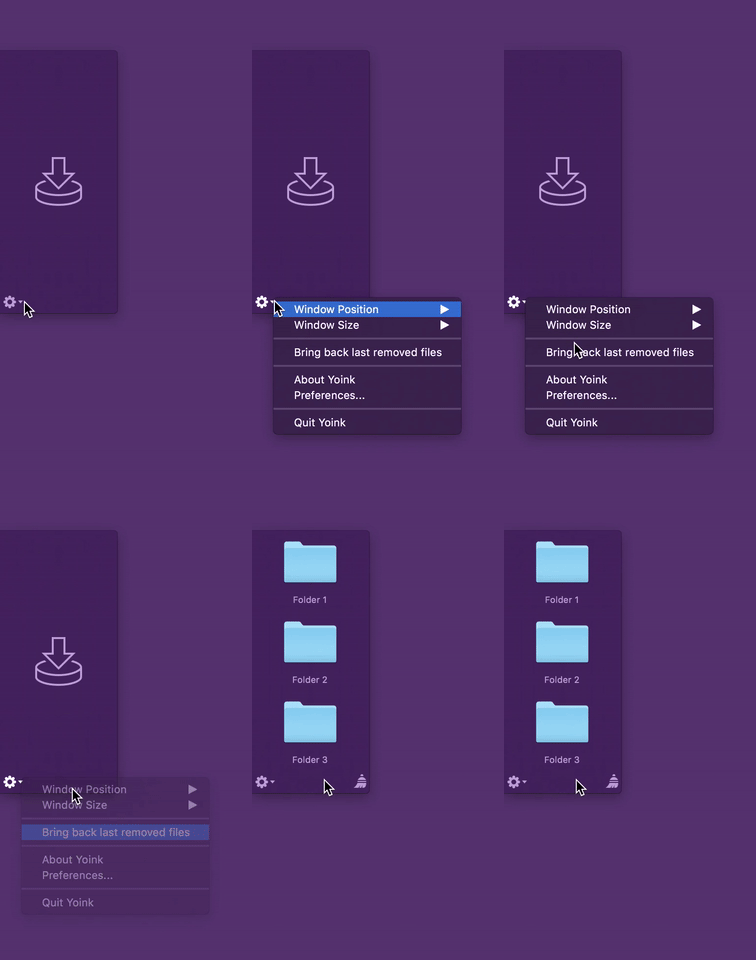
Version 3.3 lets you bring back files to the app that you’ve previously removed, in case you find you need to move or copy the file(s) somewhere else.
Just keep its keyboard shortcut pressed (by default, F5)

Press and Hold Shortcut Key in Yoink

or right-click onto Yoink to bring back previously removed files:

Right-click onto Yoink

Webloc files can now optionally show favicons for quicker identification:

Yoink loading favicons for webloc files

Further Improvements

  • Yoink now includes macOS’ “Share” menu to more easily share files to different services
  • More easily add links from your browser to Yoink by right-clicking onto it in your browser and selecting Share -> Yoink
  • A new Alfred File Action to make sending files from Alfred to Yoink possible (activate it in Yoink’s “Advanced” preferences)
  • Many improvements, refinements and bug fixes

Pricing and Availability

Yoink 3.3 is available for purchase on the Mac App Store for the price of $6.99 / £6.99 / €7,99. It is a free update for existing customers of the app.
You can download a free, 15-day demo version here, even if you’ve tried Yoink before. Yoink runs on Macs with OS X Lion 10.7.3 or newer. OS X Yosemite or newer is recommended.

If you’re interested in writing about Yoink, you can download the press kit here, which contains screenshots, links to a short video and further information.
Promo codes are available to members of the press at press (at) eternalstorms (dot) at.

Yoink Usage Tips

To get the most out of Yoink, I’m collecting useful tips and tricks for you on this website.

I’m looking forward to hearing from you and to see what you think about Yoink v3.3. If you like the app, please consider leaving a little review on the Mac App Store, it would help me out a lot!
Should you have trouble with it or have any feedback or questions, please be sure to get in touch, I’d love to hear from you! Thank you.

Eternal Storms Software Logo

– – – Do you enjoy my blog and/or my software? – – –
Stay up-to-date on all things Eternal Storms Software and join my low-frequency newsletter (one mail a month at most). Thank you 🙂

Read more

In iOS Simulator, you can, via a menu item, quickly simulate memory pressure for the simulated device to see if your app behaves correctly under low memory conditions (releasing caches, cleaning up resources, and so on).

Recently, I had the need for it on the Mac (where such a menu item is not available), while working on an XPC service for Yoink, to see if it terminated properly under certain conditions.

Meet the memory_pressure tool

OS X comes with the Terminal, and with the Terminal come some awesome tools. Among them is memory_pressure. Its man page says it all:

Apply real or simulate memory pressure on the system.

Usage of memory_tool

sudo memory_pressure -S -l critical

What this does is simulate (-S) a memory pressure of a critical level (-l critical).
sudo is needed, otherwise it will probably fail with an “Operation not permitted” error.

memory_tool’s options

-l:   Two levels of pressure are supported: ‘warn’ and ‘critical’.
-p:  For real pressure, this lets you define how much memory should remain free, in percent of total memory.
-S:  Simulate memory pressure, don’t really allocate memory.
-s:   If applying real pressure, this is the duration to wait before allocating or freeing memory.
       If it’s simulated pressure, the system will be maintained at an artificial memory level for this duration.

Read more