development

To start with: it’s difficult, but it can “work”. Sort of.

The star of the show, the MacBook Pro Mid-2012, running macOS Ventura (far right)

Why do this to yourself?

Quite frankly, I didn’t feel like shelling out ~€600 for a refurbished Mac Mini just to be able to test the odd app of mine with iCloud sync. It just seems overkill. And I did have this old MBP lying around, so I thought: why not give it a try?
If all else failed, I’d still have the Mac Mini option, anyway.
And a Virtual Machine doesn’t work, because you can’t log into iCloud / Apple ID in a VM environment for some reason. It could have been so easy…

I’d done it before, too. That 2012-MBP has served me so well over the years, with 6 partitions, reaching from macOS 10.10 Yosemite to macOS 10.15 Catalina, all for testing purposes.

It really speaks to the quality and longevity of these machines. Eleven years old, and still rocking.

Installing macOS 13 Ventura on the MBPMid2012

Getting macOS Ventura (released in 2022) to run on a Mac that’s not supposed to run even macOS 11 Big Sur (released in 2020) is surprisingly easy.
Using OpenCore Legacy Patcher, it was pretty straight forward, with only one *gasp*-I-think-I-just-bricked-this-11-year-old-Mac moment that was resolved by a simple restart (a dialog appeared telling me the installation had to be aborted due to an unknown error, which had no effect at all).
There’s really only one thing that I thought could be improved (complaining on a high level here, since it’s a miracle this works at all in the first place):
You *have* to use an external drive to create the installer drive, you can’t use an internal partition. And you cannot use a partition of an external drive, you have to wipe that drive entirely.
None of my USB thumb drives were big enough (the biggest I have is 8 GB), and all my other drives have more or less important data on them, so wiping one of them was out of the question.
Thankfully, my girlfriend had a completely empty 2TB hard drive handy that she was supposed to use for backups (and never did), so I was able to use that.
Once that was out of the way, it was all just a matter of following the on-screen instructions and waiting. And waiting. It takes a while.

Running Xcode 15 on it

It runs. It compiles. It fails to attach the debugger to the app (the LLDB RPC server crashes). But the compiled app continues running. So, debugging and coding directly on the Mac is impossible.

In hindsight, I think I may have overshot with macOS 13 Ventura and perhaps should have installed macOS 12 Monterey instead with Xcode 14, but I did what I did. It’s done. I’m not doing it over. You can’t make me.

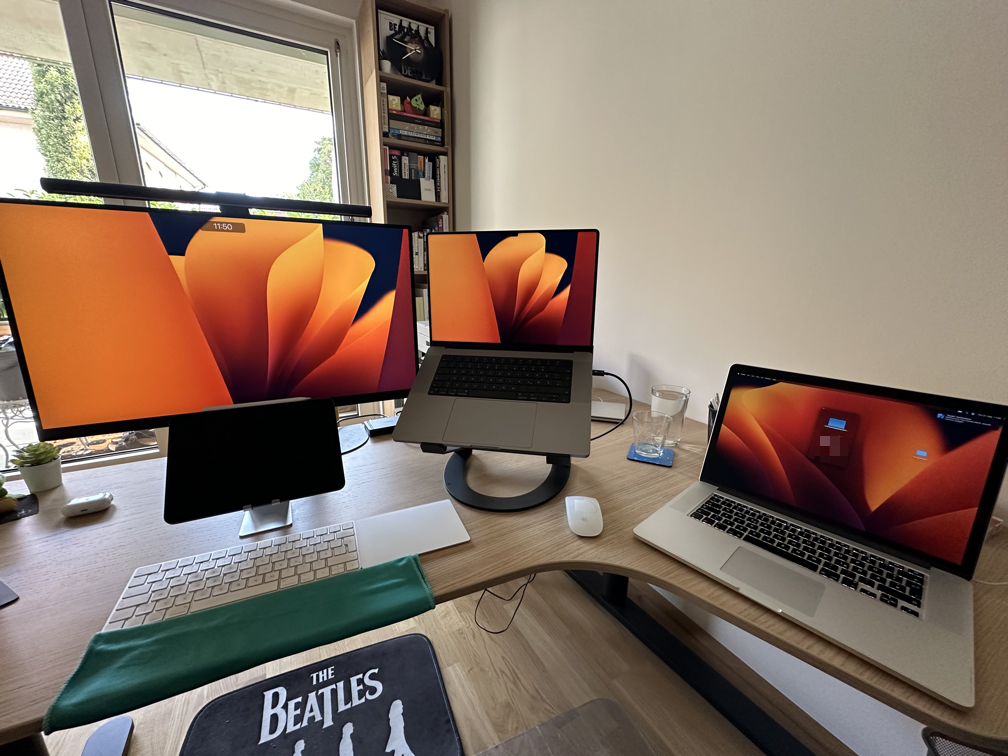
In my case, it’s just as well. All I wanted to do was to test ScreenFloat 2’s iCloud sync with another Mac. And as far as that’s concerned, it’s working perfectly.
It would have been the icing on the cake to be able to debug directly on that Mac, and commit changes back and forth, but what can you do…
I debug on my main Mac, and then commit-and-pull the new code over on the old Mac, and then re-build. It’s tedious, but I can’t really complain. Well, I can. And I am. But I shouldn’t.

Other Observations

I’m making use of the Vision framework in ScreenFloat, and that completely crashes the app on the old Mac. Apparently, there is a reason why macOS Ventura is not supported on these old Macs.

I don’t think you could use this as a machine for work, as I’d imagine you’d run into a lot of little, annoying, and big, terrifying issues. For instance, I imagine Preview would crash a lot, since it also uses the Vision framework for its OCR and whatnot.

For testing apps in development, however, it might work, depending on what it is you’re testing/developing. I had to jump through some hoops (disabling my Vision framework code) to get my app to run. Your mileage may vary.

As a no-cost alternative to a refurbished Mac Mini at ~€600, I couldn’t be more happy.
Here’s to my old, loyal MacBook Pro Mid-2012. It still has some life in it.

Read more

One of these days, I’d like to put some of the still-in-development ScreenFloat 2’s features through its paces (for instance, and most importantly, the migration of a ScreenFloat 1 library into the new format).

So I’m starting to put together a list of heavy-duty ScreenFloat users now, so that, once I’m ready, I can send out TestFlight invitations and get some feedback and insights right away.

If you consider yourself a heavy-duty ScreenFloat user, and/or have a large-ish library of shots and collections in ScreenFloat 1, please do reach out, I’d appreciate your help.

It’s still going to be a little while as I think about what I want to test exactly, and how, but I’ll be in touch nonetheless, you can be sure of that.

Thank you!

Read more

When creating a custom Quick Action for macOS Mojave’s Finder, you have the option to supply a custom icon:

Creating a custom Quick Action in Automator for macOS Mojave

Selecting an icon in Automator

But this is what happens when you supply an ordinary image in Dark Mode:

A Quick Action's icon without adjustments

or Light Mode:

Unmodified Quick Action icon

(in Light Mode, it’s obviously better, but still not as subdued as it should be, which is more grey than pitch-black, or whatever color your original icon file might have).

Tip #1 – Getting the icon’s color right

The trick is to have the file end in ‘Template’, like ‘MyWorkflowIconTemplate.tiff’. But that’s not all there is to it. When you add a custom icon through Automator, it automatically gets renamed into ‘workflowCustomImage.png’. So no matter what you name your file, it won’t matter.

To fix this, add a custom icon to your Quick Action in Automator, save, switch to Finder and navigate to /Users/yourname/Library/Services/, where your newly saved Quick Action will end up.
There, right-click your Quick Action, select ‘Show Package Contents’, and navigate into Resources, where your icon file will be. Rename it to ‘workflowCustomImageTemplate.png’.
Now, navigate into Contents and open Info.plist. Look for <key>NSIconName</key> and change ‘workflowCustomImage’ to ‘workflowCustomImageTemplate’. Save.

Now the icon will look like this:

Modified Quick Action icon in Dark Mode

Modified Quick Action icon in Light Mode

That’s much better. But there’s another issue we need to take care of:

Touch Bar with oversized Quick Action icon

The icon’s a bit too large, even though in Finder and the “More…” menu, it looks well-sized.

Tip #2 – Getting the Touch Bar icon to play nice

I thought I’d be smart about it, since the “append ‘Template’ “ trick worked, I’d have three differently sized images and append @2x and @3x. But it didn’t work.
The trick is to have a TIFF file with 2 (or 3, to be on the safe side) representations – one at 1x, one at 2x and one at 3x.
And voila, it worked:

Quick Action icon in Touch Bar with properly sized icon

To create the TIFF, I wrote a small app that takes my icon file, creates three NSBitmapImageRep objects from it and adds them to an NSImage instance. Then it writes the NSImage object’s TIFFRepresentation to disk.
Open that file in Preview.app and you’ll notice all three icons inside that one TIFF (you might have to select View – Thumbnails in the menu to show them)
Select the first and select Tools -> Adjust Size… in the menu bar.
Resize the image to 16×16 (which I found to be working nicely) and set its resolution to 72, if it isn’t already.
Select the next thumbnail and resize it to 32×32 at 144 DPI, and the third thumbnail to 48×48 at 216 DPI. Save.
Now repeat Tip #1 with this new file and you’re all set.

I hope this will save you some time, as it cost me plenty 😉

_____
Matthias Gansrigler
 | Founder & Developer – Eternal Storms Software
e: blog@eternalstorms.at
twitter | facebook | instagram

Read more

When copying files in Finder, you might have noticed that the newly created, still-being-written-to files are ‘grayed out’, conveniently informing the user that the file is not ready yet.

Greyed out files in Finder

I wanted to replicate that for an upcoming upgrade of Transloader (along with a progress indicator, as you can see in the screenshot above, but that’s another topic), and after trying a couple of things, I found out how to do it.

I tested this on macOS High Sierra only, since it’s the OS version I’m targeting right now, but I don’t see a reason why it wouldn’t work on earlier versions of macOS.

It’s All in the Date

After digging around on the internet, I found that all that needs to be done is to change the file’s creation- and modification dates to one specific date, namely:
January 24th, 1984, 09:00:00 AM

Setting the creation and modification dates of the file to be greyed out

And it works great – the created file appears ‘grayed out’ in Finder.

There’s a downside, however:
When copying a file in Finder, and trying to move that still-being-written-to file, Finder will display a convenient message that tells the user the file is in use and moving it might cause problems.
This doesn’t happen when using this date-setting approach.

So I kept digging.

The Solution

What I did, then, was use Terminal and the ‘mdls’ command to list the meta data of the still-being-written-to file:

mdls in Terminal on a copying file

At first, coming from the date-approach, I noticed the kMDItemFSCreationDate item, stating
1904-01-01 00:00:00 +0000

However, setting that as the creation date does nothing at all.

Then, I noticed the kMDItemFSCreatorCode and kMDItemFSTypeCode fields (red arrows in the screenshot of Terminal above).

Setting those like this…

Setting creator and type codes in Objective-C

…does exactly what I wanted – it ‘grays out’ the file in Finder, and displays the convenient Finder error message when trying to move it:

Finder error message when trying to move a still being written to file

Mission accomplished – we’re done!

Please keep in mind, though, that the user may still choose “Continue” to move the file, so you should definitely use an NSFileCoordinator to take care of that.

Read more