Cocoa

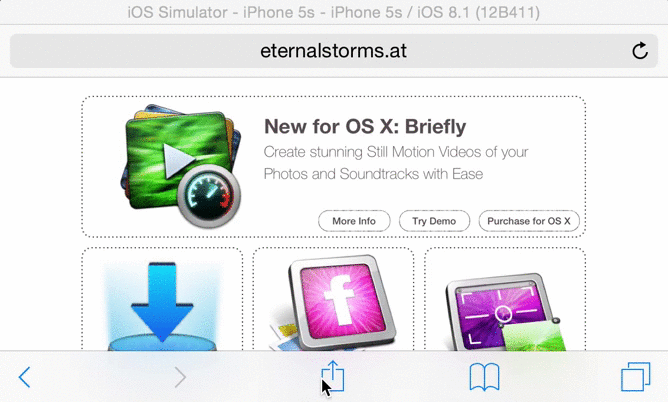
For Briefly, I needed a nice, subtle animation for switching between the detail soundtrack view and the reorderable list view. In OS X Yosemite 10.10.3’s Photos.app, I noticed something I liked very much.
When going into an album, for example, the current view is zoomed out of focus and the new view is zoomed in.

Zoomtransition Animation Gif

NSView+ESSViewCategory

I wrote a little category on NSView to do just that, it’s a one liner (ironically, in this pic, it’s more than one line) :

Line of code

It’s pretty self-explanatory. You pass in the view you want to transition from and the one you want to transition to, the type of transition (zooming in or out), the duration and an optional completionHandler that’s called when the animation ends.

Alternatively, it’s also available as an instance method where the view you call this on will be passed into the class method as fromView:

Instancemethod

The Views

For the transition to work, fromView has to be in a view hierarchy, toView shouldn’t. They should be the same size, otherwise more work on your part is necessary (which I had to do in Briefly because the NSPopover the views reside in resizes before / after the transition), but either way the code provided should give you a nice head start.

fromView’s superview is temporarily set to have a CALayer to make use of Core Animation during the transition. After the animation ends, the superview’s wantsLayer – state is reset to what it was before the animation. If we didn’t do this, the animation would appear sluggish.

ESSViewZoomTransition

As you can see in the gif above, there are two types of the transition:

ESSViewZoomTransitionZoomOut – the transition from the textView to the view with the checkboxes.
ESSViewZoomTransitionZoomIn the transition from the checkbox-view to the textView

How To Use NSView+ESSViewCategory

You’ll have to first add the NSView+ESSViewCategory.h and *.m files to your project.
Please note that the category imports <Quartz/Quartz.h> for Core Animation’s CAMediaTiming class, so you might have to add that framework to your project, too.

fromView
It has to be inside of a view hierarchy. Fades out during the transition.

toView
Can be in a different xib file (for example, a NSViewController) or in the same as fromView. It’s important that it is not already on screen somewhere. Fades in during the transition.

Once you have set up your views, either call the class method and pass fromView and toView as well as the other parameters or call the instance method on fromView.

How It Works

The method creates an NSImage of both toView and fromView, puts them into two NSImageViews that have the same frame as the views and animates those two NSImageViews accordingly (calling imageView.animator.frame = …; and imageView.animator.alphaValue = …; )
Because fromView’s superview temporarily gets a CALayer, .animator is powered by Core Animation, which makes for a much smoother animation than doing the same without a layer-backed view.

ImagecreationCreating an NSImage of toView.

So the views themselves aren’t actually resized, they’re just screenshotted, removed from view as we place the NSImageView on top of it, creating the illusion that nothing happened. Then we animate the NSImageViews and insert toView after the animation is done, removing both NSImageViews.

The Source Code

The repository (a sample OS X app) is available on Github.

It was developed (and tested) on OS X Yosemite 10.10.3 using Xcode 6.3.1, but should work on earlier versions of the operating system.

I have some more source code available here (or directly on my github profile page) if you’re interested. If you have any questions or feedback regarding my open source projects, please be sure to mail or tweet me – I’m looking forward to your feedback!

Enjoy!

Read more

ESSSquareProgressIndicator animating

What Is ESSSquareProgressIndicator?

It’s an indeterminate progress indicator originally developed for the iOS game ZEN.

It uses Core Animation (specifically, CAShapeLayers) to do its job and it’s pretty straight forward.

CGPathRefs, CAShapeLayer

CAShapeLayer has two animatable properties – -strokeStart and -strokeEnd (with a minimum value of 0.0 – start of path – and 1.0 – end of path). Going beyond 1.0 or below 0.0 doesn’t work.

So when trying to animate those values along a rectangular path – which was the first thing I tried when creating this – you do get a nice animation, but it ends at the 0.0/1.0 (which is, basically, the same) mark. So you end up with something like this:

glitchy progress indicator animation

The goal, then, was to animate beyond 1.0. The solution I came to – I’m sure there are other ways – was to use a second CAShapeLayer that animated alongside the first for the last/first part of the animation.

For a square, the values of the CAShapeLayer’s -strokeStart and -strokeEnd are as follows (starting at the top left corner):

CAShapeLayer strokeStart strokeEnd values

The CGPath begins and ends in the top left corner because I drew the path that way (you could make it start in the lower left corner or in the middle of a side, it all depends on where you start the CGPath with CGPathMoveToPoint).

The progress indicator starts at the middle of the left line and reaches to the middle of the top line. These are the two CAShapeLayers at work. The left part is one shape layer, the top line is another. I’ll do this in pictures I drew in code so it’s simpler to understand (the lines represent where the layer animated to, the dots are the invisible rest of the square).

Animating

Animation Part 1We start at this position. The line to the left is layer2(strokeStart:0.875, strokeEnd:1.0), the line at the top is layer1(strokeStart:0.0, strokeEnd:0.125).

Animation Part 2The transition to this is the reason we need two layers as we can not animate one layer beyond the 1.0 value.
So we animate layer2 to (1.0, 1.0) and at the same time animate layer1 to (0.0, 0.25) which makes it look like one line moving.

Animation Part 3This next part is easy. We animate layer1 to (0.75, 1.0).

Animation Part 4Lastly, we animate with two layers again to get to the initial position so we can repeat the whole thing from there on.
We animate layer2 from (0.75, 1.0) to (0.875, 1.0) and layer1 from (0.0, 0.0) to (0.0, 0.125) at the same time, again making it look like one line moving.

The Source Code

The repository (a sample iOS app, but the class works the same on OS X) is available on Github.

It was developed for iOS 7.1 but should work on earlier systems, and has been tested on OS X Yosemite, but should work on earlier systems as well.

You just drop in an ordinary UIView or NSView and set its class to ESSSquareProgressIndicator. Done. You can then set the color and stroke width right within Interface Builder thanks to the fairly new Xcode macros IB_Designable and IBInspectable.

Open Source

I have some more source code available here (or directly on my github profile page) if you’re interested. If you have any questions or feedback regarding this progress indicator, please be sure to mail or tweet me 😉

Enjoy!

—-
My name is Matt, I’m the developer of Eternal Storms Software. If you’d like to comment, you can catch me on twitter here: [twitter-follow screen_name=’eternalstorms’ show_count=’yes’] or by eMail.

Read more

For the upcoming action extension in Transloader, I’m using a UIWebView to show the webpage the user is currently browsing, so they can tap on a link they’d like to download:

UIWebView without zoomTransloader’s Action Extension, displaying a UIWebView

It’s nice, but I wanted to go an extra step. A user might zoom and scroll in Safari before launching the action extension and when they do, the web page would be shown from the top, not zoomed. Here’s how I changed that.

Context and Flow

One of the main purposes of an action extension is to allow a user access to functionality from a different app without a) leaving the current app and b) without leaving the current context (which is more or less the same, but context is the point I’d like to drive home with this post).

In that vain, I thought it would be neat to present the website a user was viewing in Safari the same way in the action extension – meaning the zoom level and scroll position.

I figured, a user browses a site, perhaps zooms in on stuff and when they find a link they’d like to download to their Mac, they press the Share button in Safari and select Transloader’s action extension.

The thing is, the UIWebView of the extension loads the website for itself again and hence starts from the top, not zoomed in. So the user is ripped out of the context, they’d have to scroll and zoom again to get to the same position they had in the Safari web view. I wanted to change that:
A user should see the same part of the website in Transloader’s action extension as the part they were viewing in Safari before tapping the Share button.

Luckily, Apple implemented a way that allows us to do just that.

Java Script Preprocessing

In an Action extension for webpages (action extensions that are displayed in the action sheet if the NSExtensionActivationSupportsWebPageWithMaxCount criteria is met), you can supply a JavaScript preprocessing file that will let you examine the contents of the webpage before your native code is called.

This way, we can extract the current page scale and the scroll position. Here’s how we do that. In the Action.js, we call our native code with these parameters:

arguments.completionFunction({
“pageXOffset”:window.pageXOffset,
“pageYOffset”:window.pageYOffset,
“pageScale”:(document.body.clientWidth/window.innerWidth),
“baseURI”:document.URL
})

– pageXOffset is the horizontal scroll value
– pageYOffset is the vertical scroll value
– pageScale is how far the user has zoomed into the page
– baseURI is the current URL displayed in Safari

With these parameters, we can do what we set out to do – display the web page in the Action extension the same way as the user left it in Safari.

In our implementation file, in the WebView’s delegate method “-webViewDidFinishLoad:”, all we basically need to do is apply these parameters to our own web view:

[self.webView.scrollView setZoomScale:self._pageScale
animated:YES];

[self.webView stringByEvaluatingJavaScriptFromString:[NSString stringWithFormat:@”window.scrollTo(%ld,%ld)”,self._pageXOffset,self._pageYOffset]];

For a complete project of how this exactly works, please scroll down where you’ll find a Xcode Project on Github.

And this is what it looks like in action – notice that after the Action extension is tapped, the website appears the same way as it was in Safari:

UIWebView Zoom and Scroll in Action

Example Project

TL;DR – I uploaded a demo project here on Github.

I hope you can make good use of this code – and if you do, please be sure to let me know! 🙂

—-
My name is Matt, I’m the developer of Eternal Storms Software. If you’d like to comment, you can catch me on twitter here: [twitter-follow screen_name=’eternalstorms’ show_count=’yes’] or by eMail.

Read more

At the end of September 2014, I wrote about upcoming changes in Transloader for iOS.

Transloader iOS 8 Action Extension Icon

Today Widget

In that blog post, I wrote about a Today Widget that you could use to easily paste URLs you had copied to your pasteboard on iOS.
It would look like this:

I was pretty sure this would be the way to go, but after using it for a while and iterating on it, I became more and more convinced that this was not an optimal solution.

It’s not optimal for a couple of reasons.

– Although it’s far better than before iOS 8, where you had to open the Transloader app itself to get things going, the Today Widget approach is still a little cumbersome: copy the link, open Notification Center and tap the + button
– You’d have to do this for every link you’d like to add from a website, for example
– Doing that would erase your pasteboard contents you had copied before
– It takes you out of the app’s context

Action Extensions to the Rescue

So I started looking into Action Extensions. And now, this is possible:

transloaderaction

Exactly. Instead of going back and forth to copy several links from a website to add to Transloader, it can all be done on the website itself.

If you’re on a file site itself (for example, you’re viewing a PDF in your browser), you can add it to Transloader more easily as well:

fileaction

Conclusion

I think the combination of these two, the Today Widget (where you’ll still be able to paste links into Transloader, because I think it might still be useful to a lot of users) and the Action Extension will make Transloader very accessible and easy to use on iOS 8.

It will be available soon on the App Store.

—-
My name is Matt, I’m the developer of Eternal Storms Software. If you’d like to comment, you can catch me on twitter here: [twitter-follow screen_name=’eternalstorms’ show_count=’yes’] or by eMail.

Read more