For my screen-capture all-rounder app ScreenFloat, I’ve received feedback from users that, under macOS Sequoia, their keyboard shortcuts suddenly stopped working.
Well, with macOS 15 Sequoia comes an undocumented change that boggles the mind (and which developers have never been told about during the macOS upgrade’s beta period) :
In 3rd-Party-Apps, users are no longer allowed to set up keyboard shortcuts that use only the option ⌥, only the shift ⇧, or only option + shift ⌥ ⇧ keys as the modifier (like ⌥ ⇧ 2).
Why? As an Apple Frameworks engineer puts it, “to limit the ability of key-logging in malware”. A make–shift reason, if you ask me (or the other developers in that thread):
I also don’t get the logic. The change only impacts sandboxed apps, but malware wouldn’t use sandboxing. Plus, any app can request input monitoring and misuse it, so this mostly hurts legitimate apps and their users, and does very little to stop actual malware.
– sindresorhus
That’s sadly something that’s becoming more and more routine at Apple: punish developers that adhere to the sandbox and Mac App Store rules, for no good reason.
How does this even prevents key loggers?
– IzsakSVK
Beats me (and Apple).
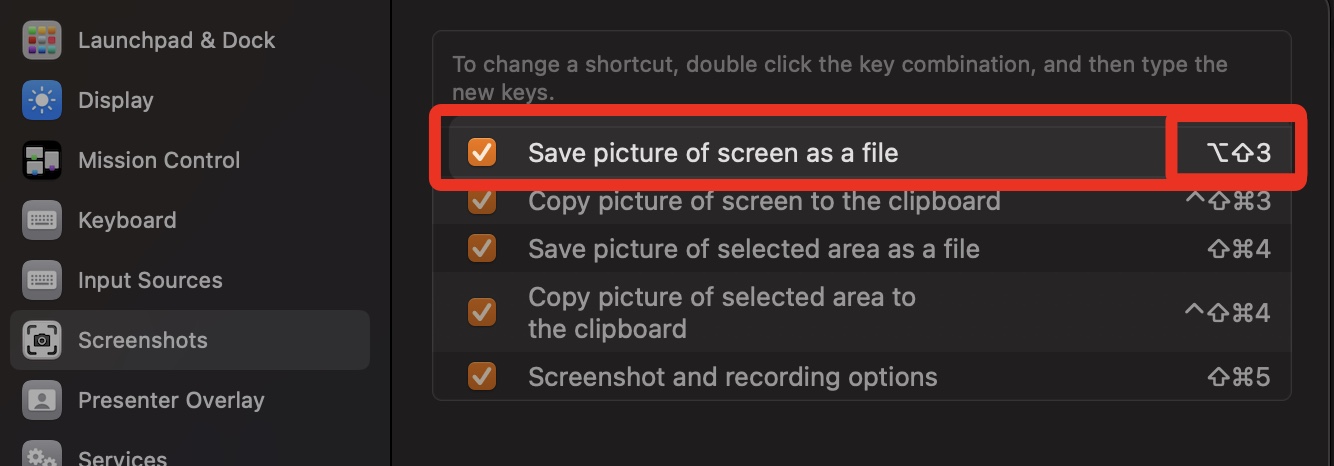
Of course, as always, Apple’s own software is exempt from this restriction, as you can see in this screenshot of System Settings > Keyboard > Keyboard Shortcuts, where I could set it up just fine.
Why this matters? Consistency. Users expect that if it works in Apple’s software, it should also work in other apps they use. And I agree!
Just yet another change where Apple oversteps its bounds to prevent users from configuring and using their own computers how they want to.
Updated for macOS 15.2
Apple seems to have reversed their decision – option-based keyboard shortcuts are allowed again for sandboxed 3rd-party apps on macOS Sequoia 15.2.