Business

With Transloader 3 finally publicly available, I’d like to invite you on a tour through the app and its functionality.
In Part III, we built custom download workflows with Transloader’s Siri Shortcuts on iPhone and iPad.
In this Part IV, we’re going to look at all the preferences and settings the app has to offer on both macOS and iOS.

Table of Contents

Part IStarting Downloads Remotely on Macs
Part IIDive Into Transloader’s iOS App
Part IIITransloader Siri Shortcuts on iPhone and iPad
Part IVPreferences and Settings
Part VLogin to Download
Part VILink Actions
Part VIIFile Actions

Part IV – Preferences and Settings

Let’s look at the Mac app first, as it lets you set up everything from download settings, Link- and File Actions, to login data, whereas the iOS companion app only contains a subset of those preferences (logically, because it doesn’t accept downloads, for example).

General
It doesn’t get more “General” than that.

“Launch Transloader at login”
Launches Transloader when you log in to your Mac. And with v3.0.1, it actually works, so, how about that?

“Show menu bar icon”
Transforms Transloader into an app that runs mostly in the background (and in your menu bar), instead of appearing in your Dock. If you’re like me and have it running all the time, this might be a nice preference for you. Plus, it has this animation, so, go ahead. Select, deselect, select, deselect. I know you want to. I’ve been doing it for hours for the video below:

“Prevent Mac from sleeping”
I’d only use this if you have a constant need to download and basically never want your Mac to idle-sleep as long as Transloader is running. It’s there for convenience, but recommend: I would not.

Downloads

“Save downloads in”
Ye olde folder selection, for where downloads should end up.
With a File Action (see Part VII), you can fine-tune this.

“Maximum simultaneous downloads”
‘Default’ means no restrictions by Transloader itself, but macOS might limit in ways it sees fit.

“Download priority”
Here’s what Apple says about the API I’m using for this – perhaps you can make sense of it:
“To provide hints to a host on how to prioritize URL session tasks from your app, specify a priority for each task. Specifying a priority provides only a hint and does not guarantee performance.”

“Open links leading to websites in default browser (…)”
As an alternative to Transloader’s “Login to download”-feature, if this is selected, Transloader sends links that lead to text/html (and such) websites to your browser. Chances are the text/html site is a login page, and if you’re logged in to that site in your browser, the download will start there.
If you deselect it, the download will fail in Transloader, notifying you about it on your devices. In that case, you could use “Login and Retry”, if it’s actually a file the link leads to, requiring a login.

“Prevent Mac from sleeping while downloading”
This prevents your Mac from idle-sleeping while downloads are active. A more sensible alternative to the one before. You know, the one that I’ve put in the app, but couldn’t recommend?

Notifications

Transloader on Mac can show you local and push notifications.
Local notifications for when a local download finishes or fails, push notifications for when a download finishes or fails on another Mac.

Actions, Login Cookies

Those are for stretching this blog series as thin as possible. Nah, I’m just kidding, those are really, really cool, so I thought I’d dedicate one part to each of them.

iCloud

Transloader is powered by iCloud, so basically anything you do runs over it.
If you should ever decide to restart fresh, you can use this button to completely wipe Transloader’s data from iCloud. A blank slate. It came in handy during development, believe you me.

Settings on iPhone and iPad

Transloader on iOS lets you configure your remote notifications (there are no local ones in the iOS companion app, since it doesn’t download itself), your login cookies (see Part V), and delete all your iCloud data.

Summary

As far as preferences go, I think it couldn’t get more exciting than Transloader’s. Wouldn’t you agree? Especially the ones on Mac we didn’t talk about!

Speaking of which, I hope you’ll join me again next time for Part V, where we’ll talk about an awesome new feature of Transloader 3, spanning across the Mac- and iOS versions of the app: “Login to Download”. I’m very happy how that turned out!

Links

Transloader Website (with a free, 15-day trial for Mac)
Transloader on the Mac App Store ($4.99 / €5.49 for a limited time)
Transloader on the iOS App Store (free)
Transloader Usage Tips

Read more

With Transloader 3 finally publicly available, I’d like to invite you on a tour through the app and its functionality.
In Part II, we dove into Transloader’s iOS companion app, but left out Siri Shortcuts.
That’s where this Part III comes in – thank you for joining me again, I’m so happy to see you here!

Table of Contents

Part IStarting Downloads Remotely on Macs
Part IIDive Into Transloader’s iOS App
Part IIITransloader Siri Shortcuts on iPhone and iPad
Part IVPreferences and Settings
Part VLogin to Download
Part VILink Actions
Part VIIFile Actions

Part III – Transloader’s Siri Shortcuts on iPhone and iPad

There are three Siri Shortcuts Transloader offers.

1. Get Status of Transloader on <Mac>

The purpose of this shortcut is simple: to be able to conditionally run subsequent actions, based on its result.
It returns a boolean value (YES or NO), depending on whether Transloader on the selected Mac is running or not, and that the selected Mac is turned on (as in, not sleeping and not turned off).

For example, you could build a “priority” download workflow:
If Transloader on my iMac at home is available, download the link on my clipboard there.
However, if it is not, download it on my MacBook Pro instead.

This is what that looks like in Shortcuts.app:

Which brings us to shortcut number…

2. Download <Link> on <Mac>

As is shown in the screenshot above, this shortcut assigns the passed-in link to the Mac you select for download.
An error is returned if the passed-in link is invalid.

This shortcut is especially useful if you don’t pre-select a Mac, but select “Ask Each Time” instead, which will then let you dynamically choose a Mac whenever you run it. More on that below.

For now, let’s move on to the third shortcut Transloader offers:

3. Save <Link> for Later

If you’d just like to save a link in Transloader so you can assign it at a later time, this is the shortcut to do it.

Shortcuts as Widgets (iOS 14 and newer)

This is more a feature of Shortcuts.app than Transloader, but it’s still nice to know.
Most of the shortcuts you have saved in Shortcuts.app can be saved as a Widget on your Home screen.
I have one titled “Download Link On…”, which retrieves the link on my clipboard and then asks me which Macs I’d like to download it on.
Here it is in action:

I like to use this shortcut with either the iPhone’s back-tap feature, or with Siri:

Shortcuts as Siri Voice Commands

A shortcut’s title is also a voice command for Siri. So when I’m browsing, I’d just copy a link, bring up Siri and tell her to “Download Link on…”, and Siri will ask me to choose a Mac:

Summary

Now you know how to use Transloader’s Siri Shortcuts to your advantage, and build potentially powerful download workflows.

Please do join me next time, when we’ll check out Transloader’s Preferences and Settings.
Just when you thought things couldn’t get more exciting than this!

Links

Transloader Website (with a free, 15-day trial for Mac)
Transloader on the Mac App Store ($4.99 / €5.49 for a limited time)
Transloader on the iOS App Store (free)
Transloader Usage Tips

Read more

With Transloader 3 finally publicly available, I’d like to invite you on a tour through the app and its functionality.
In Part I, we were mostly on the sofa, except for the part where we were out grocery shopping.
In this Part II, I’ll show you everything* there is to know about the iOS companion app.
Thank you for joining me again – I’m so happy to see you here!
*not actually everything, but read on

Table of Contents

Part IStarting Downloads Remotely on Macs
Part IIDive Into Transloader’s iOS App
Part IIITransloader Siri Shortcuts on iPhone and iPad
Part IVPreferences and Settings
Part VLogin to Download
Part VILink Actions
Part VIIFile Actions

Part II – Dive Into Transloader’s iOS App

Version 3 is not only a new Mac app, it’s also a new iOS app, and with it comes all sorts of goodness that has become available in iOS since the last time Transloader has seen a significant update (over 6 years ago – whoopsie).
Let’s take a look!

New Icon, New UI

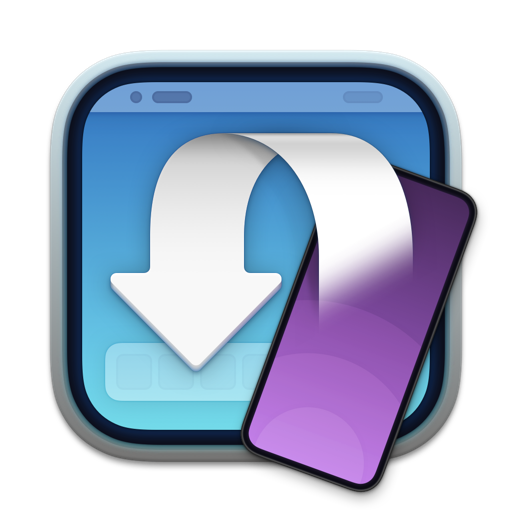
The first thing you’ll probably notice is the new icon. The old one was very long in the tooth for obvious reasons, but Alexander Käßner did an amazing job with the new one – again!
It obviously plays off the Mac version, and I believe it would fit perfectly onto one of your home screens. Preferably the first.

Don’t mind Mail.app’s badge count. It’s… I’ll… just don’t mind it.

Taking a look inside the app, everything has changed. We have three main views now:

At the top right, you’ll always see the Add Link button. It was my goal to make starting downloads as quick, painless and easy as possible, so there are numerous ways to get downloads started.

In Part I, we’ve already covered the Share extension, which is available for every link that can be shared on iOS.
But there are more ways than one to skin pet a cat.
When you’re on your home screen, long-press Transloader’s icon to reveal its Quick Actions:

Transloader’s quite serious about downloading links.
Starting Downloads with Home Screen Quick Actions

Transloader’s Quick Actions consist of a general “Download Link” item, which will open Transloader’s Add Link screen, pre-filled with the link on your clipboard (if you’ve copied one).
It also has one for the last three Macs you downloaded on, which will also open Transloader’s Add Link screen pre-filled with the link on your clipboard, and pre-select the corresponding Mac.
Here it is in action:

Starting Downloads with Gestures

Tap with three fingers into Transloader and you’ll see the quick action bar, which lets you paste any link you’ve copied into Transloader. You can also “three-finger-zoom” to do it a little quicker.

Depending on where you are in the app, this will behave a little differently.
In Downloads and Devices, it’ll open the Download Link sheet, as you can see in the video above.
In Saved Links, it’ll just save the link for later.

Starting Downloads from “Downloads”

You can send links to more than one Mac for download, and you can also assign a link that’s already been sent to a Mac for download to another Mac. In case that sentence makes no sense, here it is as a video – it’s much clearer that way:

Tap the ellipsis button next to a download, and you’ll be able to send the link to other Macs.
Note that the Mac which the link is already assigned to is missing from the potential targets, as it’s unnecessary to be included in this case.

Next to a Mac’s name, there’s a + button. Tap it to assign saved links to it, or to show the Download Link view with that Mac pre-selected.

Starting Downloads with Drag and Drop

Just like under “Downloads”, you can use the ellipsis button to assign links to Macs for download.
You can also use drag and drop, which is, like, way cooler. This also works from Downloads, of course.

When you start to drag a link, note how, at the bottom, Transloader’s Quick Drop Bar™* appears. It’ll let you quickly assign downloads to one, or multiple Macs, simply using drag and drop.
*not actually a trademark

Macs are color coded, so you’ll know if Transloader and the Mac is running (green), the Mac is sleeping (orange), or the Mac is off or Transloader is not running (red).
While you’re dragging, you can also switch to the other screens, if you prefer to assign downloads that way.

Drag and drop works across apps on iPad as well (and with iOS 15, on iPhone too), for when you’re in a hurry to download all the demo versions Eternal Storms Software (it me) has to offer – like I am in the video below ; )

Starting Downloads with Siri Shortcuts

Siri Shortcuts are so cool. And I’ve embraced them with Transloader.
However, this is the topic of the next part of this series, so nothing to see here, moving on…

Keyboard Shortcuts

If you’ve got a keyboard connected to your iOS device, Transloader has got you covered.

Depending on where you are in Transloader, it offers you keyboard access to its most relevant features
Summary

Now you know everything there is to know about Transloader for iPhone and iPad.
Well, almost everything, because I want you to keep coming back and read the other parts 😉

Speaking of which, I hope you’ll join me again next time, when we’ll look at Transloader’s Siri Shortcuts on iPhone and iPad, which allow you to create automated downloads.
See you then!

Links

Transloader Website (with a free, 15-day trial for Mac)
Transloader on the Mac App Store ($4.99 / €5.49 for a limited time)
Transloader on the iOS App Store (free)
Transloader Usage Tips


Read more

With Transloader 3 finally publicly available, I’d like to invite you on a tour through the app and its functionality.

Transloader for Mac's App Icon

Table of Contents

Part IStarting Downloads Remotely on Macs
Part IIDive Into Transloader’s iOS App
Part IIITransloader Siri Shortcuts on iPhone and iPad
Part IVPreferences and Settings
Part VLogin to Download
Part VILink Actions
Part VIIFile Actions

Part I – Starting Downloads Remotely on Macs

Let’s begin this series with why Transloader exists in the first place: to be able to download files on your Mac, especially if you’re not in front of it.

Prerequisites

In order for a Mac to receive links to download, you need, well, at least one Mac.
With macOS 10.14 or newer, and an iCloud account, you’re ready to install and launch Transloader on it.

Installation and Setup

With your iCloud account set up (I’ll let Apple explain how to set it up), launch Transloader on your Mac(s).
Each Mac you launch Transloader on will be registered in the app’s iCloud container, and will thus become available to send links to for download.

A screenshot of Transloader's Devices window, showing an available iMac, a sleeping MacBook Pro, and two iOS devices.
Transloader’s Devices window

As you can see in the screenshot above, all devices I use Transloader with are registered in iCloud.
In this case, I have an iMac, where Transloader is running, and the Mac is on (indicated by the green status icon).
I also have a MacBook Pro, where Transloader is running as well, but the Mac is sleeping (indicated by the orange status icon).
Lastly, I have an iPhone and and iPad. And because they aren’t valid targets for downloads, they get a gray status icon.
Should you no longer wish to use a particular device with Transloader, you can delete it at anytime from this window, or from the iOS app.

Anyway, apart from launching Transloader on your devices once, there’s really no setup, so now you’re all set up and ready to get downloading.

Assigning Downloads to a Mac

Imagine: you’re sitting on your sofa (with a sister or two), surfing on your MacBook, and feeling as relaxed as can be. Feet up, head in the clouds. Then suddenly – BOOM – you get a news alert. Apple has just released a new Xcode beta.
Now, do you really want to break this blissful state of serenity you’re in, get up and go to your iMac in the other room, just so you can start the download? Well, of course you don’t! And why on earth would you? You’ve got Transloader.

Transloader's Share extension appears when right-clicking a link in Safari.
Transloader’s Share extension, running in Safari

So instead of having to put your MacBook away, getting out of your comfy, sofa-surfing position, you assign the link to your iMac in the other room for download with Transloader.
Right-click the download link in Safari, select Share, and Download with Transloader. You’ll see this:

Transloader's Share extension in Safari, allowing us to assign the Xcode download link to the iMac.
Transloader’s Share extension, running in Safari

The Share extension allows you to select one or more Macs on which the file should be downloaded. Click Download, and you’re done. The iMac receives the link and will download it right away:

Transloader running on iMac, downloading Xcode.
Transloader on the iMac, downloading the Xcode beta we just assigned

And when the download finishes, you’ll be notified about it on all your devices:

A push notification on macOS, indicating that the download of Xcode has finished on the iMac and was unpacked.
A push notification lets us know on the MacBook that Xcode has indeed been downloaded, and was opened with Archive Utility to unpack it

With the proper File Action set up, the iMac also unarchives the .xip after the download, saving you even more time. But that’s something we’ll look into in Part VII.

For now, let’s imagine again.
Your friend texts you on your iPhone: “Hey, check out this Mac app – here’s the download link”. But you’re out grocery shopping. Sure, you could wait until you’re back home and remember to download it then. But you already need to remember all the things you wanted to get from the grocery store, so that’s out of the question. And what if the demo is a big file? There’s too much uncertainty here.
Just send that link to your Mac right from the produce-section and you’re worry-free.

Long press the link and select Share:

The Share sheet on your iPhone includes Transloader when sharing URLs/links

Select Transloader, and you’ll be presented with the familiar options of choosing the Mac(s) you’d like to download the file on:

Transloader’s Share sheet on iOS offers you the same options as the Mac app

And like before, as you move out of the produce- and into the refrigerated section, you’ll be notified of a successful download:

The by now familiar push notification, this time on your iPhone.
Summary

Now you know everything there is to know about the basics of getting a download started on your Macs – from your iPhones, iPads, and other Macs, wherever you are.

I hope you’ll also join me next time, when we’ll dive in to the details of the iOS app for iPhone and iPad.
I’ll see you then!

Links

Transloader Website (with a free, 15-day trial for Mac)
Transloader on the Mac App Store ($4.99 / €5.49 for a limited time)
Transloader on the iOS App Store (free)
Transloader Usage Tips

Read more