Maybe this is common knowledge and everybody knows this, but I’ve only recently come to learn how this works, so I thought I’d share.
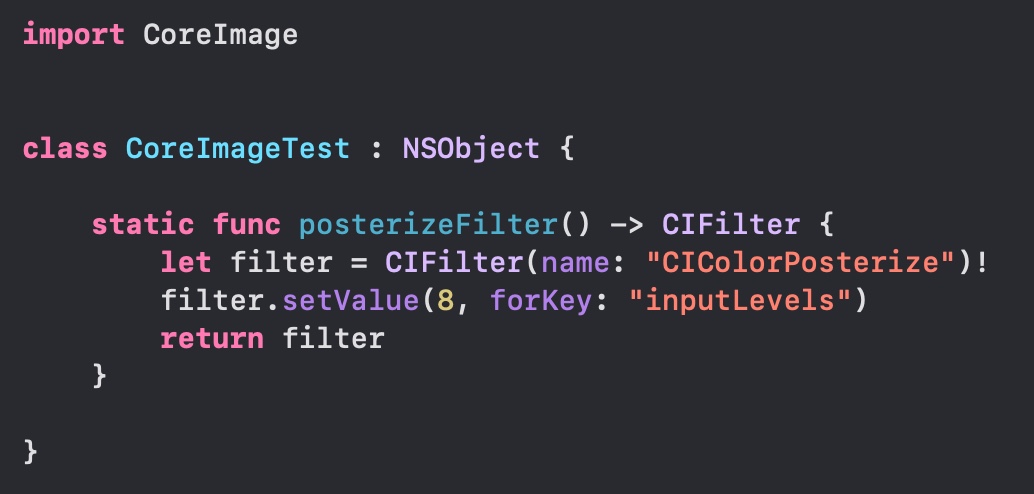
I’ve been setting up Core Image filters like this for god knows how long:
The downsides are obvious: 1) I have to know the exact name of the filter (“CIColorPosterize”) 2) I have to know the keys and values it accepts (“inputLevels”)
Browsing the Core Image headers, I did find functions for these filters where you could just call let filter = CIFilter.colorPosterize()
Yet every time I tried, it never worked and would give me an error that CIFilter has no member 'colorPosterize'. Well, “Crap!“, I thought, this must be something that will become available eventually.
How wrong I was. This has been available for a while, you just need to know how to do it! The “trick” is to not only import CoreImage, but also (why!?) import CoreImage.CIFilterBuiltins:
And lo and behold, it works. I’m so happy, I could cry. I’m off to refactor some stuff now.
Today’s my 39th birthday. Yes, I’m that old. It’s the last time my age will have a leading 3. Unless I live to be 300. But I’ll cross that bridge once I get there.
Because I don’t have a fancier way of doing it, I’ll just list the promo codes to be used on the App Store here. Please be so kind as to add a comment with the one you used so I can update this post and cross them off – thank you!
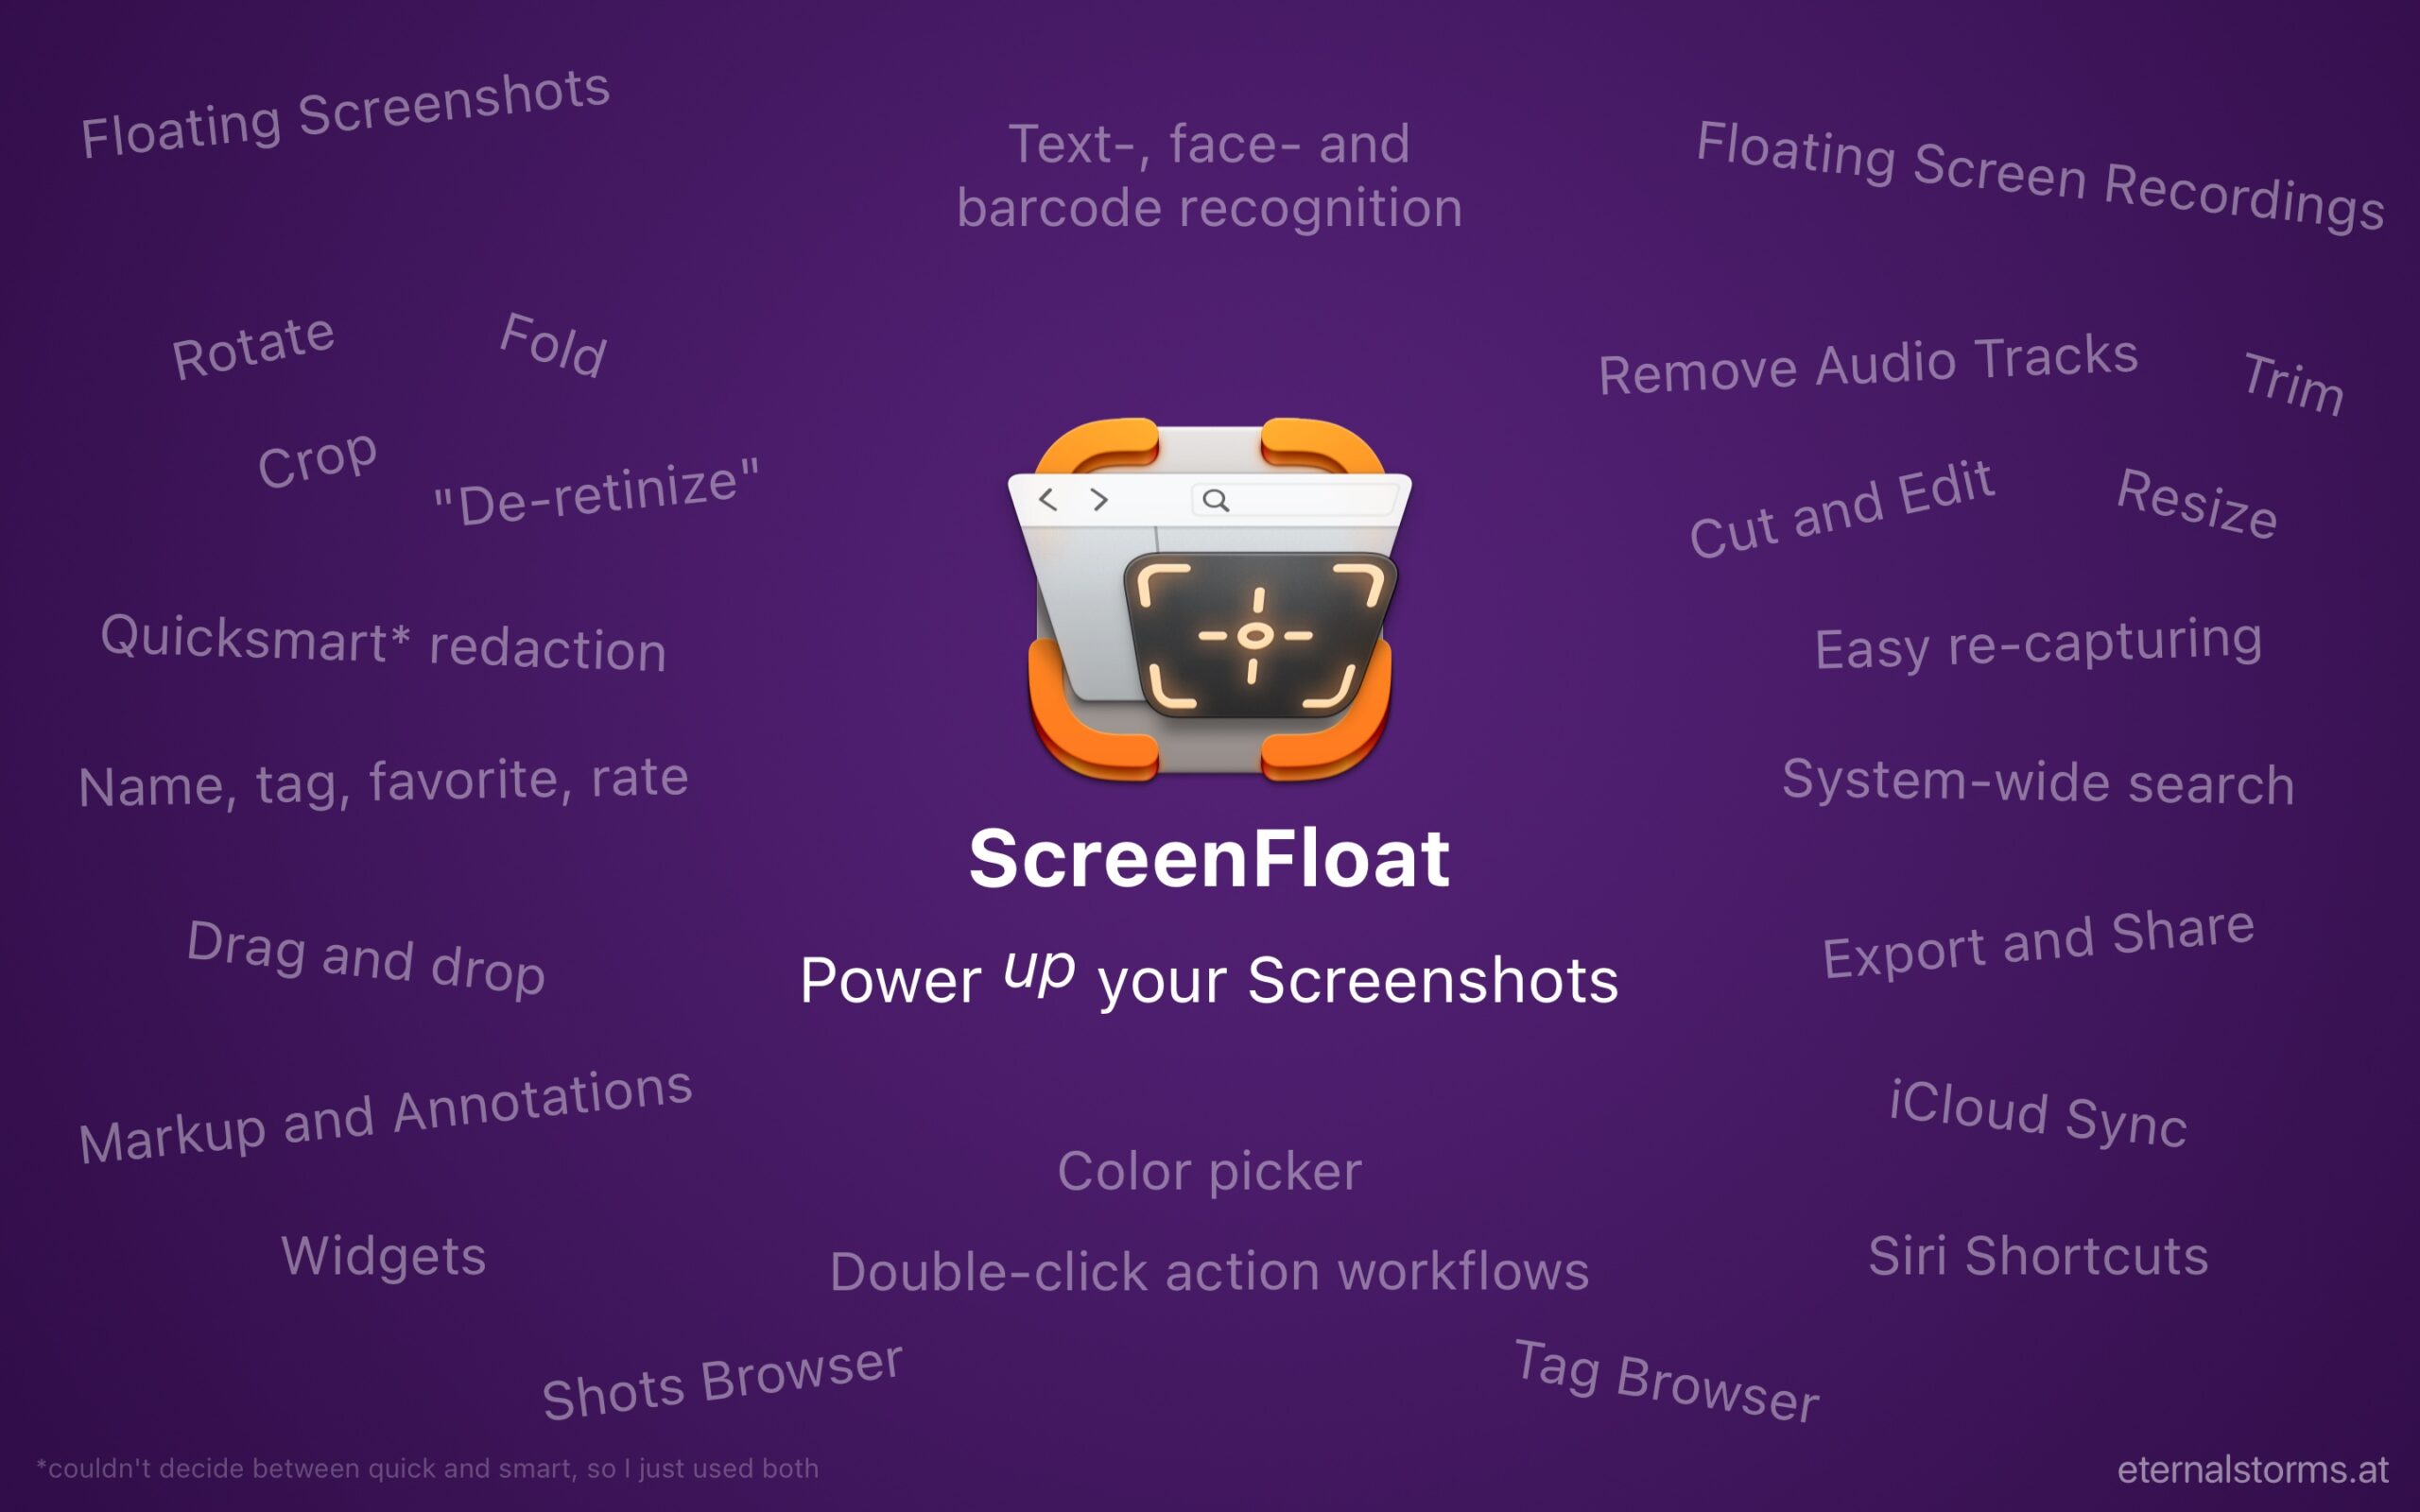
ScreenFloat v2.2.7 – your Mac’s Screen Capture All-Rounder – is now available. More easily capture menus and submenus (without the host window attached), automatically save URLs of browser window captures, and more!
What is ScreenFloat?
ScreenFloat is your Screen Capture All-Rounder. Capture screenshots and recordings that float above other windows, allowing you to reference anything on your screen, anywhere. It’s like Picture-in-Picture, only for screen captures. It keeps your Desktop clutter-free, as every capture you make is stored in its Shots Browser, where you can manage, organize and find your shots. They’re also synced across your Macs. Easily copy the non-copyable, as ScreenFloat recognizes text, barcode and faces in your shots, which also allows you to effortlessly redact sensitive parts of your screenshots. Add non-destructive annotations, redactions and markup, crop, “fold“, resize, or de-retinize your shots, or trim, cut or mute your recordings. Quickly pick colors. Create shareable and embeddable links for your captures using iCloud, ImageKit.io or Cloudinary.com. And so much more.
A screenshot is just a screenshot. Until you use ScreenFloat.
Tip: Check out the Get to Know ScreenFloat 2 Blog Post series for a deep-dive into its functionality and what it can do for you.
What’s New in ScreenFloat v2.2.7?
New system-wide Service in every app: Capture Contextual Menu. This allows you to easily capture a menu and its submenus, without having to capture an entire window. It also allows you to just store a specific submenu, when you don’t need the entire hierarchy.
When you take a shot of a browser window (currently supported are Safari, Google Chrome and Opera), ScreenFloat can save the link of that tab into the shot’s notes
For convenience and due to popular demand, the system-wide “Capture Floating Shot” has been reintroduced, as an alternative to ScreenFloat’s keyboard shortcuts, the capture widget and the menu bar icon
For cropping and re-capturing, you can now save custom aspect ratios, in addition to the app-provided ones (right-click onto the cropping area, or re-capture screen)
Improved the performance of the video editor, and fixed a bunch of minor bugs and crashes
What Customers Say About ScreenFloat
“So good I don’t even think about it” – tommykrause, Mac App Store
“A “Must Have!” ” – The Real DoctorDuck, Mac App Store
“Love it” – Shave land, Mac App Store
Links and Availability
ScreenFloat is a one-time purchase, available on the Mac App Store for USD 14.99 / EUR 15,99 / GBP 14.99 , and as a direct purchase from my website. It is a free update for existing customers. There is no difference in functionality between the version obtained from the Mac App Store and the one purchased from my website. A free, 28-day trial is available for download. ScreenFloat requires macOS 12 Monterey (macOS 14 Sonoma recommended for full functionality) A (free) iCloud account is required if you want to sync your ScreenFloat library across your Macs. ScreenFloat is currently localized in English, German, Chinese (Simplified), and Dutch.
ScreenFloat v2.2.6 – your Mac’s Screen Capture All-Rounder – is now available. You can now extract still images from movies playing in QuickTime Player; the update also brings a couple of fine improvements and bug fixes.
What is ScreenFloat?
ScreenFloat is your Screen Capture All-Rounder. Capture screenshots and recordings that float above other windows, allowing you to reference anything on your screen, anywhere. It’s like Picture-in-Picture, only for screen captures. It keeps your Desktop clutter-free, as every capture you make is stored in its Shots Browser, where you can manage, organize and find your shots. They’re also synced across your Macs. Easily copy the non-copyable, as ScreenFloat recognizes text, barcode and faces in your shots, which also allows you to effortlessly redact sensitive parts of your screenshots. Add non-destructive annotations, redactions and markup, crop, “fold“, resize, or de-retinize your shots, or trim, cut or mute your recordings. Quickly pick colors. Create shareable and embeddable links for your captures using iCloud, ImageKit.io or Cloudinary.com. And so much more.
A screenshot is just a screenshot. Until you use ScreenFloat.
Tip: Check out the Get to Know ScreenFloat 2 Blog Post series for a deep-dive into its functionality and what it can do for you.
What’s New in ScreenFloat v2.2.6?
New Service in QuickTime Player: Extract Still Images from a movie playing in QuickTime Player, at its current playback position
While taking a screenshot of the QuickTime Player window with ScreenFloat certainly is an option, this new service makes extracting still images even easier
A new Shortcuts.app shortcut to extract still images from movies using ScreenFloat
There’s now an option to record your screen at a non-retina resolution, reducing the file size, but also its quality
Improved the visibility of the selection UI in light images / on light backgrounds
Loading the Shortcuts list is now snappier and does no longer launch Shortcuts.app in the background
In the Shots Browser, Shots can now be copied from the opened Quick Look panel
Improved the reliability of the “Import files” Shortcut
Fixes a bug on macOS 15 Sequoia where the extra options in the Export dialog wouldn’t be displayed
Fixes a crash that could occur when opening the contextual menu in the Shots Browser
Fixes a bug with ScreenFloat’s URL scheme
What Customers Say About ScreenFloat
“So good I don’t even think about it” – tommykrause, Mac App Store
“A “Must Have!” ” – The Real DoctorDuck, Mac App Store
“Love it” – Shave land, Mac App Store
Links and Availability
ScreenFloat is a one-time purchase, available on the Mac App Store for USD 14.99 / EUR 15,99 / GBP 14.99 , and as a direct purchase from my website. It is a free update for existing customers. There is no difference in functionality between the version obtained from the Mac App Store and the one purchased from my website. A free, 28-day trial is available for download. ScreenFloat requires macOS 12 Monterey (macOS 14 Sonoma recommended for full functionality) A (free) iCloud account is required if you want to sync your ScreenFloat library across your Macs. ScreenFloat is currently localized in English, German, Chinese (Simplified), and Dutch.