When I ordered the new MacBook Pro M1 Max, I had no idea what I’d gotten myself into. I figured, new MacBook, new monitor, that’ll be it.
Oh, how wrong I was.
Prelude
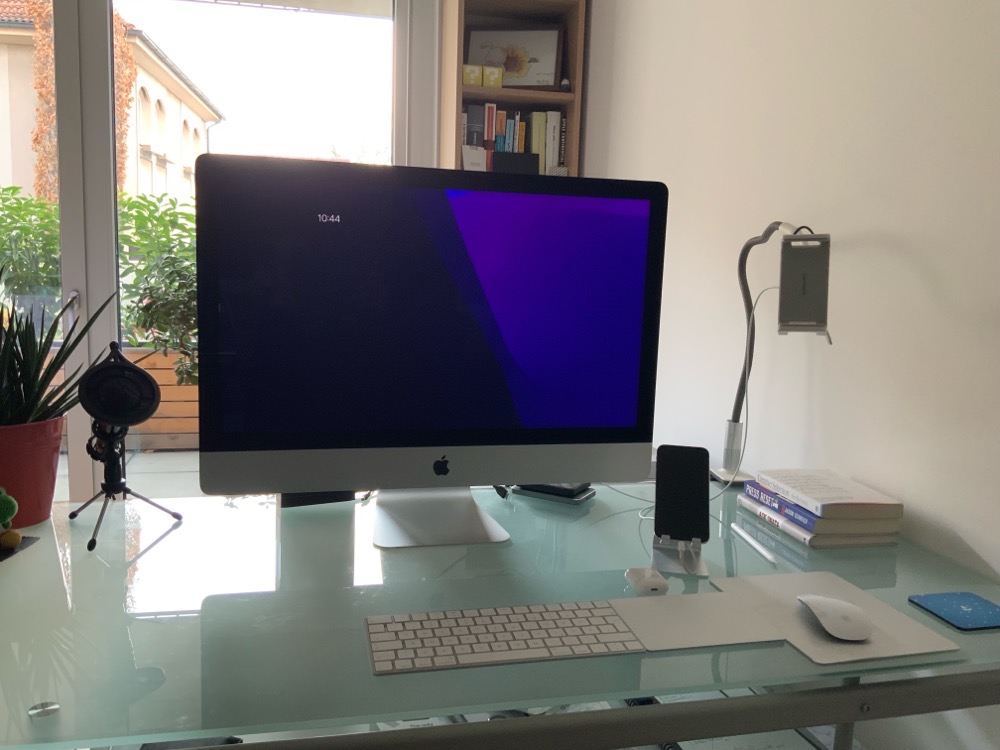
Having returned my Apple Developer Transition Kit in early 2021, I still had credit sitting there in my Developer Account, taunting me. But I wanted to wait until the very last moment (which would have been December 31st, 2021) to see what Apple might release until then. After the M1 Mac Mini came the M1 iMac, which was quite tempting to me, but I held out a little longer, and eventually Apple released the M1 Pro/Max MacBook Pros. It’s then that I pulled the trigger, because no other product announcements followed.
I was actually hoping Apple might replace the iMac 27” 5k with an M1 Pro/Max variant at the end of 2021. Coming from the 27” Intel model from 2017, I really had my heart set on a direct replacement – that display is a dream.
It didn’t happen, though, so I moved on to the new MacBook Pros, knowing I’d also have to get an external monitor if I wanted the best of two worlds – working at a desk, and working “on the go”; my very old silver 20” Apple Cinema Display, which I still have stored in the basement, just wouldn’t do.
Choosing a MacBook Pro
As I don’t buy a new Mac every year and instead tend to hold on to them as long as I can (I’d still continue to use my Intel iMac hadn’t Apple transitioned to Apple Silicon), I usually invest a little more into a new Mac, so my decision was to get the MacBook Pro M1 Max 16″ 10c/32c/16c/64GB/512GB model.
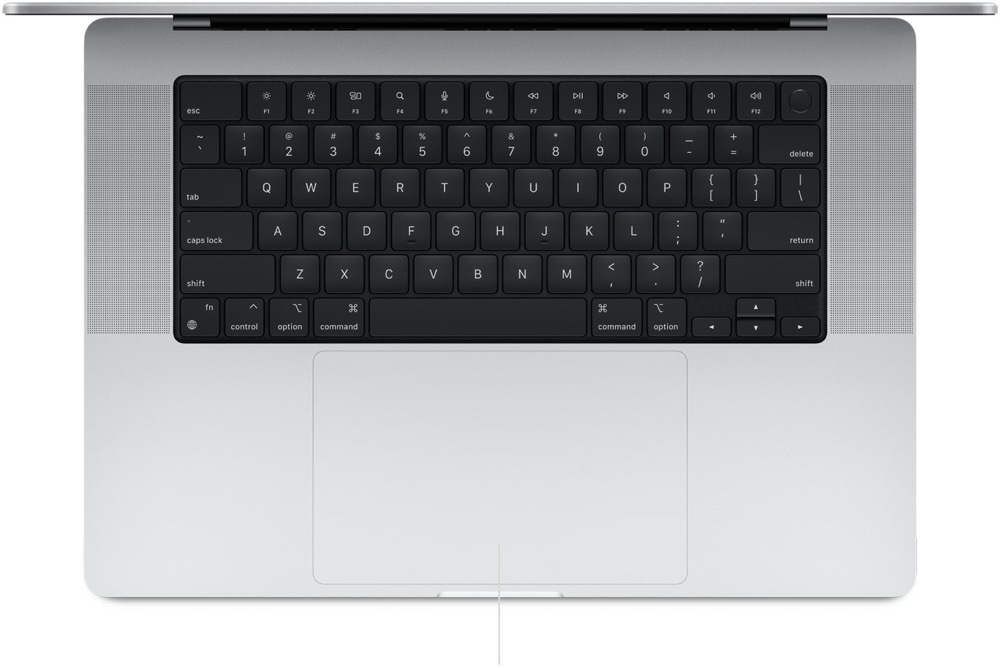
16” because I like the real estate.
64GB RAM because I came from 40GB in my iMac, and the closest option to that would have been 32GB, and I didn’t want to downgrade.
10-core, 32-core, 16-core because *speed* and *reasons*.
512GB SSD because I don’t want to spend money when I feel it’s overpriced. There are much, much, *much* cheaper, still reasonably fast external storage options available.
Choosing an external display
Here’s where it got tricky – the choice wasn’t nearly as easy as choosing the Mac itself.
It’s confusing. Choose a screen size with the proper ppi, resolution, color definition, HDR… how should I connect it to my Mac? Should I use USB-C, HDMI or DisplayPort? Does the new M1 Mac support it properly? Will it work when connected to a Thunderbolt Dock?
And that’s only the beginning. There are trillions of monitors, from billions of companies. Samsung, Huawei, Sony, Philips, LG, ASUS, and Apple, only to name a few.
I excluded Apple’s XDR display right away, because I’m not insane. I’m not paying more for an external display than for the Mac. I don’t need the color accuracy, either. And yes, sure, I love retina displays, but not at all cost. Which also eliminated LG’s 5k monitor options. Not to mention, those are butt-ugly, and reportedly buggy.
So I had to look elsewhere.
I had the following criteria for a new monitor:
– at least 27”, 32” maximum
– at least 4k resolution
– IPS panel
– 10bit color (FRC or not, I don’t care)
– at least 400 nits
– not curved
– USB-C display data connection
– clean, no-bling-design with small bezels
– Not more than – or at max very close to – €1.000
– I didn’t care about reaction time. I believe that if I need a device mounted to my screen to measure 10ms vs 5ms vs 1ms, it just will not make any difference to my eyes at all and is just marketing to be able to charge more for it.
– I didn’t care about the display’s power supply back to the Mac, as I’d be using a Thunderbolt 4 Dock, which would take care of the charging for me.
– I didn’t care about any bling like LED ambience lighting or what the back of the display looked like. I find I’m more efficient at work looking at the front of my monitors, not at their backs.
– I didn’t care about, nor did I want, a built-in webcam. I rarely do video conferences, and when I do, I’m using the MacBook’s built-in camera.
– I didn’t care about, nor did I want, internal speakers. I’m using AirPods most of the time, and when not, I’ll be using the MacBook Pro’s built-in speakers.
– I did care about ppi at first, because there’s this often referenced and popular article saying that anything between ~115ppi and ~200ppi is “unusable” on a Mac (I’m paraphrasing and dramatising). But I changed my mind. I figured, I’ll be using the 4k screen scaled to 3.200×1.800, so it might not be that much of an issue. Turns out: it really isn’t. Using a 27″ 4k display scaled to 3.200×1.800 is just fine and I don’t see any artefacts like shown in that blog post. It’s the same scaled resolution I used on the 27” 5k iMac, and though it’s obviously not as crisp, it’s very far from what I’d consider bad or unusable or unsightly.
Your mileage may vary, but I’d say: don’t worry about it. It’ll save you a ton of headaches. And I do have that nice liquid XDR MacBook Pro screen for when it really matters, so 🤷♂️.
Anyway, my criteria yielded a few options (in no particular order):
– LG UltraFine 27UN880-B
– Huawei MateView
– Philips 279C9
– HP 32
– Dell UltraSharp U3219Q
My tip for getting a new monitor: don’t read too many customer reviews. There’s pros and cons to anything, and it’ll just make you insecure about what to buy. It did me.
So yes, I did go down the rabbit hole of reading reviews for each of them and I couldn’t come to any conclusion. Features some people call a godsend others will call the worst thing since the butterfly keyboards.
All those reviews ironically led me to a monitor I couldn’t find almost no reviews for: the Philips 279C9. So it felt like the choice really was mine. And those thin bezels are 😍.
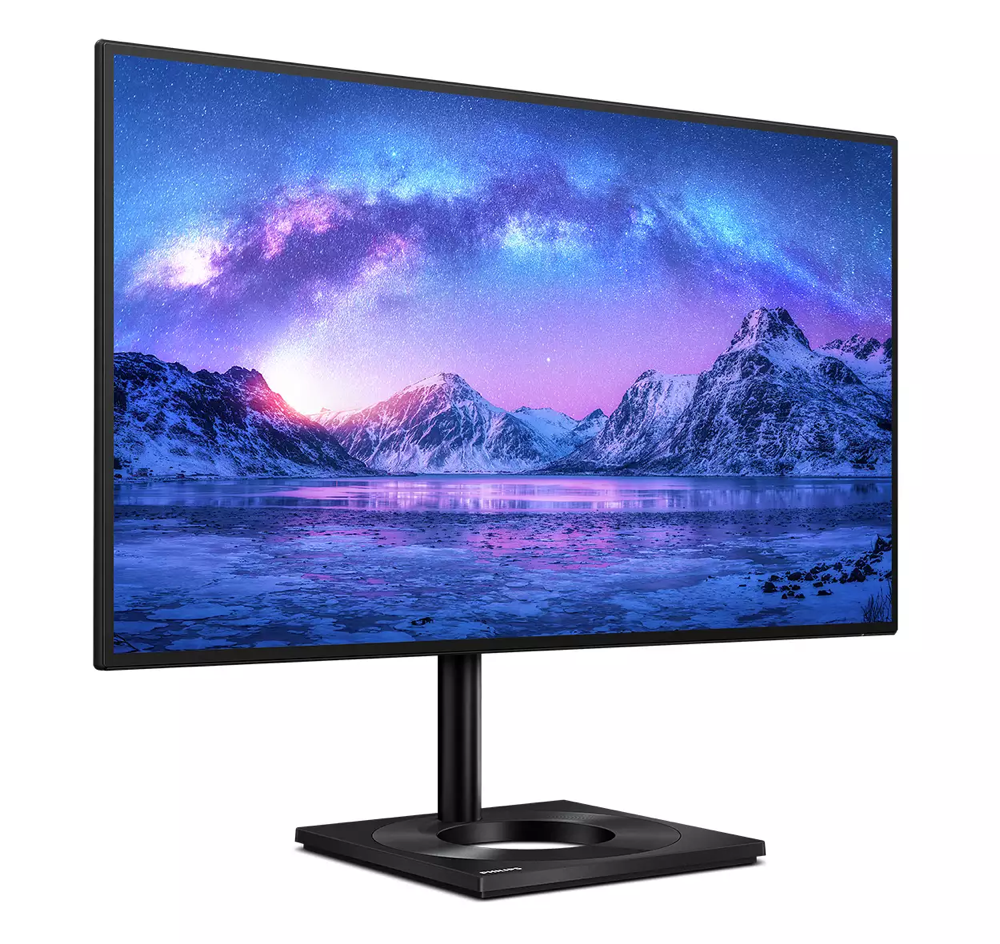
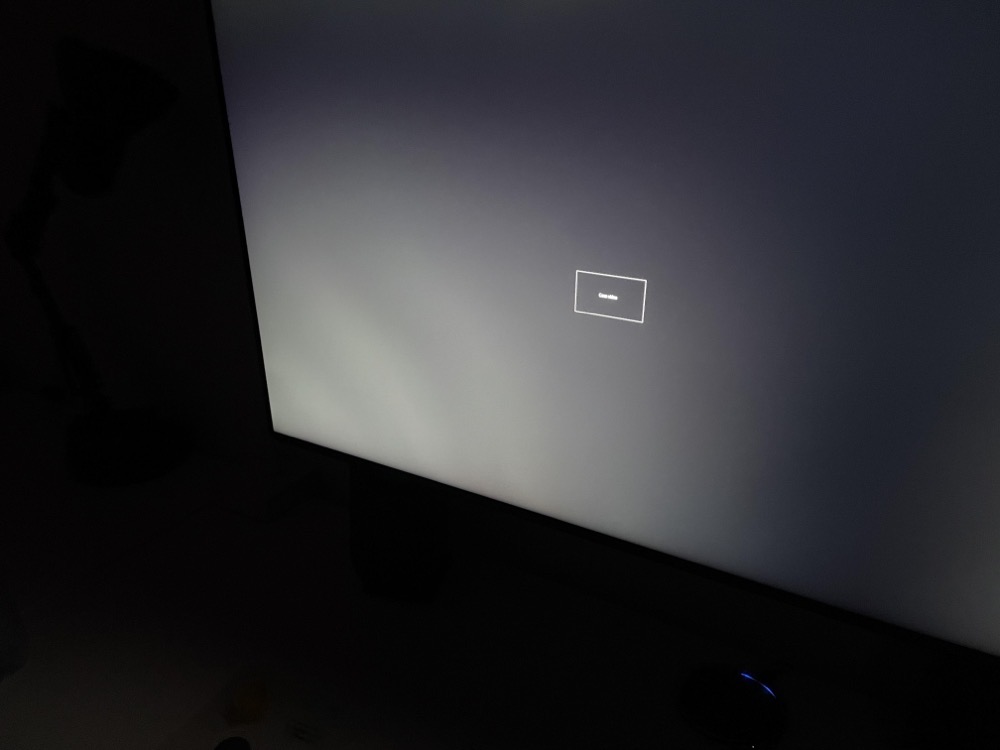
And just as I was about to order it, I found photos of it in use, and the uniformity of the background lighting was shockingly bad.

Plus, that monitor stand (though useful, as it allows you to rotate the screen) is too big and “not pretty” for my tastes. Yes, the monitor itself can be VESA mounted, but why pay for the included stand if I’m not going to use it?
I then took a closer look at the Huawei MateView 28”.
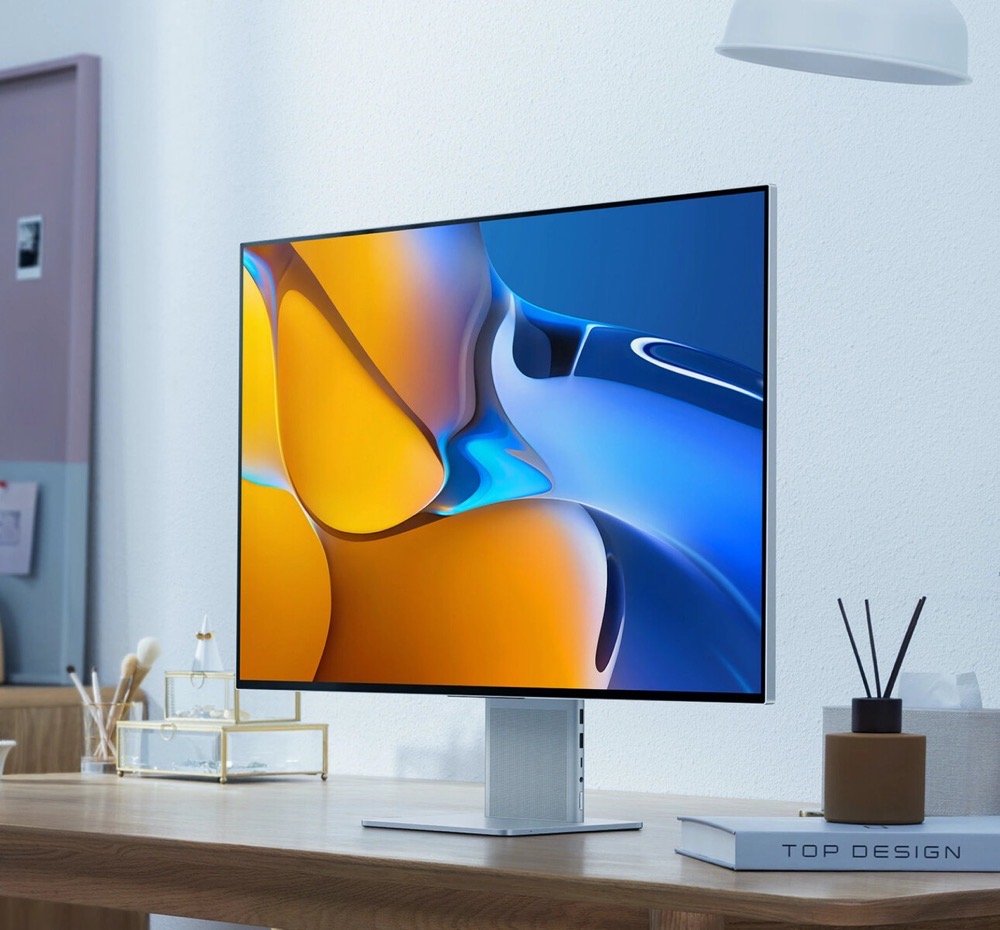
The screen has a ratio of 16:10, which makes it higher than the others, with a 3.840x2560px “4k+” resolution. It also looks very “Mac-like”, with its aluminium frame and silver appearance. But there were two caveats for me: For one, some cables come out at the side of the base, not the back. Ew. Secondly, I read that the resolution might give you metaphorical headaches with some game engines, and though I’m currently too busy to be playing games on my Mac, I might want to in the future, or connect a Nintendo Switch or Sony PlayStation, and want it to just work. Thus, another option down.
Regarding the Dell monitors, I read they had trouble with burn-in/ghosting, and staying connected to the Mac. Buh-bye.
The HP monitor looked good at first sight, until I noticed that big border at the bottom, and the standby light in the front at the lower right. Ew again.
Which left me with the LG UltraFine 27UN880-B. And I have to say: it’s a choice I don’t regret one bit. I love it.
It checked all the marks on my list (and more, considering the ergonomics).
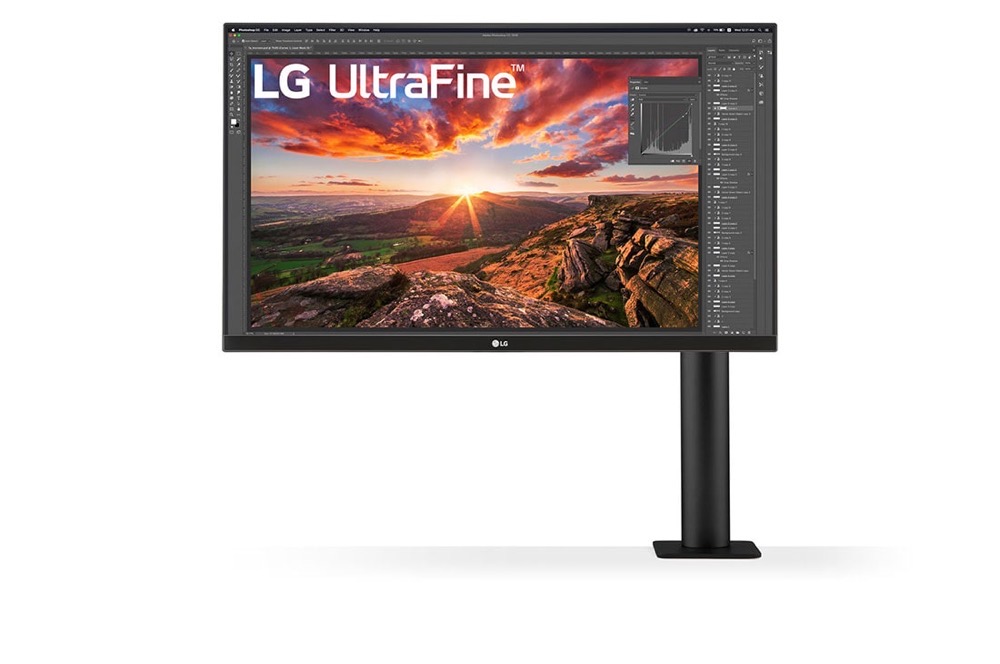
I was in luck, too: I bought it around Black Friday, so I got a nice discount.
Its most obvious feature is its ergonomic stand, which is mounted to the desk using a C-clamp. It is, indeed, very ergonomic and allows you to tilt, rotate, pivot and turn.
I was in bad luck, too: It didn’t work with my desk, as I found out after purchasing it. 🤦♂️
Up until then, I’d been using a glass desk. And that’s the first red flag right there. In the monitor’s manual, it says not to use the c-clamp with desks made of fragile materials, like glass.
Now, this is thick glass we’re talking about here, but still, in the back of my mind, it bothered and worried me. I wouldn’t want to wake up one day only to find the MacBook Pro, the monitor, the desk and everything else on it shattered on the floor.
The final nail in the coffin for my glass desk, however, was that, at the back of the glass desk, there’s this metal beam to enforce the entire frame.
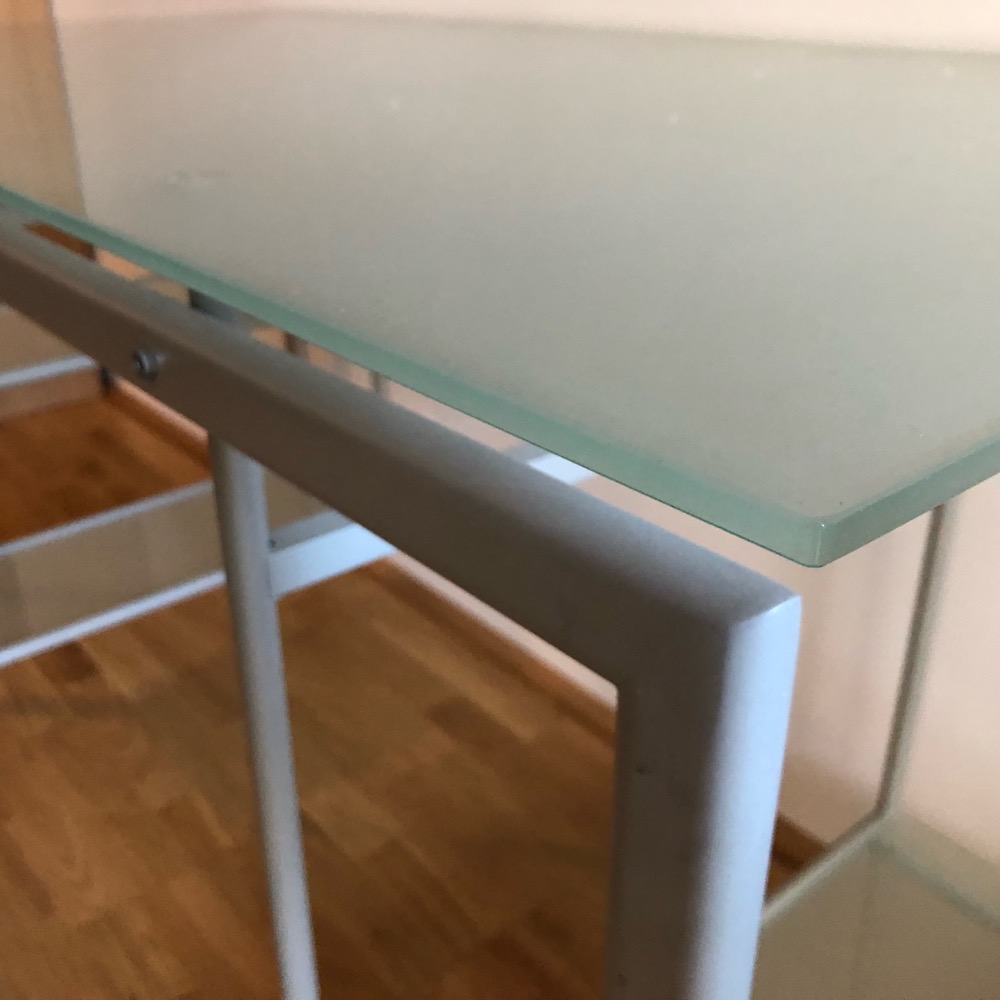
When I purchased the monitor, I had hoped the C-clamp would just about fit. Well… it didn’t.
However, there was a silver lining. I had always wanted to get an electrical sit/stand desk.
This was the perfect opportunity to get one, which led me to
Choosing a new desk
From my last trip to IKEA years ago, I remembered they had a few electrical and mechanical standing desk options.
I didn’t want to get a mechanical one, so the “Bekant” desk was the option for me. The P-shape and sheer size of it intrigued me, and the light wood finish is beautiful.
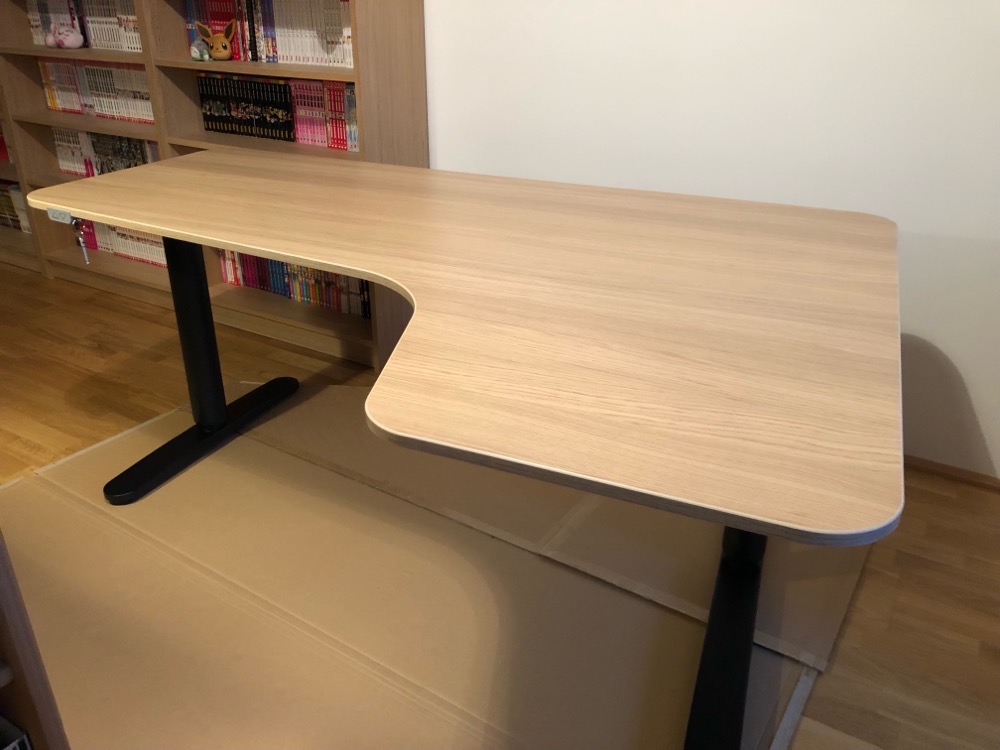
I briefly looked at fully’s Jarvis desks, but they’re smaller, at around the same price as the IKEA one.
UPLIFT’s desks were another option, but assembling my own desk – and they offer tons of options – was beyond what I wanted to do.
So I trusted my gut and got the IKEA Bekant desk, and I adore it. It wasn’t cheap, but I thought of it as an investment in my health.
Sitting 10+ hours at my desk all day (which I’ve been doing for longer than I care to remember) can’t be good, so switching it up every now and then by standing up is very nice and, if nothing else, makes me *feel* healthier.
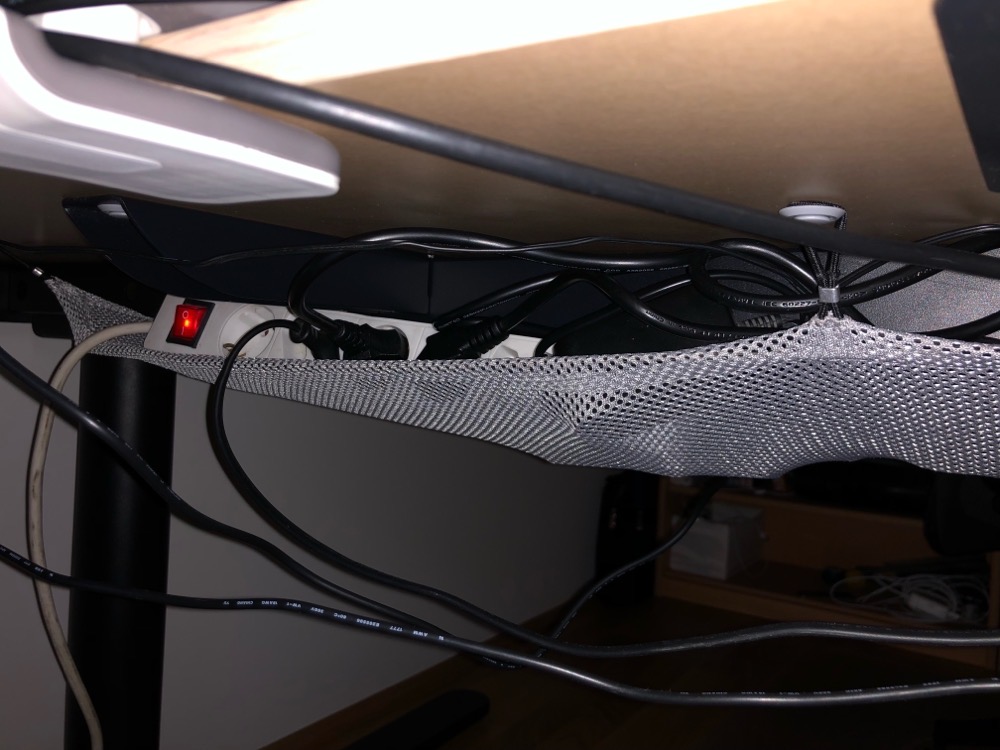
At the bottom of the desk plate, you can mount up the included mesh net, which can hold all your cables, power adapters, and power strips. So I have just one cable going from the desk to the outlet in the wall. Neat.
Choosing a Thunderbolt 4 Dock
My goal was to have all my peripherals (the monitor, my iPad, iPhone and 5 external disks) connected to the MacBook Pro with just one cable, and use that cable to charge it at the same time.
There aren’t too many Thunderbolt 4 Docks on the market yet, so I had two good options:
– OWC Thunderbolt 4 Dock
– CalDigit Thunderbolt 4 Element Hub
The OWC one was out of stock, and only has 3 USB-A ports instead of the CalDigit’s 4, so I went with the CalDigit Element Hub. It’s such a cute, compact device.
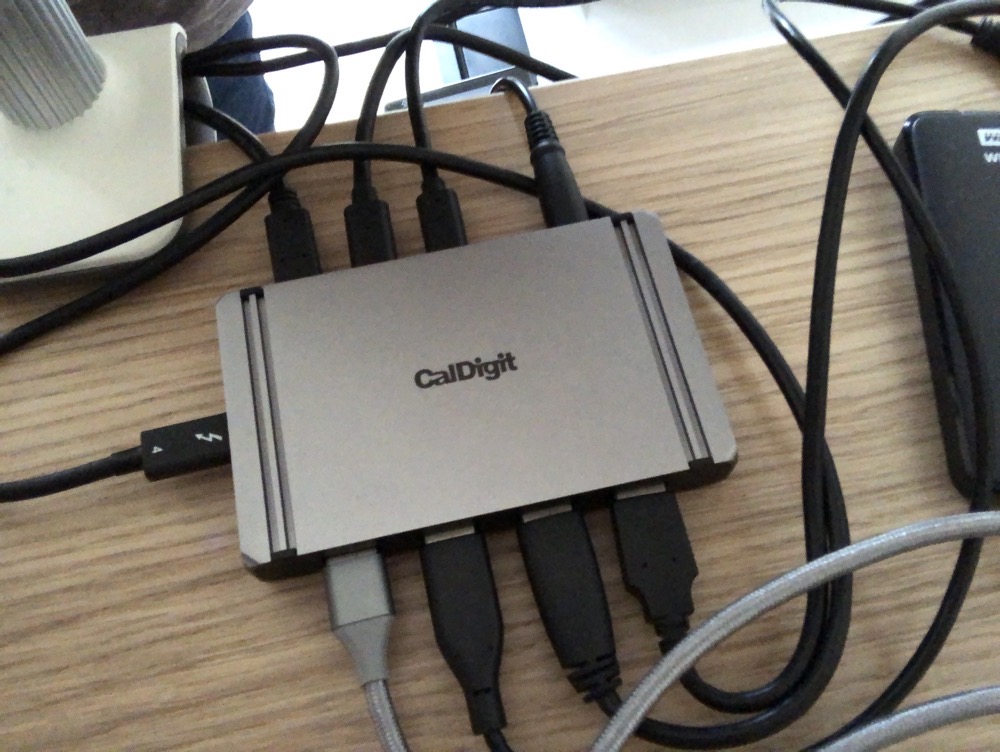
It has 4 USB-A 10Gbit/s ports, which can power devices with up to 7.5W (so I can charge my iPad Pro, iPhone, AirPods, Keyboard, Mouse and Trackpad), and 3 Thunderbolt 4 ports which can power devices with up to 15W.
The 4th, upstream Thunderbolt 4 port, which goes into the Mac, delivers power of 60W. A little on the low side (which had me worried and wanting the OWC one, which delivers 90W), but, as it turns out, plenty to keep the MacBook Pro charged during my normal work day. Gaming surely will use more power, but discharging the battery from time to time is a good thing, so I’m happy.
Another wish I had was to have one single cable to charge my iPad, iPhone, AirPods, and “Magic” input devices, so I got the Amazon Basics USB-A to C cable (10Gbit), and a USB-C to Lightning adapter, which allows for charging and synchronisation (plus on-device debugging in Xcode).
Alternatively, there’s Zagg’s 3-in-1 charging cable, but my question regarding whether it supported 10Gbit data transfer rates wasn’t answered in time. Alas, they’ve since responded, and it does support 10Gbit data transfer rates for the USB-C and USB-A part, and data for Lightning. Had I known beforehand, I’d probably have purchased that one instead.
Putting it all together
Now that I had the new Mac, a monitor, a TB 4 Dock, a charging/data cable for the iPad and iPhone, and a new desk, it was time to put it all together.
The IKEA Bekant desk I put together in maybe an hour, one and a half, tops. It was really easy to do, which is what I’ve come to expect from IKEA furniture, and my girlfriend was so kind to help me get it into position – that is definitely a two-person job.
Transitioning from sitting to standing position (or vice-versa) is very smooth and doesn’t make too much of a noise. It doesn’t wobble and feels stable and sturdy.
For the LG monitor, I ordered two cheap steel plates to reinforce the area where the C-clamp clamps down on the desk, in order to protect it. It’s likely unnecessary, but I want this to last for a long time.
I wanted the external monitor in front of me, as it’s my main display. Where I’d put the MacBook Pro was another question. At first, I had the MacBook to the left of the monitor.
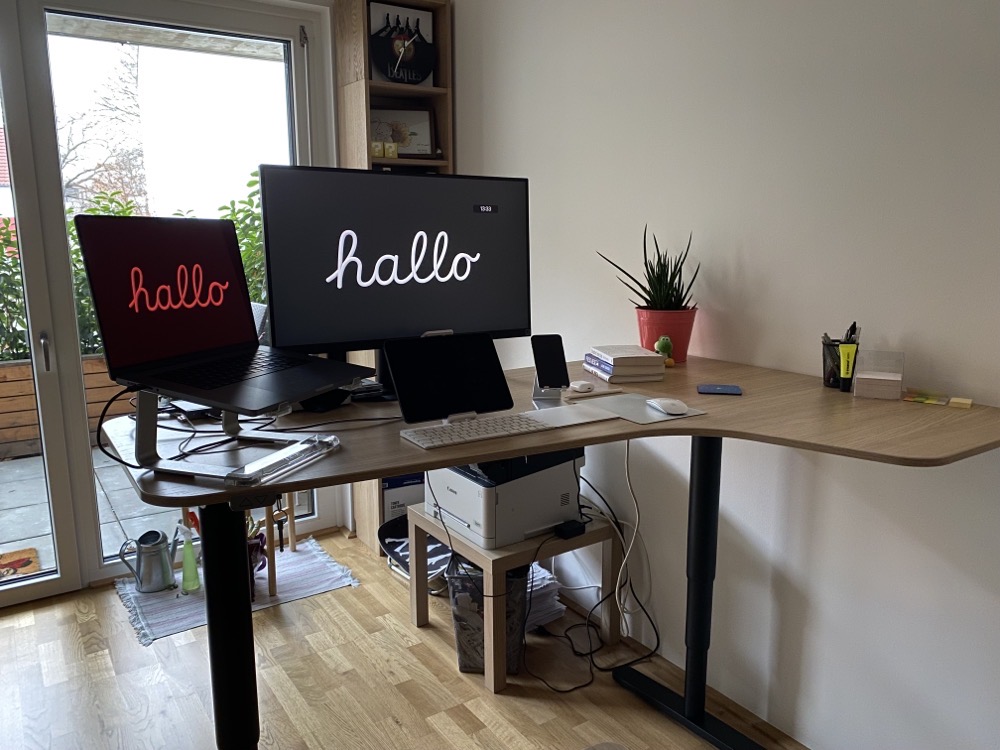
As you can see, it’s a bit too close to the edge of the desk for comfort, so I moved it to the front of my monitor.
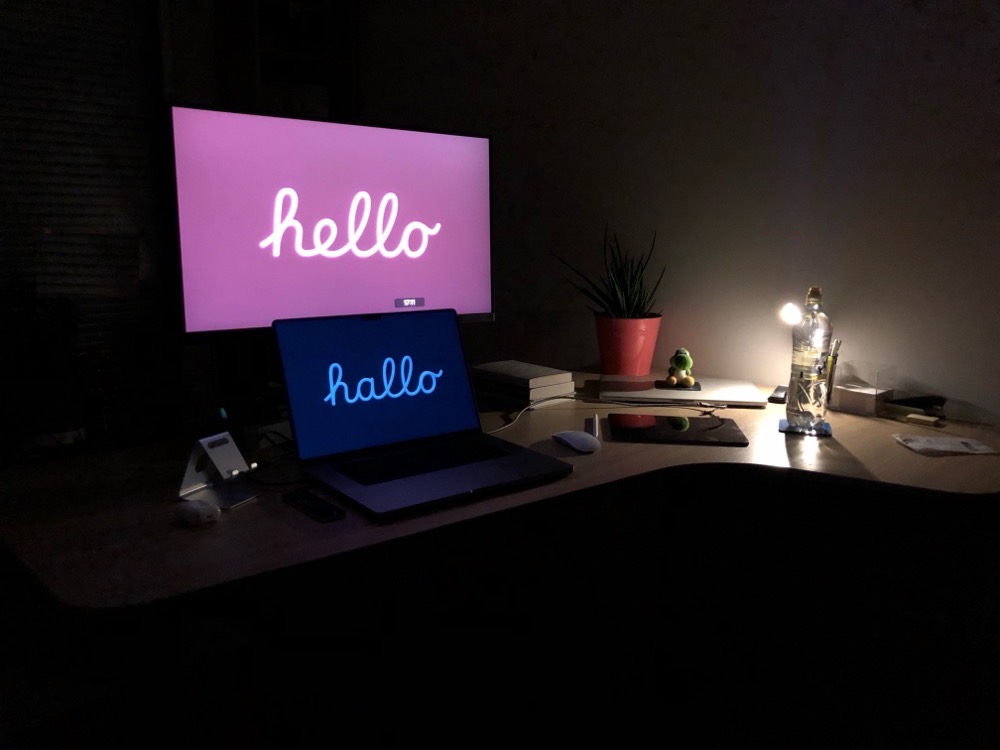
I liked it because it afforded me the opportunity to declutter my desk a bit, as I no longer needed the Magic Keyboard and Trackpad.
On the other hand, it meant that I had to move the iPad I had in front of the external display off to the side. With the iPad in front of me, it was easier to use with the Apple Pencil, and I could have it as a third screen for my Mac via SideCar when need be. It just made it more accessible to me in general.
So I moved the MacBook Pro off to the right, elevated it again with the Griffin Elevator, and put the iPad back in front of the monitor, which is the way I’m using it all now.
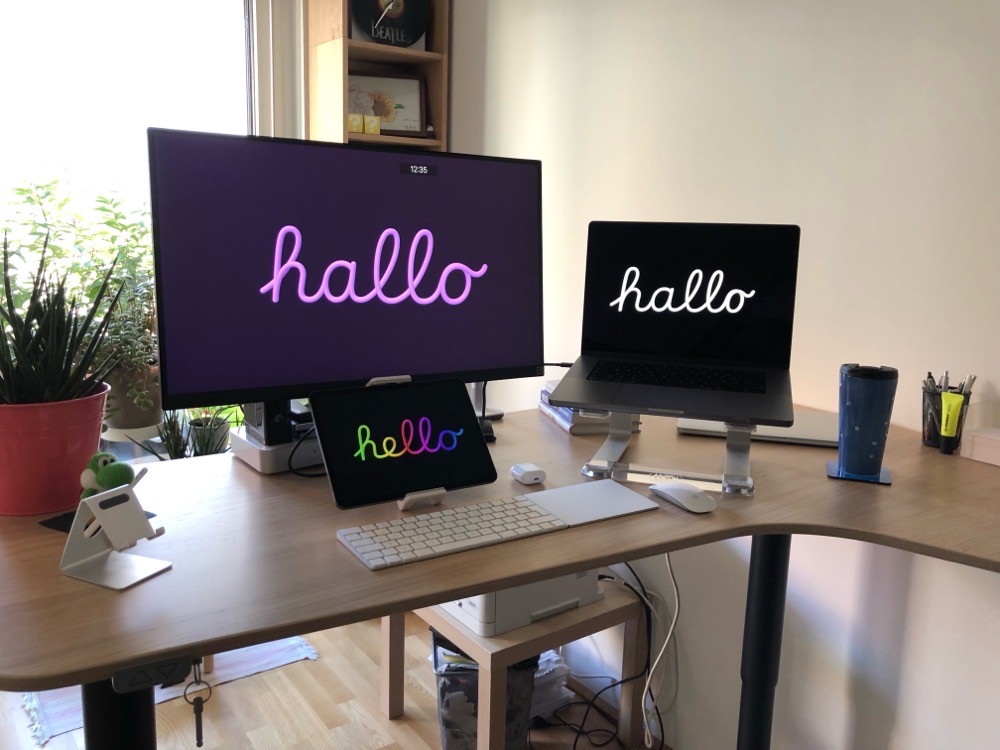
Here’s the desk from the back side:
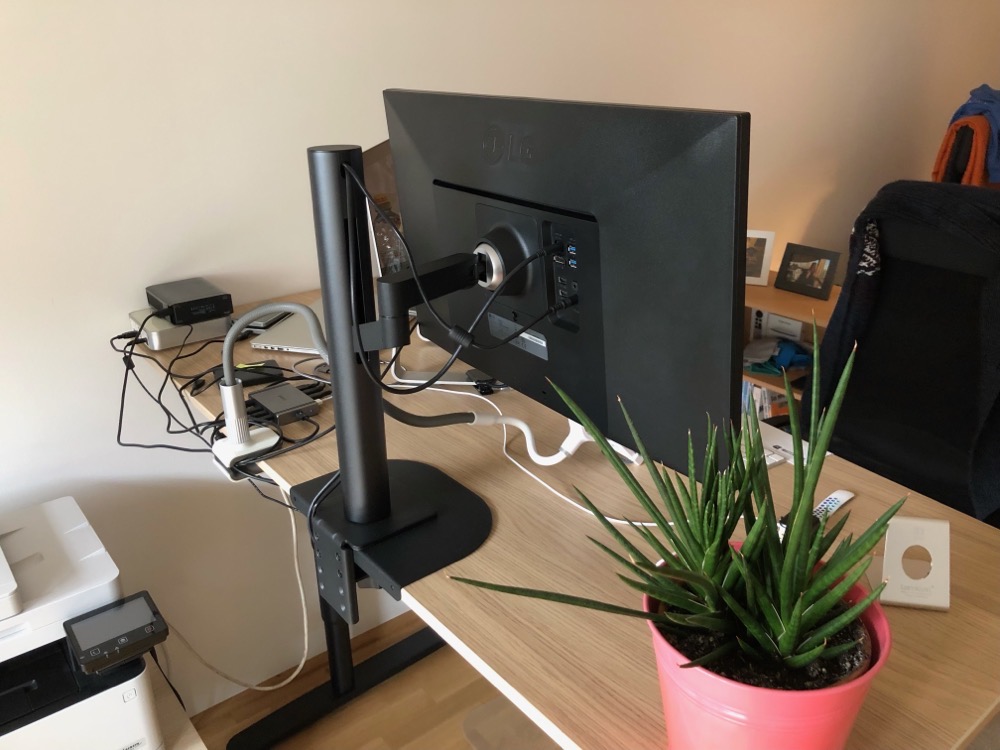
Sure enough, I’ve set it up so I don’t see all the cables or disks when I sit/stand at the desk.
However, from the back, it’s a mess. And I don’t care 🤣
Caveats and other observations
As with any change, there’s potential for frustrations and unforeseen issues.
Considering the amount of change that has happened here, they’re all minor ones, but perhaps still worthy of a mention.
The M1 Max MacBook Pro and external USB-C SSDs
Perhaps the most noteworthy and puzzling one is an issue I’ve noticed with external SSDs and the MacBook Pro.
On my older Intel iMac from 2017, I was receiving read/write speeds of around 340 MB/s. On this new MacBook Pro, I get around 240 MB/s (and there’s no change whether the SSD is connected to the Mac directly or through the CalDigit Dock).
It’s not a deal-breaker, as I don’t do much work off those drives (and even when I do, 240 MB/s is plenty for text work, which programming basically is). But I wonder where those ~100 MB/s went.
CalDigit Element Hub and charging the iPad Pro and iPhone
Whenever I charge my iPad Pro (and sometimes the iPhone) and it reaches around 94%, I pretty regularly get an error message that USB Accessories have been disabled.

Sometimes re-connecting works, sometimes it doesn’t. I’ve downloaded and installed CalDigit’s kernel extension which is supposed to help with this, but it isn’t loaded automatically into the kernel on power up, so I have to do it manually in Terminal, and even then, it doesn’t always help. It’s a minor annoyance, but an annoyance nonetheless.
Amazon Basic USB-A-to-C cable
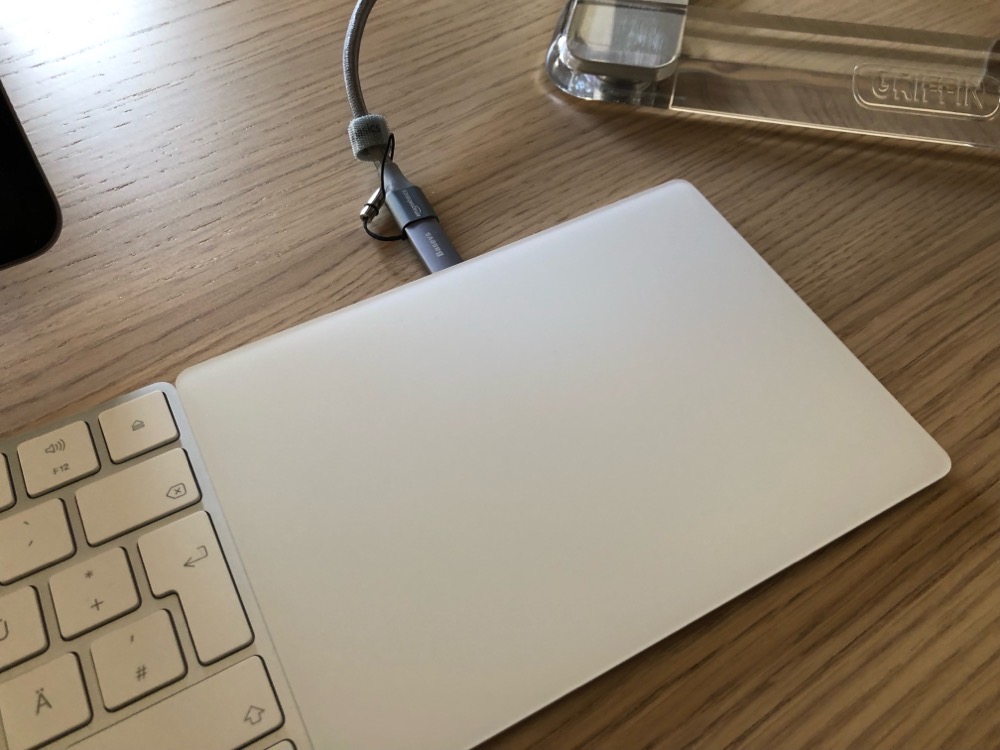
It works nicely (the Basevs Lightning Adapter too), but the braided cable is a bit stiff.
IKEA Bekant front edge is slightly receding
The cut-out at the front of the desk is slightly receding to the back of the desk, instead of being parallel to it.
(Am I explaining this correctly?)

It’s nit-picky and not a big deal, but I’d have preferred it to be parallel to the back edge.
With those nits being picked, I couldn’t be happier with the new setup!
I hope you all have a great and prosperous new year!
Take care of yourselves!
– Matthias
[…] You can find the blog post here. […]
[…] Update (2022-01-05): Matthias Gansrigler: […]
[…] I revamped my setup early this year, I struggled with getting a lamp for it.For one, the desk is rather large, and I […]