Just a quick note that since the betas (!) of macOS Ventura 13.0, configuration of 3rd-party widgets is broken, which, of course, means that Yoink’s widget’s configuration does currently not work, and I cannot do anything about it. Let’s hope Apple fixes it soon, macOS 13.0.1 didn’t bring any improvement in this regard.
Here’s a quick video of what I mean:
Again, in my testing, this not only was the case for Yoink’s widget, but a widespread issue over all sorts of 3rd-party widgets, although I do believe that dynamically app-supplied values work. It might only be static values that are affected by this.
At some point in iPadOS 16’s beta, this same bug occurred, but that was fixed before release. I guess the fix didn’t make it into macOS. Maybe it’s time for another “Back to the Mac” event.
UPDATE (Dec 14th, 2022)
This is still an issue on macOS 13.1 (22C65). Quite embarrassing for Apple.
UPDATE (Jan 24th, 2023)
macOS 13.2 (22D49) seems to have finally fixed the issue – although it *did* take an initial
killall Notification\ Centre
to kickstart the widgets after adding and configuring them. But after that, it seems to work reliably.
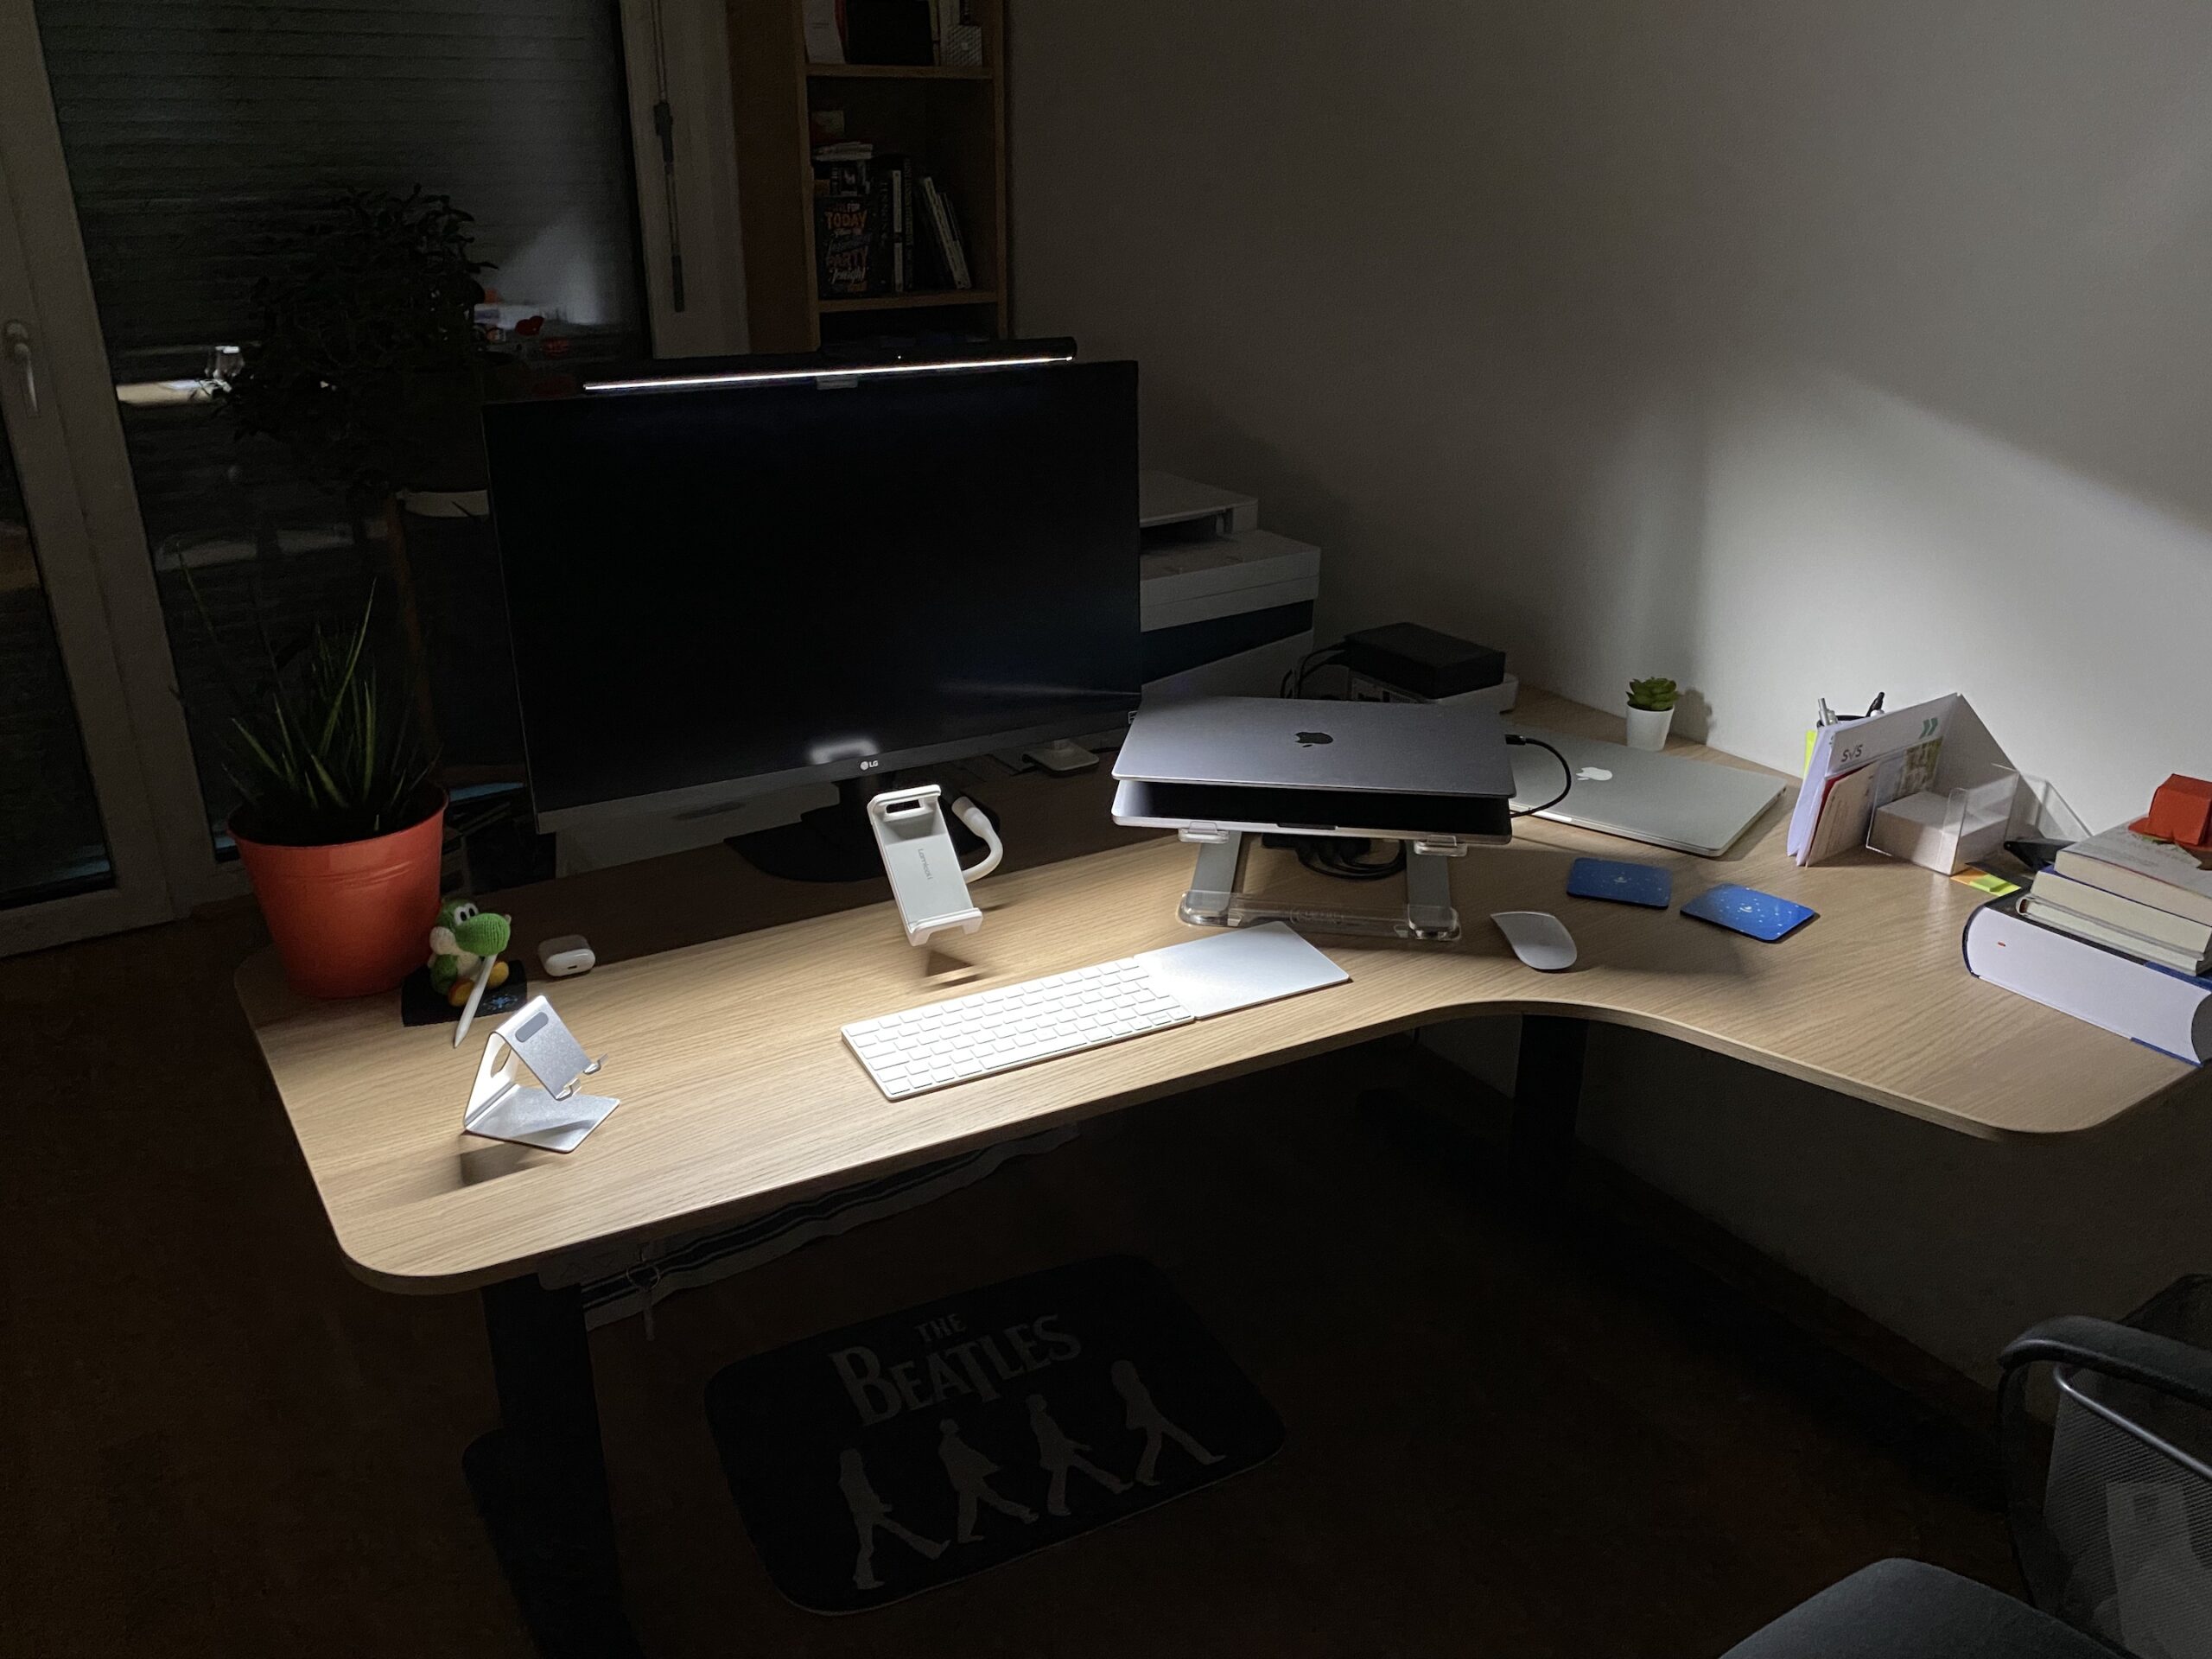
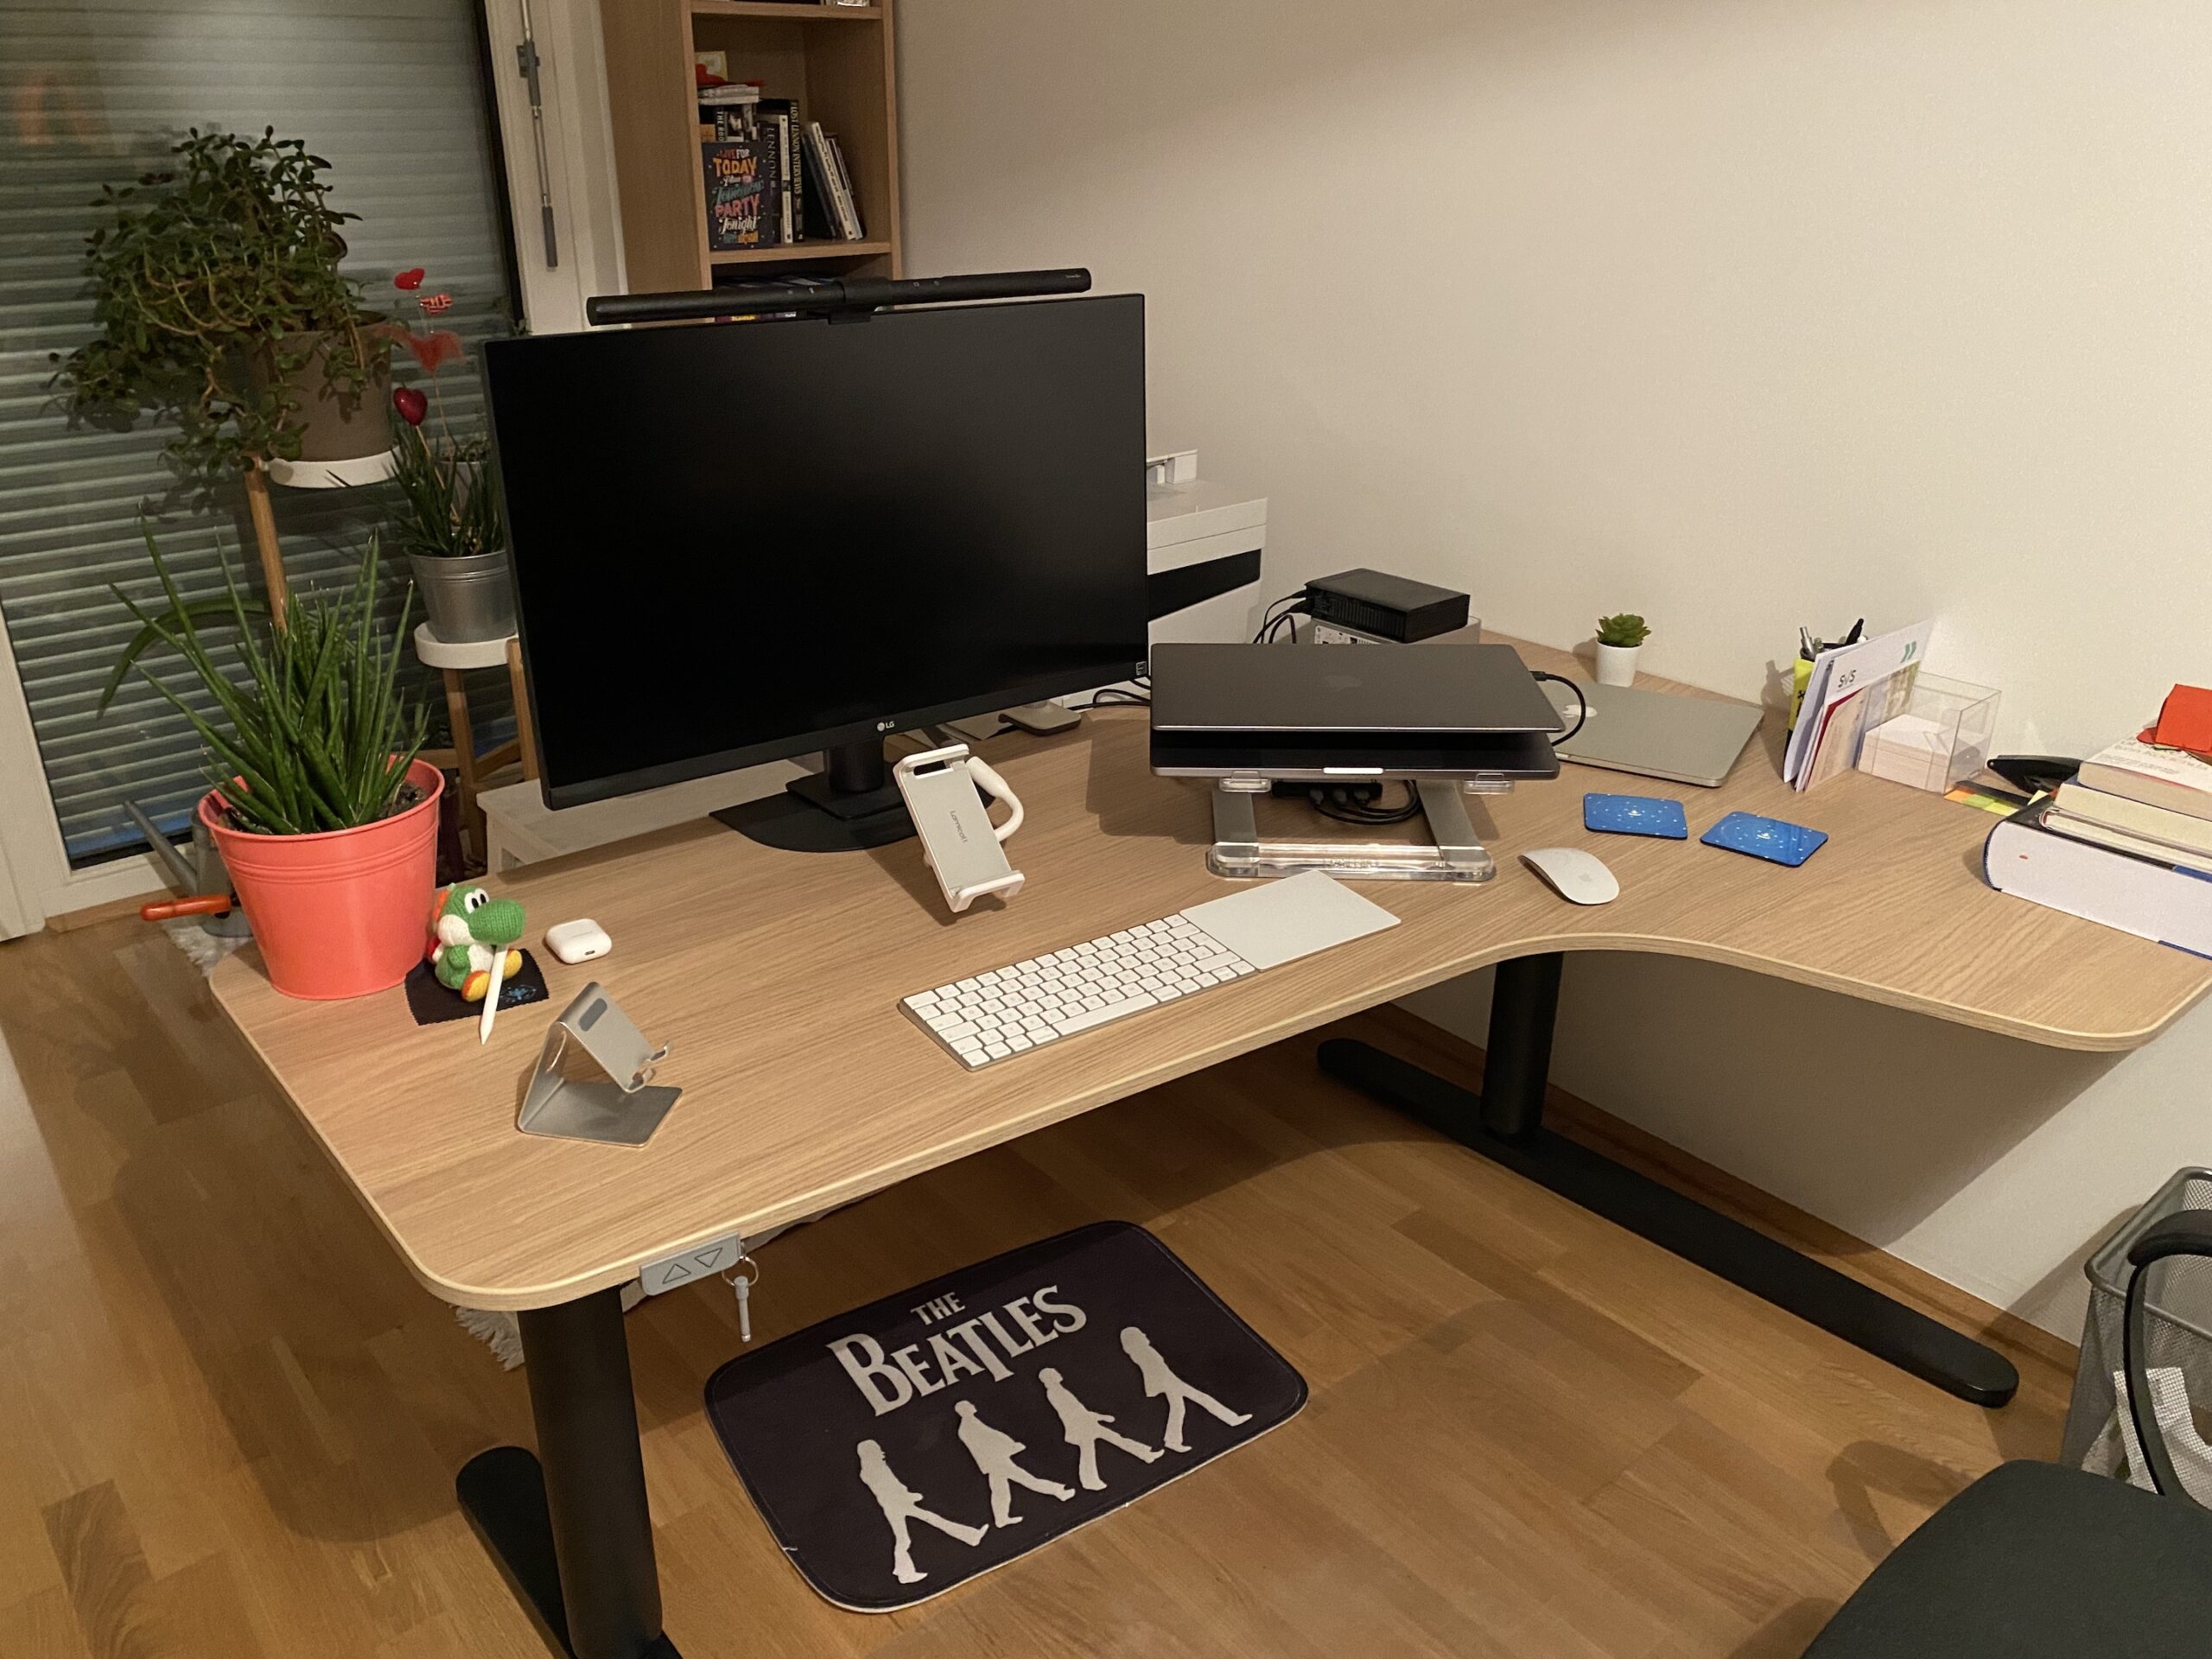
When I revamped my setup early this year, I struggled with getting a lamp for it. For one, the desk is rather large, and I wanted something that could illuminate it all pretty well, without having to get two lamps, which would have been overkill. Secondly, I wasn’t sure I really needed any additional light in the first place. With a glassy double-door, the office gets a lot of natural light, and in the evenings, I do have the “normal” lights I can turn on. I even looked into some options and was close to purchasing the BenQ ScreenBar, but decided not to in the end – just because I wasn’t sure I really needed it. But now that I’ve been using the BenQ ScreenBar for more than a week and a half, I do know better.
BenQ approached me on Twitter (via @BenQBeleuchtung) a while ago, asking if I was interested in receiving a free BenQ ScreenBar in exchange for giving my honest opinion about it on my social channels. They had me at free, so here we are.
Disclaimer
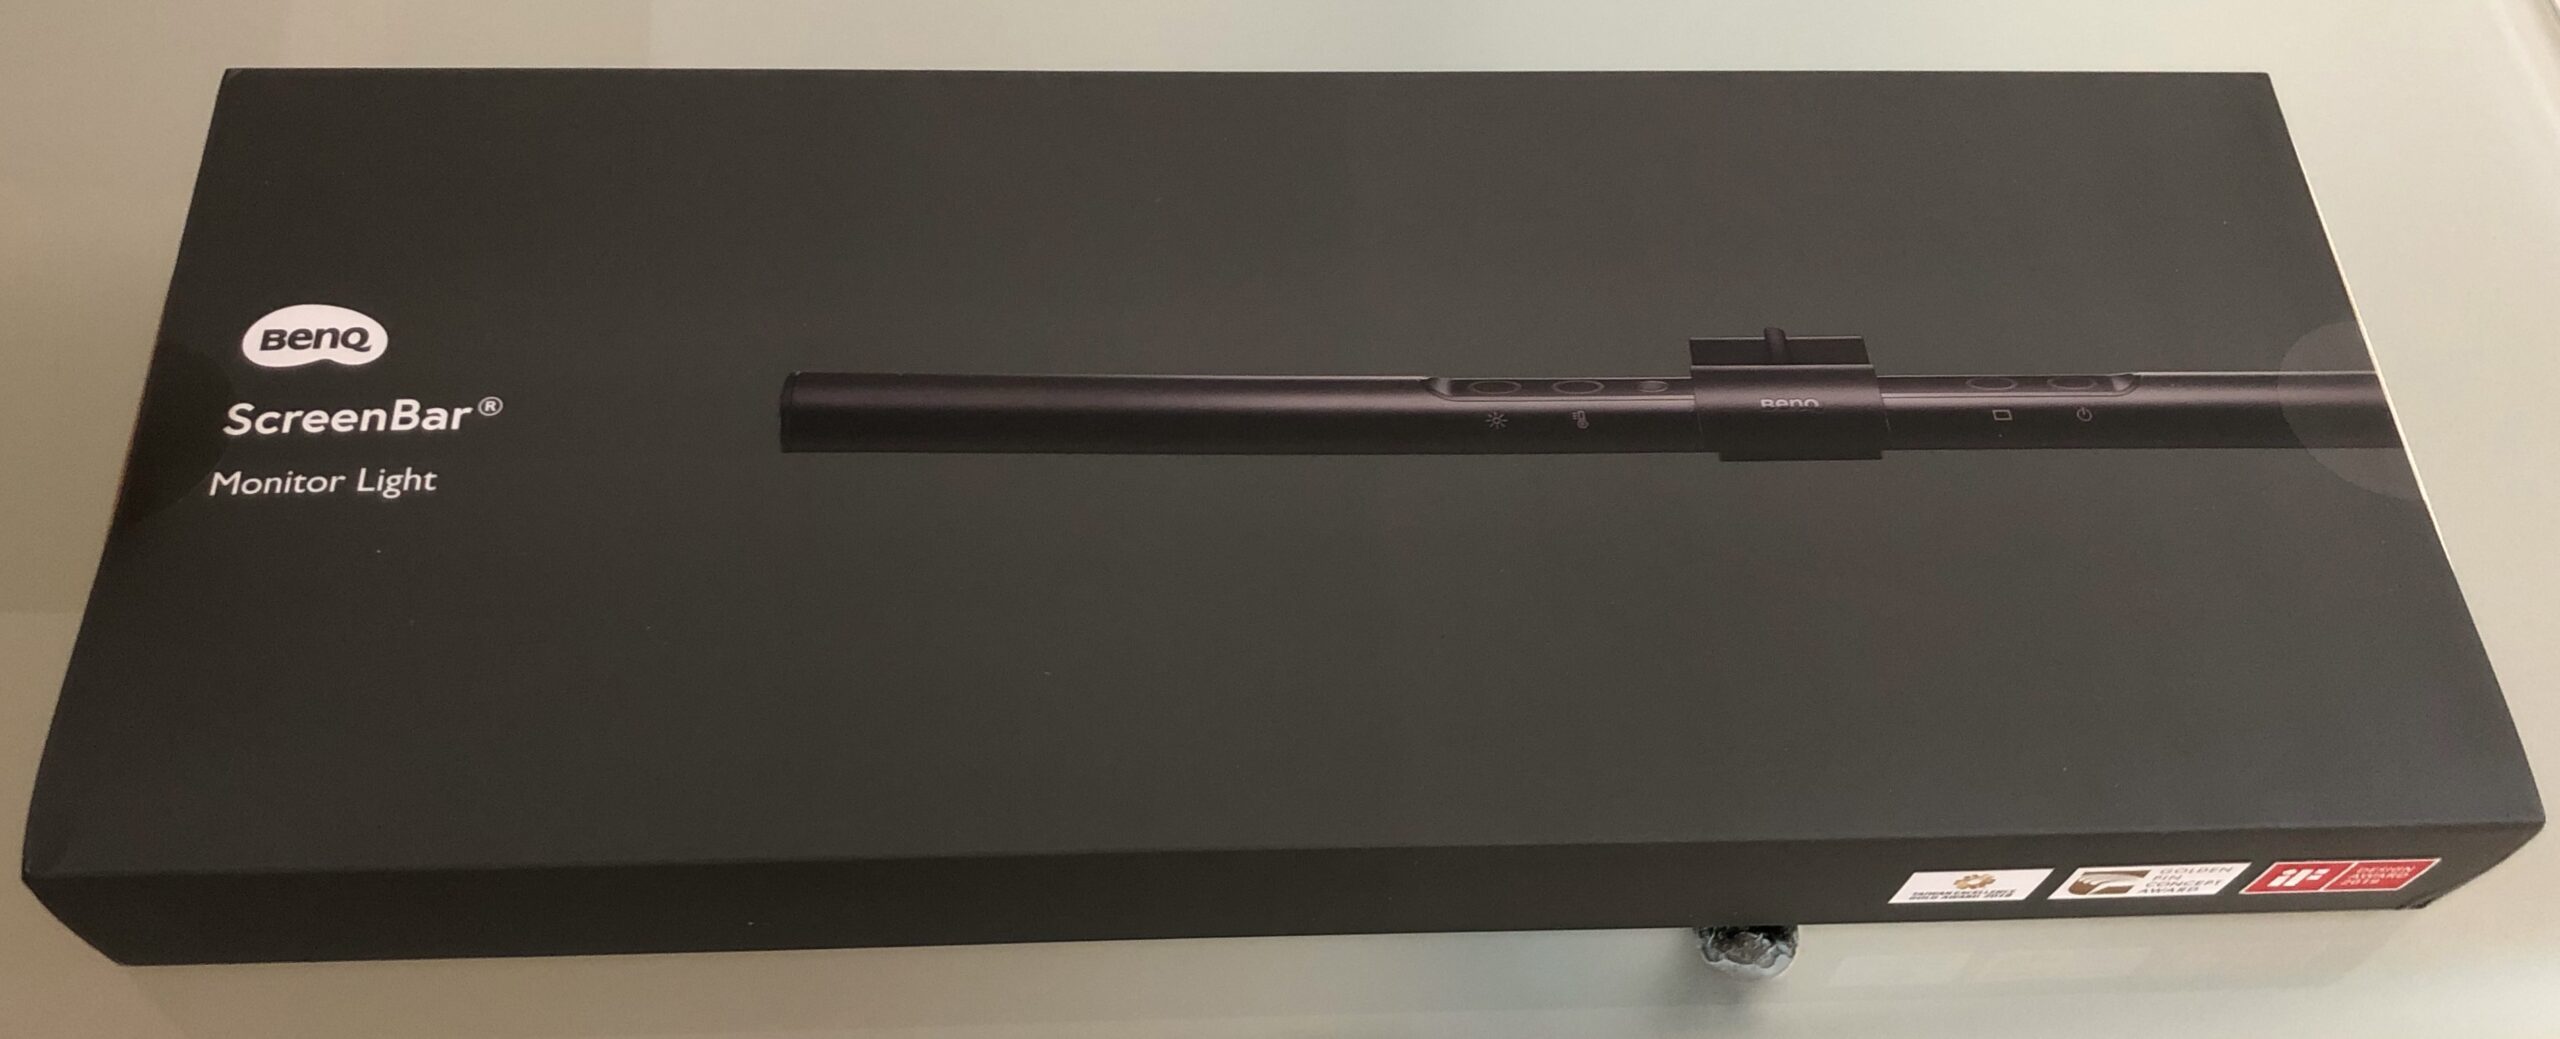
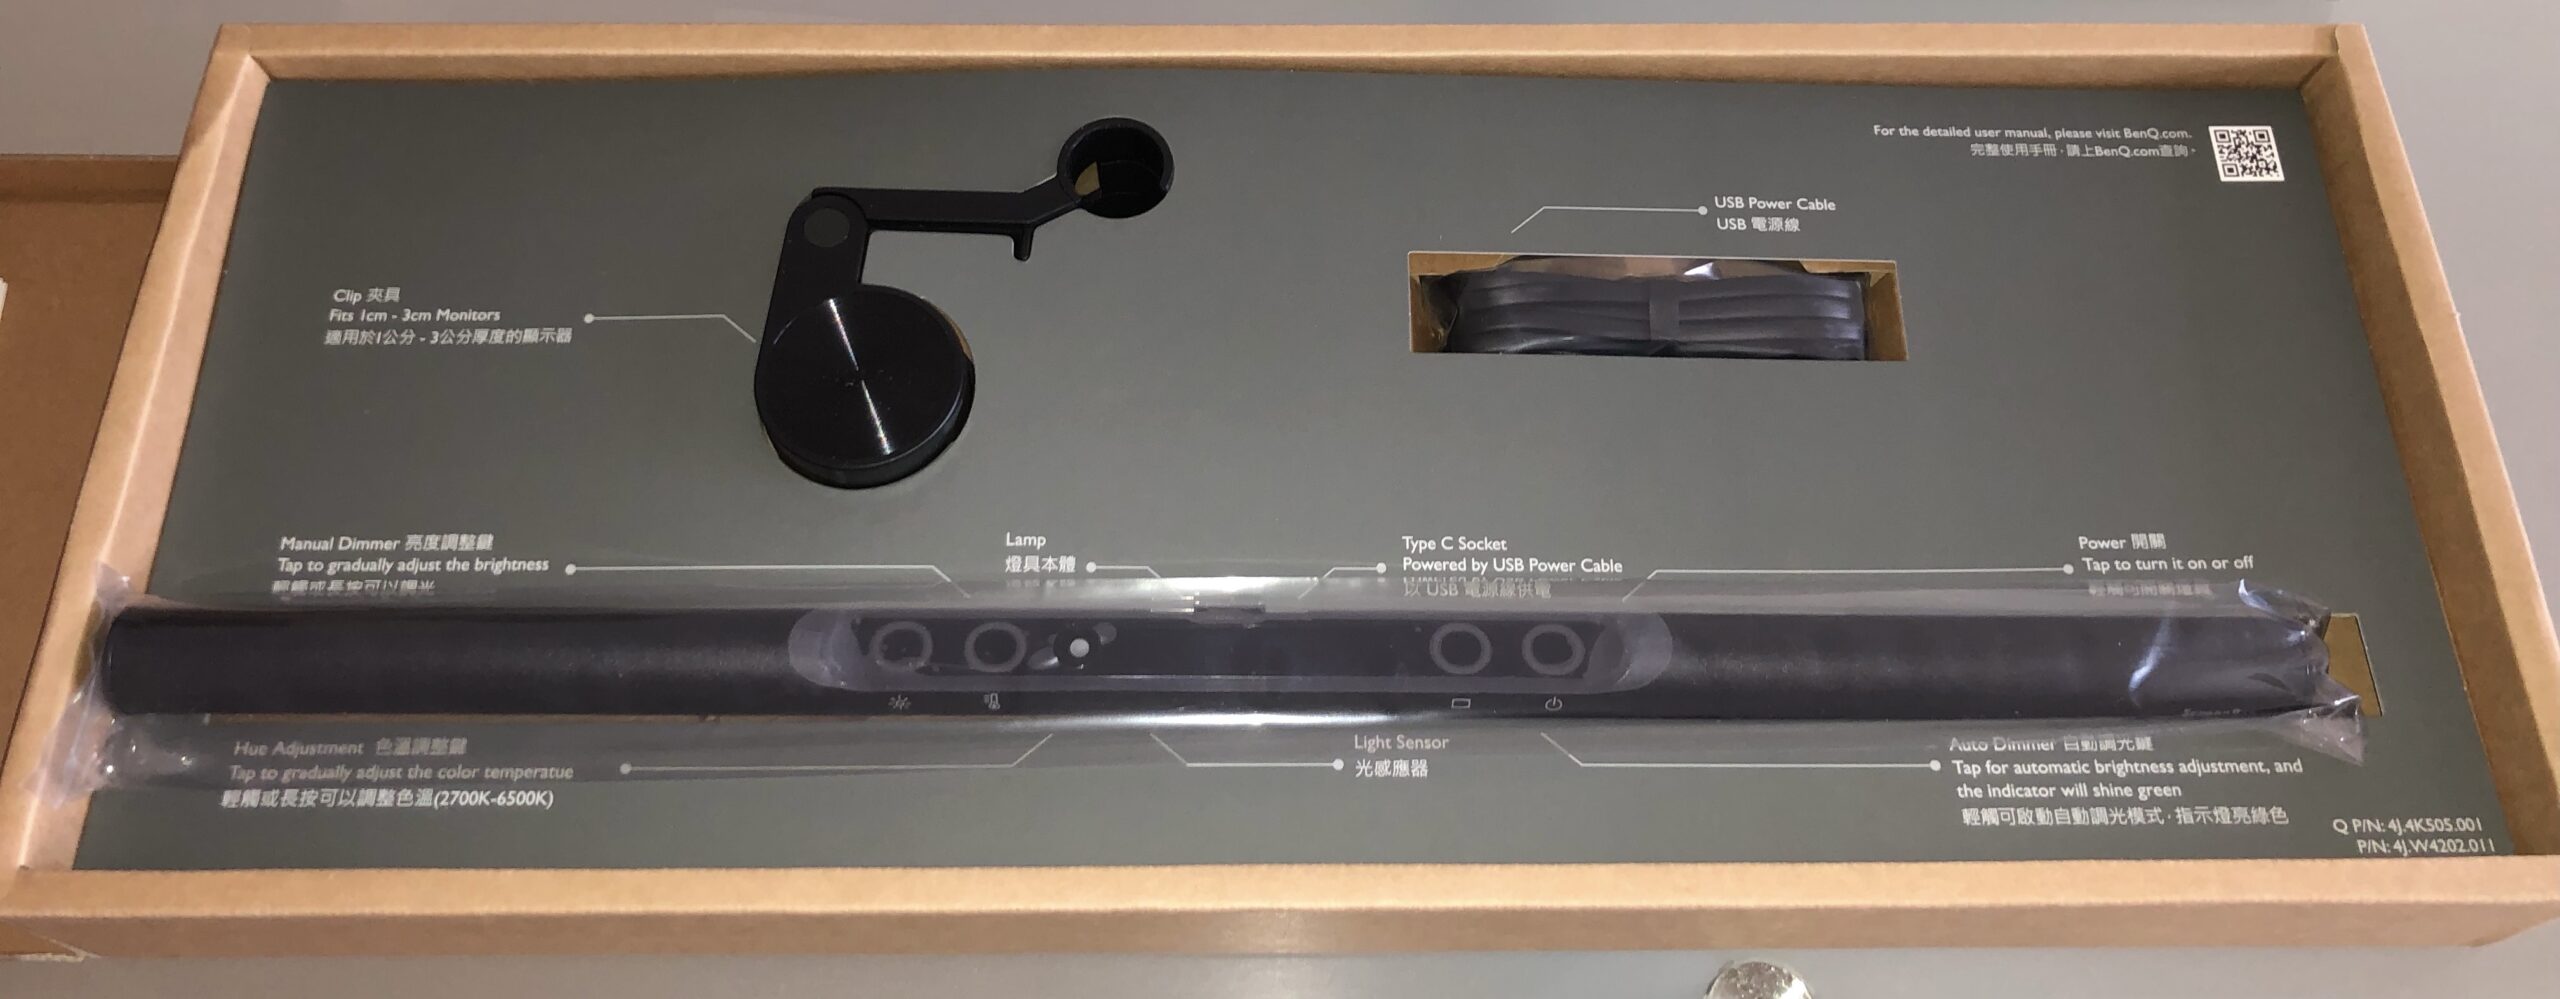
Unpacking
The packaging is pretty simple and instructive. There’s three parts: the ScreenBar (the light source), the clip (which holds it up on your monitor), and the USB cable. Each item is annotated with useful information, so there’s really no need for a manual – which, if you still need it, you can get via the printed-on QR code.
Assembly
All I had to do was push the ScreenBar into the clip, and connect the USB cable – fairly easy.
Setting it up
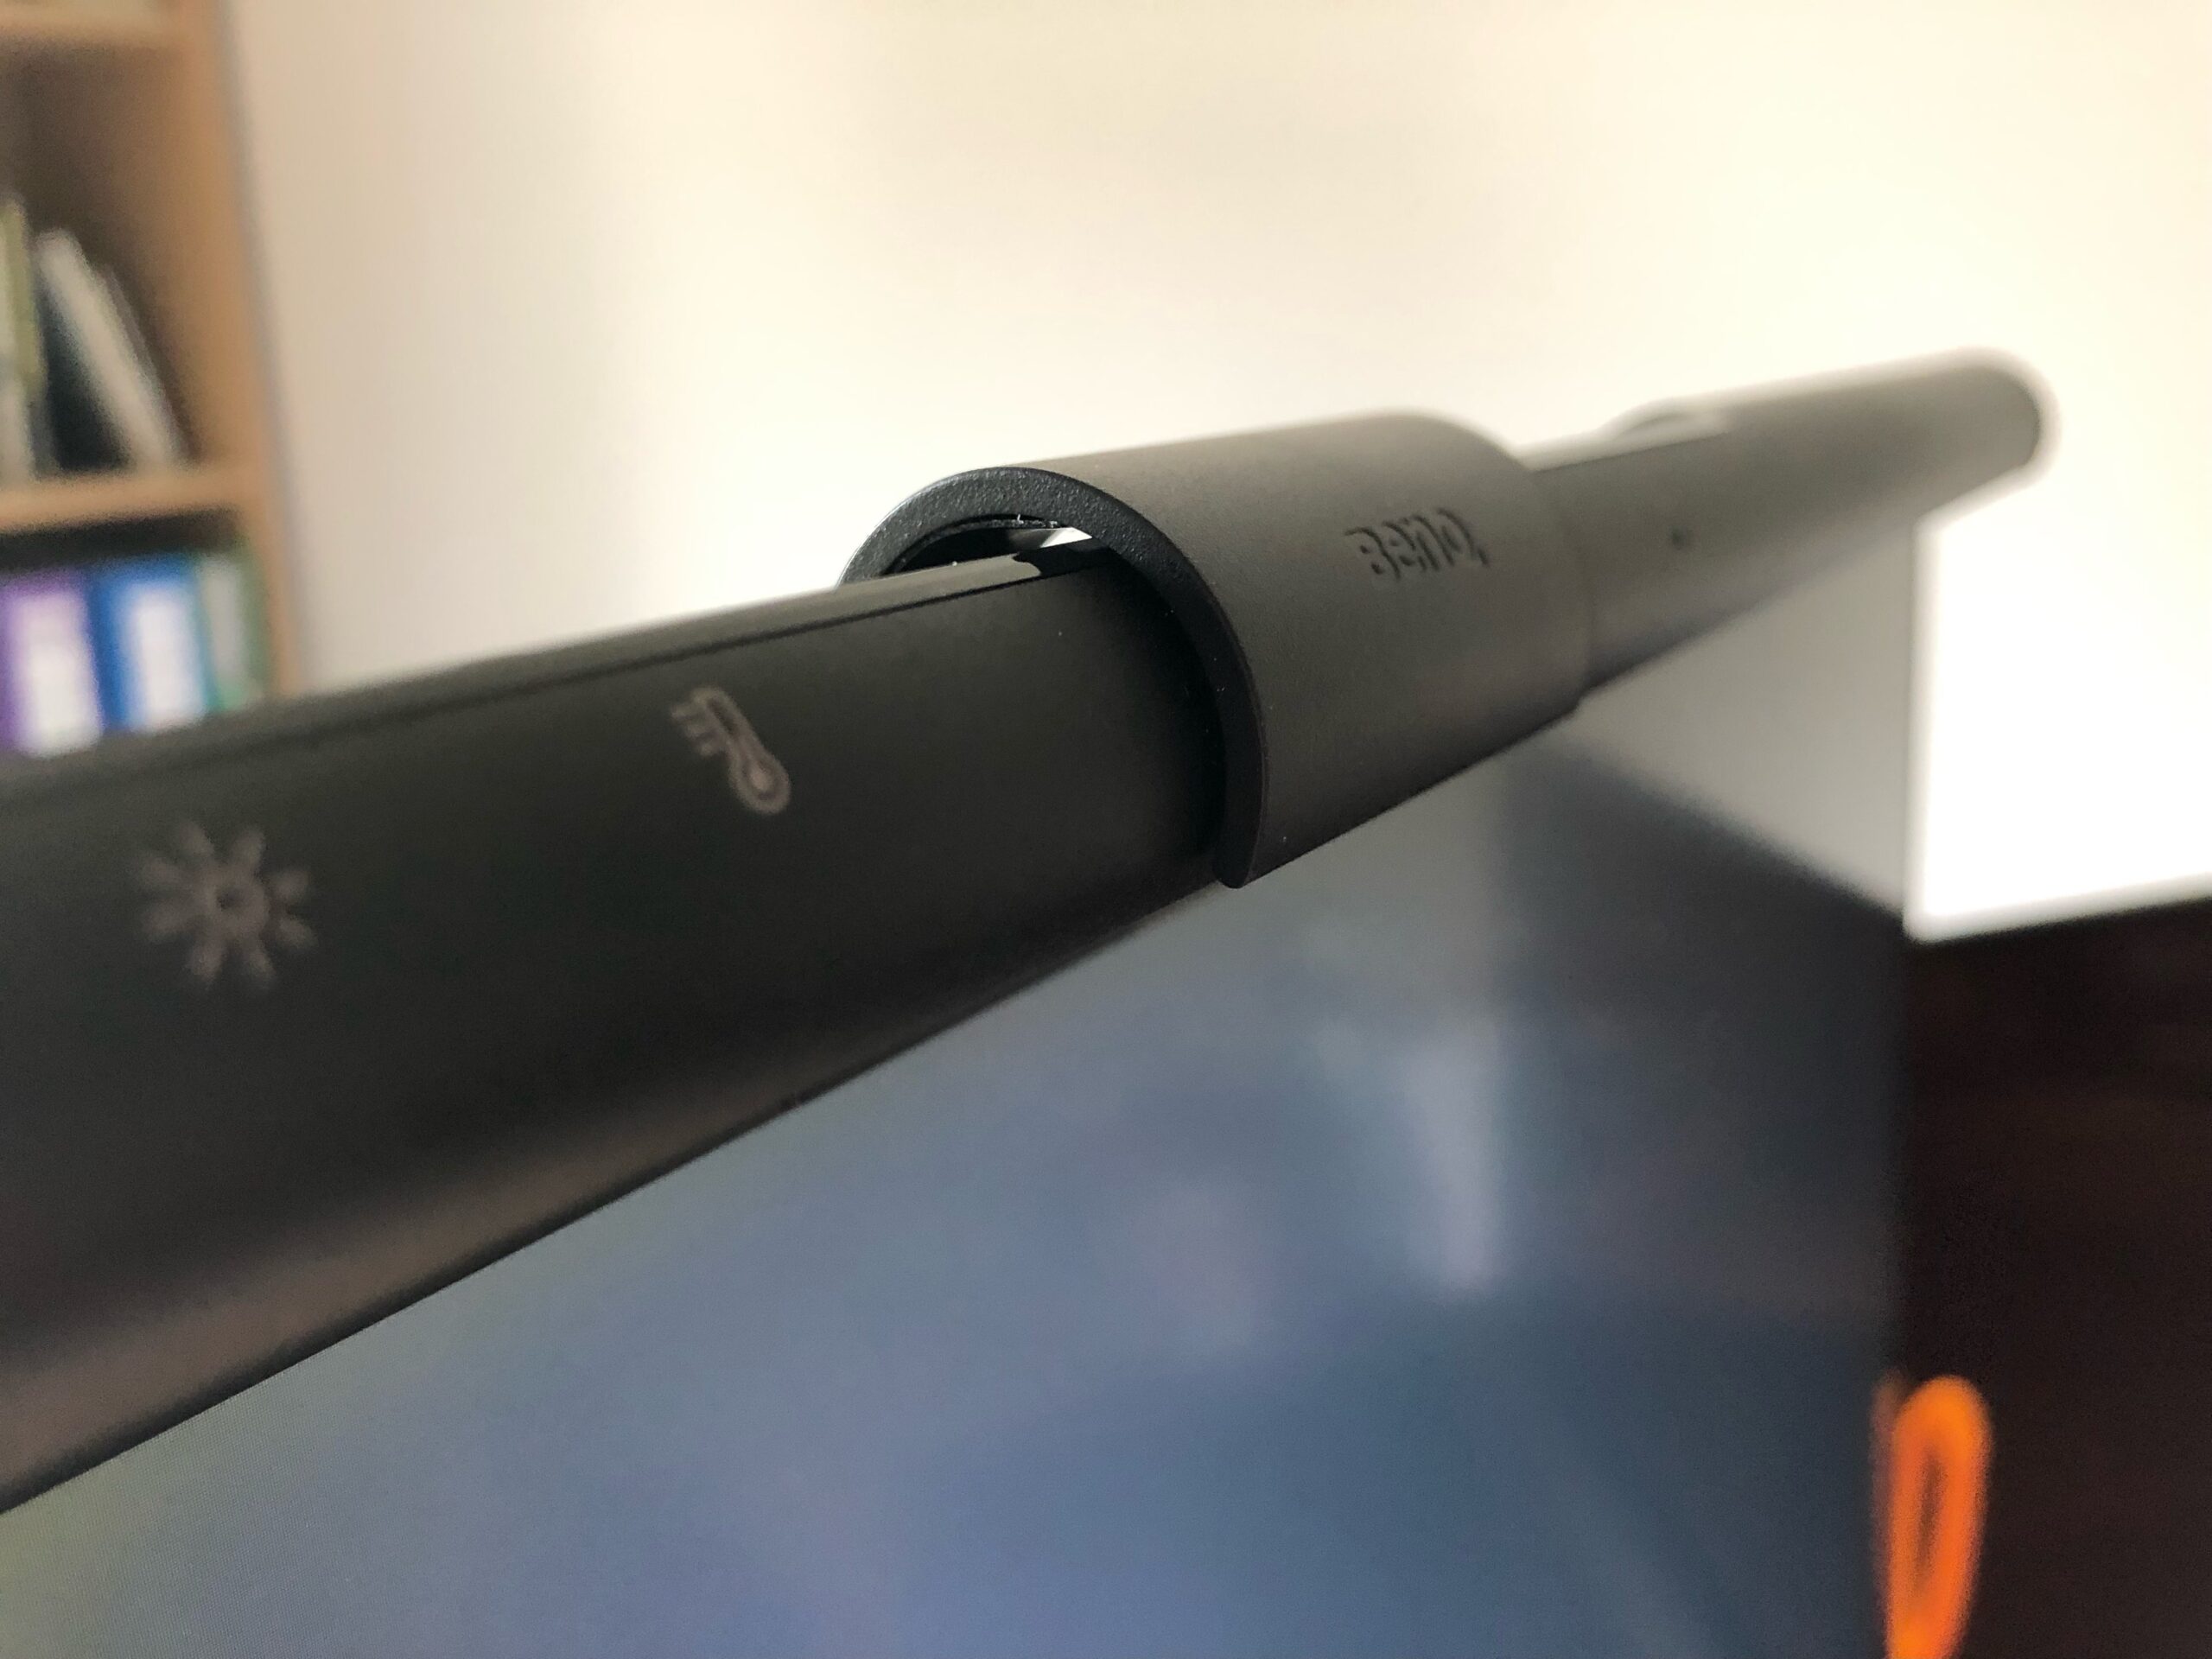
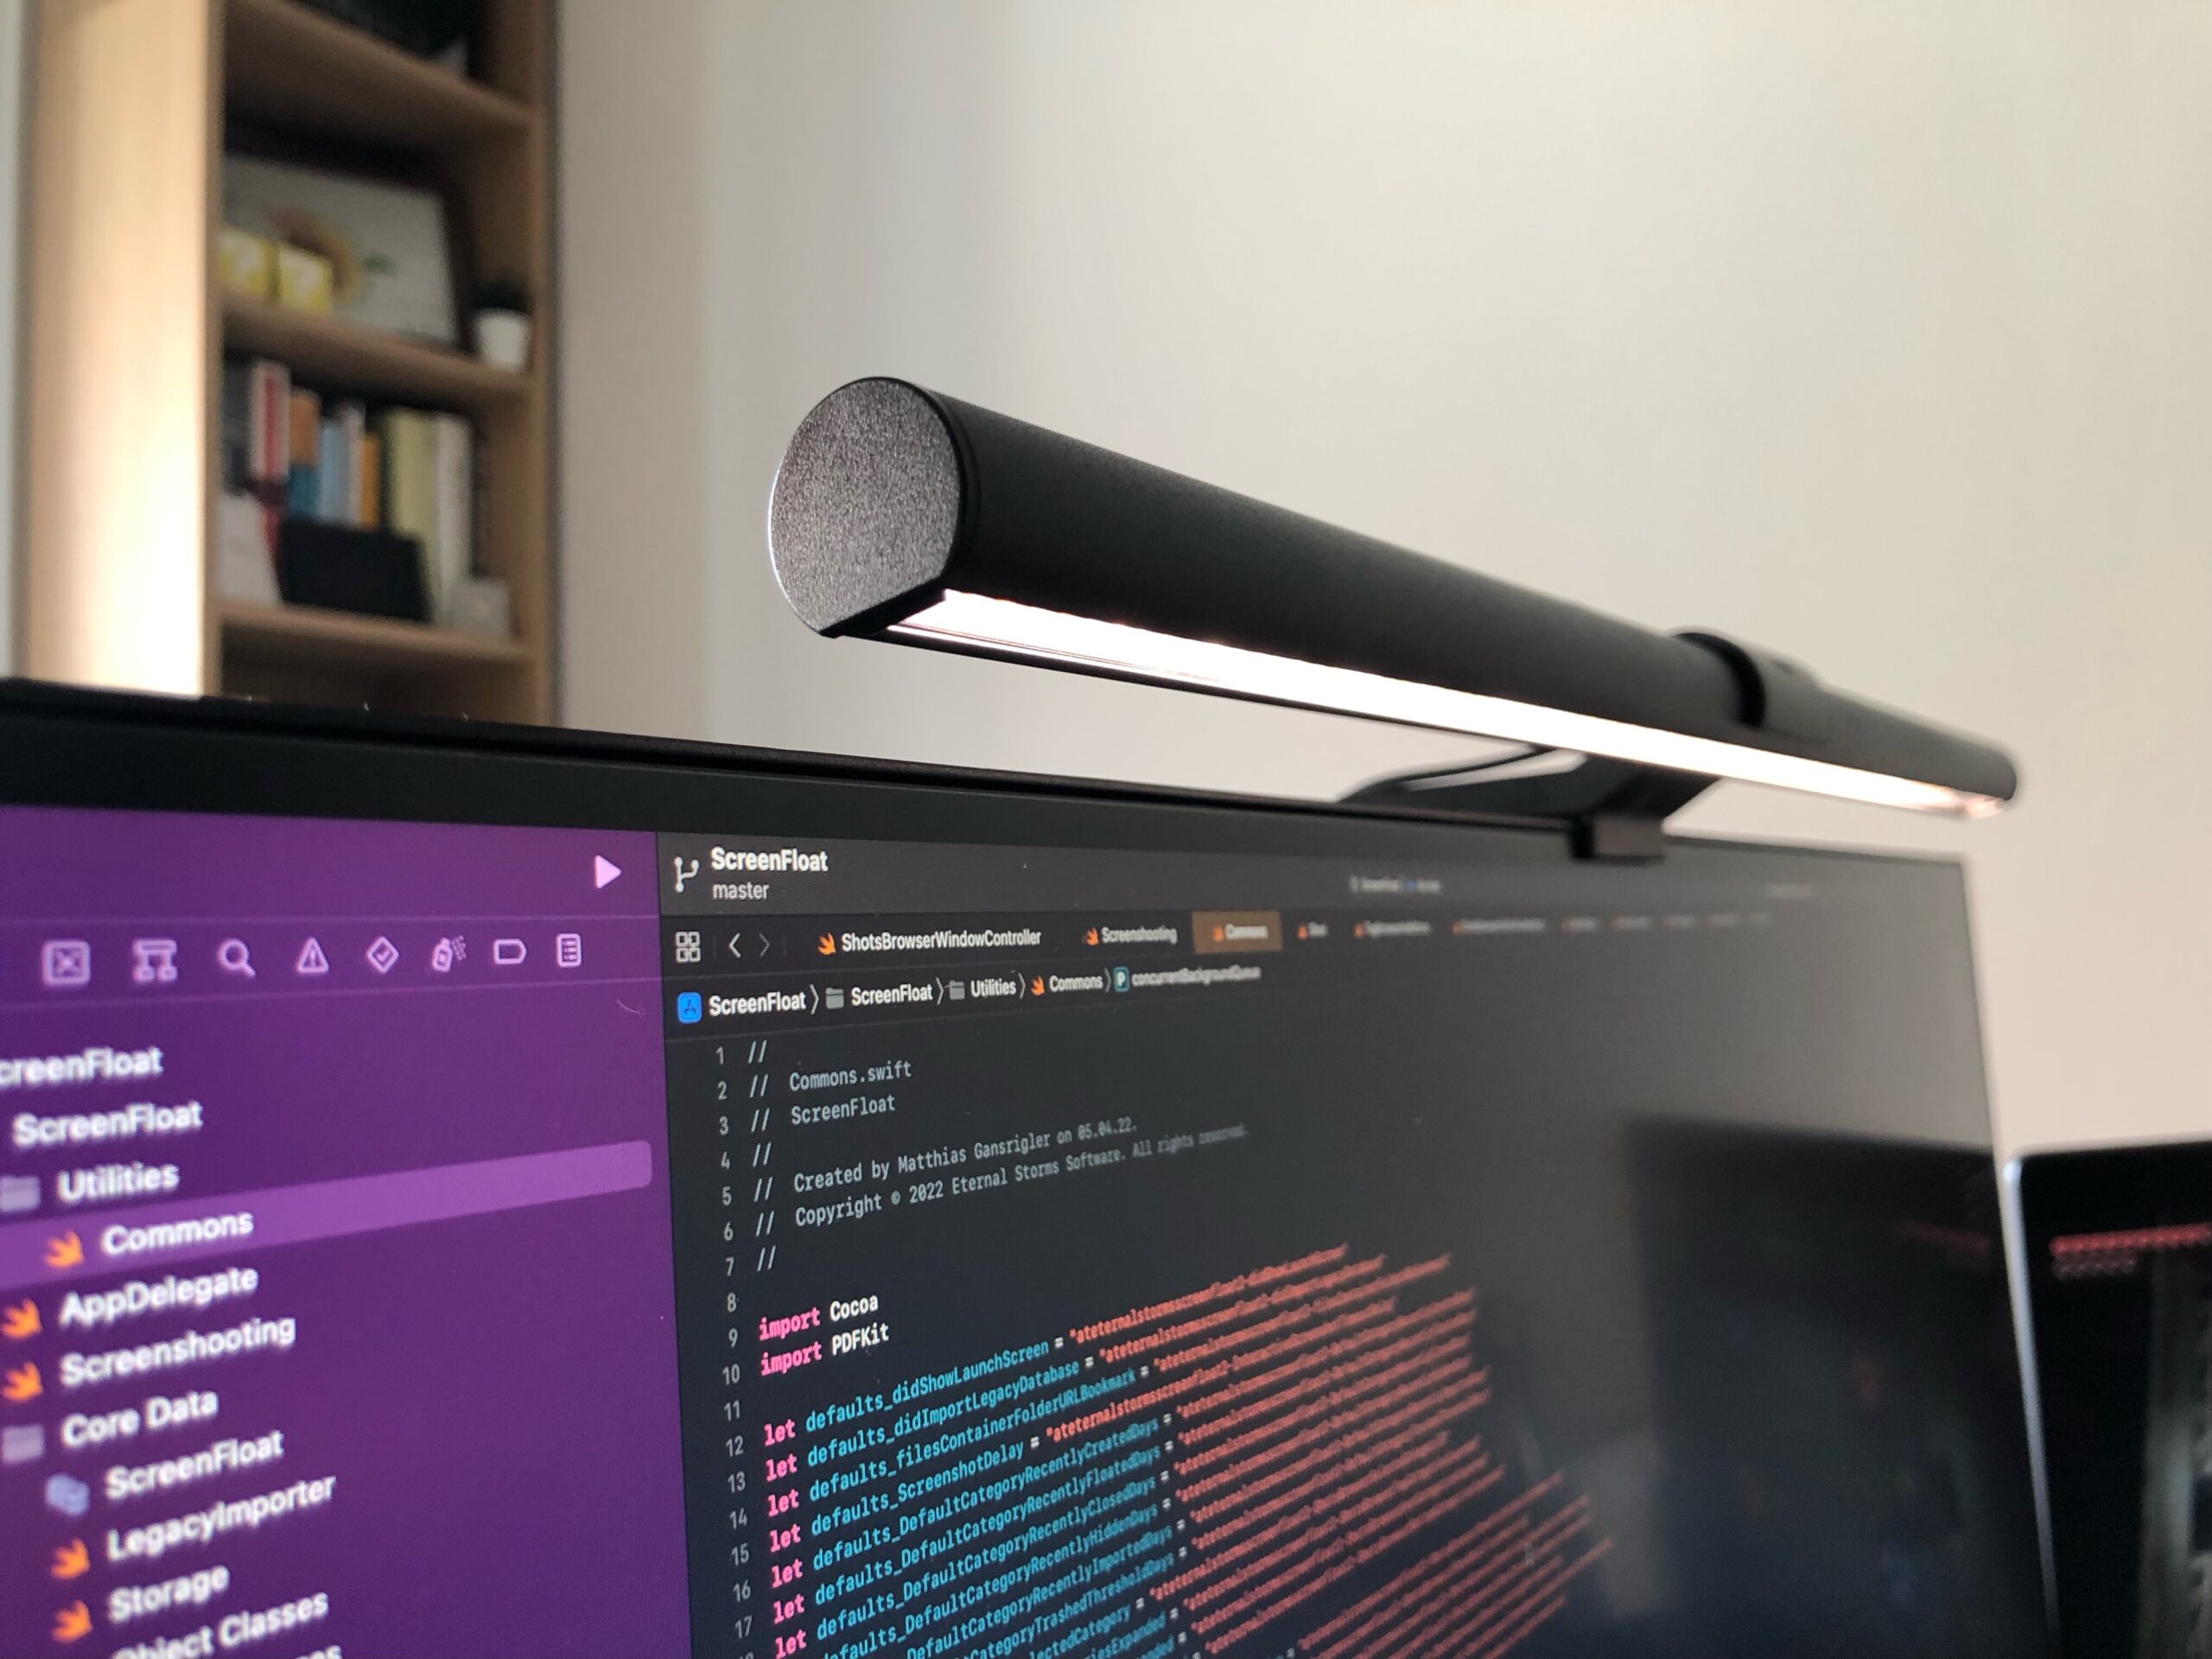
My external monitor is an LG 27UN880-B, which I’m able to pivot, rotate, tilt and elevate. I was a little worried that the monitor’s ergonomic arm wouldn’t be able to handle the additional weight (the ScreenBar’s specifications say it’s just shy of 1 kg total (bar and clip), but I worried for naught.
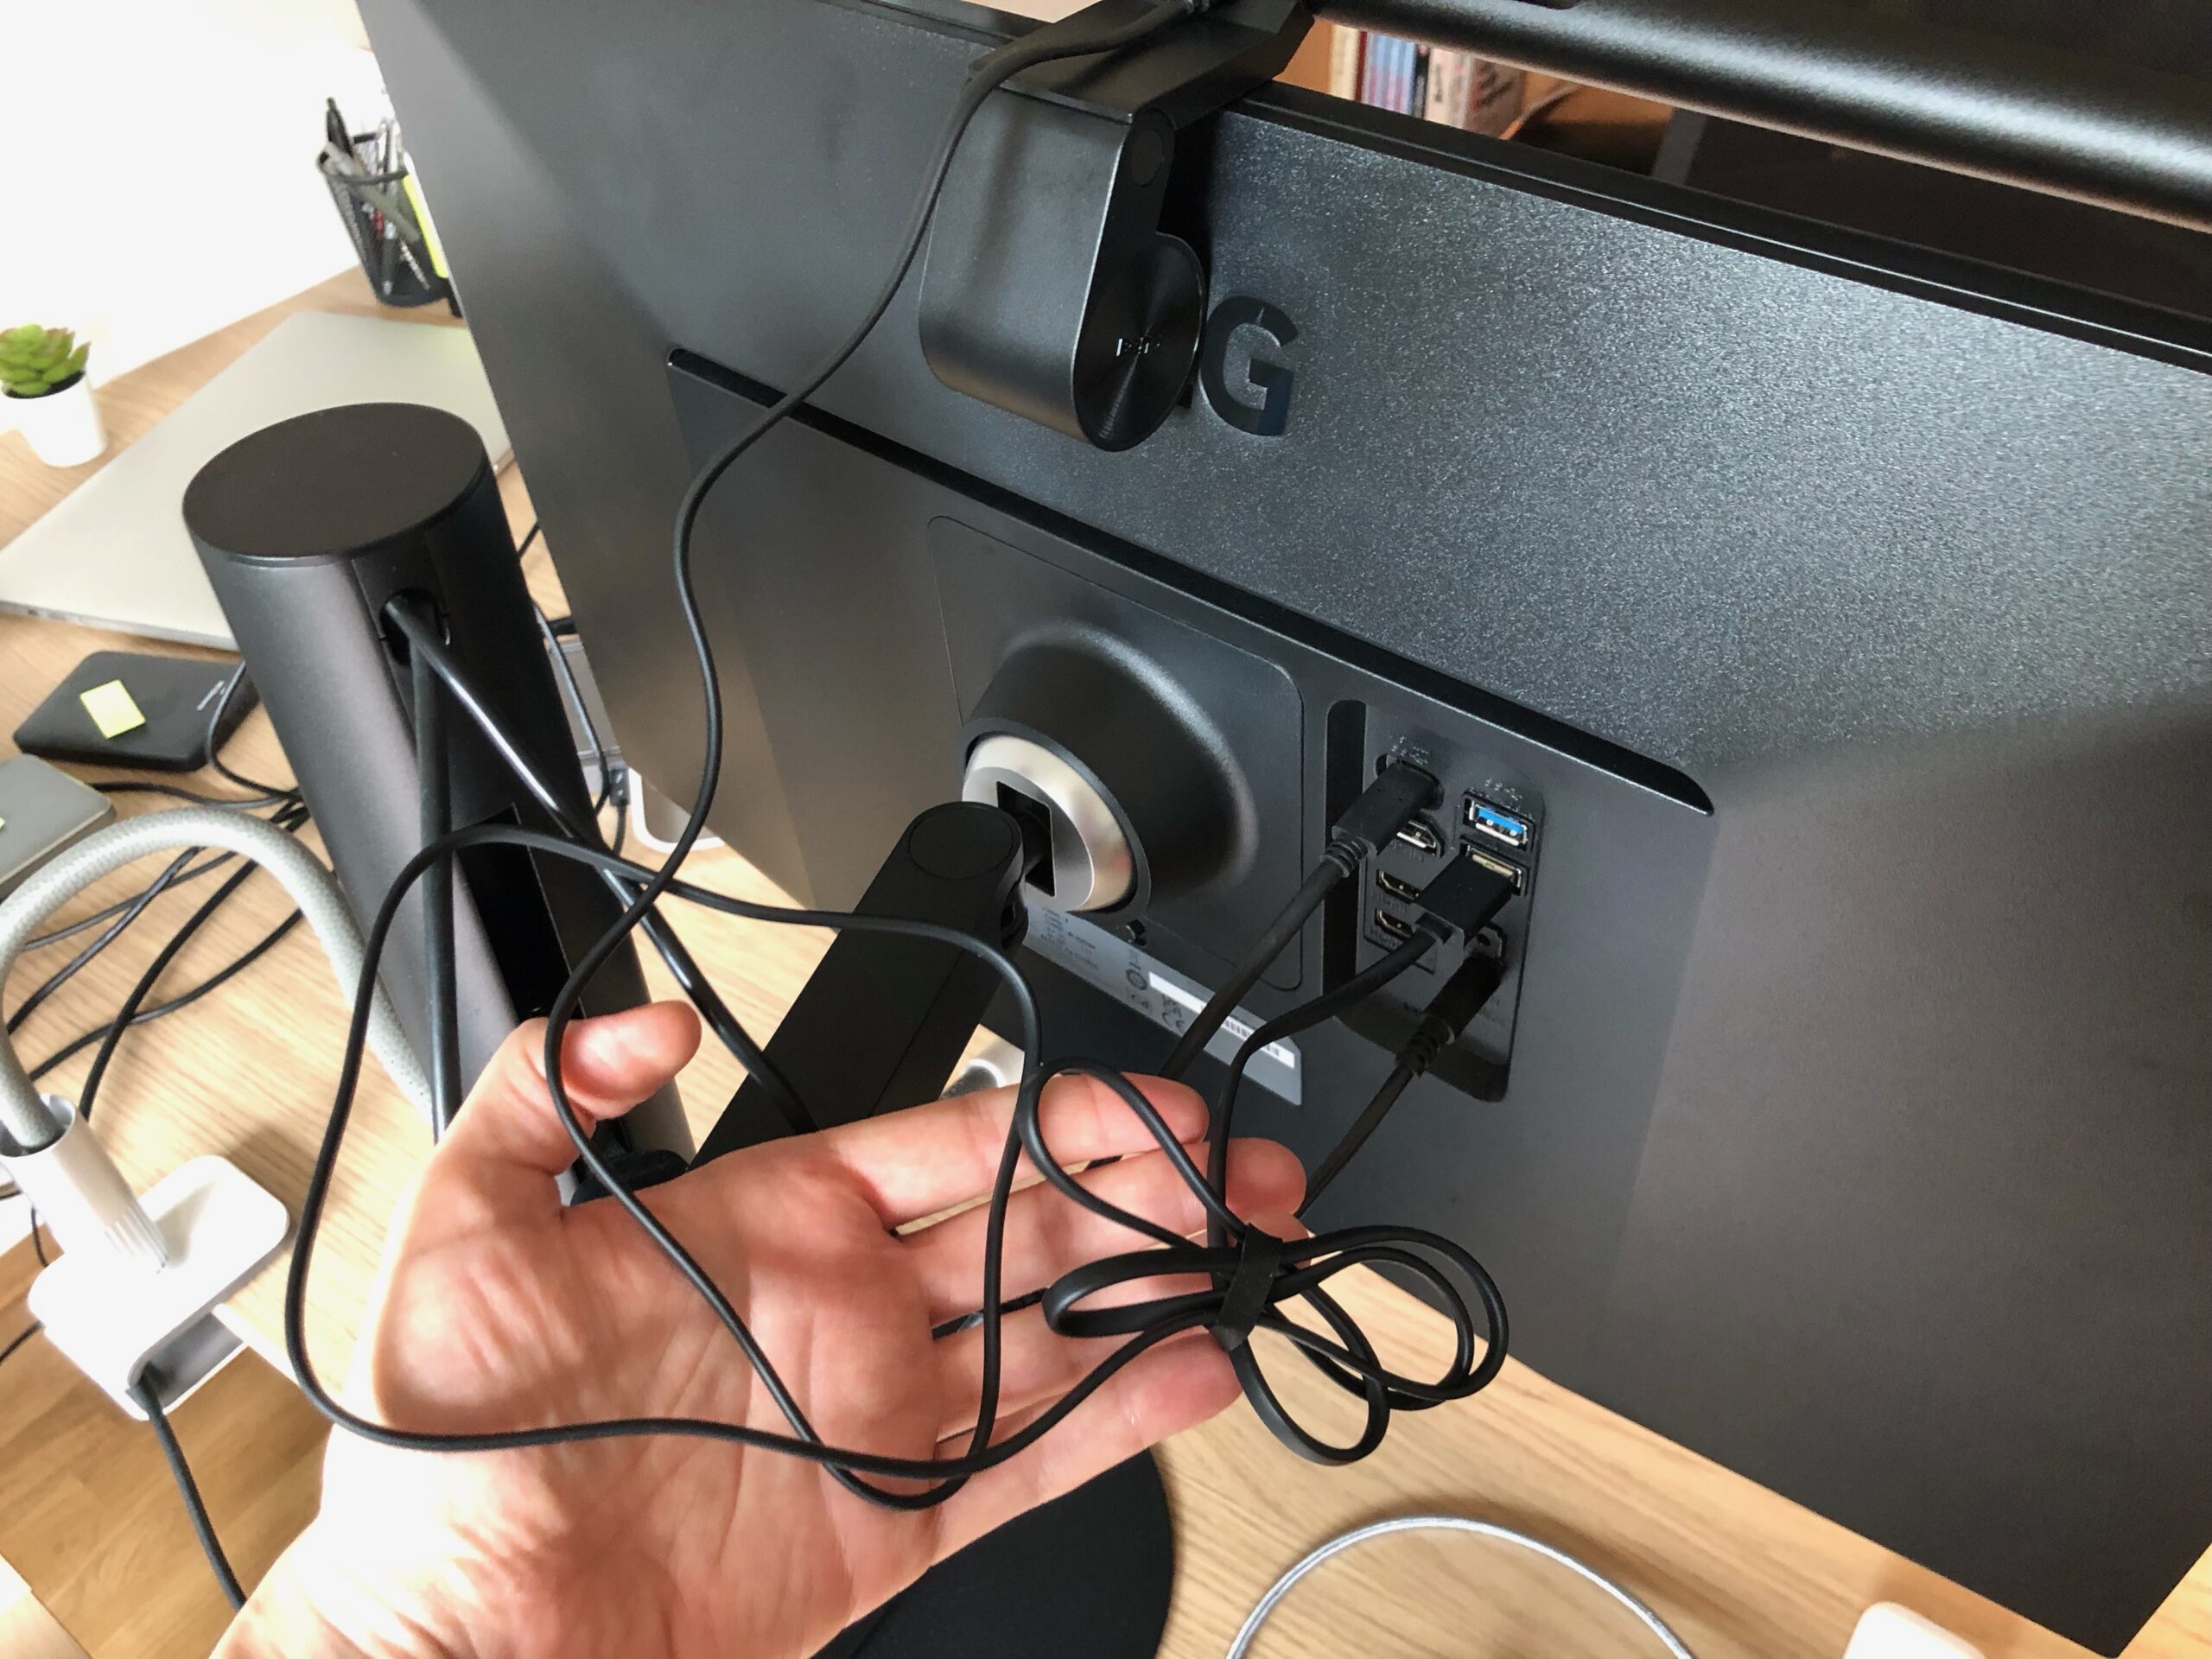
You really just have to place the ScreenBar on top of your monitor, plug in the USB cable and you’re done. Speaking of which, that is one long USB cable for something you probably plug into the monitor it sits on top of (1,5 meters).
I decided to use the thing the cable came wrapped up in to tie a bit of it up, because I don’t like loose cables hanging behind my screen – problem solved. The good thing about the length of it is that I don’t *have* to plug it in to my monitor’s USB port. I could also plug it in to my Thunderbolt hub, and leave the monitor’s plug free for quick access when I need it. I prefer a cable that’s too long over one that’s too short, anyway.
Using the ScreenBar
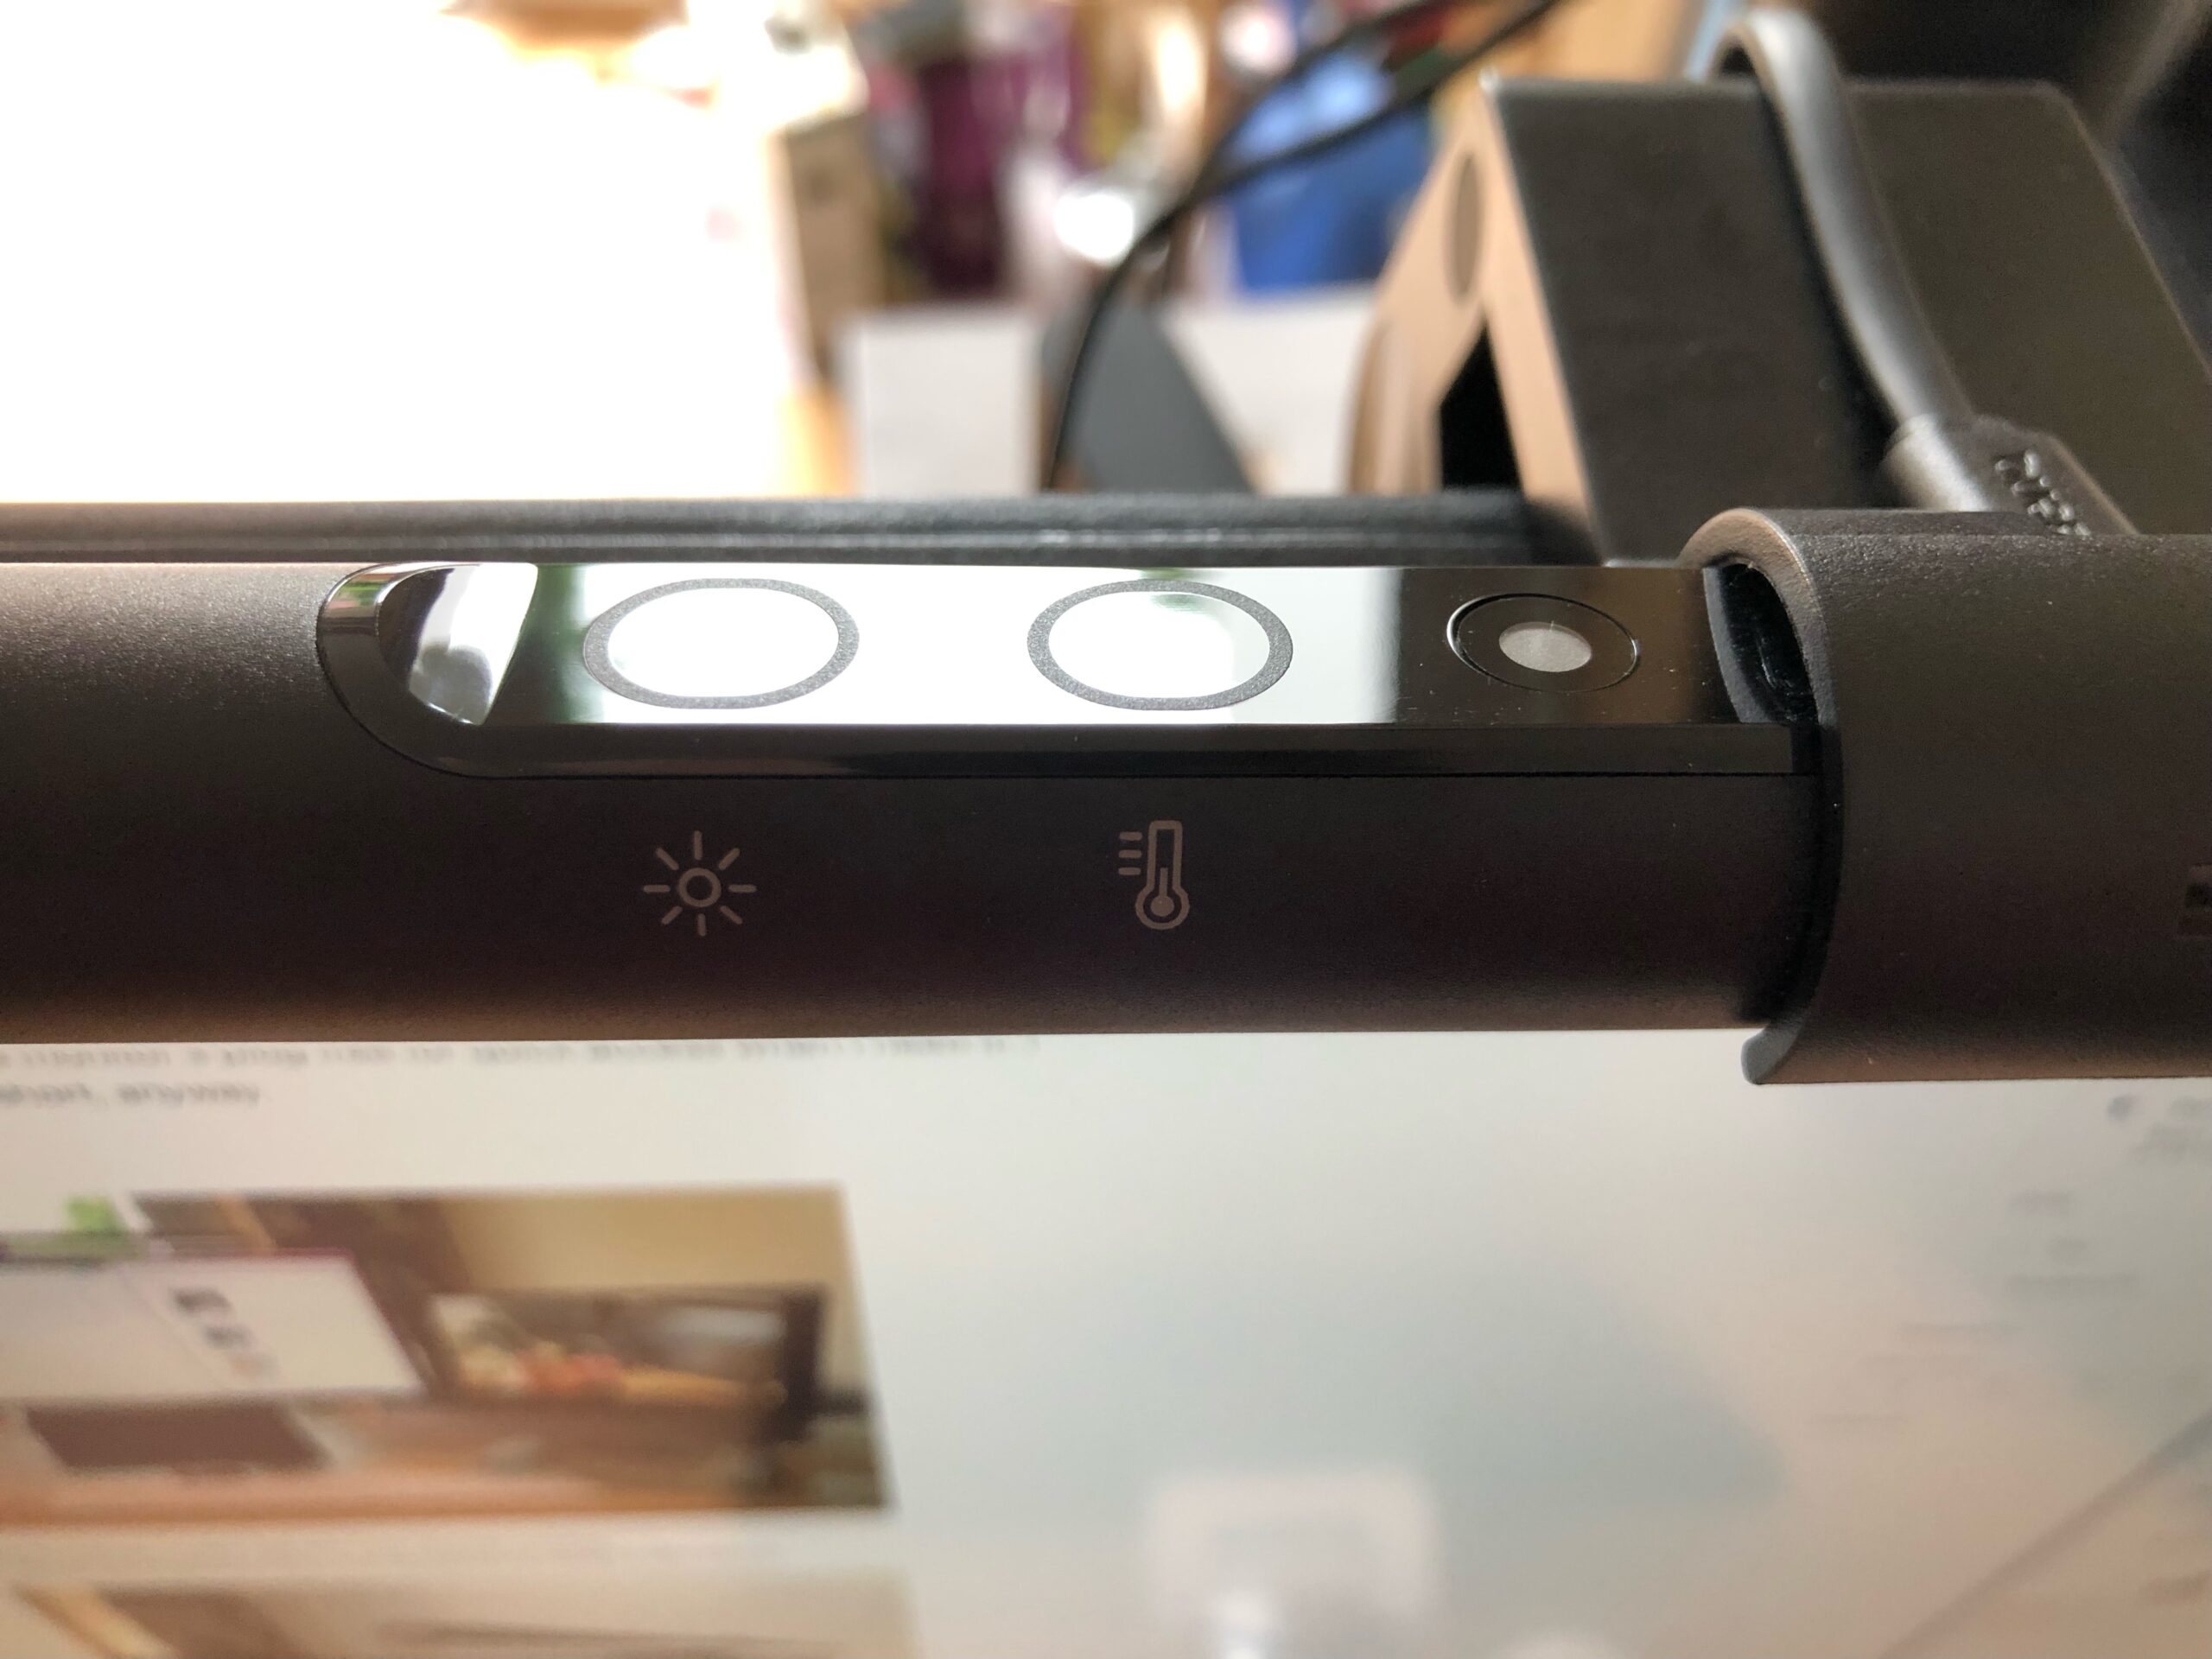
I’ve been using the ScreenBar mostly with the Auto Dimmer running. It automatically adjusts the brightness and color temperature using its light sensor. And here’s the only minor “issue” (if you can call it that) I discovered using it: the automatic adjustment doesn’t happen smoothly, but changes to the new temperature and brightness right away, which can be a bit jarring. On a cloudy day, where the light outside changes all the time, it becomes especially noticeable. But there’s a solution for those cases: turn off the automatic adjustment – which is done with a single tap.
With the buttons on top, I can quickly adjust the brightness and color temperature myself, which disables the Auto Dimmer.
Brightness and Color TemperatureAuto Dimmer and On/Off
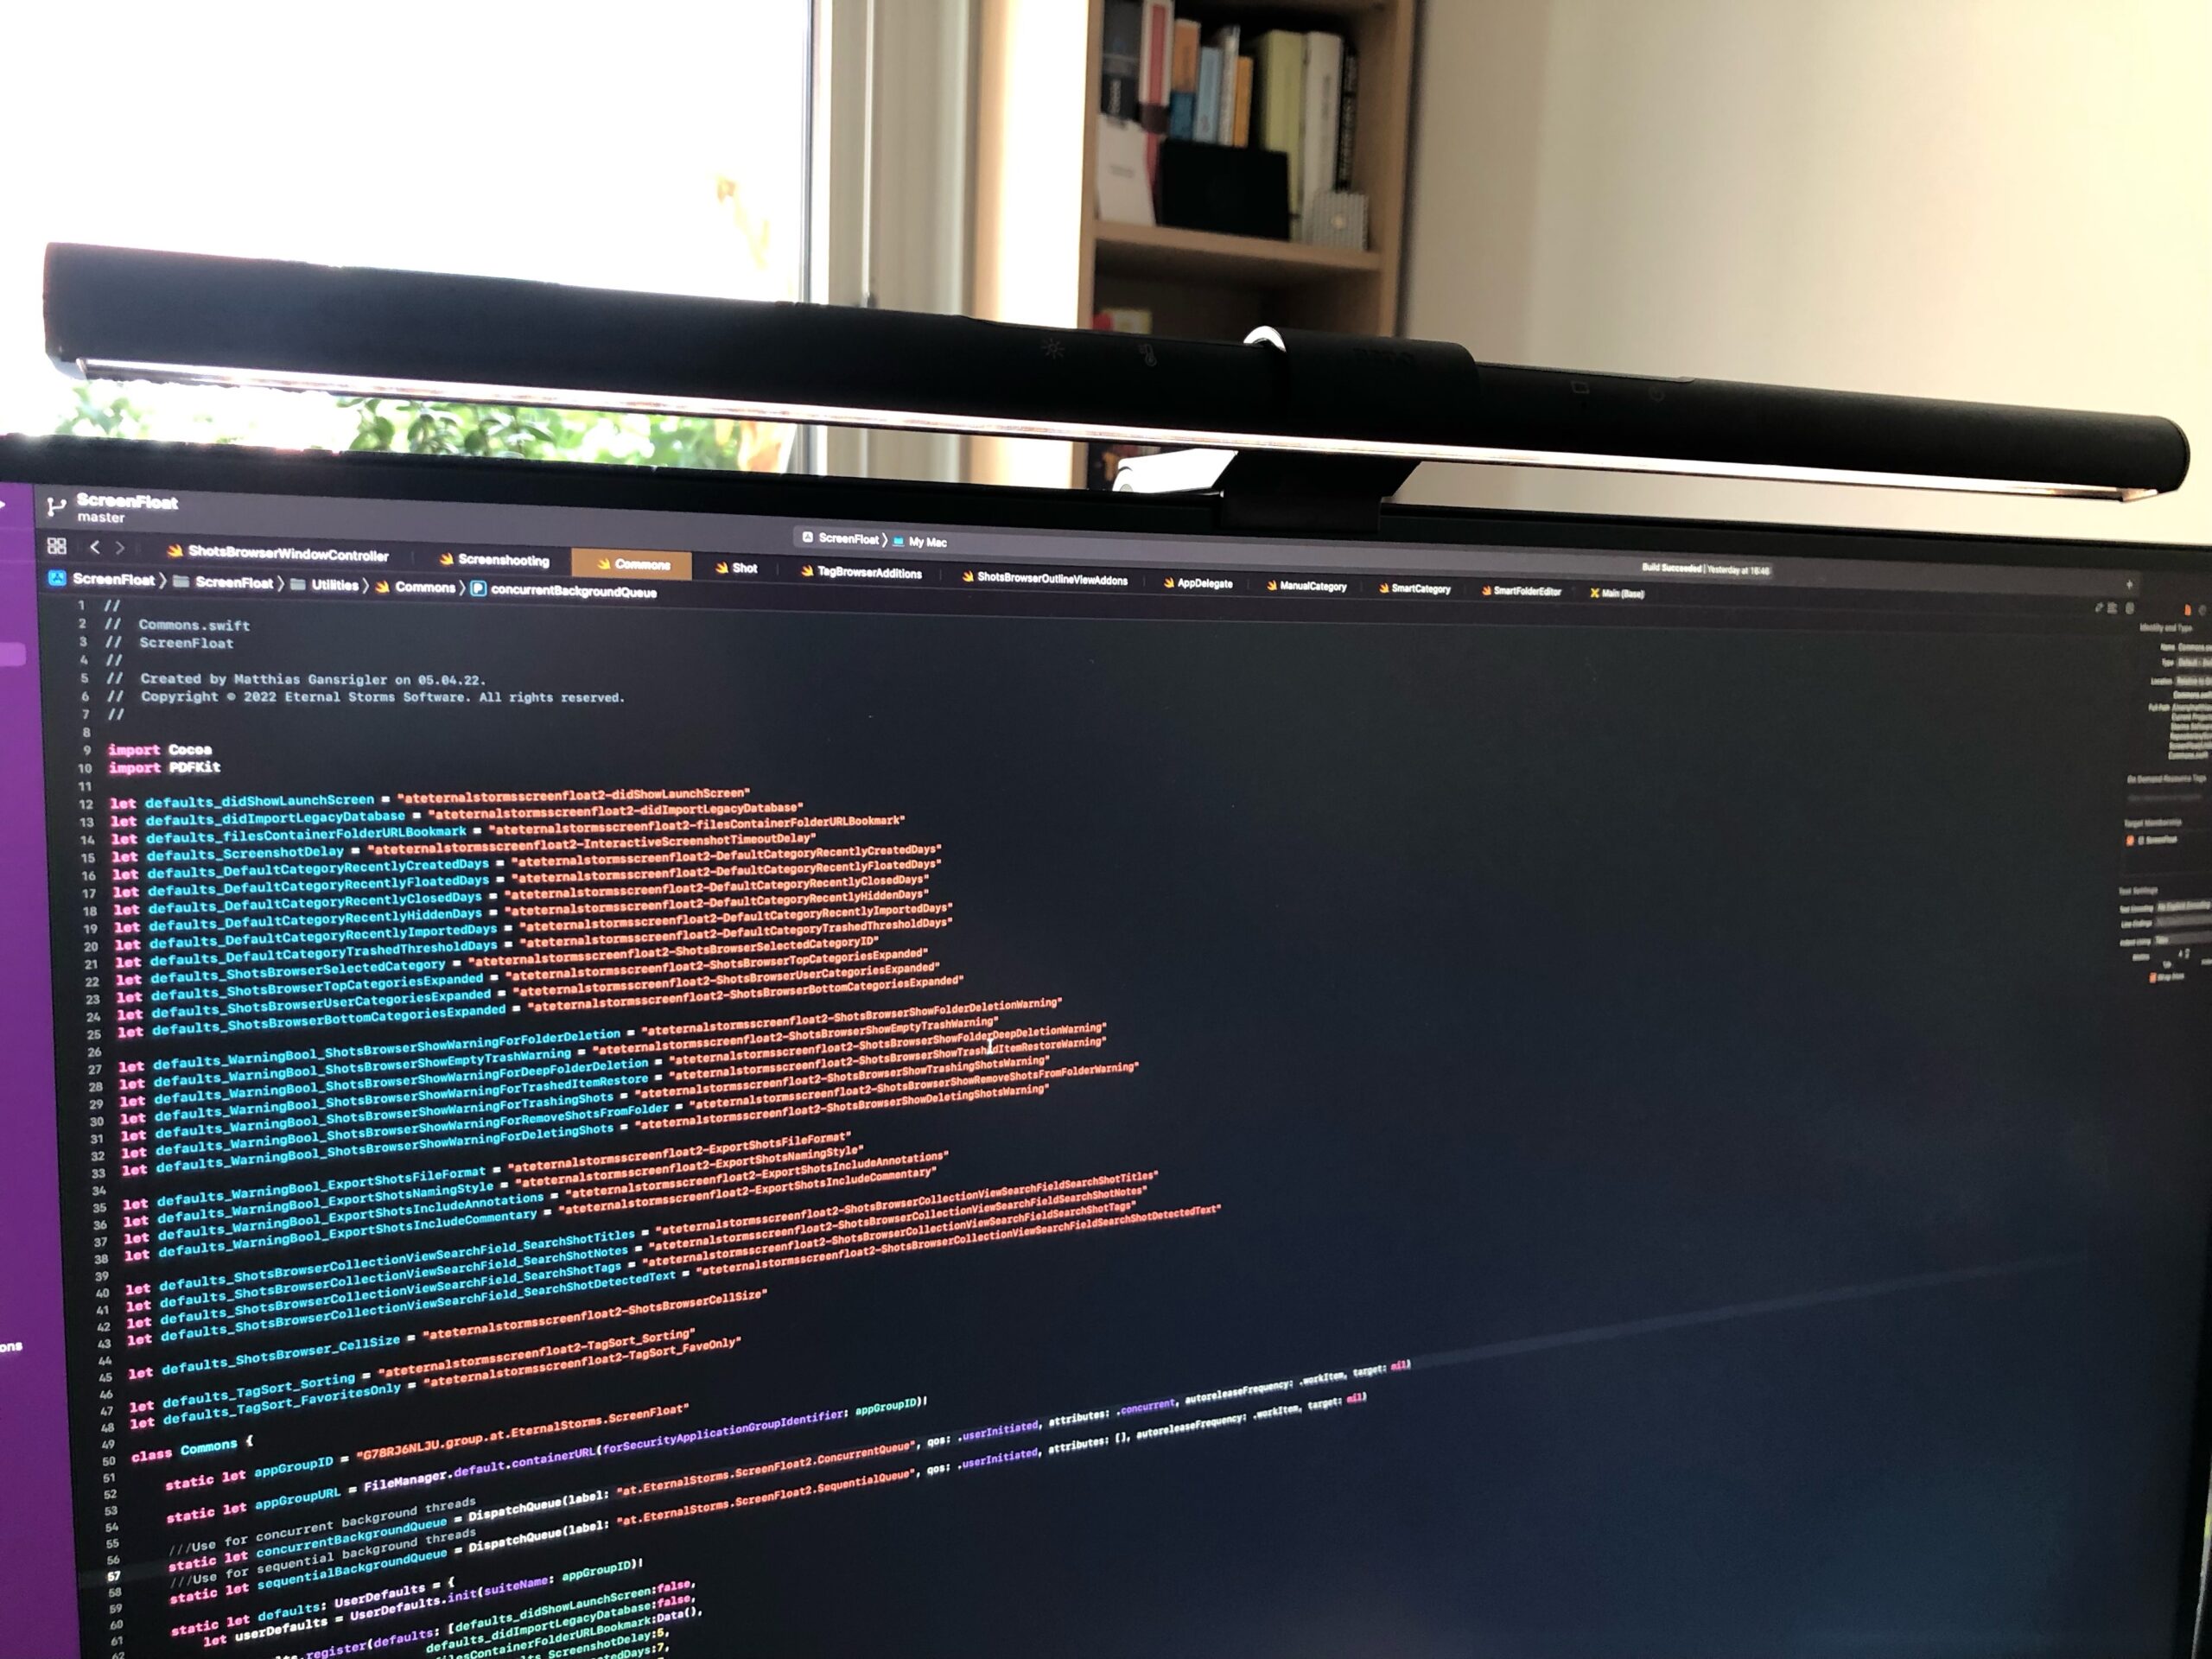
The ScreenBar, according to the documents, was designed to avoid screen glare, and it does that very well. What I find particularly nice is that you can “roll” the ScreenBar further to or farther from your screen:
And even though I have it turned all the way towards me, it doesn’t blind me. I’d have to lean in pretty far and down to be able to see the LEDs.
To give you an impression of the “power” of the ScreenBar, here are four stages of lighting in my office (during daytime, with the blinds closed):
All lights off
ScreenBar only
Room lights only
ScreenBar and room lights
Even with the room lights on, the ScreenBar very noticeably illuminates my work area.
Adjusting the ScreenBar’s color temperature (from 6500K – cool light – to 2700K – warm light, and back)
Conclusion
Again, I received the ScreenBar for free from BenQ, in “exchange” for my honest opinion about it. I seriously doubt I’d like it any less if I had had to pay for it – which, now, I wish I purchased it earlier.
It’s a great addition to my setup. It rests on top of my screen without taking up unnecessary desk space (my desk is crammed as it is, even though it’s huge) and gives me light exactly where I need it – and beyond – when I need it. The very minor, nit-picky “gripe” with the jumpy automatic brightness/temperature adjustment aside, I really couldn’t ask for more. It’s exactly what I want in a desk lamp.
I’m particularly looking forward to using this in the winter. It’s summer when I’m reviewing this, so, as I said, there’s lots of natural light, all the way into the evening, but come winter time, this thing will really shine. It’s already proven a fine companion during late-night coding sessions.
Be sure to check it out (see the links below), I do find it very useful.
I usually don’t leave comments open for my posts on my blog in fear of spam & co, but for this, I’m making an exception, in case you’d like to ask any questions about it. You can also ping me on twitter, or by mail.
With Yoink for Mac‘s clipboard history working again on macOS Big Sur and newer, I’ve seen, in forums and such, some questions about how the clipboard history operates and what it stores, in regards to privacy. I’ve answered those questions, but figured I’d let everyone know about it as well here on my blog, since this *should* be publicly available info:
General Notes about Yoink’s Clipboard History
By default, the clipboard history feature is disabled. It has to be manually enabled by either clicking onto the widget in Notification Center, or in Yoink’s preferences, under Extensions.
The clipboard history feature can be disabled at any time (and will clear any stored items at that point) in Yoink’s preferences, under Extensions.
Individual items can be deleted in the Clipboard History browser, accessible by command-clicking onto an item in the widget, by selecting Clipboard History > Organize… in Yoink’s contextual menu, or by clicking Organize… in Yoink’s preferences under Extensions.
What the Clipboard History stores
By default, Yoink stores anything you copy or cut, be it some text from a document, an image on a website, or a file in Finder, for example. Please read “What the Clipboard History does not store” below for important exceptions to this.
The clipboard history can be configured by you to completely ignore copy/cut operations in certain apps. This can be done in Yoink’s preferences, under Extensions, by pressing “Ignored Applications: Edit…”
The clipboard history is stored locally on your Mac and does not leave your Mac, unless you do it manually.
What the Clipboard History does *not* store
Yoink completely ignores cut/copy operations from any app or process that has one of the following in its name: Keychain, Enpass, 1Password, KeePass, LastPass, Password, Kaspersky, mSecure, AppLocker, Keeper Password, Passwort, oneSafe, Secrets, Strongbox, RememBear, Dashlane and Bitwarden. Anything copied from an app whose name contains one of the above (case insensitive) does not get stored in Yoink’s clipboard history.
In addition to that, Yoink also ignores copied content from any app, if the resulting clipboard content contains any of the following data types (as suggested by developers, for developers, on nspasteboard.org): com.agilebits.onepassword, org.nspasteboard.TransientType, org.nspasteboard.ConcealedType and org.nspasteboard.AutoGeneratedType. If you copy something from an app, and that app writes, say, a string to the pasteboard, and also specifies one of the data types above, the clipboard history will not pick it up.
If you have any suggestions, possible additions, questions or feedback regarding this, please do mail me.
I’ve also updated my privacy policy to clarify all of this.
Long story short: I’m not interested in anybody’s data. I don’t do any tracking, no usage statistics, and, if my apps use your internet connection, it’s exclusively for a specific feature that it offers to you, the user.
With macOS Big Sur and Macs with Apple Silicon on the horizon, I wanted to give a quick update on my Mac apps. All of them are now available in a new version, making them run nicely under macOS Big Sur, and have been recompiled to natively run on Apple Silicon.
Transloader (website | Mac App Store | iOS App Store) v2.1.1, big upgrade in the works, this update makes sure it runs nicely on the new system and architecture
Glimpses (website + free trial | Mac App Store) v2.2.3, improves video rendering speed by up to 6x and fixes a couple of minor issues